background image

Important:

R

Caller ID is required to use this feature (page 45).

R

Once phone numbers have been added to the blocked caller list, the handset does not ring
when a call is received until it has received the Caller ID and can confirm that the phone
number is not stored in the blocked caller list.

Adding a phone number manually

You can store 100 phone numbers.

Important:

R

You must store the full phone number, including the area code, in order to block calls from that
number.

1

Tap 

[Landline]

 in the home screen or app list.

2

Tap 

[Landline settings]


®


[Caller barred]

.

R

The handset connects to the base unit.

3

Tap 


®


[Add to barred list]

.

4

Enter the desired phone number and then tap 

[Done]

.

Adding a phone number from the base unit call log

1

Tap 

[Landline]

 in the home screen or app list.

2

Tap 

[Call log list]

.

R

The handset connects to the base unit.

3

Tap the desired information.

4

Tap 


®


[Add to barred list]


®


[OK]

.

Editing or erasing a phone number

1

Tap 

[Landline]

 in the home screen or app list.

2

Tap 

[Landline settings]


®


[Caller barred]

.

R

The handset connects to the base unit.

3

Select the desired phone number.

4

To edit the phone number:

→ Tap 

[Edit]

, edit the phone number, and then tap 

[Done]

.

To erase the phone number:

→ Tap 

[Delete]


®


[OK]

.

Blocking outgoing calls (call restriction)

You can use the call restriction feature to block up to 6 phone numbers so that selected handsets
cannot call those phone numbers. If you store an area code in the restricted phone number list,
you can prevent the selected handsets from making any calls to phone numbers in that area
code.

1

Tap 

[Landline]

 in the home screen or app list.

40

Other Features and Settings

Summary of Contents for KX-PRX120AZ

Page 1: ...0AZ Thank you for purchasing a Panasonic product Please read this document and save it for future reference To use this unit in your country first change the unit s region setting to match your country page 43 Please access our online customer survey http panasonic net pcc tel q ...

Page 2: ...swering system 30 Turning the answering system on and off 30 Greeting messages 31 Playing your messages 31 Remote operation features 33 Answering system settings 36 Other Features and Settings Ringtones and audio settings 38 Night mode 39 Auto talk 39 Blocking incoming calls caller barring 39 Blocking outgoing calls call restriction 40 Omitting a specific area code when making calls 41 ECO mode 41...

Page 3: ... Please contact your nearest Panasonic dealer for sales information Accessory item Model number Rechargeable battery KX PRA10EX R Lithium Ion Li Ion type battery Headset RP TCM120 1 DECT repeater KX A405AL Key finder KX TGA20AZ 2 1 Contact Panasonic or the authorised sales department listed on the back cover for the headset available in your area 2 You can register up to 4 optional key finders to ...

Page 4: ...ystem Handset optional KX PRXA10AZ You can expand your phone system by registering optional handsets 6 max to a single base unit R Optional handsets may be a different colour from that of the supplied handsets 4 Introduction ...

Page 5: ...d mark of the Wi Fi Alliance R microSDHC Logo is a trademark of SD 3C LLC R All other trademarks identified herein are the property of their respective owners Notice R The term apps is used in this document to refer to programs that are installed on the handset R The handset supports microSD and microSDHC memory cards In this document the term microSD card is used as a generic term for any of the ...

Page 6: ...uct may cause such devices to malfunction resulting in an accident R Do not allow the AC adaptor or telephone line cord to be excessively pulled bent or placed under heavy objects R Keep all accessories including the microSD card out of the reach of children to prevent swallowing R It is advised not to use the equipment at a refuelling point Users are reminded to observe restrictions on the use of...

Page 7: ...anufacturer of any personal medical devices such as pacemakers or hearing aids to determine if they are adequately shielded from external RF radio frequency energy DECT features operate between 1 88 GHz and 1 90 GHz with a peak transmission power of 250 mW Wi Fi features operate between 2 4 GHz and 2 4835 GHz with a peak transmission power of 80 mW R Wireless Technology Research WTR recommends a m...

Page 8: ... made from this device during a mains power failure Important notice R Under power failure conditions this telephone may not operate Please ensure that a separate telephone not dependent on local power is available for emergency use For New Zealand R Disconnect the telecom connection before disconnecting the power connection prior to relocating the equipment and reconnect the power first R This eq...

Page 9: ...ure and vibration R Do not place heavy objects on top of the product R When you leave the product unused for a long period of time unplug the product from the power outlet R The maximum calling distance may be shortened when the product is used in the following places Near obstacles such as hills tunnels underground near metal objects such as wire fences etc R Operating the product near electrical...

Page 10: ...use copy modify alter rent lease or transfer the software its related documentation or any copies thereof in whole or in part except as expressly provided in this agreement You may not export the software in contravention of any applicable U S or foreign export laws and regulations Open source software notice Parts of this product use open source software supplied based on the relevant conditions ...

Page 11: ...d party web site please review the web site s terms of use and applicable privacy policy in advance Specifications Connectivity R GAP Generic Access Profile R Wi Fi IEEE 802 11b g n R Bluetooth version 3 0 Class 2 R USB version 2 0 Frequency range R DECT 1 88 GHz to 1 90 GHz R Wi Fi 2 4 GHz to 2 4835 GHz RF transmission power R DECT Approx 10 mW average power per channel R Wi Fi 80 mW peak transmi...

Page 12: ...your DSL ADSL filter not supplied 1 1 For Australia Connect a DSL ADSL filter between the telephone plug and telephone line cord Note R Use only the supplied Panasonic AC adaptor PNLV226AL R Use only the supplied telephone line cord R This product is not designed to be used with rotary pulse dialling service Preparing the charger A Insert the AC adaptor plug to the unit until you hear a click B B ...

Page 13: ...age carelessly handle or short circuit the gold coloured contacts of the microSD card 1 Remove the handset s cover 2 Open the microSD card cover by sliding it toward the nearest side of the handset A and then lifting up B A B 3 Insert the microSD card with the gold coloured contacts facing down close the microSD cover A and then gently slide the cover toward the opposite side of the handset B B A ...

Page 14: ...ot disconnected A Place the handset into the charger or A Connect a USB cable not supplied directly to the handset Battery power icon When the screen is turned on the battery icon in the upper right corner of the screen indicates the battery power as described below Very low Fully charged Note R When the handset is charging is displayed inside the battery power icon R You can also check the percen...

Page 15: ...ose to an end This is dependent on the usage conditions and is not a problem Battery charging R It is normal for the handset to feel warm during charging R Clean the charge contacts of the handset base unit and charger with a soft and dry cloth once a month Before cleaning the unit disconnect from power outlets and any telephone line cords Clean more often if the unit is exposed to grease dust or ...

Page 16: ...wer button C Charge indicator D Volume button and E Touchscreen F Micro USB socket G Front camera H Receiver I menu button J Home button K back button L Microphone N M M Speaker N Charge contacts Home button You can display the home screen at any time by pressing the home button 16 Getting Started ...

Page 17: ... lock screen appears unlock the screen page 17 To turn the handset off press and hold the power button on the top of the handset and then tap Power off OK Note R The first time you turn on the handset the setup wizard is displayed page 18 Turning the screen on and off You can turn the screen off to save battery power and prevent accidental operation While the screen is turned off you can still rec...

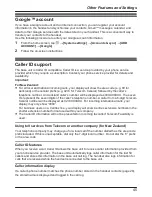
Page 18: ...ise with your Google account Your contacts will be automatically downloaded to your handset The setup wizard will prompt you to either add your existing Google account information to the handset or create a new account You can skip this step if desired To configure Google account settings later see page 45 Note R An Internet connection is required to configure a Google account If you choose to use...

Page 19: ...item to the left or right edge of the screen Using the app list The app list gives you access to all the apps and widgets stored on the handset You can view the app list by tapping in the home screen Similar to the home screen the app list also contains multiple pages that you can view by flicking the screen left and right Use the following procedure to add an item in the app list to the home scre...

Page 20: ...ttom to the top of the screen While the notifications panel is open you can tap a notification and open the corresponding app and some notifications can be removed by flicking them left or right See page 58 for a list of commonly used notification icons and their meanings Control panel The control panel is displayed at the top of the notifications panel and allows you to change settings for certai...

Page 21: ... your phone system Allows you to use the phone system s answering system KX PRX120 only Allows you to access the base unit s call log Allows you to use the base unit s key finder feature Starting the Landline app Tap Landline in the home screen or app list 21 Getting Started ...

Page 22: ...Tap Phone in the home screen or app list 2 Select the tab at the top of the screen 3 Enter the phone number and then tap at the bottom of the screen R To erase a number tap R To enter a dialling pause tap and hold 4 When finished tap to end the call Searching while dialling manually As you enter digits on the keypad the handset searches for items in the handset call log and phonebook that match th...

Page 23: ...all to mute the handset s microphone so that the other party cannot hear you Tap again to turn the mute off Hold Tap during a call to place the call on hold so that you and the other party cannot hear each other Tap again to return to the call R The handset sounds an alarm if a call is held for 9 minutes If the call remains on hold the alarm sounds again 30 seconds later i e after 9 minutes and 30...

Page 24: ...t one party to the conversation is to be aware that it is being recorded In addition the principles enumerated in the AustraliaTelecommunications Interception and Access Act 1979 shall be complied with in respect to the nature of the personal information collected the purpose for its collection how it is used and what is disclosed to any other party R For New Zealand All persons using this device ...

Page 25: ...een and answer the second call if desired Operation varies by phone service provider Consult your provider for details Important R You may need to subscribe to your phone service provider s call waiting service in order to answer a second call Consult your phone service provider for information about this feature 1 When you hear the call waiting tone tap 2 To switch between calls tap again Caller ...

Page 26: ...n you want to call 5 When finished tap to end the call Adding information from the handset call log to your contacts 1 Tap Phone in the home screen or app list 2 Select the tab at the top of the screen 3 Select the type of calls you want to view by tapping the desired tab 4 Tap the desired name or phone number and then tap Add to contacts R Add to contacts is not displayed if the selected call log...

Page 27: ... from the base unit call log 1 Tap Landline in the home screen or app list 2 Tap Call log list R The handset connects to the base unit 3 Tap next to the phone number or person you want to call 4 When finished tap to end the call Erasing the base unit call log 1 Tap Landline in the home screen or app list 2 Tap Call log list R The handset connects to the base unit 3 To erase information for one cal...

Page 28: ...will be saved R Contacts can be stored in the handset s memory or synchronised with your Google account R Tap Add new account if displayed if you want to register a Google account to the handset You can also register an account later page 45 4 Enter the information as needed R To add an image tap the image icon R To undo the changes you have made tap Discard OK Note that if you tap the changes wil...

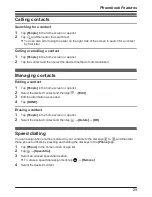
Page 29: ... People in the home screen or app list 2 Select the desired contact and then tap Edit 3 Edit the information as needed 4 Tap DONE Erasing a contact 1 Tap People in the home screen or app list 2 Select the desired contact and then tap Delete OK Speed dialling You can assign phone numbers stored in your contacts to the dial keys 2 to 9 and then dial those phone numbers by pressing and holding the di...

Page 30: ...ng capacity The total recording capacity is about 40 minutes A maximum of 64 messages can be recorded Note R The following occur if the recording memory becomes full Memory full will be displayed when the answering system is turned on or off A beep will sound A memory full announcement will be heard If you use a pre recorded greeting message the base unit will answer calls with a different pre rec...

Page 31: ... Greeting Play greeting Erasing your greeting message 1 Tap Landline in the home screen or app list 2 Tap Answering system R The handset connects to the base unit 3 Tap Greeting Reset to default greeting OK R A pre recorded greeting message will be used until you record a new greeting Playing your messages is displayed in the status bar and notifications panel when the answering system has recorde...

Page 32: ...to erase the current message Tap to switch between speaker and receiver Tap to call the caller back Caller ID required see page 45 Editing a phone number when calling back This feature is not available when playing back a message that does not have a phone number associated with it 1 Play the desired message 2 Tap Edit call R The Phone app starts 3 Edit the number as desired and then tap Erasing m...

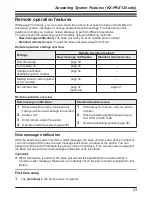
Page 33: ...on overview New message notification Standard remote access 1 While away from home the base unit calls you when new message is recorded 2 Answer call 3 Enter remote code if required 4 Operate answering system page 35 1 While away from home call your phone number 2 When answering system answers your call enter remote code 3 Operate answering system page 35 New message notification After the answeri...

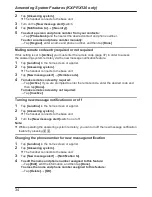
Page 34: ... remote code entry required Tap Active If you are prompted to enter the remote code enter the desired code and then tap Done To make remote code entry not required Tap Inactive Turning new message notification on or off 1 Tap Landline in the home screen or app list 2 Tap Answering system R The handset connects to the base unit 3 Turn the New message alert switch on or off Note R While operating th...

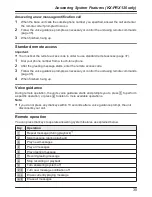
Page 35: ...mote commands page 35 4 When finished hang up Voice guidance During remote operation the unit s voice guidance starts and prompts you to press 1 to perform a specific operation or press 2 to listen to more available operations Note R If you do not press any dial keys within 10 seconds after a voice guidance prompt the unit disconnects your call Remote operation You can press dial keys to operate a...

Page 36: ...u call your home phone from outside to listen to new messages using remote operation page 33 you will know that there are no new messages when the phone rings for the 3rd time You can then hang up without being charged for the call For voicemail service subscribers To receive voicemail and use the answering system properly please note the following R To use your phone service provider s voicemail ...

Page 37: ... is a 3 digit code that must be entered in order to access the answering system remotely using standard remote access This code prevents unauthorised parties from listening to your messages remotely 1 Tap Landline in the home screen or app list 2 Tap Answering system R The handset connects to the base unit 3 Tap Settings Remote code 4 Enter the desired code and then tap Done Call screening This se...

Page 38: ...ofile R You can change the settings of the General audio profile but the other default audio profiles cannot be changed 3 Change the settings as desired 4 When finished tap the home button Frequently used settings Volumes Allows you to adjust the volume for ringtones and other alerts Landline call ringtone Allows you to select the ringtone used for incoming calls Dial pad touch tones Determines wh...

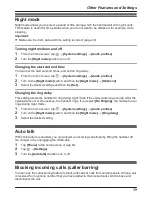
Page 39: ... This setting allows the handset to ring during night mode if the caller waits long enough After the selected amount of time passes the handset rings If you select No Ringing the handset never rings during night mode 1 From the home screen tap System settings Audio profiles 2 Turn on the Night mode switch and then tap Night mode Ring delay 3 Select the desired setting Auto talk When this feature i...

Page 40: ...he base unit call log 1 Tap Landline in the home screen or app list 2 Tap Call log list R The handset connects to the base unit 3 Tap the desired information 4 Tap Add to barred list OK Editing or erasing a phone number 1 Tap Landline in the home screen or app list 2 Tap Landline settings Caller barred R The handset connects to the base unit 3 Select the desired phone number 4 To edit the phone nu...

Page 41: ... 3 Tap Area code 4 Enter an area code 5 digits max and then tap OK Note R For New Zealand The use of this feature can prevent a National Call from being dialled E g in the case of the South Island the 03 will be omitted and will therefore prevent a National Call to other areas of the South Island ECO mode You can reduce the amount of power that the base unit consumes by enabling ECO mode This feat...

Page 42: ...mbers in your handset using and the country code this is the number that should replace the country code when calling domestically First ring This setting determines whether the first ring is heard when a call is received If your phone line has Caller ID service and you do not want your phone system to ring before caller information is received select Off Note that you can only remove the first ri...

Page 43: ...This setting resets certain base unit settings to their default values based on the region you select 1 Tap Landline in the home screen or app list 2 Tap Landline settings Initial settings R The handset connects to the base unit 3 Tap Country 4 Select the desired country Note R Changing the unit s region setting may cause the settings for your country or your customised settings to return to their...

Page 44: ...network and access the Internet for synchronising your handset with your Google account using the Browser app to view web pages etc 1 From the home screen tap System settings 2 Turn on the Wi Fi switch 3 Tap Wi Fi 4 Select a Wi Fi network R If the desired Wi Fi network is not displayed you may need to enter the network name also called the SSID manually See page 44 for more information 5 Enter the...

Page 45: ...ber A caller from a 6 digit Telecom Cellular number will be displayed as 0274XXXXXX For incoming international calls your display may only show 0000 For business users on a Centrex line your display will show Centrex extension numbers in the shorter extension number format used within your company R The Caller ID information will not be presented on incoming fax calls if Telecom FaxAbility is used...

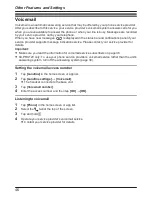
Page 46: ...r details Important R Make sure you read the information for voicemail service subscribers on page 36 R KX PRX120 only To use your phone service provider s voicemail service rather than the unit s answering system turn off the answering system page 30 Setting the voicemail access number 1 Tap Landline in the home screen or app list 2 Tap Landline settings Voicemail R The handset connects to the ba...

Page 47: ...dset as a reference only 5 Press and hold M N on the base unit for about 5 seconds and then tap OK R If all registered handsets start ringing press M N again to stop then repeat this step 6 Enter the base unit PIN and then tap OK R The handset beeps when registration is complete R If you forget the base unit PIN contact an authorised service centre Changing the handset name You can customise the n...

Page 48: ...Wait for the other handset user to answer the call R The other handset rings for 1 minute R To cancel and return to the call tap 4 Transferring After the other handset user answers the call tap to end the intercom call R The other handset user may continue to talk on the call Sharing After the other handset user answers the call tap to talk on the call together with the other handset user R The ot...

Page 49: ...onfigure the handset to connect to one of its registered base units automatically Important R A handset can only make and receive calls and intercom calls using one base unit at a time 1 Tap Landline in the home screen or app list 2 Tap Landline settings Initial settings R The handset connects to the base unit 3 Tap Select base unit 4 Select the desired base unit number or Auto R If you select Aut...

Page 50: ... the base unit for about 5 seconds 5 Connect the repeater s AC adaptor and then wait for the and indicators to light in green 6 Press M N on the base unit to exit registration mode Turning DECT repeater mode on and off 1 Tap Landline in the home screen or app list 2 Tap Landline settings Initial settings R The handset connects to the base unit 3 Turn the Repeater mode checkbox on or off Using key ...

Page 51: ...y and will sound its registration tones C D B A 5 Wait until a long beep sounds Note R If the registration tones do not sound or registration fails remove the battery from the key finder for at least 2 minutes before attempting registration again Changing a key finder s name 1 Tap Landline in the home screen or app list 2 Tap Key finder Settings R The handset connects to the base unit 3 Select the...

Page 52: ...ically after 3 minutes To continue searching for the key finder repeat step 3 5 To stop searching tap Checking key finder battery level 1 Tap Landline in the home screen or app list 2 Tap Key finder Battery check R The handset connects to the base unit 3 Select the desired key finder R If the battery is good the key finder beeps and OK is displayed R If the battery is dead the key finder does not ...

Page 53: ...and manage battery performance Apps Allows you to manage and remove the apps installed on your phone Accounts sync Allows you to add and remove new accounts as well as manage how your phone synchronises to servers to keep its data up to date Location services Contains settings related to how your phone uses location information Security Contains settings that control security related features such...

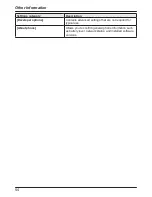
Page 54: ...Developer options Contains advanced settings that are not required for typical use About phone Allows you to confirm general phone information such as battery level network status and installed software versions 54 Other Information ...

Page 55: ...ssages Browser Internet browser Camera Uses the built in camera to allow you to take pictures and record video Gallery Picture and video viewing app Calendar Appointment management app Gmail Email client for Gmail accounts Requires a Google account Maps Provides access to the Google Maps service Navigation Google Maps with Navigation beta app Uses data from Google Maps and the handset s GPS featur...

Page 56: ...rol app for operating configuring sharing content with a compatible Panasonic VIERA TV Media5 VoIP softphone app that allows you to make and receive phone calls over the Internet using a Wi Fi or 3G connection 56 Other Information ...

Page 57: ...unit is available ECO mode is turned on No connection to base unit Airplane mode is on Connected to Wi Fi network Bluetooth feature is on Bluetooth device is connected Battery is charging Speakerphone is on Microphone is muted Silent audio profile is selected Night mode is on Privacy mode is on Answering system is on 1 Answering system is set to greeting only mode 1 1 KX PRX120 only 57 Other Infor...

Page 58: ...ssage received Calendar event reminder Song is being played Open unsecured wireless network is available PC is connected via USB Error message Call in progress Missed call Call is on hold Intercom call being received Uploading data Downloading data More notifications available GPS is activated New voicemail received New answering system messages recorded 1 1 KX PRX120 only 58 Other Information ...

Page 59: ...n rotation feature on and off Turns the handset s airplane mode feature on and off Turns the handset s Wi Fi feature on and off Turns the handset s DECT connection to the base unit on and off Turns the handset s Bluetooth feature on and off Turns the handset s GPS feature on and off Selects the General audio profile Selects the Silent audio profile Selects the Outdoor audio profile 59 Other Inform...

Page 60: ...nel page 20 to turn the DECT connection off and then on again to force the handset to connect to the base unit quickly R Make sure the battery is installed correctly page 13 R Fully charge the battery page 14 R Check the connections page 12 R Unplug the base unit s AC adaptor to reset the unit and turn off the handset Reconnect the adaptor turn on the handset and try again R The handset has not be...

Page 61: ...the wrong base unit PIN If you forget your PIN contact an authorised service centre Battery charge Problem Cause and or solution I fully charged the battery but the low battery message is still displayed and or the operating time seems to be shorter R Clean the charge contacts of the handset and charger with a dry cloth and charge again R It is time to replace the battery page 3 Calls Problem Caus...

Page 62: ...L ADSL Splitter installed We do not recommend the use of generic DSL ADSL filters Contact your DSL ADSL service provider for details for New Zealand Sound quality seems to be getting worse R You have registered a handset that is not recommended for use with the base unit The clearest sound quality is only possible when using a recommended handset page 4 The handset does not ring R The ringer volum...

Page 63: ...the modem in the SKY Digital decoder may be interfering with this unit Disconnect the other equipment and try again for New Zealand Caller information is displayed late R Depending on your phone service provider the unit may display the caller s information at the 2nd ring or later Set First ring to Off page 42 R Move closer to the base unit Answering system KX PRX120 only Problem Cause and or sol...

Page 64: ...osed to liquid to dry for at least 3 days After the exposed unit is completely dry reconnect the AC adaptor insert the microSD card and battery into the handset and charge the battery fully before use If the exposed unit does not work properly contact your place of purchase or nearest Panasonic service centre Caution R To avoid permanent damage do not use a microwave oven to speed up the drying pr...

Page 65: ...cedure 2 Connect the handset to your computer using a USB cable 3 When the USB connected screen is displayed on the handset tap Turn on USB storage 4 Using your computer download the software update file and save it to the root directory of the handset s microSD card R Save the file as is i e as a zip file Do not change the file extension R When you connect the handset to your computer the handset...

Page 66: ...Wall mounting Note R Make sure that the wall and the fixing method are strong enough to support the weight of the unit Base unit Screws Not supplied 55 mm 66 Other Information ...

Page 67: ...TE THIS EXPRESS WARRANTY IS OFFERED AS AN BENEFIT AND DOES NOT AFFECT YOUR LEGAL 1 Pick up and delivery 2 Batteries 3 Repairs when the product has not been used in accordance with the Operating Instructions Manual or has been modified 4 Normal maintenance and cleaning as required in the product s Operating Instructions Manual 5 Service calls to a Correct the set up of the product b Instruct you ho...

Page 68: ...Recording 24 Sharing 48 Transferring 48 Charger 12 14 Connections 12 Contacts 28 Control panel 20 59 Country code 42 Country setting 43 D Date and time 43 DECT repeater 3 50 Display language 43 E ECO mode 41 F First ring 42 G Google account 45 H Handset Adding 47 Charging 14 Deregistering 47 Name 47 Registering 47 Ringtones 38 Headset 3 Hold 23 Home screen 19 I Icons 55 57 58 Intercom 48 Internati...

Page 69: ...V Voicemail 36 46 Volume Receiver 23 Speakerphone 23 W Wall mounting 66 Wi Fi 44 69 Index ...

Page 70: ...70 Notes ...

Page 71: ...71 Notes ...

Page 72: ...ebsite www panasonic co nz Sales Department 1 Innovation Road Macquarie Park NSW 2113 Australia Sales Department 350 Te Irirangi Drive East Tamaki Private Bag 14911 Panmure Auckland New Zealand Phone 09 272 0100 Fax 09 272 0137 1 62 4 chome Minoshima Hakata ku Fukuoka 812 8531 Japan Panasonic System Networks Co Ltd 2013 PNQP1054ZA CC0913YK0 ...

Reviews: