background image

Useful Information

24


Error messages

Troubleshooting

If you still have difficulties after following the instructions in this section, disconnect the AC adaptor and 
turn off the handset, then reconnect the AC adaptor and turn on the handset.

Telephone

Error message

Cause & solution

Hukommelse fuld

L

The handset’s phonebook memory is full. Erase 
unnecessary entries (side 14).

Man skal abonnere på vis 
nummer

L

You must subscribe to Caller ID service. Once you 
receive caller information after subscribing to Caller ID 
service, this message will not be displayed. 

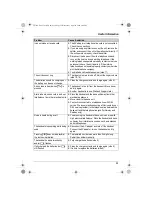
Problem

Cause & solution

w

 is flashing.

L

The handset is not registered to the base unit. Register it 
(side 20).

L

The handset is too far from the base unit. Move closer.

L

The AC adaptor is not connected. Check the 
connections.

L

You are using the handset or base unit in an area with 
high electrical interference. Place the handset and base 
unit away from interference sources, such as antennas 
and mobile phones.

The handset display is blank.

L

The handset is not turned on. Turn the power on (side 
10).

The handset will not turn on.

L

Make sure that the batteries are installed correctly (side 
9).

L

Fully charge the batteries (side 9).

L

Clean the charge contacts and charge again (side 9).

I have changed the display language to 
a language I cannot read.

L

Change the display language (side 10).

TG7100-7102-7103NE(e-da).book  Page 24  Wednesday, April 19, 2006  1:09 PM

Summary of Contents for KX-TG7100NE

Page 1: ... the batteries for about 7 hours before initial use Please read these operating instructions before using the unit and save them for future reference Operating Instructions KX TG7103NE Model No KX TG7100NE KX TG7102NE Digital Cordless Phone KX TG7100 TG7100 7102 7103NE e da book Page 1 Wednesday April 19 2006 1 09 PM ...

Page 2: ...ent R TTE Directive 1999 5 EC Declarations of Conformity for the relevant Panasonic products described in this manual are available for download by visiting http www doc panasonic de Contact Panasonic Services Europe a Division of Panasonic Marketing Europe GmbH Panasonic Testing Centre Winsbergring 15 22525 Hamburg Germany Your phone L References in these operating instructions to the charger and...

Page 3: ... Handset settings 15 Base Unit Settings Base unit settings 16 Call options 17 Caller ID Service Using Caller ID service 18 Caller list 18 Voice mail service for Denmark and Sweden only 19 Display number plus service for Denmark only 19 Multi unit Operation Operating additional units 20 Registering a handset to the base unit 20 Intercom between handsets 21 Transferring calls between handsets 21 Use...

Page 4: ...weden Finland Colour Gray 1 1 1 3 Telephone line cord for Norway Colour Black 1 1 1 4 Telephone plug for Denmark 1 1 1 5 Telephone plug for Finland 1 1 1 6 Telephone plug for Sweden 1 1 1 7 Rechargeable batteries AAA R03 size Part No HHR 55AAAB or HHR 4EPT 2 4 6 8 Handset cover 1 1 2 3 9 Charger Part No PQLV30045 1 2 j AC adaptor for charger Part No PQLV209CE 1 2 1 2 3 4 5 6 7 8 9 j TG7100 7102 71...

Page 5: ...0 mAh We recommend using Panasonic rechargeable batteries Model No P03P L We cannot be responsible for any damage to the unit or degradation of performance which may occur from using non Panasonic rechargeable batteries No Model No Description 1 KX TGA711EX Additional Digital Cordless Handset 2 KX TCA717EX Wall Mounting Adaptor 3 KX TCA718EX Belt Clip 4 KX A272 DECT repeater 2 3 TG7100 7102 7103NE...

Page 6: ...ck Confirm that smoke has stopped and contact an authorised service centre Battery caution L We recommend using the battery ies noted on side 5 Use only rechargeable battery ies L Do not mix old and new batteries L Do not dispose of the battery ies in a fire as they may explode Check local waste management codes for special disposal instructions L Do not open or mutilate the battery ies Released e...

Page 7: ...or business users in the European Union If you wish to discard electrical and electronic equipment pleasecontact your dealer or supplier for further information Information on Disposal in other Countries outside the European Union This symbol is only valid in the European Union If you wish to discard this product please contact your local authorities or dealer and ask for the correct method of dis...

Page 8: ...Within range of a base unit L When flashing Handset is searching for base unit out of range of base unit handset is not registered to base unit no power on base unit L Handset is accessing base unit intercom paging changing base unit settings etc k Handset is on an outside call 5 Battery strength 2 Handset number Standby display setting side 15 0 New voice mail message received side 19 for Danish ...

Page 9: ...n side 4 6 L When replacing batteries we recommend using the Panasonic rechargeable batteries noted on side 5 6 1 Press the notch on the handset cover firmly and slide it in the direction of the arrow L When replacing batteries remove the old batteries positive S terminal first 2 Insert the batteries negative T terminal first Close the handset cover Battery charge Place the handset on the base uni...

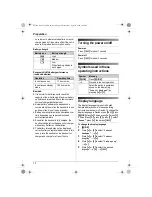
Page 10: ...ase unit or charger and charge for at least 7 hours Turning the power on off Power on Press ih for about 1 second Power off Press ih for about 2 seconds Symbols used in these operating instructions Display language The display language is preset to English Sample displays shown in these operating instructions are shown in Danish To change the display language to Danish press ih press j OK press 3 ...

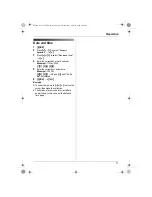
Page 11: ...06 1 7 0 5 0 6 5 Enter the current hour and minute Eksempel 3 30 PM 0 3 3 0 i Press until 03 30 PM is displayed 6 j OK i ih Bemærk L To correct a digit press or to move the cursor then make the correction L The date and time may be incorrect after a power failure In this case set the date and time again TG7100 7102 7103NE e da book Page 11 Wednesday April 19 2006 1 09 PM ...

Page 12: ...y but the other party will not be able to hear you To mute your voice press C T L To return to the conversation press C T again R button to use the recall feature R is used to access optional telephone services Contact your service provider telephone company for details Bemærk L If your unit is connected to a PBX private branch exchange pressing R can allow you to access certain features of your h...

Page 13: ... or charger You do not need to press C To turn this feature on see side 15 To adjust the handset ringer volume when receiving a call Press or V Handset locator Using this feature you can locate the handset if it has been misplaced 1 Press x on the base unit 2 To stop paging press x on the base unit or press ih on the handset TG7100 7102 7103NE e da book Page 13 Wednesday April 19 2006 1 09 PM ...

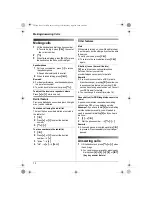
Page 14: ...esired entry Editing entries in the handset phonebook Changing a name phone number 1 Find the desired entry side 14 i j OK 2 Rediger i 3 Edit the name if necessary 16 characters max side 22 i j OK 4 Edit the phone number if necessary 24 digits max i j OK 5 Gem i i ih Erasing entries from the handset phonebook Erasing an entry 1 Find the desired entry side 14 i j OK 2 Slet i 3 JA i i ih Erasing all...

Page 15: ...e English side 10 Kontrast Display contrast Level 3 Registrering Reg Håndsæt side 20 Andre valg Tastetoner Keytones on off TIL Auto svar Auto talk on off FRA 5 1 When the ringer is turned off the handset will ring at the minimum level for intercom calls at the maximum level for paging 2 If you select one of the melody ringtones the ringtone will continue to sound for several seconds if the caller ...

Page 16: ...ation press ih 1 Change the recall time if necessary depending on the requirements of your service provider telephone company or PBX 2 If you change the PIN please make note of your new PIN The unit will not reveal the PIN to you If you forget your PIN consult your nearest Panasonic service centre Base unit settings menu Sub menu Feature default setting Ringestyrke Base unit ringer volume Medium O...

Page 17: ...g i 4 Enter the base unit PIN default 0000 5 Set which handsets will be restricted by pressing the desired handset number L All the registered handset numbers will be displayed L Flashing numbers indicate call restriction is turned on for the corresponding handset L To turn call restriction off for a handset press the number again The number will stop flashing 6 j OK 7 Select a memory location i 8...

Page 18: ...ler ID for Sweden only This is a service of your service provider telephone company and will only operate if you have subscribed to this service When you hear a call waiting tone during a conversation the display will show the second caller s information You can answer the second call keeping the first call on hold Consult your service provider telephonecompany for details of this service Caller l...

Page 19: ...ne is busy Messages are recorded by your service provider telephone company not your telephone When you have new messages 0 will be displayed on the handset Please consult your service provider telephone company for details of this service Bemærk L 0 will remain on the display after you have listened to new messages To turn off 0 press and hold C T for 2 seconds 0 will appear again when you have n...

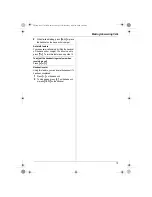
Page 20: ... a confirmation tone sounds and w stops flashing Bemærk L If an error tone sounds or if w is still flashing register the handset manually manual registration side 20 L If all registered handsets start ringing in step 2 press x to stop Start again from step 1 L Charge the batteries of your additional handset for about 7 hours before initial use L This registration method cannot be used for handsets...

Page 21: ... once w stops flashing Intercom between handsets Intercom calls can be made between handsets Eksempel When handset 1 calls handset 2 1 Handset 1 INT i Press 2 desired handset number 2 Handset 2 Press C s to answer 3 When finished talking press ih Transferring calls between handsets Outside calls can be transferred between 2 people Eksempel When handset 1 transfers a call to handset 2 1 Handset 1 D...

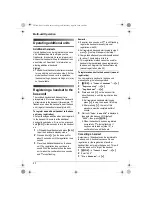
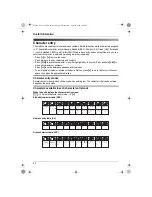
Page 22: ...mber highlighted by the cursor Press and hold C T to erase all characters or numbers Press to switch between uppercase and lowercase To enter another character located on the same dial key press to move the cursor to the next space then press the appropriate dial key Character entry modes Several character entry modes can be used when entering text The characters that can be entered depend on the ...

Page 23: ...ble N L The following are used for both uppercase and lowercase Extended 2 character table O L The following are used for both uppercase and lowercase Cyrillic character table P TG7100 7102 7103NE e da book Page 23 Wednesday April 19 2006 1 09 PM ...

Page 24: ... handset is not registered to the base unit Register it side 20 L The handset is too far from the base unit Move closer L The AC adaptor is not connected Check the connections L You are using the handset or base unit in an area with high electrical interference Place the handset and base unit away from interference sources such as antennas and mobile phones The handset display is blank L The hands...

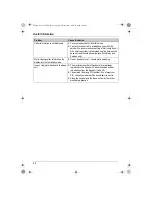
Page 25: ...s heard sound cuts in and out Interference from other electrical units L Place the handset and the base unit away from other electrical appliances L Move closer to the base unit L Your unit is connected to a telephone line with DSL service We recommend connecting a filter contact your DSL service provider to the telephone line between the base unit and the telephone line jack for Norway and Sweden...

Page 26: ...information the display returns to standby mode L Do not pause for over 1 minute while searching I cannot register a handset to the base unit L The maximum number of handsets 6 are already registered to the base unit Cancel unused handset registrations from the base unit side 20 L You entered the wrong PIN number If you forget your PIN consult your nearest Panasonic service centre L Place the hand...

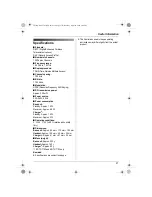
Page 27: ... consumption Base unit Standby Approx 1 9 W Maximum Approx 6 8 W Charger 1 Standby Approx 1 5 W Maximum Approx 3 W Operating conditions 5 C 40 C 20 80 relative air humidity dry Dimensions Base unit Approx 60 mm 173 mm 105 mm Handset Approx 155 mm 48 mm 34 mm Charger 1 Approx 61 mm 87 mm 95 mm Mass weight Base unit Approx 220 g Handset Approx 140 g Charger 1 Approx 90 g 1 KX TG7102 and KX TG7103 on...

Page 28: ...andlerstempel På dette produkt ydes der garanti i henhold til forbrugerkøbelovens bestemmelser Vedlæg venligst dette garantibevis i udfyldt stand samt Deres købsnota ved enhver henvendelse angående garanti Garantien bortfalder såfremt typeskilt mangler eller er ulæseligt Alle henvendelser skal ske til forhandleren TG7100 7102 7103NE e da book Page 28 Wednesday April 19 2006 1 09 PM ...

Page 29: ...15 Display number plus service 19 H Handset Cancelling 20 Locator 13 Power on off 10 Registration 20 Settings 15 I Intercom 21 K Keytones 15 M Making calls 12 Missed calls 18 Mute 12 P Pause 12 Phonebook Handset phonebook 14 PIN Base unit 16 Power on off 10 R Recall 12 16 Redialling 12 Redial list 12 Registration 20 Repeater 21 Ringtones 15 S Speakerphone 12 T Transfer calls 21 V Voice mail 19 Vol...

Page 30: ...30 Egne Kommentarer TG7100 7102 7103NE e da book Page 30 Wednesday April 19 2006 1 09 PM ...

Page 31: ...31 Egne Kommentarer TG7100 7102 7103NE e da book Page 31 Wednesday April 19 2006 1 09 PM ...

Page 32: ...0 Copyright This material is copyrighted by Panasonic Communications Co Ltd and may be reproduced for internal use only All other reproduction in whole or in part is prohibited without the written consent of Panasonic Communications Co Ltd 2006 Panasonic Communications Co Ltd All Rights Reserved TG7100 7102 7103NE e da book Page 32 Wednesday April 19 2006 1 09 PM ...

Reviews: