background image

Ins

tal

aci

ón

Con

exi

one

s/M

ont

aje

 en

 la

 pa

red

Con

ect

e la

 cl

avi

ja 

del

 ad

apt

ado

r d

e c

orr

ien

te 

a la

 to

ma 

de 

cor

rie

nte

.

Si l

o re

qui

ere

, in

ser

te 

los

 to

rni

llo

s (

1

) (n

o s

e s

um

ini

stra

n) e

n la

 pa

red

.

2

 27

.2 

mm

 (1


1

/

16

 pu

lga

das

)

1

2

1

2

Not

a:

R

El a

dap

tad

or d

e c

orr

ien

te 

deb

e p

erm

ane

cer

 co

nec

tad

o e

n to

do 

mom

ent

o (e

s n

orm

al q

ue

el a

dap

tad

or s

e c

alie

nte

 du

ran

te 

su 

uso

).

R

Ase

gúr

ese

 de

 qu

e la

 pa

red

 y 

el m

éto

do 

de 

col

oca

ció

n s

ean

 lo

 su

fic

ien

tem

ent

e

res

ist

ent

es 

par

a s

opo

rta

r e

l p

eso

 de

 la

 un

ida

d.

Ins

tal

aci

ón 

y c

arg

a d

e la

 ba

ter

ía

Im

por

tan

te:

R

Util

ice

 la

s b

ate

ría

s re

car

gab

les

 qu

e s

e s

um

ini

stra

n. P

ara

 re

em

pla

zar

las

, re

com

end

am

os

el u

so 

de 

las

 ba

ter

ías

 re

car

gab

les

 P

ana

son

ic 

que

 se

 es

pec

ific

an 

en 

la 

pág

ina

 2.

R

US

E S

ÓLO

 ba

ter

ías

 N

i-M

H re

car

gab

les

 ta

mañ

o A

AA

 (R

03)

 (

1

).

R

NO

 ut

ilic

e b

ate

ría

s a

lca

lin

as,

 de

 m

ang

ane

so 

ni d

e N

i-C

d.

R

Con

firm

e q

ue 

las

 po

lar

ida

des

 es

tén

 co

rre

cta

s (

).

Car

gue

 ap

rox

im

ada

men

te 

dur

ant

e 7

 ho

ras

.

R

Con

firm

e q

ue 

se 

mue

stre


Car

gan

do

 (

2

).

3

Instalación

Summary of Contents for KX-TGD66 Series

Page 1: ...subject to change without notice You must register this handset with your base unit before it can be used This installation manual describes only the steps needed to register and begin using the handset Please read the base unit s operating instructions for further details Please read this installation manual before using the unit and save it for future reference For assistance visit our Web site ...

Page 2: ...efore using the product to ensure proper and safe operation of your product WARNING Power connection R Completely insert the AC adaptor power plug into the power outlet Failure to do so may cause electric shock and or excessive heat resulting in a fire R Regularly remove any dust etc from the AC adaptor power plug by pulling it from the power outlet then wiping with a dry cloth Accumulated dust ma...

Page 3: ...Do not mix old and new batteries R Do not open or mutilate the batteries Released electrolyte from the batteries is corrosive and may cause burns or injury to the eyes or skin The electrolyte is toxic and may be harmful if swallowed R Exercise care when handling the batteries Do not allow conductive materials such as rings bracelets or keys to touch the batteries otherwise a short circuit may caus...

Page 4: ...this manual Do not dispose of batteries in a fire They may explode Check with local codes for possible special disposal instructions SAVE THESE INSTRUCTIONS Other information R The applied nameplate is located at the bottom or rear of the product R Operating the product near electrical appliances may cause interference Move away from the electrical appliances CAUTION Risk of explosion if battery i...

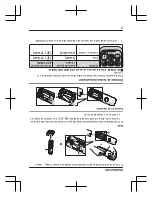
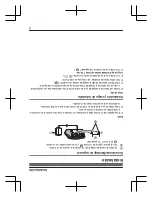
Page 5: ...mW max R Power source 120 V AC 60 Hz R Power consumption Standby 0 1 W Maximum 1 8 W R Operating conditions 0 C 40 C 32 F 104 F 20 80 relative air humidity dry Setting up Connections Wall mounting Connect the AC adaptor to the power outlet Drive the screws 1 not supplied into the wall if necessary 2 27 2 mm 1 1 16 inches 1 2 1 2 Note R The AC adaptor must remain connected at all times It is normal...

Page 6: ...MH batteries AAA R03 size 1 R Do NOT use alkaline manganese Ni Cd batteries R Confirm correct polarities Charge for about 7 hours R Confirm Charging is displayed 2 R When the batteries are fully charged Fully charged is displayed 2 1 4 2 3 1 Note R If the batteries are fully charged but the operating time seems to be shorter clean the battery ends and the charge contacts with a dry cloth and charg...

Page 7: ... handset KX TGDA63 Remote voice assist M N MFLASHN MCALL WAITN Registering a handset to a base unit 1 Base unit Press and hold MLOCATORN for about 5 seconds R If all registered handsets start ringing press MLOCATORN again to stop then repeat this step 2 Handset Place the handset on the base unit or charger then wait until a long beep sounds and is displayed Note R If an error tone sounds or if is ...

Page 8: ...not be ensured when using this phone CAUTION Any changes or modifications not expressly approved by the party responsible for compliance could void the user s authority to operate this device NOTE This equipment has been tested and found to comply with the limits for a Class B digital device pursuant to Part 15 of the FCC Rules These limits are designed to provide reasonable protection against har...

Page 9: ...e reduced noise and interference when used with T Coil equipped hearing aids and cochlear implants Notice LThis product is designed for use in the United States of America Sale or use of this product in other countries may violate local laws LCet appareil est conçu pour être utilisé aux États Unis d Amérique La vente ou l emploi de cet appareil dans certains autres pays peut constituer une infract...

Page 10: ...ries Parts for your Camera Phone A V products TV Computers Networking Personal Care Home Appliances Headphones Ba eries Backup Chargers more For Product Informa on Opera ng Assistance Parts Owner s Manuals Dealer and Service info go to h p shop panasonic com support For the hearing or speech impaired TTY 1 877 833 8855 As of June 2015 10 For assistance please visit http shop panasonic com support ...

Page 11: ...rranty excludes both parts and labor for non rechargeable batteries antennas and cosmetic parts cabinet This warranty only applies to products purchased and serviced in the United States This warranty is extended only to the original purchaser of a new product which was not sold as is Telephone When shipping the unit carefully pack include all supplied accessories listed in the Owner s Manual and ...

Page 12: ...vicer or damage that is attributable to acts of God THERE ARE NO EXPRESS WARRANTIES EXCEPT AS LISTED UNDER LIMITED WARRANTY COVERAGE THE WARRANTOR IS NOT LIABLE FOR INCIDENTAL OR CONSEQUENTIAL DAMAGES RESULTING FROM THE USE OF THIS PRODUCT OR ARISING OUT OF ANY BREACH OF THIS WARRANTY ALL EXPRESS AND IMPLIED WARRANTIES INCLUDING THE WARRANTY OF MERCHANTABILITY ARE LIMITED TO THE PERIOD OF THE LIMI...

Page 13: ...e used 4 Read troubleshooting page in the base unit s Operating Instructions IMPORTANT If your product is not working properly Visit our Web site http shop panasonic com support LFAQ and troubleshooting hints are available Two Riverfront Plaza Newark NJ 07102 5490 Panasonic Corporation 2021 For assistance please visit http shop panasonic com support 13 Appendix ...

Page 14: ...14 Notes ...

Page 15: ...6 Notas ...

Page 16: ... R Si todos los auriculares registrados comienzan a timbrar oprima MLOCATORN de nuevo para detenerlos y después repita este paso 2 Auricular Coloque el auricular en la unidad base o cargador y después espere hasta que suene un pitido largo y aparezca Nota R Si suena un tono de error o si se muestra registre el auricular de acuerdo con las instrucciones de operación de la unidad base Idioma de la p...

Page 17: ... y cárguelas de nuevo Extracción de la batería 1 2 Símbolo en teclas del auricular Para la siguiente función las teclas son diferentes para el auricular suministrado y el opcional n KX TGDA66 Para los usuarios de la serie KX TGD610 KX TGD630 Función Auricular propor cionado Auricular opcional KX TGDA66 Flash MFLASHN M N 1 MFLASHN Llamada en espera MCALL WAITN M N 1 MFLASHN 1 La función asistente d...

Page 18: ...la pared y el método de colocación sean lo suficientemente resistentes para soportar el peso de la unidad Instalación y carga de la batería Importante R Utilice las baterías recargables que se suministran Para reemplazarlas recomendamos el uso de las baterías recargables Panasonic que se especifican en la página 2 R USE SÓLO baterías Ni MH recargables tamaño AAA R03 1 R NO utilice baterías alcalin...

Page 19: ...izar en el equipo y sus descripciones de las instrucciones de operación de la unidad base Especificaciones R Estándar Tecnología inalámbrica Bluetooth 4 2 Perfil de manos libres HFP Perfil del audífono HSP Perfil del acceso a la guía telefónica PBAP Perfil de carga de objetos OPP Perfil de puerto serie SPP Mensaje del perfil de acceso MAP R Rango de frecuencia 1 92 GHz a 1 93 GHz DECT 2 402 GHz a ...

Page 20: ... están sujetos a cambio sin previo aviso Debe registrar este auricular en su unidad base antes de poder usarlo Este manual de instalación solo describe los pasos necesarios para registrar y comenzar a usar el auri cular Lea las instrucciones de operación de la unidad base para obtener más detalles Lea este manual de instalación antes de usar la unidad y guárdelo para consultarlo en el futuro Para ...

Reviews: