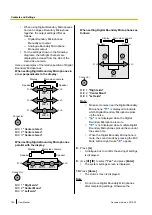
–
"ON"
(default): Enables the detection of
Boundary Microphones or headset.
–
"OFF"
: Disables the detection of Boundary
Microphones or headset.
Note
•
When not using Boundary Microphones or
headset, set this to
"OFF"
.
"Network Connection Status"
: Use
[
][
]
to
select whether to display the network status
indication.
–
"ON"
(default): Displays the network status
indication.
–
"OFF"
: Hides the network status indication.
"Active call Menu"
: Use
[
][
]
to select whether
to display the guide when a video conference call
begins.
–
"ON"
(default): Displays the guide.
–
"OFF"
: Hides the guide.
"Noise reduction"
(KX-VC600 only): Use
[
]
[
]
to select whether to enable noise reduction
when a video conference call begins.
–
"ON"
: Enables noise reduction.
–
"OFF"
(default): Disables noise reduction.
"Displays combined screen"
(KX-VC600 only):
Use
[
][
]
to select whether to enable the
combined screen function when displaying a
computer’s screen.
–
"ON"
(default): Enables the combined screen
function.
–
"OFF"
: Disables the combined screen function.
"Receive H.239 Call"
: Use
[
][
]
to select
"ON"
(default) or
"OFF"
.
Note
•
To select
"ON"
,
"H.323"
must be set to
"ON"
5.
Press
[G]
.
•
A dialogue box to confirm the saving of settings
is displayed.
6.
Use
[
][
]
to select
"Yes"
and press
[Enter]
.
•
The system settings screen is displayed.
7.
Press
[Home]
.
•
The Home screen is displayed.
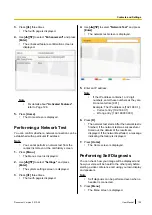
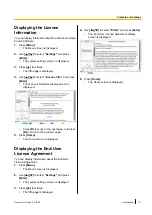
Making Screen Standby
Settings
When the remote control is not operated or a video
conference call is not received for a specified length of
time, the unit enters standby mode. You can set the
length of time here.
1.
Press
[Menu]
.
•
The Menu screen is displayed.
2.
Use
[
][
]
to select
"Settings"
and press
[Enter]
.
•
The system settings screen is displayed.
3.
Use
[
][
]
to select
"Standby Setting"
and
press
[Enter]
.
•
The screen standby settings screen is
displayed.
4.
Enter the length of time (
0
–
99
) in minutes until the
unit enters screen standby mode (default:
10
).
Note
•
If you set
"0"
, the unit will not enter screen
standby mode automatically. However, if
you press the remote control’s
[Video Out
On/Off]
button, the unit will enter screen
standby mode even if
"0"
is set.
5.
Press
[G]
.
•
A dialogue box to confirm the saving of settings
is displayed.
6.
Use
[
][
]
to select
"Yes"
and press
[Enter]
.
•
The system settings screen is displayed.
Document Version 2013-09
User Manual
101
Contacts and Settings

