Installation of this unit
Installation
34
This unit can be extended by adding the Extension
Module equipped with the Control Unit (LB-XC82) or the
Writer Unit (LB-XD73A).
≥
For details on how to install the Control Unit or the Writer
Unit into the Extension Unit, refer to "Installing of the Control
Unit/Writer Unit" (
1
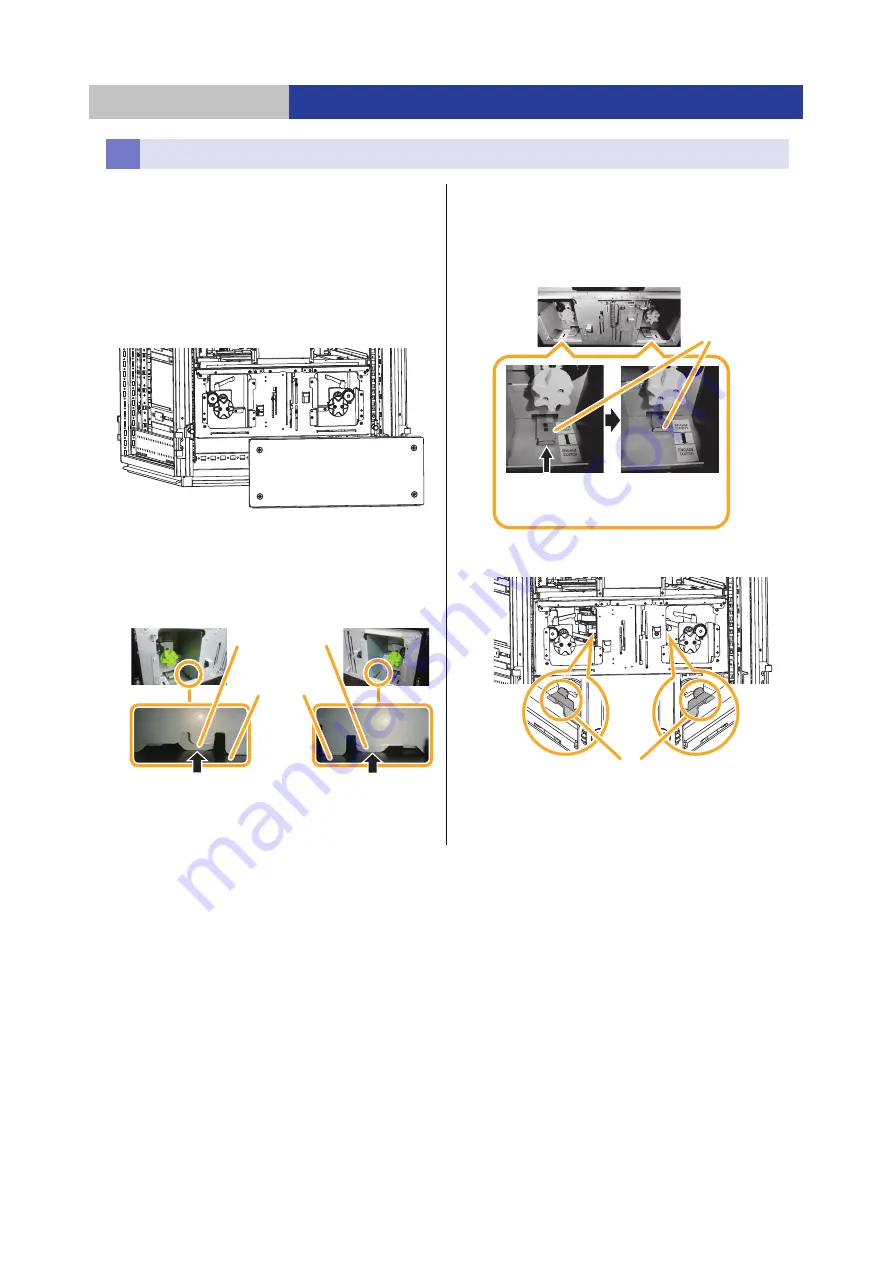
Remove the bottom panel of the Bottom
Module.
≥
Remove the four screws.
2
Check the changer unit installation.
≥
Confirm that the changer unit is correctly installed in
the Bottom Module. Confirm that a 1.5 mm (0.06
q
) gap
gauge cannot be inserted between the changer unit
seats and the bottom panel of the Bottom Module.
≥
If the 1.5 mm (0.06
q
) gap gauge can be inserted, it will
not be possible to turn off the drive transmission of the
changer unit. Contact the vendor.
3
Turn off the drive transmission of the changer
unit.
≥
Insert your hands into the opening to left and right.
Then push the clutch release arm.
≥
Make sure that the clutch release arm is stationary and
does not return.
≥
Do not touch the levers in the changer unit.
Extension
Bottom panel
Changer unit
Bottom panel of the
Bottom Module
Confirm that a 1.5 mm (0.06
q
) gap gauge cannot be inserted.
Clutch release
arm
Engage Clutch
(Default/Shipping)
Release Clutch
(Service)
Levers in the changer unit


