Installation of this unit
Appendix
60
2
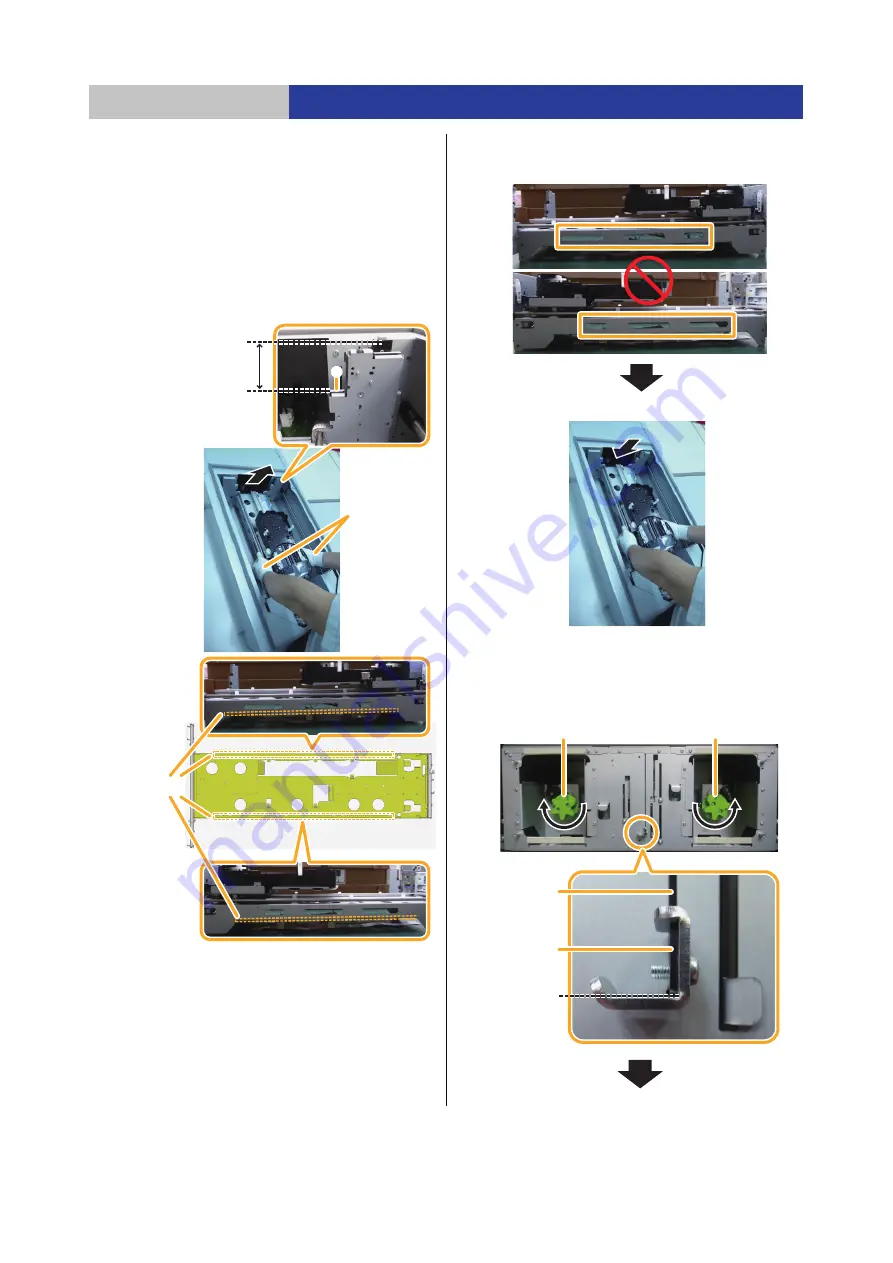
Elevate the changer unit.
≥
Slowly lift part
A
of the changer unit within the guide
range.
≥
Take care when doing so, as the changer unit may
separate from the Bottom Module if you lift beyond the
upper limit of the guide range.
≥
Make sure that you are holding the designated parts of
the rear of the changer unit with the pads of the fingers
of both hands while lifting.
≥
Note:
Do not grip the designated parts of the rear of
the changer unit too strongly. There is danger of your
fingers getting caught.
≥
Note:
Do not lift by inserting your fingers in the holes
above the designated parts. There is danger of your
fingers getting caught.
≥
Lower the changer unit slowly.
3
Secure the gear rack.
≥
Turn the left handle clockwise until it stops.
≥
Turn the right handle counterclockwise until it stops.
≥
Confirm that the lowermost part of protruding part
A
is
in contact with the end of the slit in the Bottom Module.
Guide range
Upper limit of guide range
Designated
parts
Rear of changer unit
Wear gloves
to prevent
injury.
Protruding part
A
Slit
Slit end
Right handle
Left handle


