Installation of this unit
Preparatory work for installation
17
1
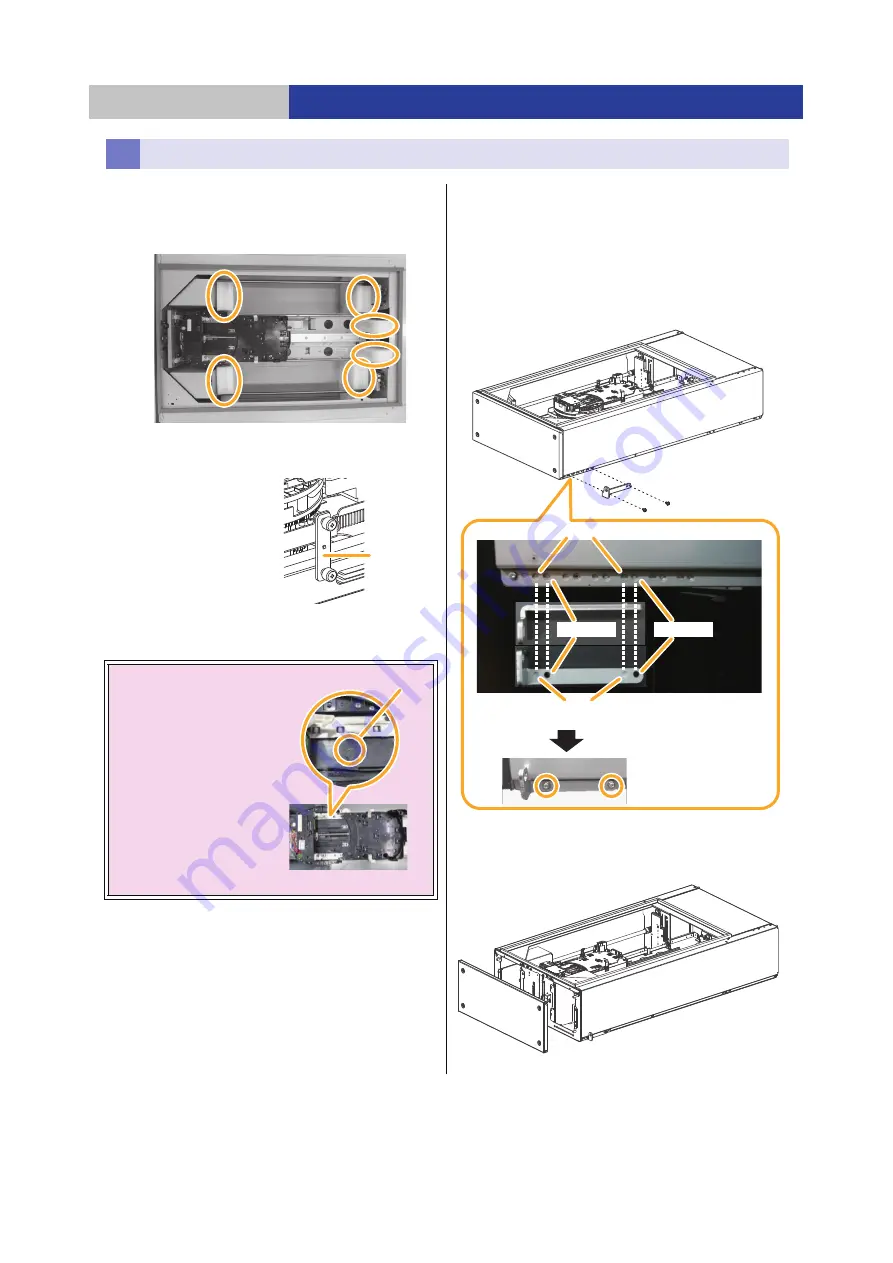
Remove the cushioning pads from the changer
unit.
≥
There are six cushioning pads protecting the changer
unit. Remove all of them.
2
Remove the metal fastening for positioning of
the changer unit.
≥
The changer unit is
secured by a metal
fastening for positioning
during transportation to
restrict movement.
(Two sides: left and
right)
≥
The metal fastening for
positioning will be used
to position the Base
Module. (
3
Attach the supplied mounting brackets to the
left and right of the unit.
≥
Each mounting bracket is fastened by two M3 screws
at the 14 mm (0.6
q
) position. (
Adjust the mounting bracket position as needed.
≥
Check the shape and orientation of the mounting
brackets to attach them correctly.
≥
Match the two locating protrusions on the mounting
bracket with the locating holes on the Bottom Module.
4
Remove the bottom panel of the Bottom
Module.
≥
Remove the four screws.
Preparation of the Bottom Module
≥
Confirm that there is no
dust or dirt on the
surface of the changer
unit so that foreign
objects do not attach to
the disks while the
system is operating.
≥
Remove any dirt
exceeding 1 mm (0.04
q
)
in diameter.
Metal
fastening for
positioning
Remove rubbish
Surface of the changer unit
Mounting bracket
Screw holes
Locating holes
Locating protrusions
Screw holes
Bottom panel


