268
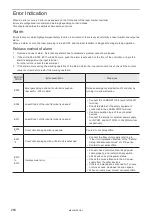
Error Indication
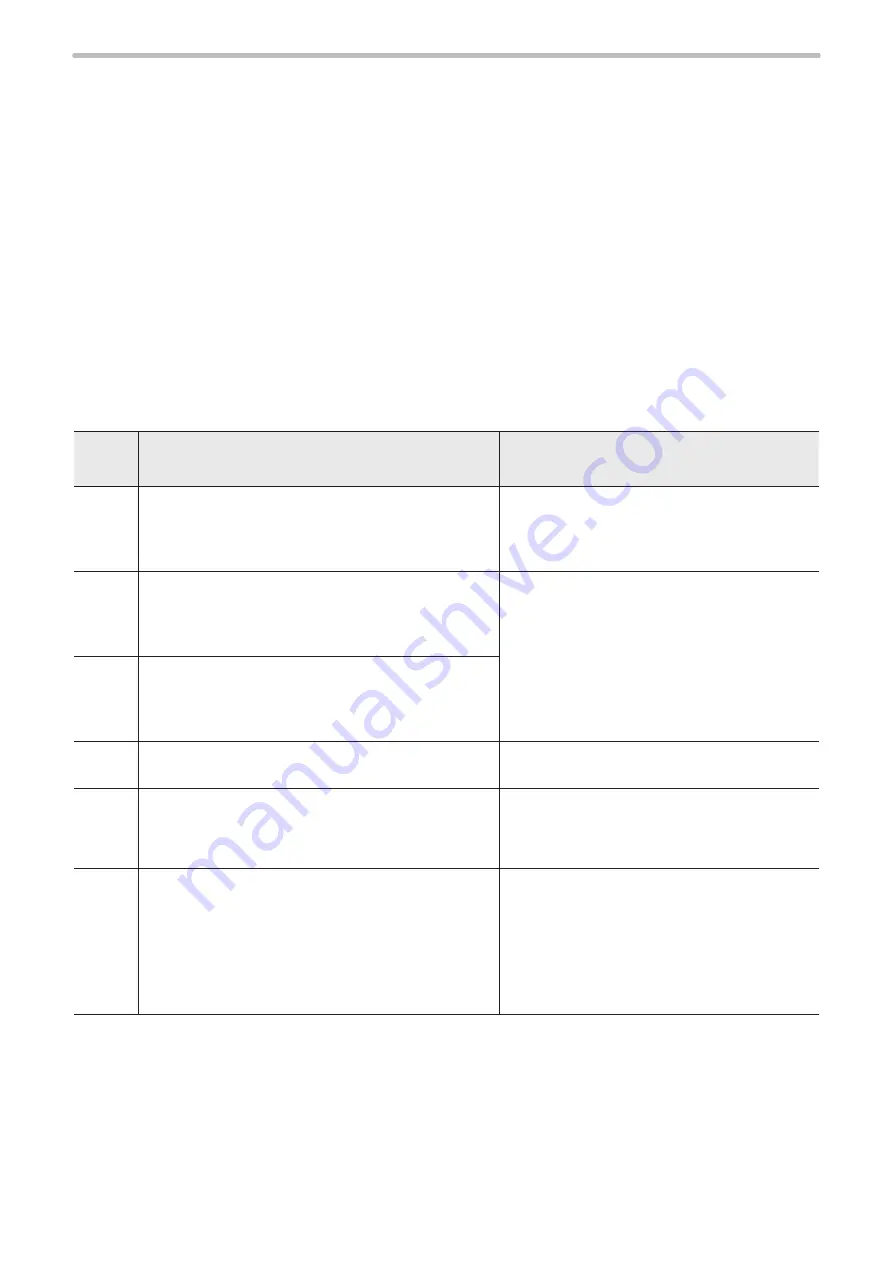
When an error occurs, an error code appears on the front panel of the laser marker controller.
Errors are categorized into alarm and warning depending on their details.
This chapter describes the details and measures of errors.
Alarm
Errors that occur when highly emergent safety function is activated or there is any abnormality in laser marker are output as
alarm.
When an alarm occurs, the laser pumping is turned OFF, and the laser radiation is stopped if during marking operation.
Release method of alarm
1. Remove a cause of alarm. Note that any alarms due to hardware’s problem cannot be released.
2. If the error E002, E004, E011 or E260 occurs, push the alarm reset switch on the front of the controller, or input the
alarm reset signal on the input terminal.
For other errors, reboot the laser marker.
3.
If the alarm occurs during the marking operation of the files in which the counter function is set, check if the counter
value is correct before restart the marking operation.
ERROR
CODE
Error description
Measures
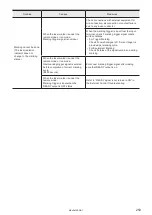
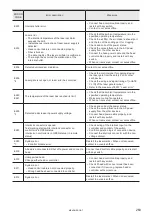
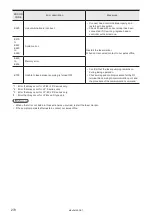
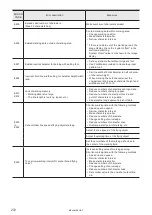
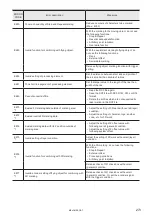
E002
Emergency stop button of controller is pushed.
(Except for -LS1 models)
Release emergency stop button of controller by
turning it in arrow direction.
E004
Laser Stop 2 of the input terminal is opened.
•
Connect the LASER STOP terminal of the I/O
terminal.
•
Check the status of the safety equipment
connected to the LASER STOP terminal.
• Confirm operation logic of the connected
devices.
•
Connect the internal or external power supply
to IN COM. and OUT COM. in the I/O terminal
respectively.
E011
Laser Stop 1 of the input terminal is opened.
E020
Cover of scanning section is opened.
Contact to our sales office.
E021
Cover of scanning section or fiber unit is detached.
• Connect the fiber unit properly referring to
“Fiber Unit Installation Method” of the “Safety /
Setup / Maintenance Guide” of LP-S series.
• Contact to our sales office.
E210
to
E213
Galvanometer error.
•
Connect head control cable or head power
cable properly, and restart with key switch.
•
Check and correct the power status.
• Check the noise influence to the AC power
supply from the other devices.
•
If there is a marking line scanned for 1 minute
or more at once, decrease the scan speed.
• When not recovered, contact our sales office.
ME-LPMSZ-OP-7
Summary of Contents for LP-M Series
Page 11: ...1 Basic Operation Procedure ME LPMSZ OP 7 ...
Page 76: ...76 MEMO ME LPMSZ OP 7 ...
Page 77: ...2 Description of Operation Screen ME LPMSZ OP 7 ...
Page 102: ...102 Symbol ME LPMSZ OP 7 ...
Page 255: ...Troubleshooting ME LPMSZ OP 7 ...
Page 276: ...Appendix ME LPMSZ OP 7 ...
Page 304: ...Index ME LPMSZ OP 7 ...
Page 307: ...No 9000 0063 56V ...
Page 308: ... Panasonic Industrial Devices SUNX Co Ltd 2013 2019 March 2019 9000 0063 56V ...

