133
4-2-4 Air-cooling fan and intake vent
The air-cooling fans are equipped on the controller.
If any dust adhered onto the fans or intake vent may decrease the cooling performance and cause the performance to
degrade, or failure of the laser marker.
Clean them regularly according to the usage environment.
Effect from deterioration of the fans
Depending on the usage environment, any dust or oil adhered onto the fan may impair air flow rate of the fan or even stop
the rotation of the fan. When the cool performance decreases, the temperature in the electric circuit or laser oscillator
will go up, which may cause an error or stoppage of laser radiation. Also, a temperature rise in the housing will foster
deterioration in the internal parts, which may cause the marking performance to degrade, or failure of the equipment.
Replacement interval of the fans
• The fan does not rotate, or the rotating speed is low.
• There is contamination on the fan.
• Abnormal noise is generated from the fan.
• Almost 5 years have passed since delivery. *
* The replacement interval may differ depending on the usage environment and marking conditions.
Replacement method
Our service representative handles the maintenance and replacement. Contact our sales office.
Steps for cleaning of air-cooling area (Daily maintenance)
1.
Turn OFF the key switch of the controller, and disconnect the AC power cable.
2.
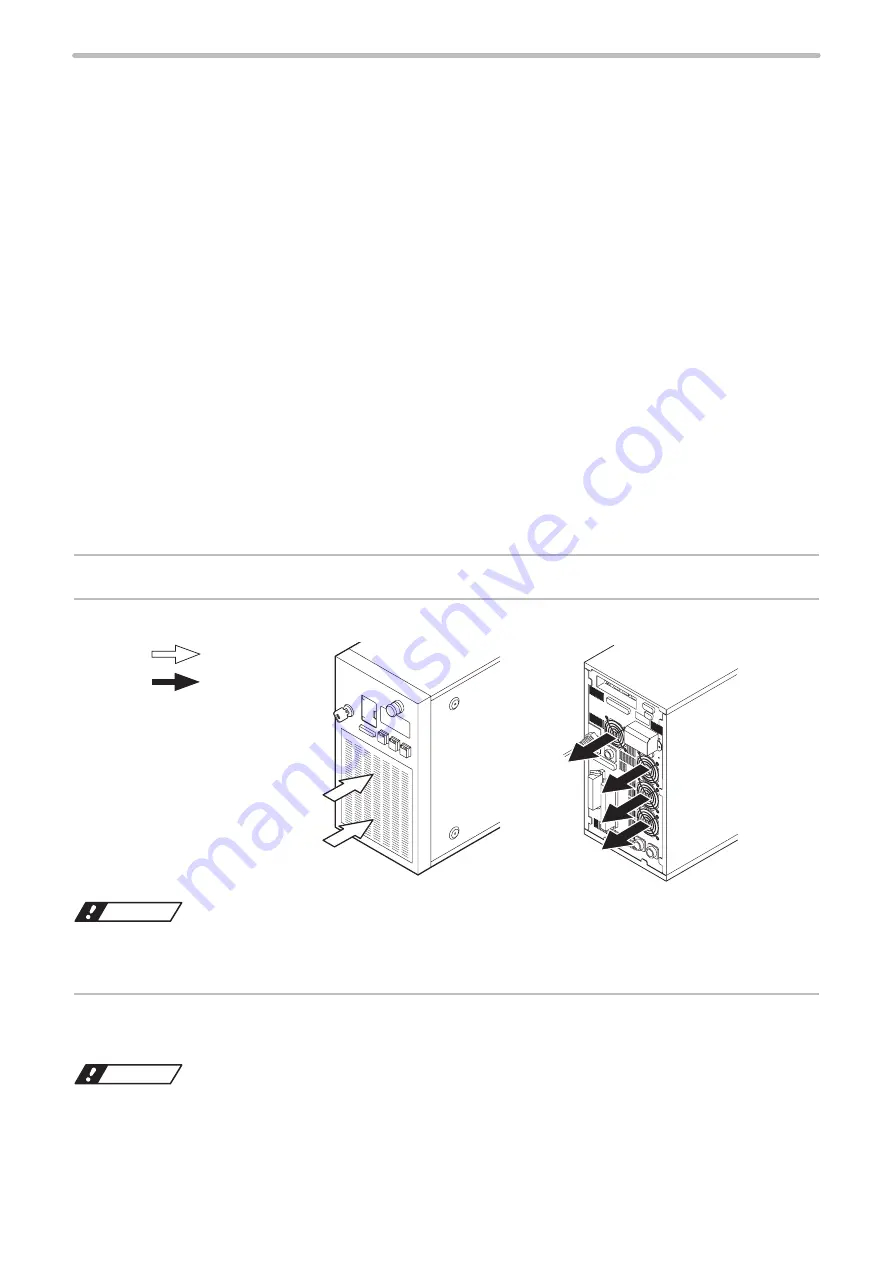
Remove dust and dirt adhered onto the intake vent and fans by vacuum cleaner.
Intake
Exhaust
ワㄐㄕㄊㄆ
• Do not blow the air in the intake vent and fans. If dust comes to the inside of the laser marker, it may cause the
failure of the laser marker.
3.
Wipe the residual contamination with a dried cloth. If a contamination is severe, use a cloth wrung
out with neutral detergent to wipe it. Then, remove the detergent with a cloth wrung out of water.
ワㄐㄕㄊㄆ
• Keep water from entering the controller inside.
ME-LPS-SSM-8
Summary of Contents for LP-S Series
Page 15: ...15 MEMO ME LPS SSM 8 ...
Page 26: ...26 Chapter 1 Specification ME LPS SSM 8 ...
Page 41: ...41 Chapter 2 Preparation ME LPS SSM 8 ...
Page 78: ...Chapter 3 Connection for External Control ME LPS SSM 8 ...
Page 126: ...Chapter 4 Maintenance ME LPS SSM 8 ...
Page 148: ...Troubleshooting ME LPS SSM 8 ...
Page 169: ...Index ME LPS SSM 8 ...
Page 172: ...172 MEMO No 9000 0066 16V ME LPS SSM 8 ...
Page 173: ...No 9000 0066 16V ...

