background image

11. Using the Wi-Fi function

158

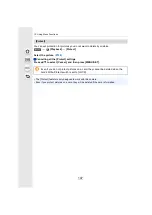
Recording location information and images

1

Start recording location information with the smartphone.

2

Record images with the camera.

3

Stop recording the location information with the smartphone.

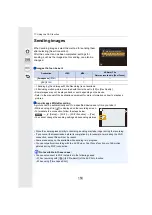
Writing the location information to the images

(Preparation on the camera)
Connect to a smartphone. 

(P152)

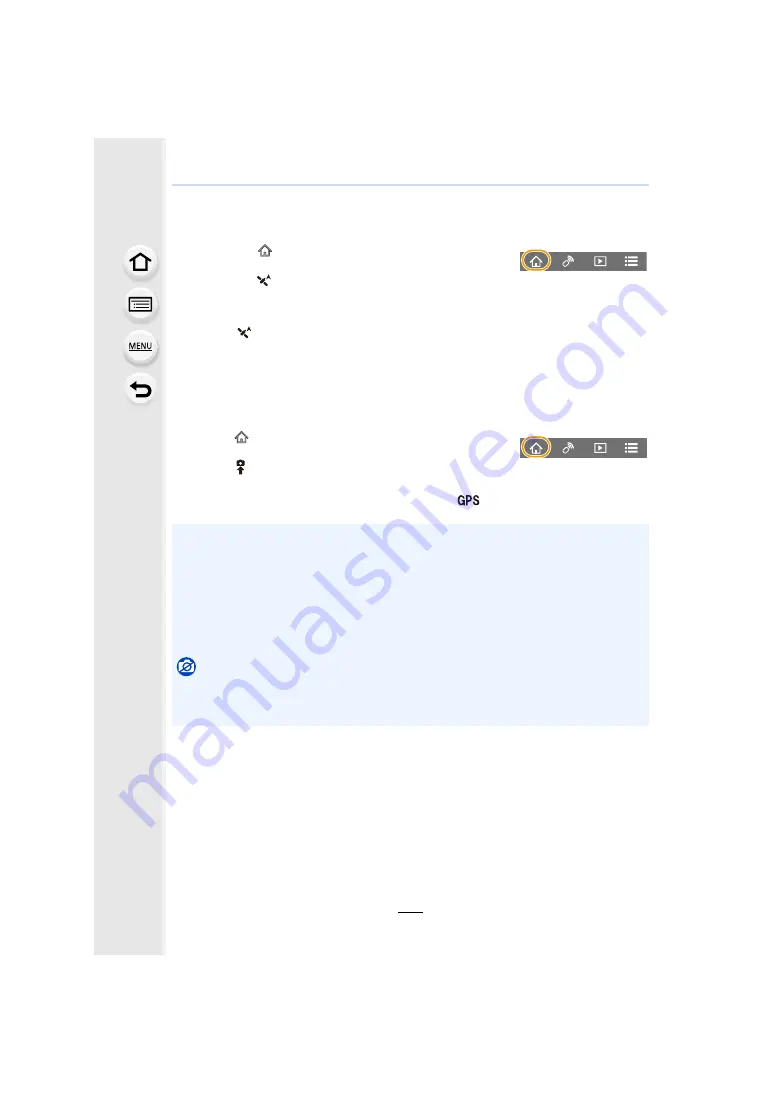
Operate the smartphone.

1

Start “Image App”. 

(P151)

2

Select [

].

3

Select [Geotagging].

4

Select [

] to send and write the location information.

• Follow the on-screen messages to operate the smartphone.
• Images with location information are indicated with [

].

1

Start “Image App”. 

(P151)

2

Select [

].

3

Select [Geotagging].

4

Select [

] to start recording location information.

Select [

] to stop recording the location information.

• Cautions for Use:

Be sure to pay special attention to the privacy, the likeness rights, etc. of the subject 
when you use this function. Use at your own risk.

• The smartphone battery drains faster while location information is being recorded.

When recording of location information is not necessary, stop it.

• On the smartphone, you can set the acquisition interval of location information and check the 

transfer status of location information.
Refer to [Help] in the “Image App” menu for details.

Not available in these cases:

• This function is not available in the following cases:

– Images recorded after location information was sent to the camera
– Images with location information already written to them

Summary of Contents for Lumix DC-FT7

Page 1: ...this manual for future use Operating Instructions for advanced features Digital Camera Model No DC FT7 DC TS7 DVQP1700ZA F0618HN0 until 2015 9 2 Message Display P181 Troubleshooting P183 Finding the...

Page 2: ...tion Search from Contents Click this icon to jump to Contents P4 Search from the list of function names P8 Search from the list of buttons P18 Search from the list of screens and icons P177 Search fro...

Page 3: ...esponding page About the indication of the applicable mode Applicable modes The icons indicate the modes available for a function Black icons Applicable modes Grey icons Unavailable modes Indicates th...

Page 4: ...er button Taking pictures 35 Motion picture button Recording motion pictures 35 MODE button Selecting a Recording Mode 36 Cursor buttons MENU SET button 36 DISP button Switching the displayed informat...

Page 5: ...s from 4K burst file and saving 80 Operations during selecting pictures 81 Controlling Focus After Recording Post Focus 83 Selecting the desired focus area and saving a picture 85 Select a Drive Mode...

Page 6: ...enu Functions Menu list 122 Rec menu 122 Motion Picture menu 129 Custom menu 130 Setup menu 132 Playback menu 138 11 Using the Wi Fi function What you can do with the Wi Fi function 148 Wi Fi function...

Page 7: ...k Pictures on a TV Screen 171 Saving still pictures and motion pictures on your PC 173 Transferring images to a PC 173 Printing the Pictures 175 13 Others Monitor Display Viewfinder Display 177 Messag...

Page 8: ...P86 Burst P87 Self Timer P91 Picture Quality and Colour Tone Sensitivity P71 White Balance P73 Photo Style P122 Picture Size P124 Quality P125 i Dynamic P126 HDR P126 Exposure Exposure Compensation P...

Page 9: ...P119 Multi Playback P119 Delete P121 Auto Review P131 Slide Show P139 Edit 4K PHOTO Bulk Saving P142 Resize P145 Cropping P146 Location Logging P141 Title Edit P142 Text Stamp P143 Image settings Prot...

Page 10: ...the camera e g Attach any items such as accessories to the strap attached to the camera When strong pressure is applied using the camera at a depth exceeding 31 m 102 feet Waterproof performance may...

Page 11: ...h the side door open when the temperature of the camera gets close to the ambient temperature Contact Panasonic if the fogging does not disappear Conditions in which inner side may be fogged Condensat...

Page 12: ...Shock However the drop height was changed from 122 cm 4 feet to 200 cm 6 6 feet dropping onto 3 cm 0 1 feet thick plyboard This drop test was passed Disregarding appearance change such as loss of pai...

Page 13: ...th a wet hand Also do not insert wet card or battery into the camera Do not leave the camera for a long period of time in cold places where the temperature reaches s10 oC 14 oF or lower ski resorts pl...

Page 14: ...al on the side door The integrity of the rubber seals may decrease after about 1 year with use and age To avoid permanently damaging the camera the seals should be replaced once each year Please conta...

Page 15: ...o not open or close the side door underwater Do not apply shock to the camera underwater Waterproof performance may not be maintained and there is a chance of water leak Do not dive into the water hol...

Page 16: ...parts of the camera are moving smoothly Bubbles may come out of the drainage hole when you immerse the camera in water but this is not a malfunction Caring of the camera after using it underwater Do...

Page 17: ...y the camera with hot air from dryer or similar Waterproof performance will deteriorate due to deformation 4 Confirm that there are no water droplets open the side door and wipe off any water droplets...

Page 18: ...fficult to record 6 Self timer indicator P91 AF Assist Lamp P130 LED light P135 7 Lens surface 8 Speaker P194 9 Side door P14 20 10 USB CHARGE socket P173 175 11 Card slot P20 12 HDMI socket P171 13 B...

Page 19: ...mation 25 Cursor buttons P36 3 Exposure Compensation P70 1 Flash Mode P102 2 Macro Mode P69 4 Drive Mode P86 26 MENU SET button P36 39 27 Charging lamp P23 Wi Fi connection lamp P149 28 Delete button...

Page 20: ...ot guarantee the quality of this product 2 Battery Being careful about the battery orientation insert all the way until you hear a locking sound and then check that it is locked by lever C Pull the le...

Page 21: ...the side door and replacing the card When this unit is turned on after opening the side door and replacing the battery Remove the battery after use The battery will be exhausted if left for a long per...

Page 22: ...s been found that counterfeit battery packs which look very similar to the genuine product are made available for purchase in some markets Some of these battery packs are not adequately protected with...

Page 23: ...ook computer battery to drain faster Do not leave the camera connected for extended periods of time Be sure to always connect the camera to a computer USB terminal Do not connect the camera to a monit...

Page 24: ...en the battery has been discharged completely The charging time may vary depending on how the battery has been used The charging time for the battery in hot cold environments or a battery that has not...

Page 25: ...d and USB connection cable supplied are for this camera only Do not use them with other devices The battery becomes warm after using it and during and after charging The camera also becomes warm durin...

Page 26: ...0 pictures Recording time Approx 150 min Number of recordable pictures Approx 250 pictures Recording time Approx 125 min Recordable time Approx 80 min Actual recordable time Approx 60 min Recordable t...

Page 27: ...displays red when pictures are being recorded on the card During access image writing reading and deleting formatting etc do not turn this unit off or remove the battery card Furthermore do not subje...

Page 28: ...rmat the data or display it by recording date The data on the card may be damaged or lost due to electromagnetic waves static electricity or breakdown of the camera or the card We recommend storing im...

Page 29: ...nute and s for second The recordable time is the total time of all the motion pictures which have been recorded Approximate number of recordable pictures and available recording time Picture Size Card...

Page 30: ...terval for dividing files 4K 29 minutes and 59 seconds When an SDHC card is used Files exceeding 4 GB in size will be divided into smaller files for recording and playback When an SDXC card is used Fi...

Page 31: ...4 to select the language and press MENU SET 4 Press MENU SET 5 Press 2 1 to select the items year month day hour minute and press 3 4 to set A Time at the home area B Time at the travel destination T...

Page 32: ...as shown in steps 5 and 6 on P31 The clock setting is maintained for about 7 days using the built in clock battery even without the battery Leave the charged battery in the unit for 2 hours to charge...

Page 33: ...Lamp LED light E Speaker Detects orientation of camera Direction Detection Function This function detects the vertical orientation when you record with the camera vertically orientated Images can be...

Page 34: ...e the dioptre adjustment dial Adjust until you can see the characters displayed in the viewfinder clearly Press LVF to switch between the Monitor and Viewfinder Press LVF Using the Viewfinder Dioptre...

Page 35: ...may be displayed and noise caused by a slow shutter speed may be automatically removed for picture taking About focus range The focus range is displayed when operating the zoom The focus range may cha...

Page 36: ...ons express the up down left and right of the cursor button as 3 4 2 1 Pressing MENU SET Confirmation of setting contents etc is performed MODE button Selecting a Recording Mode Intelligent Auto Mode...

Page 37: ...u to ON environment information measured by the compass and altimeter is displayed DISP button Switching the displayed information In Recording Mode With information Environment information Without in...

Page 38: ...nformation Detailed information display Histogram display Environment information Without information 60 F3 3 0 AWB AWB 1 98 98 1 98 80 L 4 3 100 0001 F3 3 60 s RGB 80 0 WB WB ISO ISO AWB STD STD STD...

Page 39: ...ording Motion Picture P129 This menu lets you set the Rec Quality and other aspects for motion picture recording Custom P130 Operation of the unit such as displaying of the screen and button operation...

Page 40: ...u Press or press the shutter button halfway There are functions that cannot be set or used depending on the modes or menu settings being used on the camera The description of each menu or setting item...

Page 41: ...he Quick Menu 2 Press 2 1 to select a menu item and press 4 or 3 3 Press 2 1 to select a setting 4 Press Q MENU to exit the menu once the setting is complete The same operation can be performed by pre...

Page 42: ...details on the functions that can be assigned in Setting in REC mode refer to P43 For details on the functions that can be assigned in Setting in PLAY mode refer to P43 To restore the default functio...

Page 43: ...t the time of purchase No function is assigned to Fn2 at the time of purchase Using the function buttons during recording 4K Photo Mode P76 Fn1 Post Focus P83 Fn2 Wi Fi P149 Photo Style P122 Aspect Ra...

Page 44: ...sor to the item and pressing MENU SET Switch text between A upper case characters a lower case characters 1 numbers and special characters Enter a blank Delete Delete a character Move the entry positi...

Page 45: ...subject and scene so we recommend it when you wish to leave the settings to the camera and record without thinking about them 1 Press MODE 2 Press 3 4 2 1 to select and then press MENU SET 3 Hold the...

Page 46: ...racking with AF Mode in the Rec menu Aim the AF tracking frame over the subject and press the shutter button halfway to operate the AF tracking function P65 Flash When is selected or is set depending...

Page 47: ...FF The angle of view will be slightly narrower Do not move the camera during the continuous shooting after pressing the shutter button Flash is fixed to forced flash off Not available in these cases i...

Page 48: ...c iHDR ON OFF The angle of view will be slightly narrower Do not move the camera during the continuous shooting after pressing the shutter button You cannot take the next picture until the combination...

Page 49: ...pictures with greater freedom by changing various settings in the Rec menu 1 Press MODE 2 Press 3 4 2 1 to select and then press MENU SET 3 Press the shutter button halfway and display the aperture v...

Page 50: ...3 switches the operation between setting the aperture value and shutter speed 4 Press 2 1 to adjust A Exposure meter B Aperture value C Shutter speed D Manual Exposure Assistance The available apertu...

Page 51: ...ure Assistance The Manual Exposure Assistance is an approximation We recommend checking the pictures on the playback screen The exposure is adequate Set to faster shutter speed or larger aperture valu...

Page 52: ...een 1 Press MODE 2 Press 3 4 2 1 to select and then press MENU SET 3 Press 3 4 to select the image effects filters A Preview display 4 Press MENU SET Displaying the description of each image effect Pr...

Page 53: ...tivity will be fixed to AUTO Depending on the image effect the recording screen may seem as if frames are missed Not available in these cases In the following case Simultaneous Record w o Filter does...

Page 54: ...ts Expressive Retro Old Days High Key Low Key Sepia Monochrome Dynamic Monochrome Rough Monochrome Silky Monochrome Impressive Art High Dynamic Cross Process Toy Effect Toy Pop Bleach Bypass Miniature...

Page 55: ...again Frame orientation Button operation Description of operation 3 4 Moves the frame up and down 2 1 Changes the frame orientation to vertical 3 4 Changes the frame orientation to horizontal 2 1 Move...

Page 56: ...ess 3 4 2 1 to move the centre position of the light source Pressing DISP will return the light source setting back to the default setting 3 Press MENU SET to set To change the setting press MODE and...

Page 57: ...n press MENU SET 3 Press 2 1 to select the scene 4 Press MENU SET To change the Scene Guide Mode select the tab on the menu screen select Scene Switch and then press MENU SET You can return to step 3...

Page 58: ...display Guide display List display Clear Portrait Silky Skin The smoothing effect is applied to the part that has a similar tone to the complexion of a subject as well This mode may not be effective...

Page 59: ...sing a tripod and the self timer When Clear Night Portrait is selected keep the subject still for about 1 second after taking the picture Soft Image of a Flower We recommend setting the flash to when...

Page 60: ...es The following cannot be set as the camera adjusts automatically Photo Style Sensitivity Metering Mode HDR Although White Balance is fixed to AWB you can use White Balance in the Rec menu to fine ad...

Page 61: ...or recording images underwater at a depth exceeding 3 m 9 8 feet This camera has a waterproof dustproof function equivalent to IP68 In addition it can take pictures at a depth of up to 31 m 102 feet f...

Page 62: ...n halfway to focus 4 Press the shutter button fully and move the camera in a small circle in the direction of the arrow on the screen 5 Press the shutter button once again to end the picture recording...

Page 63: ...details on the respective effects During panorama picture recording the following image effects of the Creative Control Mode are not visible on the screen Rough Monochrome Silky Monochrome Soft Focus...

Page 64: ...ture may not be recorded at the suitable focus or brightness When multiple pictures are combined to create a single panorama picture the subject may appear distorted or the connection points may be no...

Page 65: ...ought into focus This type of AF area is displayed when more than one person is detected The focus and exposure can then be adjusted to fit that face no matter what portion of the picture it is in The...

Page 66: ...areas can be focused This is effective when a subject is not in the centre of the screen 1 Area The camera focuses on the subject in the AF area on the screen Spot The camera focuses on a limited nar...

Page 67: ...is small or the location is dark cannot be used with Time Lapse Shot In the following cases operates as Sepia Monochrome Dynamic Monochrome Rough Monochrome Silky Monochrome Soft Focus Star Filter Sun...

Page 68: ...en using 1 Select the menu 2 Select or and press 4 3 Adjust the AF area position 4 Press MENU SET to set To cancel the AF area setting when or has been selected press MENU SET Setting up position of t...

Page 69: ...nge Off j Keep the following points in mind when taking close up pictures If the distance between the camera and the subject is beyond the focus range of the camera the picture may not be properly foc...

Page 70: ...rds positive Compensate the exposure towards negative You can set the exposure compensation value in the range between j5 EV and i5 EV Settings can be made within a range of j3 EV to i3 EV while recor...

Page 71: ...ity is automatically adjusted according to the brightness Maximum ISO1600 1 Intelligent ISO The camera detects movement of the subject and then automatically sets the optimum ISO sensitivity and shutt...

Page 72: ...ght outdoors When it is dark Shutter speed Slow Fast Noise Less Increased Jitter of the subject Increased Less For information on the focus range of flash when AUTO is set refer to P104 is not availab...

Page 73: ...c adjustment V When taking pictures outdoors under a clear sky When taking pictures outdoors under a cloudy sky When taking pictures outdoors in the shade When taking pictures under incandescent light...

Page 74: ...l work within this range 2 Blue sky 3 Cloudy sky Rain 4 Shade 5 Sunlight 6 White fluorescent light 7 Incandescent light bulb 8 Sunrise and sunset 9 Candlelight KlKelvin Colour Temperature Under fluore...

Page 75: ...he centre 3 Press MENU SET Finely adjusting the White Balance 2 A AMBER ORANGE 1 B BLUE BLUISH 3 G GREEN GREENISH 4 M MAGENTA REDDISH If you finely adjust the White Balance to A amber the White Balanc...

Page 76: ...Select the recording method with 2 1 and then press MENU SET You can also set the recording method in 4K PHOTO in the Rec menu Audio is not played back when you perform playback with the camera 4K Bur...

Page 77: ...the button fully slightly in advance Recording starts approximately 0 5 seconds after it has been pressed fully If you remove your finger from the shutter button immediately after the start of record...

Page 78: ...ghting the colour tone or brightness of the image may change or horizontal stripes may appear on the screen Lowering the shutter speed may reduce the effect of the horizontal stripes Subjects that are...

Page 79: ...1 1 2880k2880 Quality A Shutter Type Fixed to the electronic shutter Rec Quality 4K 100M 30p Continuous AF ON Rec Picture Size Quality iHandheld Night Shot iHDR HDR Panorama Settings Shutter Type Exte...

Page 80: ...ou can press 2 1 to skip to the next marker position 4K Burst S S only You can also select scenes on the 4K burst playback screen by pressing Fn2 4K Burst 4K Burst S S only P82 3 Press MENU SET to sav...

Page 81: ...You can select a frame from 60 frames continuous burst time of approximately 2 seconds Select MENU SET Displays the previous or next frames 45 pictures in slide view Enlarges the display Reduces the d...

Page 82: ...y not be played back correctly During pause During continuous playback Button operation Description of operation 3 Continuous playback Pause during continuous playback 4 Continuous rewind Pause during...

Page 83: ...t ON and press MENU SET You can also set the function to ON by pressing 4 pressing 2 1 to select the Post Focus icon and then pressing MENU SET P86 3 Decide on the composition and press the shutter bu...

Page 84: ...tion on P79 In addition to the limitations of the 4K Photo function the following limitations apply to Post Focus recording Auto Focus Mode is disabled Motion pictures cannot be recorded Digital Zoom...

Page 85: ...larged display 3 Press MENU SET to save the picture The picture will be saved in JPEG format Selecting the desired focus area and saving a picture Button operation Description of operation 3 4 2 1 Sel...

Page 86: ...Single When the shutter button is pressed only one picture is recorded 2 Burst P87 Recordings are made in succession while the shutter button is pressed 3 4K PHOTO P76 When the shutter button is press...

Page 87: ...the capacity of the card becomes full Depending on recording conditions the number of burst pictures that can be taken will be reduced The Burst speed may become slower depending on the following set...

Page 88: ...en in Burst Mode on the card If you take pictures continuously while saving the maximum number of recordable pictures decreases For continuous shooting use of a high speed memory card is recommended N...

Page 89: ...t the compensation range and then press MENU SET You can also set the compensation range for Auto Bracket with Auto Bracket in the Rec menu 4 Focus on the subject and take a picture If you press and h...

Page 90: ...es taken are based on the selected Exposure Compensation value Not available in these cases Auto Bracket is disabled in the following cases Rough Monochrome Silky Monochrome Miniature Effect Soft Focu...

Page 91: ...u 4 Press the shutter button halfway to focus and then press it fully to take the picture Focus and exposure will be set when the shutter button is pressed halfway After the self timer indicator flash...

Page 92: ...Off P136 is set to ON We recommend using a tripod when recording with the self timer The flash output may vary slightly when the is selected Not available in these cases It cannot be set to in the fo...

Page 93: ...e set number of pictures depending on recording conditions 2 Press 3 4 to select Start and then press MENU SET Rec Time Lapse Shot Start Time Now Starts the recording by fully pressing the shutter but...

Page 94: ...create a motion picture To create a motion picture select Yes 4 Select the methods for creating a motion picture The recording format is set to MP4 5 Press 3 4 to select OK and then press MENU SET Mo...

Page 95: ...placing the card will be saved as a separate set of group pictures Turn off this unit when replacing the battery or the card When creating motion pictures with a Rec Quality setting of 4K recording ti...

Page 96: ...tures which involves turning the camera to track the movements of a subject which continues to move in a fixed direction OFF Stabilizer does not work Preventing jitter camera shake When the jitter ale...

Page 97: ...ore difficult to achieve in the following cases In brightly lit places such as in broad daylight on a summer s day When the shutter speed is faster than 1 100th of a second When you move the camera to...

Page 98: ...tra Optical Zoom range C Intelligent Zoom range D Digital Zoom range E Current zoom position Focal lengths the same as those of a 35 mm film camera Applicable modes Zooms in without deteriorating the...

Page 99: ...in these cases This function is not available in the following cases Toy Effect Toy Pop Creative Control Mode Handheld Night Shot Scene Guide Mode When recording 4K photos When recording with Post Foc...

Page 100: ...s limited to 2k When using the Digital Zoom we recommend using a tripod and the self timer P91 for taking pictures In the Digital Zoom range the AF area is displayed at the centre in a larger size Not...

Page 101: ...over the flash with your fingers or other objects In the following cases the flash is fixed to forced flash off When recording motion pictures When recording 4K photos When recording with Post Focus W...

Page 102: ...subject appearing red in the picture and then activated again for the actual recording Use this when you take pictures of people in low lighting conditions Forced Flash On Forced On Red Eye 2 The flas...

Page 103: ...cklight Relaxing Tone Distinct Scenery Bright Blue Sky Romantic Sunset Glow Vivid Sunset Glow Glistening Water Clear Nightscape Cool Night Sky Warm Glowing Nightscape Glittering Illuminations Handheld...

Page 104: ...nt Auto Mode shutter speed changes depending on the identified scene Wide Tele AUTO in Sensitivity 0 3 m 0 98 feet to 5 6 m 18 feet 0 3 m 0 98 feet to 3 1 m 10 feet If you bring the flash too close to...

Page 105: ...The recording state indicator red C will flash while recording motion pictures Release the motion picture button right after you press it m minute s second 2 Stop the recording by pressing the motion...

Page 106: ...If the Extra Optical Zoom are used before pressing the motion picture button those settings will be cleared so the angle of view will change dramatically Stereo effects may not be obtained underwater...

Page 107: ...econd 28 Mbps FHD 20M 30p 1920k1080 30p 30 frames second 20 Mbps FHD 20M 25p 1920k1080 25p 25 frames second 20 Mbps HD 10M 30p 1280k720 30p 30 frames second 10 Mbps HD 10M 25p 1280k720 25p 25 frames s...

Page 108: ...is readjusted if you press the shutter button halfway while recording a motion picture Depending on the recording conditions operational sound may be recorded when the Auto Focus is operated while re...

Page 109: ...le recording still pictures Recording still pictures while recording motion pictures The picture aspect ratio will be fixed to 16 9 Still pictures will be recorded at an image size of 1920k1080 Up to...

Page 110: ...ressing the motion picture button 3 Stop the recording by pressing the motion picture button again Recording slow motion pictures High Speed Video Motion Picture High Speed Video ON Audio is not recor...

Page 111: ...tivate the sensors The direction and altitude can be measured and recorded in the recorded images Display the compass and altimeter The current bearing and altitude are displayed during recording whil...

Page 112: ...e About the measured altitude and atmospheric pressure Altitude value may show errors depending on the change in atmospheric pressure compared to areas such as locations with altimeter reference signs...

Page 113: ...set The current altitude will be displayed Set a value that matches the actual altitude Altitudes outside the display range cannot be set To reset to the unadjusted altitude press DISP 3 Press MENU S...

Page 114: ...ation between magnetic north the north that the camera points to and true north the exact north on Earth The bearing measurement value may be affected in locations with weak geomagnetism It may not me...

Page 115: ...igure of 8 by rolling your wrist a few times An adjustment completed message is displayed when the adjustment is successful Adjusting the compass Setup Calibrate compass Perform the adjustment with th...

Page 116: ...t on this way the playback screen will be displayed automatically Not available in these cases This camera complies with the DCF standard Design rule for Camera File system established by JEITA Japan...

Page 117: ...yed as 8m30s Operations during Motion Picture Playback The fast forward rewind speed increases if you press 1 2 again High Speed Video images are displayed with motion picture recording time and playb...

Page 118: ...l Pictures from a Motion Picture Still pictures will be saved with Aspect Ratio set to 16 9 and Quality set to A The number of pixels will differ according to the motion picture you play back 4K 3840k...

Page 119: ...ill be displayed To return to the Calendar screen press W on the zoom button 3 Press 3 4 2 1 to select a picture and then press MENU SET Using the Playback Zoom Displaying multiple screens Multi Playb...

Page 120: ...following playback methods From the first picture Pictures are played back continuously from the first picture of the group From the current picture Pictures are played back continuously from the pict...

Page 121: ...MENU SET 3 When Delete Multi is selected Press 3 4 2 1 to select the picture and then press MENU SET to set Repeat this step appears on the selected pictures If MENU SET is pressed again the setting...

Page 122: ...namic P126 iHandheld Night Shot P47 iHDR P48 HDR P126 Time Lapse Shot P93 Panorama Settings P63 Shutter Type P127 Red Eye Removal P128 ISO Limit Set P128 Extended ISO P128 i Zoom P99 Digital Zoom P100...

Page 123: ...ly focused Noise Reduction r The noise reduction effect is enhanced Picture resolution may deteriorate slightly s The noise reduction effect is reduced You can obtain pictures with higher resolution S...

Page 124: ...m film camera 16 9 Aspect Ratio of a high definition TV etc 1 1 Square aspect ratio Picture Size Rec Picture Size When the aspect ratio is 4 3 When the aspect ratio is 16 9 Settings Image size Setting...

Page 125: ...setting is fixed to A when recording 4K photos or recording in Post Focus Metering Mode Rec Metering Mode Multiple This is the method in which the camera measures the most suitable exposure by judging...

Page 126: ...chieved depending on the recording conditions In the following case i Dynamic does not work When HDR is set to ON HDR Rec HDR Do not move the unit during the continuous shooting after pressing the shu...

Page 127: ...s it with the mechanical shutter The camera starts and ends an exposure electronically Flash Shutter speed Sec 4 to 1 1300th 1 to 1 16000th Shutter sound Mechanical shutter sound i Electronic shutter...

Page 128: ...plicable modes You can extend the numeric values that can be set for ISO sensitivity Settings ON OFF Red Eye Removal Rec Red Eye Removal is displayed on the icon when it is set to ON Under certain cir...

Page 129: ...cording sound Settings ON OFF Setting Wind Cut may alter the usual sound quality Motion Picture menu Photo Style P122 Rec Quality P107 High Speed Video P110 AF Mode P65 Continuous AF P108 Metering Mod...

Page 130: ...assist lamp is a maximum of approximately 1 5 m 4 9 feet The AF Assist Lamp is valid only for the subject in the centre of the screen The setting is fixed to OFF in the following cases Distinct Scene...

Page 131: ...s not displayed in the Panorama Shot Mode Rec Area Displays the recording area according to the angle of view for still picture recording Displays the recording area according to the angle of view for...

Page 132: ...Settings P111 Altimeter Adjust P113 Calibrate compass P115 Beep P133 Live View Mode P134 Monitor Display Viewfinder P134 Monitor Luminance P134 LED Light P135 Economy P135 TV Connection P136 Language...

Page 133: ...home area C Current time D Time difference from GMT Greenwich Mean Time This allows you to set the volume for electronic sound and the electronic shutter sound Settings Beep Volume Shutter Vol Shutter...

Page 134: ...e viewfinder is in use Some subjects may appear differently from how they actually look However this does not affect the recorded pictures Monitor Luminance AUTO The brightness is adjusted automatical...

Page 135: ...rohibited set to OFF It is fixed to OFF in the following cases Underwater Mode Panorama Shot Mode Economy Auto Power Off The camera is automatically turned off if the camera has not been used for the...

Page 136: ...ode is changed or the camera is turned off Set the self timer to cancel if the camera is turned off TV Connection NTSC Video output is set to NTSC system PAL Video output is set to PAL system This wil...

Page 137: ...rmatting the card P28 after saving the data on a PC or elsewhere To reset the folder number to 100 1 Perform Format to format the card 2 Perform No Reset to reset the file number 3 Select Yes on the f...

Page 138: ...esize Cropping The camera may not play back images recorded on other devices correctly and the functions of the camera may not be available for the images Single setting 1 Press 2 1 to select the pict...

Page 139: ...the group to play back by pressing 3 4 and then press MENU SET If you select Picture Only 4K burst files and images recorded with Post Focus will also be played back Only an in focus representative im...

Page 140: ...ay back by pressing 3 4 and then press MENU SET If you select Picture Only 4K burst files and images recorded with Post Focus will also be played back Effect This allows you to select the screen effec...

Page 141: ...press MENU SET Images with location information are indicated with To pause the recording of location information Press MENU SET while recording of the location information onto images is taking place...

Page 142: ...e saved as a groups of Burst Mode pictures in JPEG format P120 You can add text comments to pictures After text has been registered it can be stamped in prints using Text Stamp P143 1 Select the pictu...

Page 143: ...mped When you print pictures stamped with text the date will be printed over the stamped text if you specify printing of the date at the photo shop or on the printer You can set up to 100 pictures at...

Page 144: ...ess MENU SET 2 Create a motion picture by selecting the methods for creating it Refer to step 4 onwards on P94 for details Also refer to the notes on P95 for created motion pictures Video Divide Playb...

Page 145: ...2 1 to select the picture and then press MENU SET to set repeat The setting is cancelled when MENU SET is pressed again 3 Press 2 to select OK and then press MENU SET to execute You can set up to 100...

Page 146: ...picture quality of the cropped picture will deteriorate Crop one picture at a time when you want to crop the pictures in a picture group You cannot edit all pictures in a group at once When you crop...

Page 147: ...tings Press 3 4 to select Cancel and then press MENU SET Protect Playback Protect Even if you do not protect pictures on a card they cannot be deleted when the card s Write Protect switch is set to LO...

Page 148: ...d otherwise Controlling with a Smartphone Tablet P151 Recording with a smartphone P155 Playing back or saving images stored on the camera or uploading them on social media sites P156 Writing location...

Page 149: ...DISP to connect with the same settings as used previously This is a convenient and quick way to establish a connection P167 After connecting to a Wi Fi network you can perform the following operations...

Page 150: ...nding images When the battery indicator is flashing red the connection with other equipment may not start or the connection may be disrupted When sending images on a mobile network high packet communi...

Page 151: ...e to a mobile phone network such as the 3G or LTE network or to a Wi Fi router and then display Help in the Image App Some of the screens and information provided in these operating instructions may d...

Page 152: ...me connection only Connecting to a smartphone tablet Connecting without using the password On the camera Setup Wi Fi Wi Fi Function New Connection Remote Shooting View On your smartphone At the time o...

Page 153: ...o scan the QR code displayed on the screen of the camera If you press MENU SET on the camera the QR code will be enlarged 4 Install the profile If a pass code is set on the smartphone you need to ente...

Page 154: ...camera 3 Enter the password displayed on the camera into the smartphone For first time connection only 4 Start Image App 1 Press any button on the camera and press MENU SET Confirmation screen is dis...

Page 155: ...g 1 Select 2 Record an image The recorded images are saved in the camera Some functions such as 4K Photo Post Focus and 4K motion picture recording are not available Not available in these cases In th...

Page 156: ...on picture or picture playback You cannot save the following types of images When the MP4 motion picture size is set to 4K in Rec Quality 4K burst files Images recorded with Post Focus Playing back sa...

Page 157: ...he time of recording may be written Keep the following points in mind Set the camera s Home setting in World Time to your region Once you start recording location information with your smartphone do n...

Page 158: ...lect Geotagging 4 Select to start recording location information Select to stop recording the location information Cautions for Use Be sure to pay special attention to the privacy the likeness rights...

Page 159: ...ing screen To terminate the connection follow the steps below Setup Wi Fi Wi Fi Function Yes You cannot change the sending settings while sending pictures Destination JPEG MP4 1 2 4K Burst File Pictur...

Page 160: ...number of pictures that can be sent by Multi Select is limited To terminate the connection press 3 4 to select Exit and then press MENU SET Changing the settings for sending images Pressing DISP after...

Page 161: ...d in the Camera Smartphone Direct WPS Connection WPS Push Button 1 On the camera screen press 3 4 to select WPS Push Button and then press MENU SET 2 Set the smartphone to the WPS mode You can wait lo...

Page 162: ...connect to and then press MENU SET 4 Check the send setting and then press MENU SET To change the send setting press DISP P160 5 When Send Images While Recording has been selected Take pictures P159...

Page 163: ...o create a receive folder may fail if the account includes non alphanumeric characters For Windows Supported OS Windows 7 Windows 8 Windows 8 1 Windows 10 Example Windows 7 1 Select a folder you inten...

Page 164: ...Send Images Stored in the Camera PC Via Network WPS Push Button Press the WPS button on the wireless access point to set up a connection Press the wireless access point WPS button until it switches to...

Page 165: ...59 When Send Images Stored in the Camera has been selected Select the picture P160 Folders sorted by the sent date are created in the specified folder and pictures are saved in those folders If the sc...

Page 166: ...re about the WPS compatibility connecting by From List select Manual Input by pressing 3 4 then press MENU SET 2 Enter the SSID of the wireless access point you are connecting to then select Set For i...

Page 167: ...with 3 4 and then press MENU SET You can display details of the connection by pressing DISP Registering records as favourites 1 Select the menu 2 Press 3 4 to select the history record you want to re...

Page 168: ...can be saved is limited register frequently used connection settings as favourites Performing Reset Wi Fi Settings clears the history and the contents saved in Select a destination from Favorite If t...

Page 169: ...tting is WORKGROUP If you are using the PC with standard settings you do not need to change the workgroup You can change the name SSID of this unit 1 Press DISP 2 Enter the desired device name For inf...

Page 170: ...with Reset Wi Fi Settings in the Setup menu however other settings will also be reset Displays the MAC address and IP address of this unit A MAC address is a unique address that is used to identify n...

Page 171: ...ged in obliquely or in wrong direction Do not connect devices to incorrect terminals Doing so may cause malfunction 2 Turn on the TV and select the input to match the connector in use 3 Turn the camer...

Page 172: ...TV to be connected 4K burst files may not be played back correctly No image will be displayed on the monitor viewfinder of the camera In addition no audio will be output from the speaker of the camer...

Page 173: ...esult in malfunction by the deforming of the terminal if it is plugged in obliquely or in wrong direction Do not connect devices to incorrect terminals Doing so may cause malfunction Do not use any ot...

Page 174: ...ker of camera When there is a picture with file number 999 inside the folder Use a battery with sufficient battery power If the remaining battery power becomes low while the camera and the PC are comm...

Page 175: ...tings at the printer before printing the pictures 1 Connect the printer and camera with the USB connection cable supplied Check the direction of the terminals and plug in out straight holding onto the...

Page 176: ...s to be printed up to 10 pictures Paper Size Sets the paper size Page Layout Sets whether or not to add borders and how many pictures to be printed on each sheet of paper Disconnect the USB connection...

Page 177: ...display P54 Image effect filter setting P63 Card displayed only during recording P27 Elapsed recording time 1 P105 Simultaneous recording indicator P109 HDR P126 iHDR P48 Electronic shutter P127 Over...

Page 178: ...er speed P35 Exposure compensation value P70 Manual Exposure Assistance P51 ISO sensitivity P71 5 White Balance Fine Adjustment P75 V White Balance P73 98 Number of recordable pictures P29 Available r...

Page 179: ...picture from pictures recorded using Post Focus P85 Continuous group picture playback P120 Stamped with text indication P143 Elapsed playback time P117 8m30s 2 Icon indicating the presence of a marker...

Page 180: ...ntrol P126 HDR P126 iHDR P48 2 Recorded date and time World Time P133 3 Picture size Aspect Ratio P124 Recording quality P107 High Speed Video P110 A Quality P125 Colour space 4K Photo 4K burst file P...

Page 181: ...ry another card An error has occurred accessing the card Insert the card again Insert a different card Insert SD card again Write Error Please check the card It has failed to read or write data Remove...

Page 182: ...from other devices may block the connection to a wireless access point Check other devices that are connected to the wireless access point and devices that use the 2 4 GHz band Connection error Conne...

Page 183: ...continuous 4K photo recording is performed after is displayed recording may stop to protect the camera Wait until the camera cools down Picture might look whitish when lens gets dirty with fingerprin...

Page 184: ...the electronic shutter or recording motion picture or a 4K photo the subject may appear distorted on the picture This is characteristic of MOS sensors which serve as the camera s pickup sensors This...

Page 185: ...Rec Quality of a motion picture the speed class rating required for the card differs Use a card that meets the rating P27 This phenomenon occurs when the camera is trying to record with highly accurat...

Page 186: ...d Is this a folder or picture which was processed in the PC If it is it cannot be played back by this unit Has Playback Mode been set for playback Change to Normal Play P140 When Red Eye Removal or is...

Page 187: ...connect is in operating state Check the radio wave condition of the wireless access point Move this unit closer to the wireless access point Change the location and orientation of the wireless access...

Page 188: ...camera matches with time date and time zone in Windows PC or Mac computer When both settings do not match severely please match them Is the size of the image too large Reduce the image size at Size P1...

Page 189: ...off Pictures cannot be printed using a printer that does not support PictBridge Select PictBridge PTP when connecting P175 When using a printer with a Cropping or borderless printing function cancel...

Page 190: ...on will stop temporarily This is not a malfunction Press MENU SET select the Setup menu icon and then select the icon to set the desired language P136 AF Assist Lamp will turn on white in the dark pla...

Page 191: ...d side door This is not a malfunction When the camera returns to normal temperature it will function as normal When using the camera in places with large amounts of sand or dust some parts of the came...

Page 192: ...n where the ambient temperature is between 10 oC and 30 oC 50 oF and 86 oF If the camera gets very cold in cold places such as ski resorts or places at high altitude performance of the monitor may tem...

Page 193: ...ou record near radio transmitters or high voltage lines the recorded pictures and or sound may be adversely affected Always use the supplied cords and cables If you use optional accessories use the co...

Page 194: ...indow If there is water or dirt on the lens wipe it off with dry soft cloth before taking a picture If water is left in the microphone or speaker hole weak or distorted audio may be recorded and playe...

Page 195: ...laces at high altitude When you travel do not forget to bring the AC adaptor supplied and USB connection cable supplied so that you can charge the battery in the country that you are travelling in Dis...

Page 196: ...uding personal information may be altered or vanish due to erroneous operation effect of static electricity accident malfunction repair or other handlings Please note in advance that Panasonic is not...

Page 197: ...Check all the parts before taking pictures when you have not used the camera for a long period of time Recorded data may be damaged or lost if the camera breaks down due to inappropriate handling Pana...

Page 198: ...ta sent and received via radio waves may be intercepted by a third party Do not use the camera in areas with magnetic fields static electricity or interference Do not use the camera in areas with magn...

Page 199: ...ted Setup Logo is a certification mark of Wi Fi Alliance Wi Fi is a registered trademarks of Wi Fi Alliance Wi Fi Protected Setup WPA and WPA2 are trademarks of Wi Fi Alliance This product uses DynaFo...

Reviews: