30
s
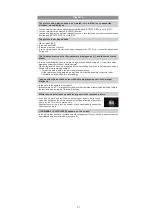
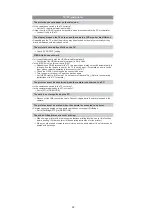
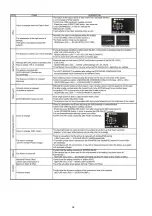
The LCD monitor turns off when [AUTO LCD OFF] is selected for the [ECONOMY] mode.
[This does not happen when using the AC adaptor.]
If the remaining battery power is low, it may take longer for the flash to be charged, and the
time during which the LCD monitor is turned off may become longer.
s
It will switch to viewfinder display if there is hand or object near the eye sensor.
Adjust the brightness of the LCD monitor/viewfinder to a proper level.
s
[POWER LCD] is activated.
s
Does the picture appear on the Viewfinder?
Press [LVF/LCD] button to switch to LCD monitor display.
s
Is the LCD monitor switched off?
Switch the display by pressing [DISPLAY].
s
Is the [EXPO. SETTINGS] set to [SWITCH BY PRESSING THE LVF/LCD BUTTON]?
s
It is only displayed on the LCD monitor when the camera is connected to a PC or printer.
s
This is not a malfunction.
These pixels do not affect the recorded pictures.
s
In dark places, noise may appear to maintain the brightness of the LCD monitor. This does not
affect the pictures you are recording.
s
The LCD monitor may flicker for a few seconds after turning the camera on indoors under
fluorescent light. This is not a malfunction.
s
This is characteristic of MOS sensors which serve as the camera’s pickup sensors.
This is not a malfunction. This does not affect the pictures you are recording.
s
This is a characteristic of the drive system of the viewfinder of this unit, and it is not a
malfunction. There will be no problem with the recorded image.
LCD monitor/Viewfinder
The LCD monitor turns off although the camera is turned on.
The LCD monitor/Viewfinder is too bright or dark.
The picture is not displayed on the LCD monitor.
LCD monitor and viewfinder does not switch when [LVF/LCD] is pressed.
Black, red, blue and green dots appear on the LCD monitor.
Noise appears on the LCD monitor.
The LCD monitor flickers indoors.
A flickering vertical line appears on the LCD monitor under fluorescent light.
You see red, green, or blue flashes when you move your eyes in the viewfinder,
or when the camera is moved rapidly.
Summary of Contents for Lumix DMC-G1KEB
Page 13: ...13 4 Specifications ...
Page 36: ...36 7 Troubleshooting Guide ...
Page 37: ...37 ...
Page 38: ...38 ...
Page 42: ...42 9 Disassembly and Assembly Instructions 9 1 Disassembly Flow Chart 9 2 PCB Location ...
Page 44: ...44 9 3 1 Removal of the Rear Case Unit Fig D1 Fig D2 ...
Page 45: ...45 9 3 2 Removal of the Top Case Unit Fig D3 9 3 3 Removal of the LVF Unit Fig D4 ...
Page 46: ...46 9 3 4 Removal of the Main P C B Fig D5 9 3 5 Removal of the Front Case Unit Fig D6 ...
Page 50: ...50 Fig D15 9 3 12 Removal of the LCD TFT Unit Fig D16 ...
Page 52: ...52 ...
Page 55: ...55 11 Maintenance ...
Page 56: ...56 ...


