background image

- 105 -

Recording

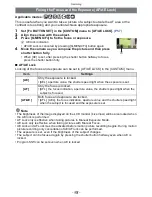
This mode makes it easy to pick out the subject on which to focus and blurs the 
background to make the subject stand out.

Setting the AF area

1

Touch the subject to move the AF area.

AF area can also be moved by pressing the cursor button.

2

Touch [SET].

Note

Quick AF is performed automatically.

Use the functions that are assigned to the cursor button, such as [WHITE BALANCE] 

(P92)

, by 

assigning them to the menu item of the Quick Menu 

(P59)

.

AF area setting screen is displayed by pressing the cursor button. Press [

] to return the 

AF area to the center of the screen.

The obtained effects will differ depending on factors such as the distance to the subject and 

background, and the type of lens used. For best results, we recommend getting as close as 

possible to the subject when taking pictures. 

(P91)

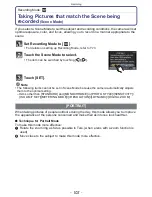
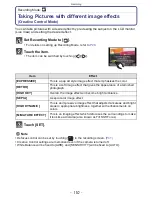
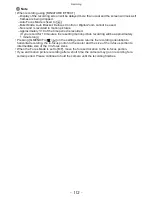
Flowers outdoors are recorded with natural colors in macro settings. The guide lines are 
displayed.

Technique for Flower Mode

We recommend using a tripod and the self-timer.

We recommend setting the flash to [

Œ

] when you take pictures at close range.

Note

The focus range is different depending on lens used. Refer to 

About the focus distance 

reference mark

 on 

P91

 for the focus range.

When a subject is close to the camera, the effective focus range is significantly narrowed. 

Therefore, if the distance between the camera and the subject is changed after focusing on the 

subject, it may become difficult to focus on it again.

Close-up regions are prioritized when taking pictures, and so time is required to focus if you 

take a picture of a distant subject.

When you take pictures at close range, the resolution of the periphery of the picture may 

decrease slightly. This is not a malfunction.

If the lens becomes dirty with fingerprints or dust, the lens may not be able to focus on the 

subject correctly.

[PERIPHERAL DEFOCUS]

[FLOWER]

Summary of Contents for Lumix DMC-GF3

Page 1: ...ra are contained in Owner s Manual for advanced features PDF format in the supplied CD ROM Install it on your PC to read it VQT3Q61 PP For USA and Puerto Rico assistance please call 1 800 211 PANA 726...

Page 2: ...adcast material for purposes other than your own private use may infringe copyright laws Even for the purpose of private use recording of certain material may be restricted Information for Your Safety...

Page 3: ...es Reorient or relocate the receiving antenna Increase the separation between the equipment and receiver Connect the equipment into an outlet on a circuit different from that to which the receiver is...

Page 4: ...yes Rinse eyes thoroughly with water and then consult a doctor CAUTION Danger of explosion if battery is incorrectly replaced Replace only with the same or equivalent type recommended by the manufactu...

Page 5: ...istorted by strong magnetic fields created by speakers or large motors Electromagnetic wave radiation generated by microprocessors may adversely affect this unit disturbing the pictures and or sound I...

Page 6: ...and record Intelligent Auto Plus Mode 28 Taking Pictures with Defocus Control Function 29 Taking Pictures with Your Favorite Settings Program AE Mode 30 Recording Motion Picture 31 Playing Back Pictu...

Page 7: ...eable lens at the time of purchase 8 Body Cap This is attached to the camera body at the time of purchase 9 Battery Pack Indicated as battery pack or battery in the text Charge the battery before use...

Page 8: ...in DMC GF3K only 3 Supplied in DMC GF3 only 4 5 6 7 DMW BLE9PP 14 VFF0831 15 VFC4710 16 VGQ0C14 K1HY08YY0020 K1HY08YY0019 2 3 H H014 VYF3371 H FS014042 VYC1009 VYF3201 VFC4315 8 VKF4385 DMC GF3C 1 DMC...

Page 9: ...utton 9 Touch panel LCD monitor 10 Playback button 11 Q MENU Fn button Delete Return button 12 MENU SET button 13 Control dial 14 Cursor buttons 3 Exposure Compensation button 1 WB White Balance 2 AF...

Page 10: ...ndicator 26 Tripod receptacle 27 Card Battery door 28 DC coupler cover When using an AC adaptor ensure that the Panasonic DC coupler DMW DCC11 optional and AC adaptor DMW AC8PP optional are used Alway...

Page 11: ...30 Lens surface 31 Focus ring 32 Contact point 33 Lens fitting mark 34 Tele 35 Wide 36 Zoom ring H H014 LUMIX G 14 mm F2 5 ASPH H FS014042 LUMIX G VARIO 14 42 mm F3 5 5 6 ASPH MEGA O I S 32 33 31 30 3...

Page 12: ...pens Do not operate with your fingernails Wipe the LCD monitor with dry soft cloth when it gets dirty with finger prints and others Do not scratch or press the LCD monitor too hard About the Stylus pe...

Page 13: ...th the Four Thirds mount specification can be used by using the mount adaptor DMW MA1 optional Leica mount specification lens When you use the M mount adaptor or R mount adaptor DMW MA2M DMW MA3R opti...

Page 14: ...he arrow until it stops and then remove Align the lens fitting marks B red marks and then rotate the lens in the direction of the arrow until it clicks Do not press the lens release button A when you...

Page 15: ...tector optional to protect the lens surface when carrying In bright sunlight or backlight the lens hood will minimize lens flare and ghosting The lens hood cuts off excess lighting and improves the pi...

Page 16: ...en pass it through the stopper Pass the end of the shoulder strap through the hole on the other side of the stopper Pull the other side of the shoulder strap and then check that it will not come out P...

Page 17: ...are dirty In this case wipe them with a dry cloth It has been found that counterfeit battery packs which look very similar to the genuine product are made available to purchase in some markets Some of...

Page 18: ...mory Card 2 GB Using the supplied battery Starting recording 30 seconds after the camera is turned on Recording once every 30 seconds with full flash every second recording Turning the camera off ever...

Page 19: ...GB Only the maximum recordable time for 2 GB is displayed on the screen Playback When the interchangeable lens H H014 is used Recordable time Approx 150 min Actual recordable time Approx 75 min When...

Page 20: ...g careful about the battery orientation insert all the way until you hear a locking sound and then check that it is locked by lever A Pull the lever A in the direction of the arrow to remove the batte...

Page 21: ...vibration impact or static electricity perform the operation again Please confirm the latest information on the following website http panasonic jp support global cs dsc This Site is English only Not...

Page 22: ...witch the settings by continuously touching 3 4 Touch CANCEL to cancel the date and time settings without setting a date and time To set the display order and the time display format Touch STYLE to di...

Page 23: ...display the screen listing the Recording Mode by touching the Recording Mode icon in Recording Mode Touch the Recording Mode to select is turned on when is touched and a description of the Recording...

Page 24: ...Mode The shutter speed is automatically determined by the aperture value you set Shutter Priority AE Mode The aperture value is automatically determined by the shutter speed you set Manual Exposure Mo...

Page 25: ...ocus A Aperture value B Shutter speed Aperture value and shutter speed are displayed It will flash in red if the correct exposure is not achieved except when set to flash When the image is correctly f...

Page 26: ...pressing the button you can switch between the Intelligent Auto or Mode of the Recording Mode and other modes When the Recording Mode is or the button lights up Light turns off during recording Set Re...

Page 27: ...ter speed will be slower than normal Take care not to move the camera while taking pictures An optimum scene for the specified subject will be chosen when set to AF tracking When FACE RECOG is set to...

Page 28: ...elligent Auto Plus Mode is identical to Intelligent Auto Mode 1 Press 3 to display the setting screen 2 Touch the slide bar to set This will adjust the brightness of the image Setting can also be perf...

Page 29: ...of the background while checking the screen Touch to display the setting screen Touch the slide bar to set Setting can also be performed by rotating the control dial Recording of pictures or motion pi...

Page 30: ...t aperture value and shutter speed without changing the exposure This is called Program Shift You can make the background more blurred by decreasing the aperture value or record a moving subject more...

Page 31: ...tes 20 seconds Screen will only display up to 13 hours 3 minutes 20 seconds However the recording may stop before that depending on the remaining battery level Motion picture recorded continuously in...

Page 32: ...image by pressing 2 1 of the cursor button Speed of picture forwarding rewinding changes depending on the playback status You can forward or rewind pictures continuously by keeping your finger on the...

Page 33: ...Playing Back Motion Pictures Press Select a picture with a Motion Picture icon and then touch to play back A Motion picture icon B The motion picture recording time After playback starts the elapsed...

Page 34: ...by frame forward while pausing Increase volume level Reduce volume level Not displayed when playing back motion pictures recorded with MINIATURE EFFECT in Creative Control Mode About fast forward rew...

Page 35: ...g Pictures Once deleted pictures cannot be recovered Press To delete a single picture Select the picture to be deleted and then touch Touch DELETE SINGLE Confirmation screen is displayed Picture is de...

Page 36: ...of settings REC This menu lets you set the aspect ratio number of pixels and other aspects of the pictures you are recording MOTION PICTURE This menu lets you set the REC MODE REC QUALITY and other a...

Page 37: ...e menu by pressing 3 4 2 1 or by rotating the control dial It can also be set by the touch operation Press MENU SET to display the menu Select the menu item by pressing 3 4 or by rotating the control...

Page 38: ...menu from REC Mode menu 1 Press 2 A Menu toggle icon 2 Press 4 or rotate the control dial to select the SETUP menu icon 3 Press 1 Select a menu item next and set it Select the settings by pressing 3...

Page 39: ...g examples Underexposed Properly exposed Overexposed Compensate the exposure towards positive Compensate the exposure towards negative Press 3 to switch to Exposure Compensation operation Rotate the c...

Page 40: ...o set the aperture value Each press of the cursor button 3 switches between Aperture Setting and Exposure Compensation When you want to take a sharp picture of a fast moving subject set with a faster...

Page 41: ...d shutter speed Each press of the cursor button 3 switches between Aperture Setting and Shutter Speed Setting A Manual Exposure Assistance Manual Exposure Assistance The Manual Exposure Assistance is...

Page 42: ...r or Adobe Reader 7 0 or later to browse or print the Owner s Manual PDF format Insert the CD ROM containing the Owner s Manual supplied click A and then follow the messages on the screen to install C...

Page 43: ...y color filter Digital Zoom Max 4k Extended Tele Conversion Except for the maximum picture size for each aspect ratio ON OFF simple enlargement compatible with lenses from other manufacturers Focus Au...

Page 44: ...rture priority AE A Shutter priority AE S Manual exposure M AUTO Exposure Compensation 1 3 EV Step j3 EV to i3 EV Metering Mode Multiple Center weighted Spot LCD monitor 3 0q TFT LCD 3 2 Approx 460 00...

Page 45: ...tio setting is 2992k2992 pixels 2112k2112 pixels 1504k1504 pixels Recording quality Motion pictures AVCHD With audio When set to FSH 1920k1080 pixels 60i recording Approx 17 Mbps When set to SH 1280k7...

Page 46: ...mm W k67 1 mm H k32 5 mm D 4 24q W k2 64q H k1 28q D excluding the projecting parts Mass weight Approx 319 g 0 70 lb with the Interchangeable lens H H014 card and battery Approx 429 g 0 95 lb with th...

Page 47: ...oups 3 aspherical lenses In focus distance 0 18 m 0 59 feet to from the focus distance reference line Maximum image magnification 0 1k 35 mm film camera equivalent 0 2k Optical Image Stabilizer None O...

Page 48: ...1 aspherical lens In focus distance 0 3 m 0 99 feet to from the focus distance reference line Maximum image magnification 0 16k 35 mm film camera equivalent 0 32k Optical Image Stabilizer Available O...

Page 49: ...MI mini Cable RP CDHM15 RP CDHM30 Interchangeable Lens H VS014140 H FS014042 H FS014045 H FS045200 H F007014 H ES045 H H020 H F008 H H014 H FS100300 H FT012 Mount Adaptor DMW MA1 DMW MA2M DMW MA3R Cla...

Page 50: ...H H014 H FS014042 please use the optional accessories compatible with that lens 6 Use if the attached lens is in contact with the tripod pedestal Read P13 for information about other lenses that can b...

Page 51: ...Y ORDER OFFICE 20421 84th Avenue South Kent WA 98032 Ship To Mr Mrs Ms First Last Street Address City State Zip Phone Day Night 4 Shipping information UPS delivery requires complete street address Ple...

Page 52: ...oduct with new or refurbished parts b replace it with a new or a refurbished equivalent value product or c refund your purchase price The decision to repair replace or refund will be made by the warra...

Page 53: ...tion set up adjustments misadjustment of consumer controls improper maintenance power line surge lightning damage modification introduction of sand humidity or liquids commercial use such as hotel off...

Page 54: ...9pm Saturday Sunday 10am 7pm EST For hearing or speech impaired TTY users TTY 1 877 833 8855 Accessory Purchases United States and Puerto Rico Purchase Parts Accessories and Instruction Books online f...

Page 55: ...a Chile Venezuela Uruguay Peru Argentina 800 PANA Sil0 7262 01 800G 94PANA 01 IIOOG 947262 1110G PANASONIC 181l0 726276 800 PANA737 800 7262737 800 PANA Sil0 7262 HIOHI11 PANA 1 801 1111 7262 800 391...

Page 56: ...arks or registered trademarks of Apple Inc used under license therefrom Adobe is a trademark or registered trademark of Adobe Systems Incorporated in the United States and or other countries Mac and M...

Page 57: ...VQT3Q95 Owner s Manual for advanced features Digital Camera Model No DMC GF3 Before connecting operating or adjusting this product please read the instructions completely...

Page 58: ...Auto Plus Mode 39 Taking Pictures with Defocus Control Function 41 Taking Pictures with Your Favorite Settings Program AE Mode 42 Recording Motion Picture 44 How to set focus when recording a motion p...

Page 59: ...TIO 123 PICTURE SIZE 124 QUALITY 125 SENSITIVITY 126 ISO LIMIT SET 127 ISO INCREMENTS 127 FACE RECOG 127 FOCUS MODE 127 QUICK AF 128 METERING MODE 128 FLASH 129 RED EYE REMOVAL 129 I RESOLUTION 129 I...

Page 60: ...es and Motion Pictures 168 Copy by inserting the SD card into the recorder 168 Copy the playback image using an AV cable 169 Copying to a PC using PHOTOfunSTUDIO 170 Connecting to a PC 171 Printing th...

Page 61: ...malfunctions but it may become unrepairable Places with a lot of sand or dust Places where water can come into contact with this unit such as when using it on a rainy day or on a beach Do not place yo...

Page 62: ...SD Memory Card SDHC Memory Card and SDXC Memory Card are indicated as card in the text The card is optional Description in this owner s manual is based on the interchangeable lens H H014 About unavail...

Page 63: ...monitor P10 10 Playback button P47 51 11 Q MENU Fn button P59 97 Delete Return button 12 MENU SET button P11 57 13 Control dial P11 14 Cursor buttons P11 3 Exposure Compensation button P39 76 100 101...

Page 64: ...tton P33 20 Motion picture button P45 21 Speaker P64 Do not cover the speaker with your fingers 22 Focus distance reference mark P91 23 Intelligent Auto button P35 24 Camera ON OFF switch P26 25 Statu...

Page 65: ...s surface 31 Focus ring P89 32 Contact point 33 Lens fitting mark P14 34 Tele 35 Wide 36 Zoom ring P71 H H014 LUMIX G 14 mm F2 5 ASPH H FS014042 LUMIX G VARIO 14 42 mm F3 5 5 6 ASPH MEGA O I S 32 33 3...

Page 66: ...LCD monitor with dry soft cloth when it gets dirty with finger prints and others Do not scratch or press the LCD monitor too hard For information about the icons displayed on the touch panel refer to...

Page 67: ...r button as follows or as 3 4 2 1 Even when the camera is operated using the touch panel it is possible to operate with the cursor button and MENU SET button if a guide like the one shown on the right...

Page 68: ...ture setting the Direction Detection Function P30 DEFOCUS CTRL P41 STABILIZER P69 QUICK AF P128 SHADING COMP P131 Interchangeable lenses H H014 H FS014042 are compatible with the Auto Focus and automa...

Page 69: ...a Change the lens using the following procedure Check that the camera is turned off Change lenses where there is not a lot of dirt or dust Refer to P183 P184 when dirt or dust gets on the lens While p...

Page 70: ...the mount when the lens and body cap are removed from the camera body To prevent dust or debris from adhering to internal parts of the camera body fit the body cap or a lens to the mount on the camera...

Page 71: ...pe that came with the interchangeable lens H FS014042 The interchangeable lens H H014 does not have a lens hood Insert the lens hood into the lens with the short sides at the top and bottom and turn i...

Page 72: ...en pass it through the stopper Pass the end of the shoulder strap through the hole on the other side of the stopper Pull the other side of the shoulder strap and then check that it will not come out P...

Page 73: ...cloth It has been found that counterfeit battery packs which look very similar to the genuine product are made available to purchase in some markets Some of these battery packs are not adequately prot...

Page 74: ...a long time may be longer than normal Note Do not leave any metal items such as clips near the contact areas of the power plug Otherwise a fire and or electric shocks may be caused by short circuitin...

Page 75: ...h full flash every second recording Turning the camera off every 10 recordings and leaving it until the temperature of the battery decreases The number of recordable pictures varies depending on the r...

Page 76: ...ing recording etc Motion picture recorded continuously in MOTION JPEG is up to 2 GB Only the maximum recordable time for 2 GB is displayed on the screen When the interchangeable lens H H014 is used Re...

Page 77: ...s reduced In low temperature environments such as on ski slopes Using the AUTO of LCD MODE or MODE1 of LCD MODE When flash is used repeatedly When the operating time of the camera becomes extremely sh...

Page 78: ...a click while being careful about the direction in which you insert it To remove the card push the card until it clicks then pull the card out upright B Do not touch the connection terminals of the ca...

Page 79: ...rmally If operation fails due to vibration impact or static electricity perform the operation again Please confirm the latest information on the following website http panasonic jp support global cs d...

Page 80: ...en the switch is returned to its original position The data on the card may be damaged or lost due to electromagnetic waves static electricity or breakdown of the camera or the card We recommend stori...

Page 81: ...recordable pictures and the available recording time varies depending on the subjects Maximum time to record motion pictures continuously with AVCHD is 13 hours 3 minutes 20 seconds Screen will only...

Page 82: ...tems you wish to set Year Month Day Hours Minutes and set using 3 4 You can continue to switch the settings by continuously touching 3 4 Touch CANCEL to cancel the date and time settings without setti...

Page 83: ...battery Leave the charged battery in the unit for 24 hours to charge the built in battery If the clock is not set the correct date cannot be printed when you stamp the date on the pictures with TEXT...

Page 84: ...display the screen listing the Recording Mode by touching the Recording Mode icon in Recording Mode Touch the Recording Mode to select is turned on when is touched and a description of the Recording...

Page 85: ...he shutter speed is automatically determined by the aperture value you set Shutter Priority AE Mode P100 The aperture value is automatically determined by the shutter speed you set Manual Exposure Mod...

Page 86: ...ayed back vertically rotated Only when ROTATE DISP P154 is set to ON The Direction Detection Function may not operate correctly if recording is performed with the camera aimed up or down You can only...

Page 87: ...to compose a picture more easily by continuously focusing on the movement of the subject while the shutter button is pressed halfway When taking pictures of a moving subject the camera predicts the m...

Page 88: ...n the interchangeable lens H FS014042 is used 0 3 m 0 99 feet to Subjects and recording conditions which are difficult to focus Fast moving subjects extremely bright subjects or subjects without contr...

Page 89: ...on halfway to focus A Aperture value B Shutter speed Aperture value and shutter speed are displayed It will flash in red if the correct exposure is not achieved except when set to flash When the image...

Page 90: ...et to AFS and the Touch Shutter fails if the AF area briefly turns red and disappears this signifies that the picture cannot be taken under the current conditions When set to AFC the picture will not...

Page 91: ...e and other modes When the Recording Mode is or the button lights up Light turns off during recording To switch between and of the Recording Modes use the Recording Mode setting method of P28 Set Reco...

Page 92: ...ted or is set depending on the type of subject and brightness When or is set Digital Red Eye Correction is enabled Shutter speed will be slower during or Menu Item REC PHOTO STYLE ASPECT RATIO PICTURE...

Page 93: ...speed will be slower than normal Take care not to move the camera while taking pictures An optimum scene for the specified subject will be chosen when set to AF tracking When FACE RECOG is set to ON...

Page 94: ...CK AF RED EYE REMOVAL I RESOLUTION I DYNAMIC LONG SHTR NR SHADING COMP FOCUS PRIORITY AF ASSIST LAMP The Backlight Compensation Backlight refers to when light comes from the back of a subject In this...

Page 95: ...etails on setting up Recording Mode refer to P28 Except for allowing setting of the brightness and color Intelligent Auto Plus Mode is identical to Intelligent Auto Mode For details on automatic funct...

Page 96: ...tting can also be performed by rotating the control dial Pressing the 1 cursor button again returns to the recording screen Note It is also possible to record a picture by touching The brightness and...

Page 97: ...s Aperture is controlled within the range of appropriate exposure during the recording of a motion picture so the aperture may not actually change even when the slide bar is moved depending on the bri...

Page 98: ...ing various settings in REC Mode menu Set Recording Mode to For details on setting up Recording Mode refer to P28 Note The shutter speed is automatically set between about 20 seconds and 1 4000th of a...

Page 99: ...ogram Shift turn the camera off or rotate the control dial until the Program Shift indication disappears Example of Program Shift When the interchangeable lens H H014 is used Note EV is an abbreviatio...

Page 100: ...sound may be recorded when the Auto Focus is operated while recording a motion picture It is recommended to record with CONTINUOUS AF in the MOTION PICTURE Mode menu set to OFF if the sound of operati...

Page 101: ...by pressing the motion picture button A Elapsed recording time B Available recording time The recording state indicator red C will flash while recording motion pictures When recording a motion pictur...

Page 102: ...rded If you record for 10 minutes the resulting motion picture recording will be approximately 1 minute long If you end motion picture recording after a short time when using MINIATURE EFFECT of the C...

Page 103: ...r finger on the left or right sides of the screen after forwarding rewinding a picture Pictures are displayed reduced in size To finish playback Press again press the motion picture button or press th...

Page 104: ...ack screen can also be switched by rotating the control dial Switch the screen by touching 3 4 if these are displayed on the slide bar Screen can be switched by dragging the slide bar up or down P10 A...

Page 105: ...1st 2011 If you take pictures after setting the travel destination in WORLD TIME the pictures are displayed by the dates at the travel destination in Calendar Playback Displaying Pictures by Recording...

Page 106: ...h of time alone will be displayed Histogram is displayed in R red G green B blue and Y luminance during the playback Using the Playback Zoom Touch the part to enlarge firmly 1k 2k 4k 8k 16k You can al...

Page 107: ...aying Back Motion Pictures Press Select a picture with a Motion Picture icon and then touch to play back A Motion picture icon B The motion picture recording time After playback starts the elapsed pla...

Page 108: ...MINIATURE EFFECT in Creative Control Mode play back at approximately 10 times speed Play Pause Stop Fast rewind Fast forward Frame by frame rewind while pausing Frame by frame forward while pausing I...

Page 109: ...l be saved with PICTURE SIZE set to S 2 M ASPECT RATIO set to W and QUALITY set to Still pictures created from a motion picture may be coarser than with normal picture quality While recording MOTION J...

Page 110: ...ictures Once deleted pictures cannot be recovered Press To delete a single picture Select the picture to be deleted and then touch Touch DELETE SINGLE Confirmation screen is displayed Picture is delet...

Page 111: ...delete multiple pictures up to 100 or all the pictures Touch Touch DELETE MULTI or DELETE ALL DELETE ALL Confirmation screen is displayed Picture is deleted by selecting YES It is possible to delete...

Page 112: ...s menu lets you set the aspect ratio number of pixels and other aspects of the pictures you are recording MOTION PICTURE P133 to 136 This menu lets you set the REC MODE REC QUALITY and other aspects f...

Page 113: ...e menu by pressing 3 4 2 1 or by rotating the control dial It can also be set by the touch operation Press MENU SET to display the menu Select the menu item by pressing 3 4 or by rotating the control...

Page 114: ...the control dial to select the SETUP menu icon 3 Press 1 Select a menu item next and set it Note There are functions that cannot be set or used depending on the modes or menu settings being used on th...

Page 115: ...t and touch the setting Touch EXIT to exit menu once the setting is completed Note When MINIATURE EFFECT in Creative Control Mode is set or when the Q MENU Fn is set to Fn touch to display the Quick M...

Page 116: ...t space will become empty Menu item or Settings can be switched by touching Items that can be set are as follows 3 Touch EXIT It will return to screen of above step 1 Touch EXIT to switch to the recor...

Page 117: ...TUP menu settings refer to P57 Refer to Setting Date Time Clock Set on P26 for other information U CLOCK SET Setting Date Time 1 Press 2 1 to select the items and press 3 4 to set A WORLD TIME setting...

Page 118: ...e area WORLD TIME Set the time in your home area and travel destination You can display the local times at the travel destinations and record them on the pictures you take After selecting DESTINATION...

Page 119: ...led when recording AVCHD motion pictures While recording motion pictures the LOCATION feature is disabled When Intelligent Auto or Mode is selected the TRAVEL DATE feature is disabled Setting of other...

Page 120: ...umber of recordable pictures decreases in AUTO and MODE1 AUTO is only available in the Recording Mode AUTO is disabled during motion picture recording When the menu screen is displayed in a dark envir...

Page 121: ...ng with Auto Bracket Will not hold If HIGHLIGHT is set to ON white saturated areas appear blinking in black and white when the Auto Review function is activated AUTO REVIEW is disabled when Burst Mode...

Page 122: ...he camera to a PC or a printer supporting PictBridge PictBridge PTP Set after or before connecting to a printer supporting PictBridge z PC Set after or before connecting to a PC TV ASPECT Set to match...

Page 123: ...his unit ON Remote control operation of the VIERA Link compatible equipment is enabled Not all operations are possible Button operation of the main unit will be limited 3D PLAYBACK Setup the output me...

Page 124: ...date return date location The WORLD TIME setting The folder number and the clock setting are not changed Use a battery with sufficient battery power or the AC adaptor optional when formatting Do not...

Page 125: ...ens you are using has an internal stabilizer Exit the menu after it is set A lens which supports the stabilizer function is required The interchangeable lens H H014 does not supports the stabilizer fu...

Page 126: ...ally set to It is recommended to disable the Optical Image Stabilizer when using a tripod is displayed on the screen at that time The stabilizer function may not be effective in the following cases Wh...

Page 127: ...en recording quality setting SH or HD is selected When FSH is selected there will be no enlarging with the Extended Tele Conversion 1k When VGA or QVGA is selected Extended Tele Conversion factor will...

Page 128: ...le modes Set the flash to match the recording Open the flash 1 Select FLASH in the REC Mode menu P57 2 Press 3 4 to select a mode and press MENU SET Exit the menu after it is set A To open the flash B...

Page 129: ...ake pictures of people in low lighting conditions Forced Flash ON Forced ON Red Eye Reduction The flash is activated every time regardless of the recording conditions Use this when your subject is bac...

Page 130: ...ecomes dark because the light of flash is blocked by the lens or it becomes out of flash range Check the distance to the subject when taking a picture Distance to the subject where the light of flash...

Page 131: ...ure while the flash icon is blinking RED indicating the flash is charging When you take a picture beyond the available flash range white balance may be set incorrectly When you use certain lenses ligh...

Page 132: ...hes between Program Shift and Exposure Compensation In Aperture Priority AE Mode each press of the cursor button 3 switches between Aperture Setting P100 and Exposure Compensation In Shutter Priority...

Page 133: ...n the aspect ratio the picture size the setting for the quality and the type of card used The Burst Mode speed may become slower depending on the following settings PICTURE SIZE P124 QUALITY P125 SENS...

Page 134: ...et to H when FOCUS MODE is AFS or MF the exposure and White Balance are fixed at the settings used for the first picture for the subsequent pictures as well Depending on the brightness of the subject...

Page 135: ...t icon etc Select and touch the step Touch SET Focus on the subject and take a picture A Auto Bracket indication If you press and hold the shutter button the number of pictures that you set is taken T...

Page 136: ...e based on the selected Exposure Compensation range The exposure may be compensated incorrectly depending on the brightness of the subject When taking pictures continuously using Auto Bracket with I R...

Page 137: ...set when the shutter button is pressed halfway If you want to press the shutter button fully to take a picture even when the subject is not focused set FOCUS PRIORITY in the CUSTOM menu to OFF P139 T...

Page 138: ...r button We recommend using a tripod when recording with the self timer Depending on the recording conditions the recording interval may become more than 2 seconds when is selected The flash output ma...

Page 139: ...and the composition Set the FOCUS MODE to AFS or AFC P31 Press 2 Touch the item AF area selection screen is displayed when 4 is pressed while or is selected For operation in the AF area selection scr...

Page 140: ...size of the AF area can be changed P87 When is selected and METERING MODE is set to multiple C the camera will adjust the exposure to suit the person s face P128 Under certain picture taking condition...

Page 141: ...anceled when MENU SET is pressed Tracking AF and Face Detection will switch every time 2 is pressed in the Intelligent Auto or Mode Note Exposure is adjusted in accordance with the locked subject when...

Page 142: ...a fix the focus and exposure by pressing the shutter button halfway move the camera to the composition you want with the shutter button pressed halfway and then take the picture Only when the FOCUS MO...

Page 143: ...AF area with the same function as is displayed in the touched position when the is selected Setting of the AF area is cleared when is touched When selecting The 23 AF areas can be divided into 9 area...

Page 144: ...n selecting the enlarged position using the cursor buttons and pressing MENU SET 2 Drag the screen to align the subject on the cross point of the crosshair in the center of the screen It is also possi...

Page 145: ...in REC Mode menu to MF P57 Rotate the focus ring on the lens to focus on the subject When MF ASSIST in the CUSTOM menu is set to ON turning the focus ring switches to the assist screen and enlarges t...

Page 146: ...e control dial Moving the enlarged area The enlarged area can be moved by dragging the screen P10 or pressing the cursor button The following will return the MF assistance to the original position Whe...

Page 147: ...efore if the distance between the camera and the subject is changed after focusing on the subject it may become difficult to focus on it again The resolution of the periphery of the picture may decrea...

Page 148: ...1 Touch the White Balance to select The item can be switched by touching Touch SET It will operate as AWB during motion picture recording Item Recording conditions AWB Automatic adjustment V When tak...

Page 149: ...scent light 7 Incandescent light bulb 8 Sunrise and sunset 9 Candlelight KlKelvin Color Temperature Note Under fluorescent lighting LED lighting fixture etc the appropriate White Balance will vary dep...

Page 150: ...r adjusting to appropriate brightness Setting the color temperature You can set the color temperature manually for taking natural pictures in different lighting conditions The color of light is measur...

Page 151: ...hange to blue If you finely adjust the White Balance to G_ green or M magenta _ green or magenta appears beside the White Balance icon on the screen Select the center point if you are not finely adjus...

Page 152: ...y adjusting the White Balance procedure and touch to set the bracket Horizontal A to B Vertical Gi to Mj Bracket settings can also be made by rotating the control dial 2 Touch SET Note is displayed in...

Page 153: ...menu Select the function you want to assign and press MENU SET Exit the menu after it is set Note Not available with MINIATURE EFFECT in Creative Control Mode Some functions cannot be used depending...

Page 154: ...e AE lock is performed AF Lock only is effective when taking pictures in Manual Exposure Mode AE Lock only is effective when taking pictures with Manual Focus AE Lock and AF Lock must be activated bef...

Page 155: ...water 1 Set Fn BUTTON SET in the CUSTOM menu to PREVIEW P57 2 Switch to confirmation screen by pressing Q MENU Fn Screen is switched every time Q MENU Fn is pressed Depth of field properties 1 Record...

Page 156: ...o set the aperture value Each press of the cursor button 3 switches between Aperture Setting and Exposure Compensation When you want to take a sharp picture of a fast moving subject set with a faster...

Page 157: ...dial to set the aperture and shutter speed Each press of the cursor button 3 switches between Aperture Setting and Shutter Speed Setting A Manual Exposure Assistance Manual Exposure Assistance The Man...

Page 158: ...d using a tripod when the shutter speed is slow When the flash is activated the fastest shutter speed that can be selected is 1 160th of a second P75 The SENSITIVITY is automatically set to AUTO when...

Page 159: ...he following items cannot be set in Scene Mode because the camera automatically adjusts them to the optimal setting Items other than STANDARD and MONOCHROME in PHOTO STYLE SENSITIVITY ISO LIMIT SET ME...

Page 160: ...Tele when a lens with a zoom function is used 2 Move close to the subject to make this mode more effective Note If a part of the background etc is a color close to skin color this part is also smoothe...

Page 161: ...outdoors are recorded with natural colors in macro settings The guide lines are displayed Technique for Flower Mode We recommend using a tripod and the self timer We recommend setting the flash to whe...

Page 162: ...self timer We recommend setting the flash to when you take pictures at close range Note Refer to FLOWER for other information about this mode This allows you to take pictures of a person and the backg...

Page 163: ...e to signal processing and is not a malfunction Noise may become visible when you take pictures in dark places Illuminations are photographed beautifully Technique for ILLUMINATIONS Mode We recommend...

Page 164: ...thday or name is set AGE or NAME is automatically set to ON If ON is selected when the birthday or name has not been registered the setting screen appears automatically 4 Press 3 4 to select EXIT and...

Page 165: ...o take pictures at a wedding reception an indoor party etc This allows you to take pictures of people and the background with near real life brightness Technique for Party Mode Open the flash You can...

Page 166: ...orized even if the camera is turned off White Balance will be fixed to AWB and SENSITIVITY will be fixed to AUTO Item Effect EXPRESSIVE This is a pop art style image effect that emphasises the color R...

Page 167: ...isplay the setting screen by pressing Q MENU Fn Adjust the MINIATURE EFFECT settings as desired 4 Touch to set the recording orientation defocus orientation A Setting screen when recording with horizo...

Page 168: ...ou record for 10 minutes the resulting motion picture recording will be approximately 1 minute long Pressing Q MENU Fn on the setting screen returns the recording orientation to horizontal recording t...

Page 169: ...ng Mode refer to P28 Select and touch the custom settings Settings for the selected custom set are displayed Only some of the menu items are displayed Refer to the following for the menu items that ar...

Page 170: ...elected Exit the menu after it is executed When changing the menu settings Registered contents will not change when the menu setting is changed temporarily with one of the custom settings selected To...

Page 171: ...E RECOG only works when the AF Mode is set to During the Burst Mode FACE RECOG picture information can be attached to only the first picture You cannot use FACE RECOG in the following cases PERIPHERAL...

Page 172: ...en registering Make sure there is no extreme shading on the face when registering Flash will not flash during registration Good example for registering When face is not recognized during recording Reg...

Page 173: ...NU SET Press 3 4 2 1 to select the face recognition frame that is not registered and then press MENU SET Take the picture adjusting the face with the guide The faces of subjects other than people pets...

Page 174: ...possible to register the birthday 1 Press 4 to select SET and then press MENU SET 2 Press 2 1 to select the items Year Month Day and then press 3 4 to set and then press MENU SET ADD IMAGES To add add...

Page 175: ...ress MENU SET Exit the menu after it is set Item Description of settings INFO EDIT Changing the information of an already registered person Perform step 5 in Registering face image of new person PRIOR...

Page 176: ...nging a face image the screen returns automatically to the recording screen 3 Perform the operation in Step 5 and following in Registering face image of new person Note If the registration screen will...

Page 177: ...item and pressing MENU SET _ Enter a blank Text between A capitals a small case 1 numbers and special characters DELETE Delete a character Move the entry position cursor to the left Move the entry po...

Page 178: ...led when Intelligent Auto or Mode or Scene Mode is selected 2 Color and picture quality are approximately the same as in the SCENERY and PORTRAIT in Scene Mode but it can be adjusted to desired pictur...

Page 179: ...racteristics The shutter speed may become very slow at this time This allows you to select the aspect ratio of the pictures to suit printing or the playback method Applicable modes Note The ends of th...

Page 180: ...when the picture size is set to a size other than the maximum picture size for each aspect ratio A digital picture is made of numerous dots called pixels The higher the numbers of pixels the finer th...

Page 181: ...ratory on the CD ROM supplied The following effects are not reflected in RAW images PHOTO STYLE RED EYE REMOVAL I RESOLUTION I DYNAMIC and COLOR SPACE in REC Mode menu Scene Mode Creative Control Mode...

Page 182: ...button is pressed halfway It is continuously changing to match the movement of the subject until the shutter button is pressed fully Note For the focus range of flash when AUTO is set refer to P74 The...

Page 183: ...anged for every 1 3 EV Applicable modes Note When the setting is changed from 1 3 EV to 1 EV SENSITIVITY will be set to value closest to the value set during the 1 3 EV Set value will not restore when...

Page 184: ...ged display using in AF Mode In Preview Mode In low light situations With lenses that only offer Manual Focus With some Four Third lenses that do not support contrast AF Type of optical measurement to...

Page 185: ...ve Under certain circumstances red eye cannot be corrected is displayed on the icon when it is set to ON Pictures with sharp profile and resolution can be taken by utilising the Intelligent Resolution...

Page 186: ...The camera automatically removes noise that appears when the shutter speed becomes slower to take pictures of night scenery etc so you can take beautiful pictures Applicable modes OFF ON Note If you s...

Page 187: ...in the periphery of the picture may stand out with higher ISO sensitivity Correction is not possible in the following cases When recording motion pictures Depending on the lens used SHADING COMP may n...

Page 188: ...re not very familiar with AdobeRGB The setting is fixed to sRGB when recording motion pictures OFF Note Refer to P69 for details SELF TIMER COLOR SPACE sRGB Color space is set to sRGB color space This...

Page 189: ...Applicable modes AVCHD Select this format to record HD high definition video for playback on your HDTV using an HDMI connection It can be played back as is by inserting the card into a device compati...

Page 190: ...or picture or sound quality or playback may not be possible even when played back with equipment compatible with these formats Also the recording information may not be displayed properly In this case...

Page 191: ...OFF LOW STANDARD HIGH Note Sound quality will be different than usual when WIND CUT is set Not available with MINIATURE EFFECT in Creative Control Mode Set whether or not the mic levels are displayed...

Page 192: ...CT in Creative Control Mode The shutter speed can be fixed to reduce the flicker or striping in the motion picture Applicable modes OFF 1 50 1 60 1 100 1 120 Note Shutter speed for recording a motion...

Page 193: ...screen is not correctly displayed in dark places When the exposure is not adequately adjusted The histogram is an approximation in the Recording Mode The histogram displayed in this camera does not m...

Page 194: ...layback P48 Calendar Playback P49 or Playback Zoom P50 Set to ON to display the EXPO METER when correcting exposure performing Program Shift setting aperture and setting shutter speed Unsuitable areas...

Page 195: ...PRIORITY is disabled during motion picture recording AF AE LOCK AE AF AF AE FOCUS PRIORITY It will set so no picture can be taken when it is out of focus OFF This gives priority to the best time to ta...

Page 196: ...ble lens H FS014042 is used but it does not affect the performance The AF Assist Lamp may be greatly blocked and it may become harder to focus when a lens with large diameter is used The setting for t...

Page 197: ...e by pressing for a while BUTTON Enables disables the motion picture button OFF ON REC AREA This changes the angle of view during motion picture recording and still picture recording Picture Motion pi...

Page 198: ...uch Quick Menu operation OFF ON DEFOCUS CTRL Defocus control operation OFF ON TOUCH SHUTTER Touch shutter operation OFF ON TOUCH AF Operation to focus on the touched subject OFF ON TOUCH GUIDE When pl...

Page 199: ...MW MA3R optional set it to ON MENU RESUME The last operated menu position is saved even if the camera is turned off OFF ON PIXEL REFRESH It will perform optimization of imaging device and image proces...

Page 200: ...onisation with music and you can do this in sequence while leaving a fixed interval between each of the pictures You can also put together a slide show composed of only still pictures only motion pict...

Page 201: ...ct AUTO can be used only when CATEGORY SELECTION has been selected The pictures are played back with the recommended effects in each category EFFECT is set to OFF when playing a slide show with motion...

Page 202: ...y and then press MENU SET to set If a picture is found in a category the category icon turns blue Pictures are sorted into the categories shown below Press 3 4 2 1 to select the person to play back an...

Page 203: ...led software on the CD ROM supplied You can set up to 100 pictures at one time with MULTI Title editing is disabled during the following conditions Motion pictures Pictures taken with or Pictures reco...

Page 204: ...NU SET 5 Press 3 4 to select text stamp items and then press MENU SET TEXT STAMP 3 Select the picture and then press MENU SET to set appears on screen if the picture is stamped with text MULTI setting...

Page 205: ...y be cut at printing Check before printing The TEXT STAMP feature is disabled during the following conditions Motion pictures Pictures recorded without setting the clock and title Pictures that were p...

Page 206: ...to divide motion picture near the very beginning or end of the motion picture The VIDEO DIVIDE feature only works on motion pictures recorded on this camera With MOTION JPEG motion pictures the order...

Page 207: ...es Pictures stamped with TEXT STAMP Pictures taken with or RESIZE 3 Select the picture and size SINGLE setting 1 Press 2 1 to select the picture and then press MENU SET 2 Press 2 1 to select the size...

Page 208: ...d It is executed when YES is selected Exit the menu after it is executed Note The picture quality of the cropped picture will deteriorate It may not be possible to crop pictures recorded with other eq...

Page 209: ...cture You may not be able to convert pictures taken on other equipment The ASPECT CONV feature is disabled during the following conditions Motion pictures Pictures stamped with TEXT STAMP Pictures tak...

Page 210: ...can only be used with a lens P12 compatible with the Direction Detection Function P30 When you play back pictures on a PC they cannot be displayed in the rotated direction unless the OS or software i...

Page 211: ...nd then press MENU SET Confirmation screen is displayed It is executed when YES is selected Exit the menu after it is executed In PLAYBACK MODE the CANCEL Mode is disabled Note You can set up to 999 p...

Page 212: ...PLAYBACK Mode menu P57 4 Press 3 4 to set the number of prints and then press MENU SET to set When MULTI has been selected repeat steps 3 and 4 for each picture Exit the menu after it is set Cancelin...

Page 213: ...printer The date print feature is disabled for pictures that are stamped with text Note The number of prints can be set from 0 to 999 Depending on the printer the date print settings of the printer m...

Page 214: ...ure is only designed to work with this camera Even if you protect pictures on a card they will be deleted if the card is formatted Even if you do not protect pictures on a card they cannot be deleted...

Page 215: ...4 Press 2 1 to select the person and then press MENU SET 5 When REPLACE is selected Press 3 4 2 1 to select the person to replace and then press MENU SET Confirmation screen is displayed It is execut...

Page 216: ...pictures When a distance to the subject is 0 6 m 1 97 feet to approximately 1 m 3 28 feet horizontal disparity becomes too great and you may not see the 3D effect at the edges of the image Using the 3...

Page 217: ...ode menu PICTURE SIZE 2 QUALITY 3 FOCUS MODE QUICK AF RED EYE REMOVAL I RESOLUTION I DYNAMIC SHADING COMP EX TELE CONV DIGITAL ZOOM STABILIZER 2 The setting is fixed as shown below 3 When attaching 3D...

Page 218: ...rded in 3D Select 3D in SLIDE SHOW in the PLAYBACK Mode menu P144 Switch the playback method for the still pictures recorded in 3D 1 Select the picture recorded in 3D 2 Select 2D 3D SETTINGS on the PL...

Page 219: ...a 3D picture thumbnail it may take a few seconds for playback to start After playback the thumbnail display may take a few seconds to reappear When viewing 3D pictures your eyes may become tired if y...

Page 220: ...AV cable supplied B HDMI mini cable optional C Align the marks and insert Check the TV ASPECT P66 when connecting with an AV cable Check the HDMI MODE P66 when connecting with an HDMI mini cable Check...

Page 221: ...i cable has priority when both AV cable and HDMI mini cable are connected The connection with the USB connection cable will take priority when you connect the USB connection cable simultaneously with...

Page 222: ...the operating instructions of the TV for how to set etc If you are not using VIERA Link set VIERA Link P67 to OFF Playback using VIERA Link HDMI HDAVI Control What is the VIERA Link VIERA Link is a ne...

Page 223: ...ut channel For details on how to switch input please read the operating instructions for the TV If VIERA Link does not work properly refer to page 199 Note If you are unsure whether or not the TV you...

Page 224: ...the equipment described may not be available in certain countries and regions Copy by inserting the SD card into the recorder It is possible to copy onto Blu ray disc DVD disc or hard disk by insertin...

Page 225: ...yback of this unit 3 Start the recording on the recording equipment When ending the recording copying stop the playback on this unit after stopping the recording on recording equipment Note When you p...

Page 226: ...n then be stored onto a DVD 1 Install PHOTOfunSTUDIO to the PC Read the separate instructions for the supplied software for more information about the software in the CD ROM supplied and how to instal...

Page 227: ...separate instructions for the supplied software for more information about the software in the CD ROM supplied and how to install it PC that can be used PC with Windows 98 98SE or older or Mac OS 8 x...

Page 228: ...connection cable may cause malfunction Press 3 4 to select PC and then press MENU SET If USB MODE P66 is set to PC in the SETUP menu in advance the camera will be automatically connected to the PC wi...

Page 229: ...f the icon is not displayed check that ACCESS is not displayed on the LCD monitor of the digital camera before removing the hardware Connection in the PTP Mode WindowsR XP Windows VistaR WindowsR 7 an...

Page 230: ...e camera and the printer are connected the status indicator blinks and the alarm beeps If this happens during printing stop printing at once If not printing disconnect the USB connection cable Connect...

Page 231: ...pictures and then press MENU SET When MENU SET is pressed again the setting is canceled Once the selection is completed press 2 a few times to select OK and press MENU SET SELECT ALL Prints all the st...

Page 232: ...nting the date cannot be printed on the picture Depending on the printer the date print settings of the printer may take precedence so check if this is the case When printing images with a text stamp...

Page 233: ...e indication lights orange during printing After finishing printing make sure there are no problems with the printer If the number of prints is high the pictures may be printed several times In this c...

Page 234: ...d NDu Neutral Density Do not attach multiple filters at the same time You can attach the lens cap or the lens hood when the filter is attached Accessories other than filters such as conversion lenses...

Page 235: ...ng state Flashes red Focus P32 Lights green 10 Touch Shutter P34 11 Display P34 50 12 Number of recordable pictures 2 P25 13 3 Guide 14 ISO sensitivity P126 15 Exposure compensation value P76 Brightne...

Page 236: ...passed since the departure date 5 P63 44 Intelligent Resolution P129 45 Intelligent Dynamic Range Control P130 46 Photo Style P122 1 Only available when a lens that supports the Stabilizer function is...

Page 237: ...d playback time P51 1 19 Favorites P155 Cable disconnection warning icon P174 20 Folder File number 2 P173 21 Color space 4 P132 22 Recorded date and time World Time P62 23 Histogram P50 1 h is an abb...

Page 238: ...ly affected by electromagnetic equipment and stops functioning properly turn this unit off and remove the battery or disconnect AC adaptor optional Then reinsert the battery or reconnect AC adaptor an...

Page 239: ...ternal parts of the body avoid changing the lens in a dusty environment and always fit the body cap or a lens when storing the camera Remove any dirt on the body cap before attaching it Removing dirt...

Page 240: ...acing the camera outside or near a window When there is dirt water oil and fingerprints etc on the surface of the lens the picture may be affected Lightly wipe the surface of the lens with a soft dry...

Page 241: ...bring the battery charger supplied so that you can charge the battery in the country that you are traveling in Dispose of unusable battery The battery has a limited life Do not throw the battery into...

Page 242: ...lness Please rest appropriately after stopping the viewing When viewing 3D pictures we recommend taking a break every 30 to 60 minutes Viewing for extended periods may cause eye fatigue Short sighted...

Page 243: ...f data in the memory card is the responsibility of the user If a name or birthday is set for BABY1 BABY2 Face Recognition function this personal information is kept in the camera and recorded in the i...

Page 244: ...you use a tripod make sure the tripod is stable when this unit is attached to it You may not be able to remove the card or the battery when using a tripod or unipod Make sure that the screw on the tr...

Page 245: ...the camera after saving necessary data on a PC etc P68 Data will be deleted LENS NOT FOUND OR SHOOT W O LENS IS SET TO OFF When using a Leica lens mount adaptor DMW MA2M DMW MA3R optional set SHOOT W...

Page 246: ...CHD Also use a card with SD Speed Class with Class 6 or higher when recording motion pictures in MOTION JPEG In the event that it stops even after using a Class 4 card or higher the data writing speed...

Page 247: ...s If you want to be able to take a picture when you press the shutter button fully even if the subject is not focused set FOCUS PRIORITY in the CUSTOM menu to OFF P139 Picture might look whitish when...

Page 248: ...aking pictures with a slow shutter speed Are you using a lens which supports the Stabilizer function P69 Is there any memory remaining on the card Is the ISO sensitivity high or the shutter speed slow...

Page 249: ...TOM menu Set the AF area to the distinctive color of the subject if there is a part that is different from the surrounding color P85 Striping or flicker may appear under lighting such as fluorescent l...

Page 250: ...depending on the environment of the motion picture recording Object seems to be warped slightly when the object moves across the image very fast but this is because the unit is using MOS for the image...

Page 251: ...ware of the digital camera at the following website http panasonic jp support global cs dsc download When using this lens with another make of digital cameras the Optical Image Stabilizer function wil...

Page 252: ...right lens such as the interchangeable lens H H014 is used for recording in brightly lit outdoor environments This is not a malfunction These pixels do not affect the recorded pictures In dark places...

Page 253: ...a low remaining charge Format the data to delete the pictures mentioned above P68 Other pictures will be deleted as well and it will not be possible to restore them Therefore check well before formatt...

Page 254: ...t are not compatible with AVCHD Some AVCHD compatible devices may not be able to play them correctly Is the camera connected to the TV correctly Set the TV input to external input mode Depending on th...

Page 255: ...d in the camera Check if your PC is compatible with SDXC memory cards http panasonic net avc sdcard information SDXC html A message prompting to format the card may be displayed when connecting but do...

Page 256: ...white saturated area P138 Is the HIGHLIGHT set to ON In dark places the AF Assist Lamp P140 lights red to make it easier to focus on a subject Is AF ASSIST LAMP on the CUSTOM menu set to ON P140 The A...

Page 257: ...e camera s power off the folder and file numbers for the pictures taken will not be stored in the memory When the power is then turned back on and pictures are taken they may be stored under file numb...

Page 258: ...ckTime and the QuickTime logo are trademarks or registered trademarks of Apple Inc used under license therefrom Adobe is a trademark or registered trademark of Adobe Systems Incorporated in the United...

Page 259: ...es marques d posees de Apple Inc et sont utilisees sous licence for Windows and Macintosh pour Windows et Macintosh SILKYPIX Developer Studio 3 1SE 2011 Ichikawa Soft Laboratory Co LTD All rights rese...

Page 260: ...Language options Choix de langue ENGLISH FRAN9AIS CANADA ESPANOL PORTUGU S DMC GF3 Owner s Manual Manuel d utilisation llllllllllllllllllllllllllllllllllll VFF0831...

Page 261: ...luded in the CD ROM is described If you have questions about any of the supplied software contact the appropriate support center If the computer being used does not support SDXC Memory Cards a message...

Page 262: ...ot be used on some PCs When 2 or more USB devices are connected to 1 PC or when the product is connected to the PC through a USB hub or a USB extension cable operation is not guaranteed When connected...

Page 263: ...wer the digital camera using a battery with sufficient charge left on it If the battery runs out during data transmission the data being transmitted may be damaged 4 VQC8408 Installing supplied softwa...

Page 264: ...ay back smoothly depending on the PC environment you use video to be played back or the switching effect Recommended environment for AVCHD AVCHD Lite motion picture function Intel CoreTM 2 Duo 2 16 GH...

Page 265: ...garding the PC environment is displayed while using the PHOTOfunSTUDIO check the recommended environment stated in the operation environment PHOTOfunSTUDIO is available for Windows only It cannot be u...

Page 266: ...mount of photographs and data you would like to save a considerable amount of space is necessary 1 photograph will use around 10MB Drive CD ROM drive required to install this program Other requirement...

Page 267: ...e AVCHD logo are trademarks of Panasonic Corporation and Sony Corporation Manufactured under license from Dolby Laboratories Dolby and the double D symbol are trademarks of Dolby Laboratories Quicklim...

Page 268: ...IIVJPDRTANT Respond promptly and receive an Early Bird discount on the Panasonic Customer Care Plan An extended service plan that assures continued top performance of your electronic product after th...

Page 269: ...pendence Parkway Chesapeake VA 23320 EWS01 PANASONIC CONSUMER ELECTRONICS COMPANY PO BOX 174287 DENVER CO 80217 4287 E v PostOffice will n liv r Without nrop er _ _ _ _ _ _ _ _ _ _ t i _ _ _ _ po tag...

Page 270: ...al Art events 13 0 Crafts 20 0 Casino gambling 07 D Avid book reading 14 0 Sewing Needlework Knitting Thanks for taking the time to fill out this questionnaire Your answers will be used for market res...

Page 271: ...e Operating Instructions owner s manual in the setup process 1 0 Yes 2 0 No 12 On ascale of 1 10 one being extremely dissatisfied and ten being extremely satisfied how satisfied are you with Extremely...

Page 272: ...duct is returned to that centre 6 Obtaining warranty service CD The products must be taken or sent directly to an Authorized Service Centre along with the duly issued Warranty Certificate Card and a v...

Page 273: ...4 844 3852 For customers in the Republic of Ireland TEL 01 289 8333 URL www panasonic co uk E mail customer care panasonic co uk POLAND Panasonic Marketing Europe GmbH Spolka z ograniczona odpowiedzia...

Reviews: