10
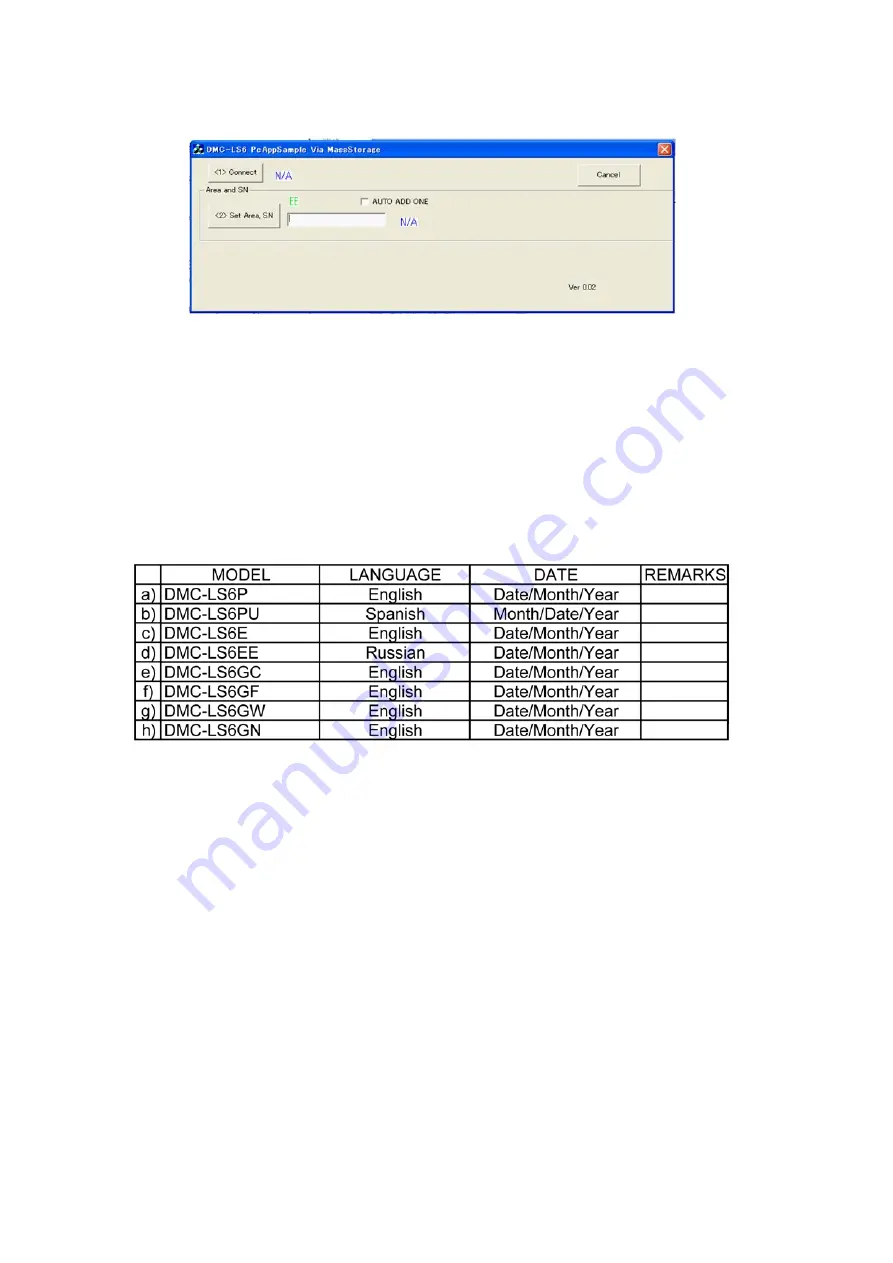
g. After about 2 seconds, the comments are changed again as follows.
<1>Connect : “Connect E:” -> “N/A”
<2>Set Area : “Success” -> “N/A”
NOTE:
If the Initial Setting is executing, the setting item of DSC returns to the state of the shipment.
-”<2>SetArea, SN” button is not use in panasonic service.
-"AUTO ADD ONE" function is not use in panasonic service.
Step 3.Confirmation :
a. Close the “PcAppSample.exe” by clicking on the “Cancel” located on the top right corner.
b. Turn off the camera switch.
c. Disconnect the USB cable.
d. Confirm that the language and Clock set request screen is displayed on the LCD monitor. Major default setting condition is as
shown in the following table.
Summary of Contents for Lumix DMC-LS6P
Page 11: ...11 4 Specifications...
Page 17: ...17 7 3 2 Removal of the Rear Case Unit Fig D3 Fig D4...
Page 18: ...18 7 3 3 Removal of the Top Case Unit Fig D5 Fig D6...
Page 19: ...19 7 3 4 Removal of the LCD Unit Fig D7 Fig D8...
Page 20: ...20 7 3 5 Removal of the Main P C B and Lens Unit W CCD Fig D9 Fig D10...
Page 31: ...Model No DMC LS6 series parts list note...
Page 32: ...Model No DMC LS6 series Frame and Casing Section...
Page 33: ...Model No DMC LS6 series Packing Parts and Accessories...


