background image

6   

VQT1Z96 (ENG)

(ENG) VQT1Z96

   7

 Before use

Before use .............................................. 7

Read first .......................................................7
To prevent damage and faults .......................7

Standard Accessories ........................... 8
Names of parts....................................... 9

Cursor button ................................................9

 Preparations

Charging battery .................................. 10
Inserting battery and card .................. 12

Picture save destination 
(cards and built-in memory) ........................13
Remaining battery and memory capacity ....13

Setting the clock .................................. 14
Using menus ........................................ 15

Menu type ...................................................16

 Basics

Basic shooting operation 

 ........ 17

Holding the camera/
Direction detection function .........................18
Mode dial .....................................................18

Basic shooting operation 

 ........ 19

Holding the camera/
Direction detection function .........................20
Mode dial .....................................................20

 Taking picture with automatic 
settings ............................................. 21

Face Detection and Face Recognition ........23
AF TRACKING ............................................23

 Taking pictures with your own 
settings ............................................. 24

Align focus for desired composition ............25

Taking pictures/
motion pictures with zoom ................. 26
Taking pictures with flash ................... 27
Taking images with self-timer ............ 28
Viewing your pictures 
(NORMAL PLAY) .................................. 29
Deleting pictures ................................. 30

To delete multiple (up to 50) or all pictures ...30

 Others

Reading the Operating Instructions
(PDF format) ......................................... 31
Specifications ...................................... 32

Contents

Before use

 Do a test shot first!

   Check first to see if you can take pictures 

and record sounds (motion pictures/
pictures with audio) successfully.

 We will not compensate for failed/

lost recording or for direct/indirect 

damage.

   Panasonic will not provide compensation 

even if damage is caused by faults with 
camera or card.

 Certain pictures cannot be played 

back

 • 


Pictures edited on a computer

 • 


Pictures taken or edited on a different 
camera

     (Pictures taken or edited on this camera 

may also not be able to be played back 
on other cameras)

 Software on the CD-ROM supplied

  The following actions are prohibited:
 • 


Making duplicates (copying) for sale or 
rent

 • 


Copying onto networks

 Avoid shocks, vibration, and pressure

 • 


Avoid exposing the camera to strong 
vibration or shock; e.g. dropping or 
hitting the camera, or sitting down with 
the camera in your pocket.

(Attach hand strap to avoid dropping 

camera. Hanging any items other than 

the supplied hand strap from the camera 

can apply pressure against it.)

 • 


Do not press the lens or the LCD monitor.

 Do not get the camera wet or insert 

foreign objects

This camera is not waterproof.

 • 


 Do not expose the camera to water, rain, or seawater.

     (If camera gets wet, wipe with a soft, 

dry cloth. Wring cloth thoroughly first if 
wet with seawater, etc.)

 • 


Avoid exposing lens and socket to dust 
or sand, and do not allow liquids to leak 
into gaps around buttons.

 Avoid condensation caused by 

sudden changes in temperature and 

humidity

 • 


When moving between places of 
different temperature or humidity, place 
camera into a plastic bag and allow to 
adjust to conditions before use.

 • 


  If the lens clouds up, switch off the 
power and leave for about two hours to 
allow camera to adjust to conditions.

 • 


  If the LCD monitor clouds up, wipe with 

a soft, dry cloth.

Read first

To prevent damage and faults

LCD monitor characteristics

Extremely high precision technology is employed to produce the LCD monitor screen. 
However there may be some dark or bright spots (red, blue or green) on the screen.  

This is not a malfunction.
The LCD monitor screen has more than 99.99% effective pixels with 
a mere 0.01% of the pixels inactive or always lit. The spots will not be 
recorded on pictures on the built-in memory or a card.

Grip area

Unit temperature

The camera may become warm during use. (Especially grip area, etc.)
This does not cause a problem with the performance or quality of the 
camera.

Summary of Contents for LUMIX DMC-TZ7

Page 1: ...plied You can learn about advanced operation methods and check the Troubleshooting Basic Operating Instructions Digital Camera Model No DMC TZ7 DMC ZS3 DMC TZ6 DMC ZS1 Before use please read these instructions completely All descriptions and logos pertaining to HDMI VIERA Link AVCHD Lite and Dolby pertain to DMC TZ7 DMC ZS3 only GC GJ SG GH ...

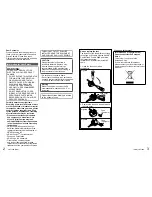
Page 2: ...emark of Panasonic Corporation SDHC Logo is a trademark Other names company names and product names printed in these instructions are trademarks or registered trademarks of the companies concerned THE SOCKET OUTLET SHALL BE INSTALLED NEAR THE EQUIPMENT AND SHALL BE EASILY ACCESSIBLE CAUTION Danger of explosion if battery is incorrectly replaced Replace only with the same or equivalent type recomme...

Page 3: ...le from electromagnetic equipment such as microwave ovens TVs video games etc If you use the camera on top of or near a TV the pictures and sound on the camera may be disrupted by electromagnetic wave radiation Do not use the camera near cell phones because doing so may result in noise adversely affecting the pictures and sound Recorded data may be damaged or pictures may be distorted by strong ma...

Page 4: ...he following actions are prohibited Making duplicates copying for sale or rent Copying onto networks Avoid shocks vibration and pressure Avoid exposing the camera to strong vibration or shock e g dropping or hitting the camera or sitting down with the camera in your pocket Attach hand strap to avoid dropping camera Hanging any items other than the supplied hand strap from the camera can apply pres...

Page 5: ...ware on your computer to use it Please dispose of all packaging appropriately Cards are optional You can record or play back pictures on the built in memory when you are not using a card P 13 Consult the dealer or your nearest servicentre if you lose the supplied accessories You can purchase the accessories separately MENU SET menu display set finish P 15 Left cursor button Self timer P 28 Down cu...

Page 6: ...eviation of Camera Imaging Products Association Temperature 23 C humidity 50 LCD monitor ON The number of recordable pictures decreases in AUTO POWER LCD POWER LCD and HIGH ANGLE mode Using Panasonic SD memory card 32 MB Using the supplied battery NORMAL PICTURE mode First picture taken 30 sec after power turned on STABILIZER AUTO 1 picture taken per 30 sec Full flash used for every other picture ...

Page 7: ...f pictures Do not turn off the power or remove the battery card or AC adaptor optional this may cause damage to or loss of data Do not subject the camera to vibrations impact or static electricity Should any of these cause camera operation to be terminated attempt to perform the operation again It is recommended that you copy important pictures to your computer as electromagnetic waves static elec...

Page 8: ...DISPLAY several times REC PLAY switch Failure to set the date and time will cause the date time to be improperly printed when printing pictures in digital photo centre or when using TEXT STAMP Year can be set between 2000 and 2099 After the time has been set the date can be printed correctly even if the date is not displayed on the camera screen To set local time at travel destination WORLD TIME T...

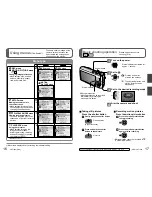
Page 9: ...e settings for using the images you have taken including protecting trimming and handy settings for printing your pictures DPOF REC PLAY switch Turn on the power Status indicator illuminated for approx 1 second Set to Pictures and motion pictures can be taken The captured pictures and motion pictures can be played back Set to the desired recording mode Aim the camera and shoot Status indicator Shu...

Page 10: ...ures cannot be displayed vertically during playback Align to correct mode The current mode will be displayed on the LCD monitor when the mode dial is turned INTELLIGENT AUTO Mode Take images with automatic settings P 21 NORMAL PICTURE Mode Take images with customized settings P 24 MY SCN MODE Taking images in frequently used scene modes SCENE MODE Take images according to scene CLIPBOARD Mode Take...

Page 11: ...ENT AUTO Mode Take pictures with automatic settings P 21 NORMAL PICTURE Mode Take pictures with customized settings P 24 MY SCENE MODE Taking pictures in frequently used scene modes SCENE MODE Take pictures according to scene MOTION PICTURE Mode Take motion pictures CLIPBOARD Mode Take pictures as memos Turn on the power Status indicator illuminated for approx 1 second Set to Set to INTELLIGENT AU...

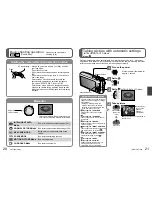
Page 12: ...1 area focusing when face cannot be recognised The following functions cannot be used HISTOGRAM EXPOSURE AUTO BRACKET MULTI ASPECT WB ADJUST DIGITAL ZOOM MIN SHTR SPEED AUDIO REC e g Face too large i PORTRAIT becomes i MACRO Face Detection and Face Recognition If the camera automatically identifies the scene and determines that people appear as subjects in the image or Face Detection is activated ...

Page 13: ...ired composition Useful when subject is not in centre of picture First adjust focus according to subject Hold down halfway AF area Subjects environments which may make focusing difficult Fast moving or extremely bright objects or objects with no colour contrast Taking pictures through glass or near objects emitting light In dark or with significant jitter When too close to object or when taking pi...

Page 14: ...zed central part of a 10 M equivalent to 10 1 million pixels area meaning that the picture can be enlarged further Display FLASH Select the desired type Displayed for approx 5 sec Can also be selected with Type operations Uses AUTO Automatically judges whether or not to flash Normal use AUTO RED EYE reduction 1 Automatically judges whether or not to flash reduce red eye Taking pictures of subjects...

Page 15: ...ss MENU SET Set to Scroll through pictures Previous Next File number Picture number Total pictures Hold down to quickly scroll forwards backwards Only file numbers change while held down picture is displayed when released Scroll speed increases the longer you press Speed may vary according to playback conditions If file number is not displayed press display button After the final picture display r...

Page 16: ... supplied You can learn about advanced operation methods and check the Troubleshooting For Windows 1 Turn the PC on and insert the CD ROM containing the Operating Instructions supplied 2 Select the desired language and then click Operating Instructions to install 3 Double click the TZ7_ZS3_TZ6_ZS1 Operating Instructions shortcut icon on the desktop When the Operating Instructions PDF format will n...

Page 17: ... AE AUTO Programme AE Exposure compensation 1 3 EV Step 2 EV to 2 EV Metering mode Multiple Centre weighted Spot LCD monitor 3 0 low temperature polycrystalline TFT LCD Approx 460 800 dots field of view ratio about 100 Flash Flash range ISO AUTO Approx 60 cm to 5 3 m Wide AUTO AUTO Red eye reduction Forced flash ON Forced flash ON Red eye reduction Slow sync Red eye reduction Forced flash OFF Micr...

Page 18: ...e compensation 1 3 EV Step 2 EV to 2 EV Metering mode Multiple Centre weighted Spot Specifications DMC TZ6 DMC ZS1 LCD monitor 2 7 amorphous silicon TFT LCD Approx 230 400 dots field of view ratio about 100 Flash Flash range ISO AUTO Approx 60 cm to 5 3 m Wide AUTO AUTO Red eye reduction Forced flash ON Forced flash ON Red eye reduction Slow sync Red eye reduction Forced flash OFF Microphone Monau...

Page 19: ...f Panasonic Corporation and Sony Corporation Manufactured under license from Dolby Laboratories Dolby and the double D symbol are trademarks of Dolby Laboratories QuickTime and the QuickTime logo are trademarks or registered trademarks of Apple Inc used under license therefrom ...

Reviews: