any electrical component or electrical enclosure, the unit
should be reassembled and checked for dielectric
breakdown or current leakage.
3.4. Motor
3.4.1. Removal
1. Remove upper body (See Upper Body - Removal).
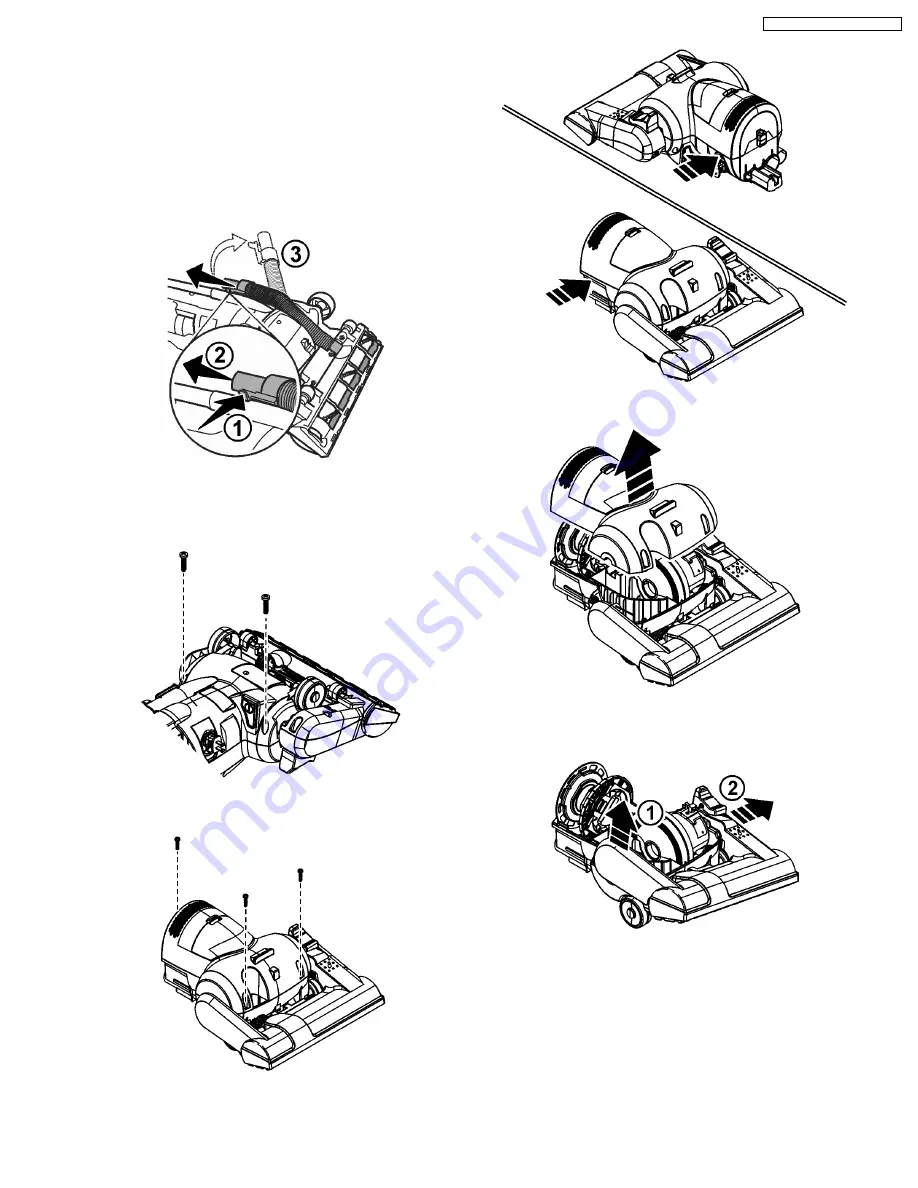
2. Remove nozzle hose from body by (1) pressing in locking
tab and (2) sliding up and out of retaining slot.
3. Remove lower plate (See Lower Plate - Removal).
4. Remove agitator (See Agitator - Removal).
5. Remove two (2) screws from rear of vacuum cleaner.
6. Remove three screws from front of vacuum cleaner.
7. Press inwards on the sides of the dust container in area
shown to release tabs on the motor cover.
8. Lift off motor cover.
9. Remove nozzle by (1) raising non-belt side and (2) sliding
nozzle off the motor shaft.
10. Lift out motor assembly, plastic holder (MC-UG323),and
noise suppressor.
11. Disconnect lead wires from motor.
12. Remove noise suppressor.
13. Remove motor support rubbers.
14. (MC-UG327-00 only) Remove two (2) screws and motor
flange. Lay aside.
15
MC-UG323-00 / MC-UG327-00 /


