18
5.4.
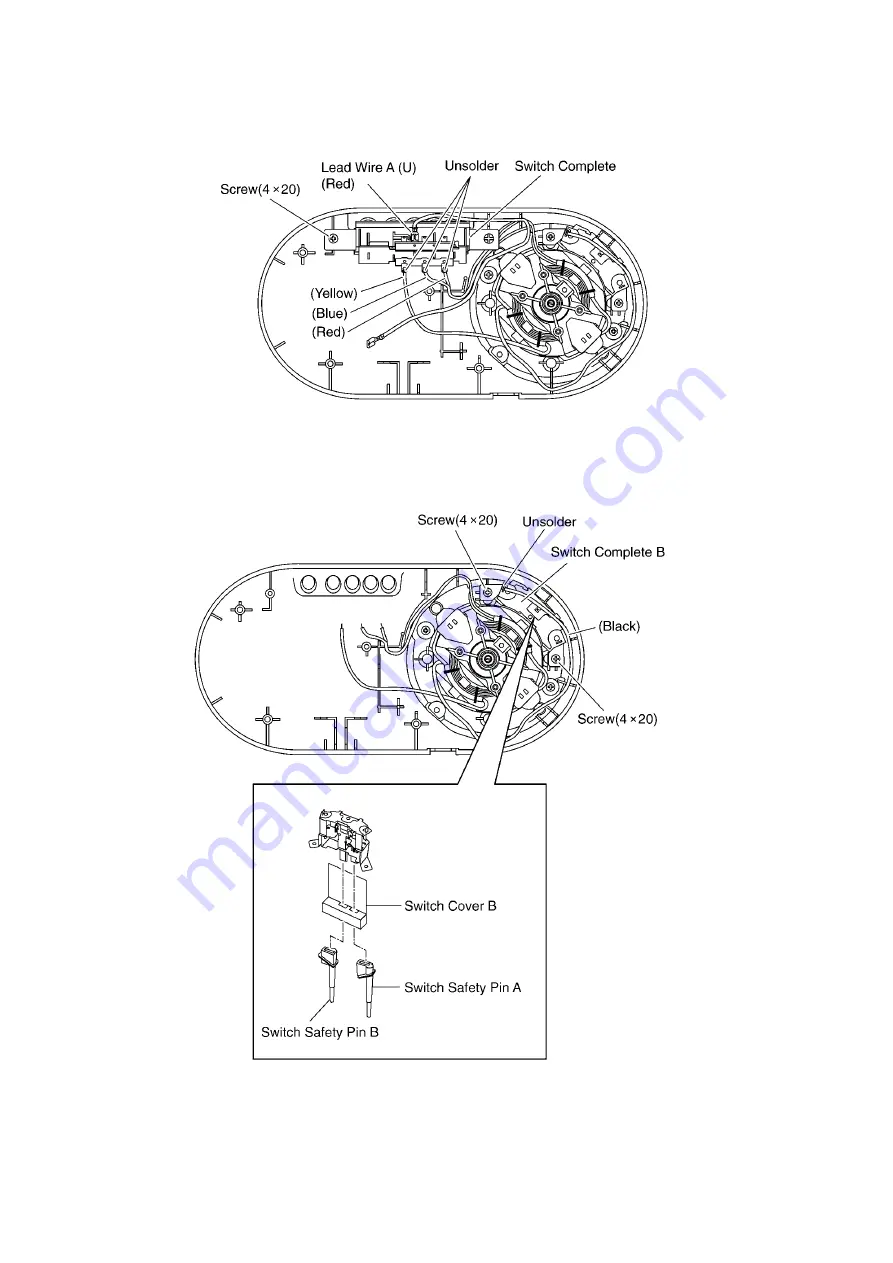
Switch Complete
1. Remove the faston terminal of Lead Wire A (U).
2. Melt the solder and detach the Lead Wire Yellow, Blue,
Red from the Motor Complete.
3. Remove the Screw (4x20), and remove the Switch Com-
plete.
5.5.
Switch Complete B
1. Melt the solder and detach the Lead Wire (Black) from the
Motor Complete.
2. Remove the Screws (4x20) and remove Switch Complete
B.
Summary of Contents for MX-AC400WUA
Page 2: ...2 1 Safety Precautions ...
Page 3: ...3 2 Specifications ...
Page 4: ...4 3 Location of Controls and Components 3 1 Parts Identification ...
Page 5: ...5 ...
Page 6: ...6 3 2 How to Use ...
Page 7: ...7 ...
Page 8: ...8 3 3 How to Assemble Disassemble ...
Page 9: ...9 3 4 Safety Lock Circuit Breaker Protection ...
Page 10: ...10 3 5 How to Use Plastic jar with Filter Unit ...
Page 11: ...11 ...
Page 12: ...12 3 6 How to Clean ...
Page 13: ...13 4 Troubleshooting Guide ...
Page 14: ...14 ...
Page 15: ...15 ...
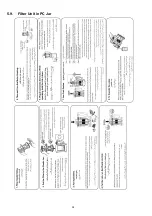
Page 24: ...24 5 9 Filter Unit in PC Jar ...
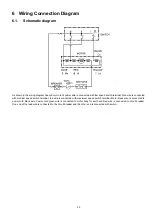
Page 26: ...26 6 2 Wiring diagram ...
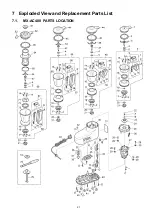
Page 27: ...27 7 Exploded View and Replacement Parts List 7 1 MX AC400 PARTS LOCATION ...


