6
4. Installation Instructions
4.1.
Moving and Installing
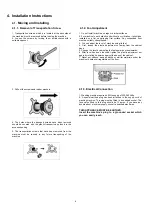
4.1.1. Removal of Transportation Screw
1. Transportation screws, which are located at the back side of
the machine, must be removed before running the machine.
2. Loosen the screws by turning them anticlockwise with a
suitable spanner.
4.1.2. Foot Adjustment
1. Do not install machine on rugs or similar surfaces.
2. For machine to work silently and without any vibration, it should be
installed on a flat, non-slippery firm surface. Any suspended floor
must be suitably strengthened.
3. You can adjust the level of machine using its feet.
4. First, loosen the plastic adjustment nut away from the cabinet
base.
5. Change the level by adjusting the feet upwards or downwards.
6. After level has been reached, tighten the plastic adjustment nut
again by rotating it upwards against the base of the cabinet.
7. Never put cartons, wooden blocks or similar materials under the
machine to balance irregularities of the floor.
3. Pull out the screws and rubber washers.
4.1.3. Electrical Connection
1. Washing machine requires a 50Hz supply of 220-240Volts.
2. A special earthed plug has been attached to the supply cord of
washing machine. This plug must be fitted to an earthed socket. The
fuse value fitted to this plug should be 13 amps. If you have any
doubts about electrical supply, consult a qualified electrician.
THIS APPLIANCE MUST BE EARTHED.
Insert the machine’s plug to a grounded socket which
you can easily reach.
4. The holes where the transport screws have been removed
should be covered with the plastic transport caps found in the
accessories bag.
5. The transportation screws that have been removed from the
machine must be re-used in any future transporting of the
machine.
Summary of Contents for NA-148VB6WDE
Page 2: ...2 ...
Page 4: ...4 2 3 Dimension in millimetres NA 148VB6 ...
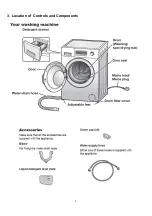
Page 5: ...5 3 Location of Controls and Components ...
Page 9: ...9 5 2 Program Details ...


