How to Operate
- 11 -
NE-1037
Heating
Open the door and place the food in the oven cavity. Close the door.
“0” must be showing in the display window.
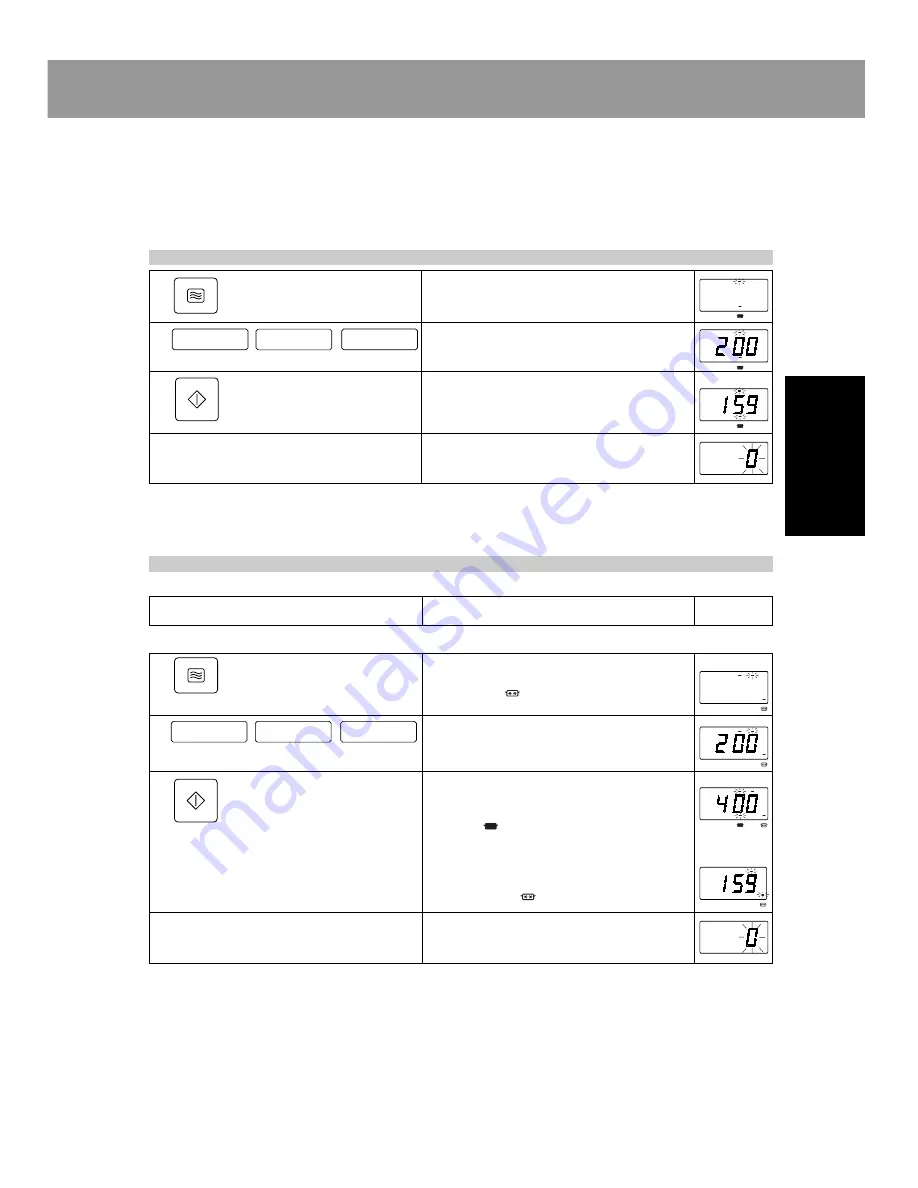
A. Manual Single Stage Heating:
This feature gives the user maximum flexibility to set the oven to desired heating time and power level.
This is ideal for menus that require various heating requirements.
Example: To heat for 2 minutes at 1000 W
1.
2
2.
3.
4. Beep tone will sound.
(See page 18)
1
1
B. Manual 2 or 3 Stages Heating:
This feature allows you to set to begin heating at one power level then shift automatically to a different
power level after the designated length of heating time.
Example: To heat for 2 minutes at 340 W for 2nd stage heating
1.
For Stage 1 cooking
For Stage 2 cooking
1.
2.
3.
4.
Beep tone will sound.
(See page 18)
•
Press the Power Level Pad once.
•
Press the Memory Pads 2, 0 and 0.
•
Press the Start Pad.
Heating will start. The time on digital
display will count down.
•
All heating will stop. When opening the
door, the display will stop blinking.
NOTE:
For 3 stages heating, select a power level again and set the cooking time.
SPECIAL NOTE: For both single and 2 or 3 stages heating
1. While heating, one touch on the Stop/Reset Pad stops the oven. You can restart by pressing the Start Pad
or a second touch on the Stop/Reset Pad will cancel the selected program.
2. One touch on the Stop/Reset Pad, before the heating cycle is started, will cancel the selected program.
•
Follow steps 1 and 2 above table.
•
Press the Power Level Pad 3 times.
Indicator will change each time the pad is
pressed. “
” is now displayed. The stage
“2” is blinking.
•
Press the Memory Pad 2, 0 and 0.
•
Press the Start Pad.
The total time for both stages will be
displayed. The stage “1” and the power
level “
” blink. The oven lamp will be
turned on. Heating will start.
•
The total time will be displayed and count down.
•
When oven shifts to the next stage, a single
beep tone will sound. The stage “2” and the
power level “
” blink.
•
All heating will stop.
When opening the door, the display will
stop blinking.
0
0
1
1
2
1
2
1
2
2
2
0
0
Summary of Contents for NE-1027
Page 9: ...8 MEMO...


