background image

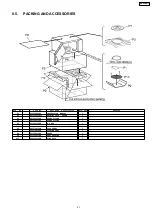
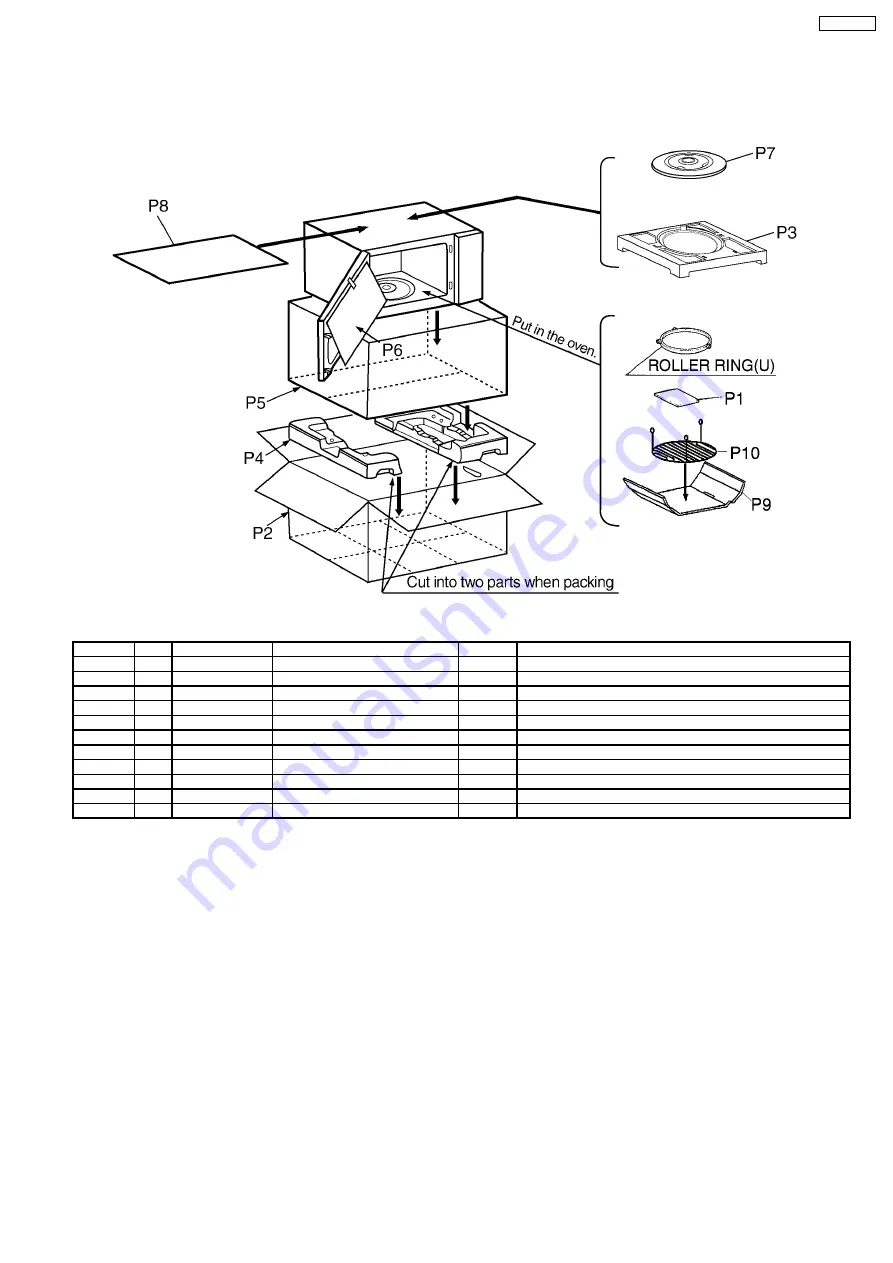
8.5. PACKING AND ACCESSORIES

Ref. No.

Part No.

Part Name & Description

Pcs/Set

Remarks

P1

F00036R60HP

INSTRUCTION MANUAL

1

P2

F01026R60HYT

PACKING CASE, PAPER

1

P3

F01048L50XP

UPPER FILLER

1

P4

F01056S10XP

LOWER FILLER

1

P5

F01068100XN

P.E BAG

1

P6

F01075G10XN

DOOR SHEET

1

P7

F06016D00XN

COOKING TRAY

1

P8

F01924T00AP

SHEET

1

P9

F01085G50XN

TRAY PACKING

1

P10

F060V5G50XN

OVEN RACK

1

21

NN-G335WF

Summary of Contents for NN-G335WF

Page 1: ... Panasonic Home Appliances Microwave Oven Shanghai Co Ltd 2008 NN G335WF TUE India Microwave Oven ORDER NO PHAMOS0812054C3 ...

Page 2: ...2 NN G335WF ...

Page 3: ...elays RY1 RY2 8 4 4 Fan motor 8 4 5 Door assembly 9 4 6 Turntable motor 9 4 7 Quartz heater 10 5 COMPONENT TEST PROCEDURE 11 5 1 Primary Secondary Latch Switch Interlocks 11 5 2 Short Switch Monitor 11 5 3 High voltage transformer 11 5 4 High voltage capacitor 11 5 5 Magnetron 12 5 6 Diode U 12 5 7 Membrane key board Membrane switch assembly 12 6 MEASUREMENTS AND ADJUSTMENTS 13 6 1 Adjustment of P...

Page 4: ...1 SCHEMATIC DIAGRAM 4 NN G335WF ...

Page 5: ...IME OF POWERSETTING POWER POWER RELAY B RY1 APPROX ON SEC OFF SEC HIGH 100 22 0 MEDIUM HIGH 70 17 5 MEDIUM 50 13 9 MEDIUM LOW 30 8 14 LOW 15 5 17 DEFROST 30 8 14 2 2 Turbo Defrost Auto Reheat Auto Cook control When those Auto Control feature is selected and the Start Pad is tapped 1 The digital programmer circuit determines the power level and cooking time to complete cooking and indicates the ope...

Page 6: ...o malfunction of the interlock monitor switch you must replace all of the components Primary latch switch Door switch Short switch 1 This is mandatory Refer to Measurements and Adjustments for these switches 2 When replacing the fuse confirm that it has the appropriate rating for these models 3 When replacing faulty switches be sure mounting tabs are not bent broken or otherwise deficient in their...

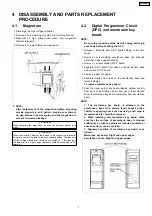
Page 7: ... Release 1 flat cable from D P C board holding on the oven cavity 2 Remove 1 screw holding escutcheon base and slide the escutcheon base upward slightly 3 Remove 1 screws holding D P C board 4 Separate D P C board from tabs on the escutcheon base and remove D P C board 5 Remove rubber connector 6 Separate display from tabs on the escutcheon base and remove display To replace membrane key board 7 P...

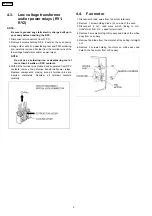
Page 8: ...ntacts 4 With all the terminal pins cleaned and separated from DPC contacts remove the defective transformer power relays Replace components making sure all terminal pins are inserted completely Resolder all terminal contacts carefully 4 4 Fan motor 1 Disconnect 2 lead wires from fan motor terminals 2 Remove 1 screw holding diode U on side of the oven 3 Disconnent 2 H V lead wires which linking to...

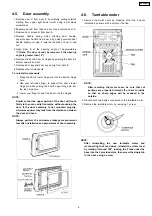
Page 9: ...ge pin into the top hinge hole 3 Lower your finger to seat the door onto the hinges NOTE Adjust so that the upper portion of the door will touch firmly to the oven cavity front plate without pushing the door If the door assembly is not mounted properly microwave power may leak from the clearance between the door and oven NOTE Always perform the microwave leakage measurement test after installation...

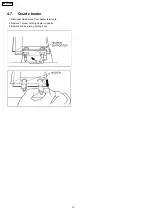
Page 10: ...4 7 Quartz heater 1 Disconnect lead wires from heater terminals 2 Remove 1 screw holding heater supports 3 Remove the heater by pulling it out 10 NN G335WF ...

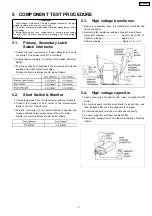
Page 11: ...from H V transformer primary terminals 2 Connect test probes of ohm meter to the disconnected leads of the H V Transformer 3 Test the continuity of short switch with door opened and closed positions using lowest scale of the ohm meter Normal continuity readings should be as follows 5 3 High voltage transformer 1 Remove connectors from the transformer terminals and check continuity 2 Normal cold re...

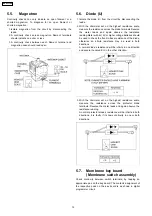
Page 12: ... 6V 9V or higher voltage batteries should be used to check the front to back resistance of the diode otherwise an infinite resistance may be read in both directions A normal diode s resistance will be infinite in one direction and several hundred KΩ in the other direction 3 With the ohmmeter set on the highest resistance scale measure the resistance across the protector diode terminals Reverse the...

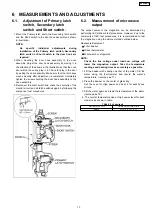
Page 13: ...tches again by following the component test procedures 6 2 Measurement of microwave output The output power of the magnetron can be determined by performing IEC standard test procedures However due to the complexity of IEC test procedures it is recommended to test the magnetron using the simple method outlined below Necessary Equipment 1 liter beaker Glass thermometer Wrist watch or stopwatch NOTE...

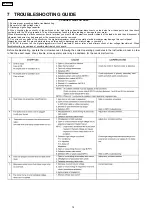
Page 14: ...herwise lead wire may be damaged or the connector cannot be removed 5 Do not touch any parts of the circuitry on the digital programmer circuit since static electric discharge may damage this control panel Always touch yourself to ground while working on this panel to discharge any static charge in your body 6 230V AC is present on the digital programmer circuit Terminals of power relay s and prim...

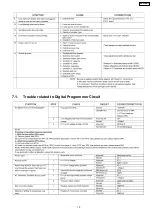
Page 15: ...7 1 Trouble related to Digital Programmer Circuit 15 NN G335WF ...

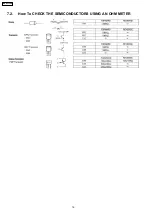
Page 16: ...7 2 How To CHECK THE SEMICONDUCTORS USING AN OHM METER 16 NN G335WF ...

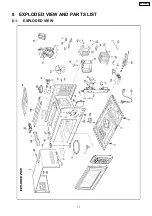
Page 17: ...8 EXPLODED VIEW AND PARTS LIST 8 1 EXPLODED VIEW 17 NN G335WF ...

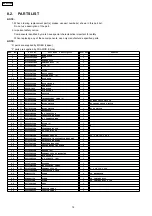
Page 18: ...25U30XN MICRO SWITCH 1 PRIMARY LATCH SWITCH 18 F61415U30XN MICRO SWITCH 1 SECONDARY LATCH SWITCH 21 F61785U30XN MICRO SWITCH 1 SHORT SWITCH 22 2M211A M1JP MAGNETRON 1 23 F60906N60XP H V CAPACITOR 1 24 F60376S10XP CAPACITOR BRACKET 1 25 F621B8H30HP H V TRANSFORMER 1 26 F605V8L50AP DIODE U 1 27 F62306S10XP FUSE 1 8A 29 F63266S30XP TURNTABLE MOTOR 1 30 F900C6R60TU AC CORD W PLUG 1 31 F61456N00AP THER...

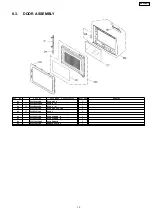
Page 19: ...D1 F30186S10XP DOOR KEY A 1 D2 F301A6S10HXP DOOR A U 1 D3 F302K6S40XP DOOR E U 1 D4 F30216S10XP DOOR KEY SPRING 1 D5 F30856S10XP DOOR C 1 D6 F31455G10XN DOOR SCREEN A 1 D7 F31466S10XP DOOR SCREEN B 1 D8 F30126S10KXP DOOR HANDLE 1 D9 F30216S10XP HANDLE SPRING 1 19 NN G335WF ...

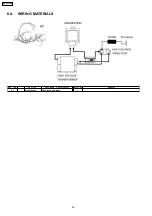
Page 20: ...8 4 WIRING MATERIALS Ref No Part No Part Name Description Pcs Set Remarks W1 F030A6R60XP LEAD WIRE HARNESS 1 20 NN G335WF ...

Page 21: ...P INSTRUCTION MANUAL 1 P2 F01026R60HYT PACKING CASE PAPER 1 P3 F01048L50XP UPPER FILLER 1 P4 F01056S10XP LOWER FILLER 1 P5 F01068100XN P E BAG 1 P6 F01075G10XN DOOR SHEET 1 P7 F06016D00XN COOKING TRAY 1 P8 F01924T00AP SHEET 1 P9 F01085G50XN TRAY PACKING 1 P10 F060V5G50XN OVEN RACK 1 21 NN G335WF ...

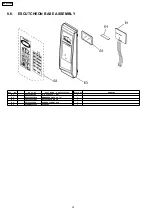
Page 22: ...Y Ref No Part No Part Name Description Pcs Set Remarks E1 F603L6R60HP D P CIRCUIT AU 1 E2 F630Y6R60HTU MEMBRANE SWITCH U 1 E3 F80346S20HXP ESCUTCHEON BASE 1 E4 F67006S20XP RUBBER CONNECTOR 1 E5 L5AAAEC00062 DISPLAY 1 22 NN G335WF ...

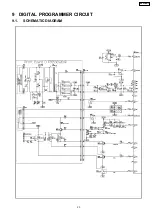
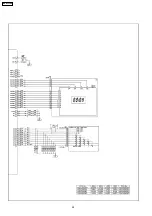
Page 23: ...9 DIGITAL PROGRAMMER CIRCUIT 9 1 SCHEMATIC DIAGRAM 23 NN G335WF ...

Page 24: ...24 NN G335WF ...

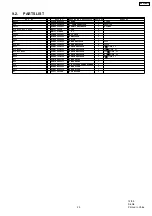
Page 25: ...36 ZENER RESISTOR 1 510V D26 D27 D4EAY102A036 ZENER RESISTOR 2 1000V R311 D0AE102JA155 CARBON RESISTOR 1 1KΩ 1 4W 5 R15 R223 D0AE103JA155 CARBON RESISTOR 2 10KΩ 1 4W 5 R12 R13 R222 D0AE104JA155 CARBON RESISTOR 3 100KΩ 1 4W 5 R210 D0AE332JA155 CARBON RESISTOR 1 3 3KΩ 1 4W 5 R225 D0AE470JA155 CARBON RESISTOR 1 47Ω 1 4W 5 RY1 K6B1AGA00140 POWER RELAY 1 RY2 K6B1AZA00011 POWER RELAY 1 T10 G4C2AAH00001 ...

Reviews: