background image

Record mode

29

VQT0N50

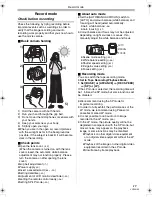
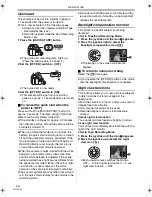
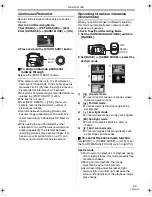
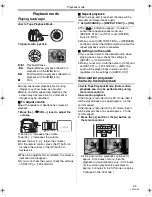
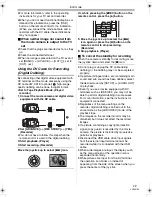
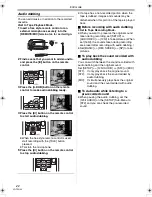
Continuous Photoshot

Records still pictures continuously at a certain 
interval.

Set to Card Recording Mode.

1

Set


[BASIC] >> [PICTURE SIZE] >> [640].

2

Set


[ADVANCE] >> [BURST MODE] >> [ON].

3

Press and hold the


[PHOTO SHOT] button.

ª

To stop continuous photoshot 
midway through

Release the [PHOTO SHOT] button.

The camera records up to 10 still pictures at 
intervals of 0.5 seconds. If the shutter speed is 
manually set to 1/25, then the still pictures can 
be recorded at intervals of 0.7 seconds.

One more still picture may be recorded after you 
release the [PHOTO SHOT] button.

The flash is not used.

If set [SELF TIMER] >> [YES], the movie 
camera records the maximum number of 
pictures recordable.

Intervals between recording pictures may 
become longer depending on the card. We 
recommend using a Panasonic SD Memory 
Card.

When using the card formatted by other 
equipment or a card that was recorded and 
erased repeatedly, the intervals between 
recording pictures may become longer. If so, 
back up your important data on a PC, and 
format your card with this movie camera.

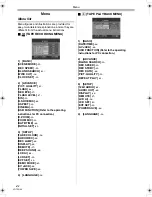
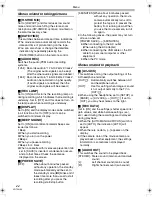
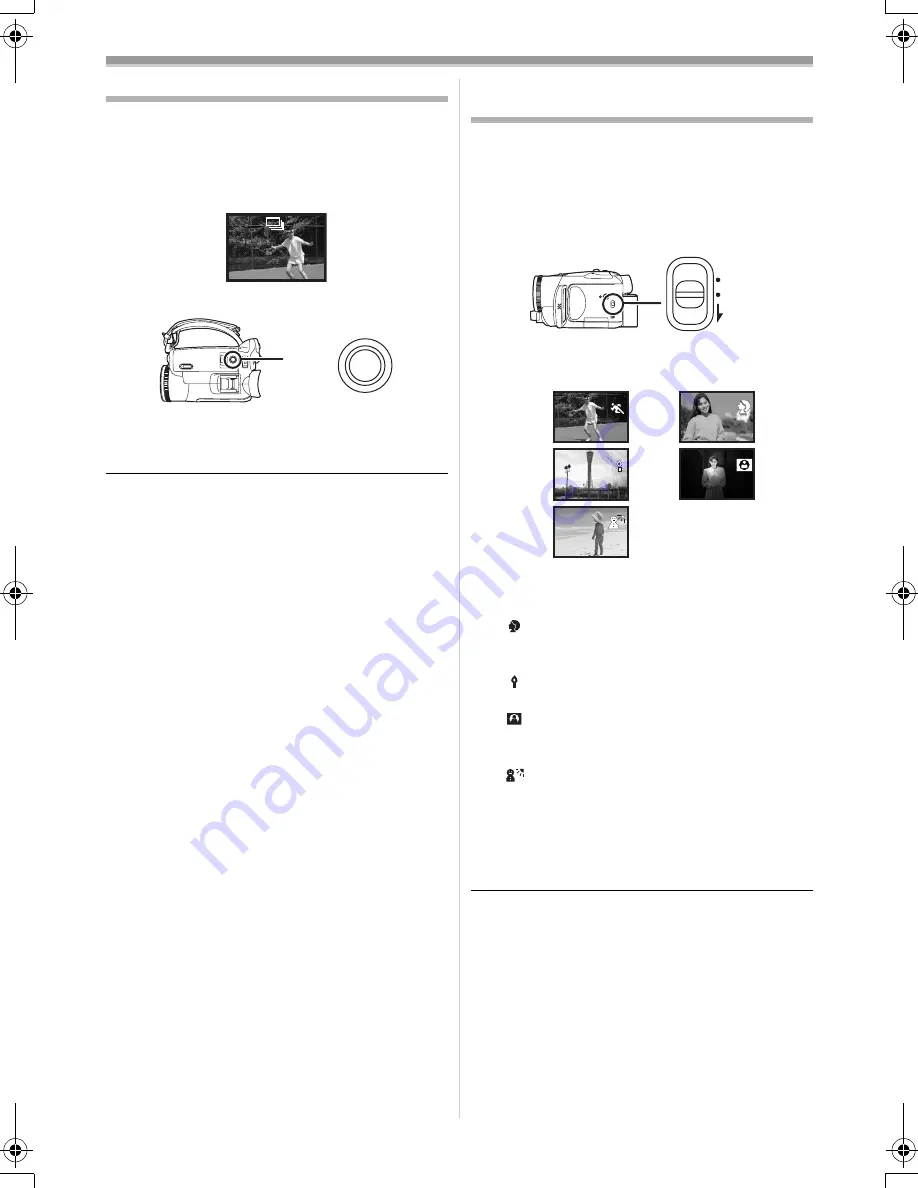
Recording in various situations 
(Scene mode)

When you record images in different situations, 
this mode automatically sets optimum shutter 
speeds and apertures.

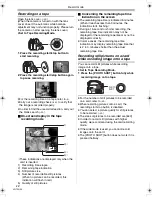
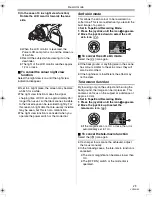
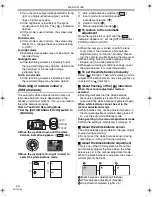
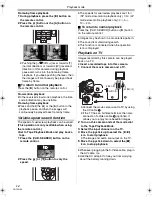
Set to Tape/Card Recording Mode.

1

Set the


[AUTO/MANUAL/FOCUS] switch to 

[MANUAL].

2

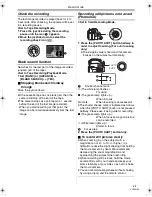
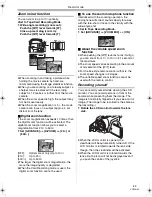
Set [BASIC] >> [SCENE MODE] >> select the 
desired mode.

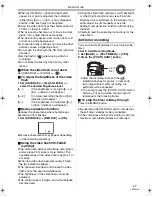
1) [

5

] Sports mode

To record sports scenes or scenes where 

there are quick motions

2) [

] Portrait mode

To make persons stand out against the 

background

3) [

] Low light mode

To record dark scenes so they are brighter

4) [

] Spotlight mode

To record subjects spotlit in a party or 

theatre

5) [

] Surf & snow mode

To record images at dazzling places such 

as ski slopes and beaches

ª

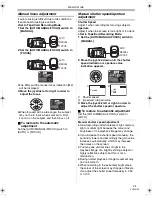
To cancel the scene mode function

Set [BASIC] >> [SCENE MODE] >> [OFF] or set 
the [AUTO/MANUAL/FOCUS] switch to [AUTO].

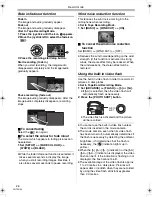
Sports mode

For slow-motion playback or playback pause 
of recorded pictures, this mode presents free 
of camera shakes.

During normal playback, the image 
movement may not look smooth.

Avoid recording under fluorescent light, 
mercury light or sodium light because the 
colour and brightness of the playback image 
may change.

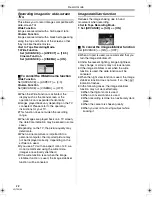
PHOTO
SHOT

AUTO

MANUAL

FOCUS

1)

3)

2)

4)

5)

GS150_GN.book  29 ページ  2005年1月6日 木曜日 午後4時50分

Summary of Contents for NV-GS150GN

Page 1: ...Operating Instructions Digital Video Camera Model No NV GS150GN Before use please read these instructions completely VQT0N50 R ...

Page 2: ...f Microsoft Corporation U S A SD Logo is a trademark Leica is a registered trademark of Leica microsystems IR GmbH and Dicomar is a registered trademark of Leica Camera AG All other company and product names in the operating instructions are trademarks or registered trademarks of their respective corporations Files recorded on SD Memory Card It may not be possible to play back the files on this Mo...

Page 3: ...e in fade out function 26 Wind noise reduction function 26 Using the built in video flash 26 Self timer recording 27 Recording images for wide screen TVs 28 Image stabilizer function 28 Continuous Photoshot 29 Recording in various situations Scene mode 29 Recording in natural colours White balance 30 Manual focus adjustment 31 Manual shutter speed aperture adjustment 31 Playback mode Playing back ...

Page 4: ...tereo microphone VW VMS2E 16 Video flash VW FLH3E 17 Tripod VW CT45E 18 DV cable VW CD1E 19 Jacket pouch VW SJ05E Some optional accessories may not be available in some countries Parts identification and handling ª Camera 1 Built in video flash 26 2 Recording lamp 44 3 Microphone built in stereo 23 26 4 Grip belt One touch free style grip belt 7 5 Lens LEICA DICOMAR 6 White balance sensor 30 Remot...

Page 5: ... ring 12 35 Cassette eject lever OPEN EJECT 10 36 Cassette cover 10 37 Zoom lever W T 23 Volume lever s VOLr 33 38 Photoshot button PHOTO SHOT 20 39 Smart accessory shoe The stereo zoom microphone VW VMH3E optional or the video DC light VW LDH3E optional should be mounted here When using an accessory for the smart accessory shoe the power is supplied from this product Due to limitations in LCD pro...

Page 6: ...re Put the strap through the fixture 1 and through the stopper 2 so it will not come off Extend part 3 by at least 2 cm Fit the other end of the belt similarly 42 Lens hood In order to remove the lens hood rotate it counterclockwise 1 In order to fit it put into slot 2 and then rotate it clockwise Fit the MC protector or the ND filter of the Filter Kit VW LF37WE optional in front of the lens hood ...

Page 7: ...e one touch free style grip belt ª To use as a hand strap If you use the grip belt as a hand strap then you can carry or handle this camera more easily 1 Open the lock cover 1 by pinching the projections 2 on both sides Press the lock button 3 to remove the grip belt When removing the grip belt tightly hold the camera with both hands After removing the grip belt restore the lock cover to the origi...

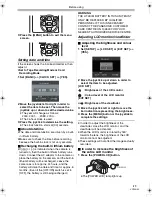
Page 8: ...rding yourself the LCD monitor and the viewfinder will be simultaneously activated Using the viewfinder ª Extending the viewfinder 1 Pull out the viewfinder and extend it by pinching the extension knob ª Adjusting the field of view 1 Adjust the focus by sliding the eyepiece corrector knob You can adjust the brightness of the viewfinder from the menu Power supply ª Charging the battery When this pr...

Page 9: ...lder and slide it until it clicks ª Removing the battery While sliding the BATT lever slide the battery or the DC input lead to remove it Hold the battery with your hand so it does not fall Charging time and recordable time The times shown in the table below show the times at a temperature of 25oC and a humidity of 60 This is just a guide If the temperature is higher or lower than the specified va...

Page 10: ...it as far as it goes When removing pull it straight out 3 Push the PUSH mark 1 in order to close the cassette holder 4 Only after the cassette holder is completely housed close the cassette cover After using make sure to rewind the cassette completely remove it and put it in a case Store the case in an upright position 55 When condensation is formed on the lens or the main unit of the movie camera...

Page 11: ... camera or the card may damage or erase the data stored on the card We recommend saving important data on a personal computer by using a USB cable PC card adaptor and USB reader writer ª Card access lamp When the camera accesses the card reading recording playback erasing etc the access lamp lights up If the following operations are performed when the access lamp is lit then the card or the record...

Page 12: ...mode Use this when you record the image on a tape Also you can simultaneously record still pictures on a card while recording images on a tape Tape playback mode Use this to play back a tape Card recording mode Use this to record still pictures on a card Picture playback mode Use this to play back the still pictures recorded on a card PC mode You can view or edit the images recorded on a card on y...

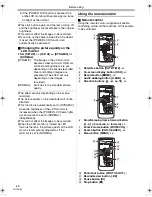
Page 13: ...OCUS switch is set to AUTO 5 Card recording mode AUTO MANUAL FOCUS switch is set to MANUAL 6 Picture playback mode 3 Tele macro 25 4 Soft skin mode 25 2 Fade 26 1 Backlight compensation 24 3 Night view 0 Lux night view 24 4 Recording check 21 4 White balance Shutter speed Iris or gain value 30 1 Select Adjust 30 2 Select Adjust 30 3 Playback pause 33 4 Stop 33 2 Rewind review playback 33 1 Fast fo...

Page 14: ... or down in order to select the sub menu 5 Move the joystick right or press it to set the selection 6 Move the joystick up or down in order to select the item to be set 7 Press the joystick to determine the setting ª To exit the menu screen Press the MENU button ª To get back to the previous screen Move the joystick left ª About the menu setting The menu screen does not appear during recording And...

Page 15: ...rive the date and time for approx 6 months Even if the OFF ON switch is set to OFF the battery is still being recharged WARNING THE LITHIUM BATTERY IN THIS UNIT MUST ONLY BE REPLACED BY QUALIFIED PERSONNEL IF THIS IS NECESSARY CONTACT THE PANASONIC CUSTOMER CARE CENTRE ON 132600 FOR YOUR NEAREST AUTHORIZED SERVICE CENTRE Adjusting LCD monitor viewfinder ª Adjusting the brightness and colour level ...

Page 16: ...p and cannot be set to NORMAL independently This will not affect the images to be recorded When the LCD monitor is rotated by 180 towards the lens the picture quality of the LCD monitor is temporarily adjusted as if the LCD AI is set to NORMAL Using the remote control ª Remote control Using the remote control supplied will enable controlling almost all the functions of this camera to be controlled...

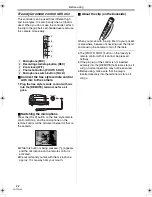
Page 17: ...usly 2 ª Concerning the button type battery When the button type battery runs down replace it with a new battery part number CR2025 The battery is normally expected to last about 1 year but it depends on operation frequency Keep the button type battery out of the reach of children If the remote control mode of the camera and that of the remote control do not match with each other REMOTE will appea...

Page 18: ...free style remote control with mic and the microphone on the remote control will be activated instead of that on the camera While this button is being pressed appears and the microphone on the remote control is activated We recommend you talk with the microphone approx 10 cm away from your mouth ª About the clip on the backside When you move with the clip fitted to your pocket or elsewhere beware ...

Page 19: ...NUAL FOCUS switch to AUTO and colour balance white balance and focusing will be adjusted automatically Auto white balance 56 Auto focusing 57 Colour balance and focus may not be adjusted depending on light sources or scenes If so manually adjust the white balance and focus Scene mode setting 29 White balance setting 30 Shutter speed setting 31 Iris gain value setting 31 Focus setting 31 ª Recordin...

Page 20: ...ning tape time is indicated in minutes When it reaches less than 3 minutes the indication starts flashing During a 15 second or shorter recording the remaining tape time indication may not be displayed or the remaining tape time may not be displayed correctly In some cases the remaining tape time indication may display remaining tape time that is 2 to 3 minutes shorter than the actual remaining ta...

Page 21: ...button halfway in order to adjust focusing For auto focusing only The iris gain value is fixed and this camera focuses on the subject automatically 1 Shutter chance mark The white lamp flashes Focusing The green lamp lights up When in focus No mark When focusing is unsuccessful The shutter chance mark is indicated as follows when the PHOTO SHOT button is not pressed halfway Please use it as a guid...

Page 22: ...size 1760 1760k1320 1280 1280k960 640 640k480 ª Select the picture quality for photoshot images 1 Set BASIC PICT QUALITY select the desired picture quality High picture quality Normal picture quality You can also change the picture quality on ADVANCE PICT QUALITY in the tape recording mode ª Recording with a shutter operation effect You can add a shutter operation simulating sound 1 Set ADVANCE SH...

Page 23: ...nction cannot be used ª To use the zoom microphone function Interlocked with the zooming operation the microphone will collect sounds clearly far away with the tele shot or those in the vicinity with the wide angle shot Set to Tape Recording Mode 1 Set ADVANCE ZOOM MIC ON ª About the variable speed zoom function When pushing the W T lever as far as it will go you can zoom from 1k to 10k in 2 1 sec...

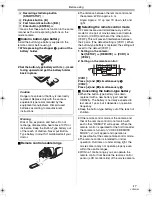
Page 24: ... different from the scene last recorded When the colour night view function is used however the white balance of the scene last recorded is retained The zoom magnification may differ from when it is in the quick start standby mode and when the recording starts Since about half the power of normal recording is used in quick start standby using quick start reduces the recordable time Backlight compe...

Page 25: ...ecorded in a softer tone This is more effective if you record the bust image of a person Set to Tape Card Recording Mode 1 Press the joystick until the icon 1 appears 2 Move the joystick down to select the soft skin icon ª To cancel the soft skin mode Select the icon again If the background or anything else in the scene has colours similar to the skin colour they will also be smoothed If the brigh...

Page 26: ...wind noise reduction function Set BASIC WIND CUT OFF Reduces the wind noise depending on the wind strength If this function is activated in strong winds the stereo effect may be reduced When the wind weakens the stereo effect will be restored Using the built in video flash Use the built in video flash in order to record still pictures in dark places Set to Tape Card Recording Mode 1 Set ADVANCE FL...

Page 27: ...ideo flash VW FLH3E optional The video flash permits still picture recording in a dark place 2 0 metres or more distant The available range of the video flash is approx 1 to 4 metres When the video flash becomes ready to flash the ß indication appears The optional video flash and the built in video flash cannot be used simultaneously The brightness of the video flash cannot be adjusted The shutter...

Page 28: ...mported into a personal computer the imported picture may not be displayed correctly depending on the software in used If you use a TV with an aspect ratio of 4 3 we do not recommend using the wide mode Images are vertically stretched If the wide function is set when the Image stabilizer function is used the image stabilizer function will be canceled Image stabilizer function Reduces the image sha...

Page 29: ...up your important data on a PC and format your card with this movie camera Recording in various situations Scene mode When you record images in different situations this mode automatically sets optimum shutter speeds and apertures Set to Tape Card Recording Mode 1 Set the AUTO MANUAL FOCUS switch to MANUAL 2 Set BASIC SCENE MODE select the desired mode 1 5 Sports mode To record sports scenes or sc...

Page 30: ...itch to AUTO When the camera is turned on with the lens cover closed the automatic white balance adjustment may not function properly Please turn the camera on after opening the lens cover When setting both the white balance and the iris gain set the white balance first Whenever recording conditions change re set the white balance for correct adjustment ª To set the white balance manually Select i...

Page 31: ...shutter speed indication or aperture value indication appears 1 Shutter speed 2 Aperture Iris gain value 3 Move the joystick left or right in order to adjust the shutter speed or aperture ª To restore to automatic adjustment Set the AUTO MANUAL FOCUS switch to AUTO Manual shutter speed adjustment Avoid recording under fluorescent light mercury light or sodium light because the colour and brightnes...

Page 32: ... on the zoom magnification there are iris values that are not displayed ª Shutter speed range 1 50 1 8000 seconds Tape Recording Mode 1 25 1 500 seconds Card Recording Mode The shutter speed closer to 1 8000 is faster ª Iris gain value range CLOSE Closed F16 F2 0 OPEN Opened 0dB 18dB Value closer to CLOSE darken the image Value closer to 18dB brighten the image Values with dB are gain values ...

Page 33: ...ears In order to cancel the repeat playback mode set REPEAT PLAY OFF or set OFF ON switch to OFF When you set USB FUNCTION WEBCAM and then connect the USB connection cable the repeat playback mode is canceled ª Settings on the audio If you cannot listen to the desired audio when playing back a tape check the settings in SETUP 12bit AUDIO When you record or dub the audio in 12bit and set SETUP 12bi...

Page 34: ...d The speeds for cue review playback are 1 5k SP mode slow motion playback only 1 3k LP mode slow motion playback only 2k 5k 10k 20k ª To return to normal playback Press the VAR SEARCH button or 1 button on the remote control Images may be shown in a mosaic like pattern The sound is muted during search This function is canceled when the operation icon is displayed Playback on TV Images recorded by...

Page 35: ...ARD indication may appear as warning When playing back a file recorded on other equipment the date and time display is different from when it was recorded When playing back a picture recorded on other equipment its size and that of this movie camera may appear differently ª To display multiple playback files Multiple files on the card 6 files on 1 screen are displayed 1 Move the s VOLr lever to sw...

Page 36: ... files recorded on a card by other equipment A still picture file other than JPEG that cannot be played back on the movie camera may be erased Formatting a card Please be aware that if a card is formatted then all the data recorded on the card will be erased Store important data on a personal computer etc Set to Picture Playback Mode 1 Set ADVANCE CARD FORMAT YES 2 When the confirmation message ap...

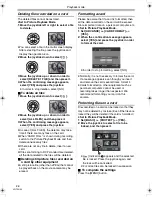
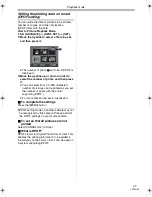
Page 37: ...and then press it You can select from 0 to 999 Selected number of pictures can be printed as you set the number of prints with the printer supporting DPOF 2 or more files can be set in succession ª To complete the settings Press the MENU button DPOF setting made on another camera may not be recognised by this camera Please perform the DPOF settings on your movie camera ª To set so that all picture...

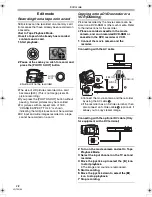
Page 38: ...DVD recorder or a VCR Dubbing Pictures recorded by the movie camera can be stored on a DVD RAM or other such media Refer to the instructions for the recorder Place a recorded cassette in the movie camera and an unrecorded DVD RAM or cassette in the DVD recorder or VCR 1 Connect the movie camera and the recorder Connecting with the AV cable Connect the movie camera and the recorder by using the AV ...

Page 39: ...remote control to stop recording Recorder 6 Stop playback Player ª To cancel the standby for recording When the camera is standby for recording move the joystick down and select the icon Do not plug or unplug the DV cable during dubbing or the dubbing may not be completed properly If a picture bilingual video etc containing main sound and sub sound has been dubbed select the desired sound by SETUP...

Page 40: ...rding Mode When you want to preserve the original sound taken during recording set SETUP AUDIO REC 12bit to take pictures When set 16bit the sounds taken during recording are erased after recording with audio dubbing Set BASIC REC SPEED SP to take pictures ª To play back the sound recorded with audio dubbing You can switch between the sound recorded with audio dubbing and the original sound Set SE...

Page 41: ...OF setting you cannot select DPOF PRINT When you select DPOF PRINT for printing set the number of prints in DPOF setting When DPOF PRINT is selected print after you determine the paper size 3 Move the joystick left and right to select a desired picture and then press it 4 Select the desired number of prints You can set up to 9 prints 5 Select the setting for date printing If the printer is not cap...

Page 42: ...the operating instructions for PC connection D ZOOM 23 ZOOM MIC 23 DATE TIME 44 INITIAL SET 45 3 SETUP FADE COLOUR 26 AUDIO REC 44 REC LAMP 44 DISPLAY 44 REMOTE 17 BEEP SOUND 44 LCD AI 16 LCD SET 15 EVF SET 15 DEMO MODE 45 AV JACK 44 POWER SAVE 44 4 LANGUAGE 14 ª TAPE PLAYBACK MENU 1 BASIC DATE TIME 44 AV JACK 44 USB FUNCTION Refer to the operating instructions for PC connection 2 ADVANCE BLANK SE...

Page 43: ...E 27 FLASH LEVEL 27 SHTR EFFECT 22 DATE TIME 44 INITIAL SET 45 3 SETUP REC LAMP 44 DISPLAY 44 REMOTE 17 BEEP SOUND 44 LCD AI 16 LCD SET 15 EVF SET 15 POWER SAVE 44 4 LANGUAGE 14 ª PICTURE PLAYBACK MENU 1 BASIC DATE TIME 44 PROTECT 36 2 ADVANCE DPOF SET 37 CARD FORMAT 36 3 SETUP DISPLAY 44 REMOTE 17 LCD SET 15 EVF SET 15 LCD AI 16 POWER SAVE 44 4 LANGUAGE 14 ...

Page 44: ... displayed on the screen ª POWER SAVE OFF When about 5 minutes passed without any operation the standby mode automatically will be set In the standby mode blinks and it takes time more than usual to start recording after you press the recording start stop button 5 MINUTES When about 5 minutes passed without any operation the movie camera automatically turns off to protect the tape or to prevent th...

Page 45: ...ion ª DEMO MODE If you set to DEMO MODE ON without inserting a cassette and a card the movie camera is automatically set to the demonstration mode for introducing its functions If any button is pressed or operated the demonstration mode is cancelled If no operations take place for approx 10 minutes the demonstration mode automatically starts To terminate the demonstration mode insert a cassette or...

Page 46: ... Wind noise reduction 26 When the microphone of the free style remote control with mic is used 18 External microphone supporting the smart accessory shoe 5 External microphone supporting the smart accessory shoe LOW CUT 5 5 Sports mode Scene mode 29 Portrait mode Scene mode 29 Low light mode Scene mode 29 Spotlight mode Scene mode 29 Surf snow mode Scene mode 29 Auto white balance 30 Indoor mode r...

Page 47: ...hile It takes some time until the cassette holder opens but this is not a malfunction 52 LOW BATTERY The battery is low Recharge it 8 NO TAPE No tape is inserted 10 TAPE END The tape came to the end during recording CHECK REC TAB You are attempting to record pictures on a tape with the accidental erasure prevention slider placed in the SAVE position You are attempting audio dubbing or digital dubb...

Page 48: ...PERATE MOTION DV MODE You are attempting to change D ZOOM setting during MotionDV Mode REVERSE THE LCD MONITOR At the time of 0 Lux night view mode when LCD monitor is not reversed it displays When the LCD monitor is rotated by 180 towards the lens the brightness of the LCD monitor cannot be adjusted Functions cannot be used simultaneously Some functions in the movie camera are disabled or cannot ...

Page 49: ...arged Charge it with the AC adaptor 8 Are you using the battery in an extremely cold place The battery is affected by ambient temperature In cold places the operating time of the battery becomes shorter Has the battery worn out The battery has a limited life If the operating time is still too short even after the battery is fully charged depending on the usage the battery has worn out and can no l...

Page 50: ...perate normally Close the cassette cover 10 2 The screen has changed suddenly Has the demonstration started In the Tape Recording mode if you set DEMO MODE ON without inserting a cassette and a card the demonstration starts For normal use set this function to OFF 45 3 A cassette cannot be inserted Has condensation occurred Wait until the condensation indication disappears 4 Auto focus function doe...

Page 51: ...s set to OUT Ë Playback Pictures 1 Mosaic pattern noise appears on images during cue or review playback This phenomenon is characteristic of digital video systems It is not a malfunction 2 Horizontal stripes appear on images during cue and review playback Horizontal stripes may appear depending on the scene but this is not a malfunction 3 Although the movie camera is correctly connected to a TV pl...

Page 52: ... DV If a tape is recorded in multiple modes such as SP and LP recording mode 12bit and 16bit sound recording mode normal and wide recorded and unrecorded parts the movie camera may malfunction at a point where the mode switches When you edit do not record in multiple modes 6 The warning alarm indication appears when the camera is operated in the WEB camera mode Did you press the menu button or the...

Page 53: ... be performed because the heads were dirty at the time of recording Clean the heads and perform recording and playback again If normal playback can be performed the heads are clean Before an important recording be sure to conduct a test recording to make sure that normal recording can be performed If the heads become dirty soon after cleaning the problem may be attributable to the tape If so try a...

Page 54: ...cation may not appear or the low battery indication may appear about 5 minutes after the start of use At high temperature moreover the protection function may work disabling use of the movie camera Be sure to detach the battery after use If the battery is left attached to the movie camera a minute amount of current is consumed even when the movie camera power is OFF If the battery is left attached...

Page 55: ... and the heads After use be sure to rewind the tape to the beginning put the cassette in the case to protect it from dust and store it upright Keep the cassette away from strong magnetism Apparatuses using magnets such as magnetic necklaces and toys have magnetic force that is stronger than expected and they may erase the contents of a recording or may increase noise ª About the card When insertin...

Page 56: ... TV screen 4 Cloudy sky rain 5 Sunlight 6 White fluorescent lamp 7 2 hours after sunrise or before sunset 8 1 hour after sunrise or before sunset 9 Halogen light bulb 10 Incandescent light bulb 11 Sunrise or sunset 12 Candlelight ª White balance The image recorded by the movie camera may become bluish or reddish under the influence of light sources To avoid such phenomena adjust the white balance ...

Page 57: ...s located in both the foreground and background Recording a subject behind dirty or dusty glass The subject behind the glass will not be focused because the focus is on the dirty glass Recording a subject that is surrounded by objects with glossy surfaces or by highly reflective objects The recording subject may become blurry because the movie camera focuses on the objects with glossy surfaces or ...

Page 58: ...put level 1 0 Vp p 75 ohm S Video output level Y Output 1 0 Vp p 75 ohm C Output 0 3 Vp p 75 ohm Audio output level Line 316 mV 600 ohm Mic input Mic sensitivity 50 dB 0 dB 1 V Pa 1 kHz Stereo mini jack USB Card reader writer function USB 2 0 compliant Hi Speed No copyright protection support PictBridge compliant Digital interface DV input output terminal IEEE1394 4 pin Video flash GN 4 0 Dimensio...

Page 59: ... depending on the subject being photographed Power source AC 110 240 V 50 60 Hz Power consumption 19 W DC output DC 7 9 V 1 4 A Movie camera operation DC 8 4 V 0 65 A Battery charging Maximum number of still pictures recordable on an SD Memory Card optional PICTURE SIZE 640 1280 1760 PICT QUALITY 32 MB 220 440 47 76 24 40 64 MB 440 880 98 158 52 84 128 MB 880 1760 187 302 100 161 256 MB 1760 3520 ...

Page 60: ...A VQT0N50 S0105Ke0 C Matsushita Electric Industrial Co Ltd Web site http www panasonic co jp global ...

Reviews: