14
1
2
3
4
5
6
1
2
3
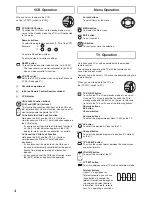
EXT LINK
EXT LINK
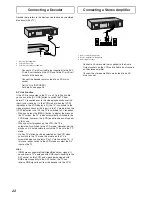
Satellite or Digital Receiver
Connecting the VCR to a Satellite Receiver
or Digital Receiver
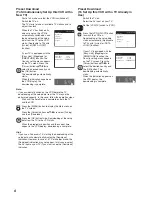
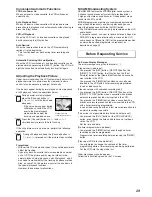
If the satellite receiver is equipped with a 21-pin scart socket
1
Satellite receiver (not supplied)
2
21-pin Scart socket
– If your satellite receiver has a VCR socket, connect the cable to it.
3
21-pin Scart cable (not supplied)
Set [AV2] to [EXT], [EXT LINK 1] or [EXT LINK 2].
For details, see page 26.
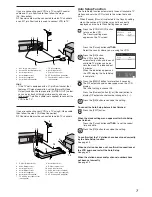
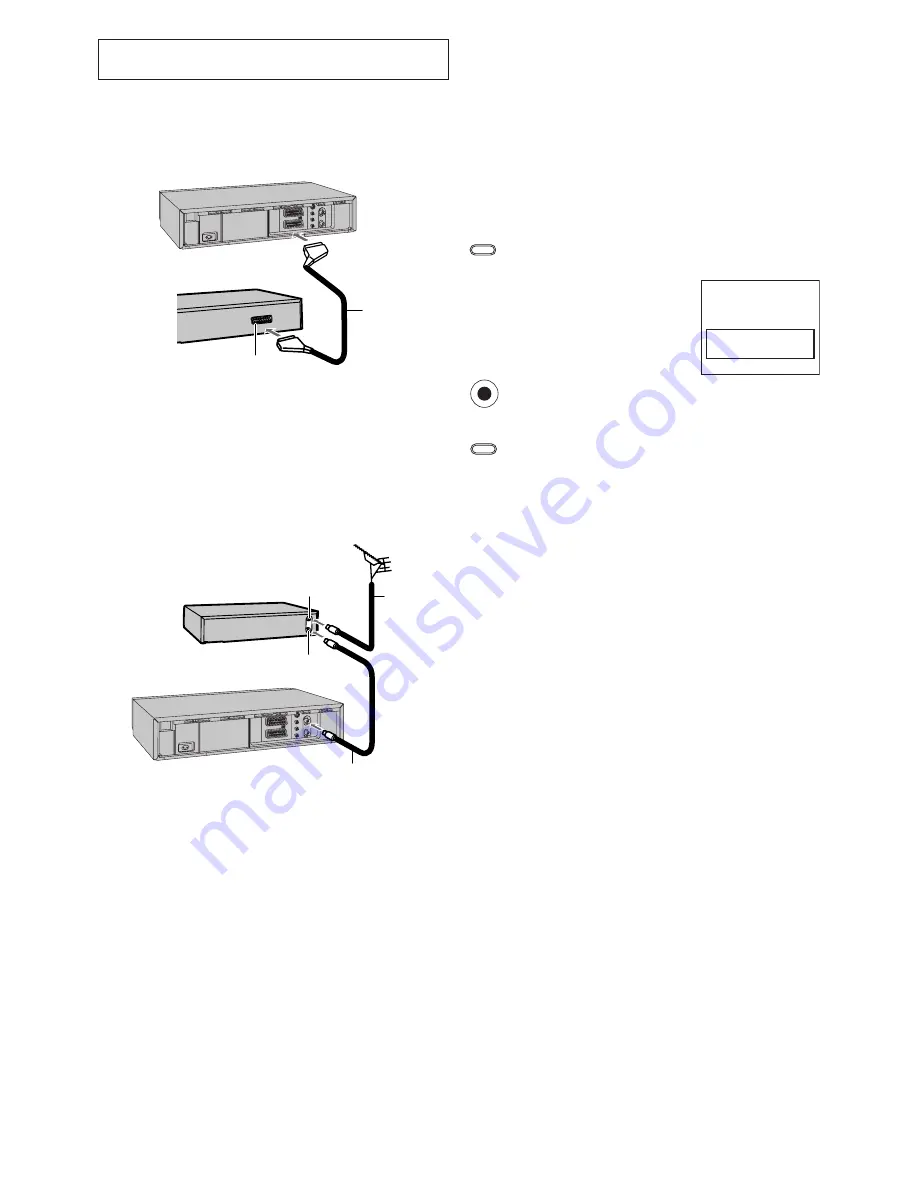
If the satellite receiver is not equipped with a 21-pin scart
socket
1
Satellite receiver (not supplied)
2
Aerial Input socket
3
Aerial Output socket
4
Aerial (not supplied)
5
Aerial lead (not supplied)
6
RF coaxial cable (not supplied)
Hint:
– The RF output channel of the satellite receiver should be
adjusted away from channel 38, which is used by the VCR,
e.g. re-adjust to channel 33.
Linked Timer Recordings by External
Equipments (EXT LINK)
If an external equipment (for example a satellite receiver) with
a timer function is connected to the AV2 socket of this VCR
by a 21-pin cable, it is possible to control the recording of the
VCR from this equipment.
Make sure that [AV2] is set to [EXT LINK 1] or
[EXT LINK 2]. (See page 26.)
Timer programming has to be done on the external
equipment and switch to the timer recording standby
mode, refer to its operating instructions.
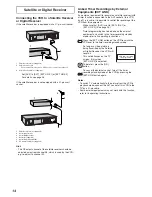
Press the [EXT LINK] button on the VCR to switch the
VCR over to the timer recording standby mode.
As long as a video picture is
being trasmitted by the Satellite
or Digital Receiver, the VCR will
record it.
This notice flashes on the TV
screen. (Only when
[EXT LINK 2] is selected)
To delete it, press the [OK]
button.
To cancel the external control, turn off the timer
recording standby mode of the VCR by pressing the
[EXT LINK] button again.
Notes:
– To switch TV automatically to the picture from the VCR in
playback mode, connect the AV1 socket of this VCR to the
TV by a 21-pin cable.
– Some external equipments may not work with this function,
refer to its operating instructions.
VCR now recording
this programme
OK


