


22
For assistance, please call : 1-800-211-PANA(7262) or send e-mail to : consumerproducts@panasonic.com
VIDEO IN
AUDIO IN
POWER
VOL
CH
STOP/EJECT REW/
PLAY/REPEAT FF/
REC
TIMER/FM
ACTION
REC ON TIMER
VIDEO IN
AUDIO IN
POWER
VOL
CH
STOP/EJECT REW/
PLAY/REPEAT FF/
REC
TIMER/FM
ACTION
REC ON TIMER PROG TIMER
PROG TIMER
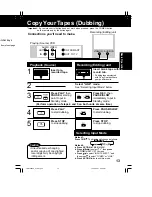
Press PROG (or
ACTION) to end the
program.
To Enter More Programs,
press
to select
and to set a blank
program number, and
then repeat step 3.
4
CANCEL : ADD / DLT
SELECT 1 - 8 :
ENTER :
END : PROG / ACT I ON
P DT START STOP CH SPD
1
day
day
9 : 00
00 p
12
12 : 00
00a
08
08
SP
SP
2 -- -- : -- -- : -- -- --
3 -- -- : -- -- : -- -- --
4 -- -- : -- -- : -- -- --
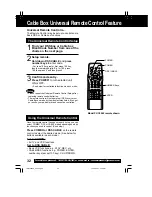
Press PROG twice (or ACTION)
to exit this mode.
• If you’re using a cable box, make sure that it is
tuned to the desired channel and the power is
left on for timer recording.
• PROG TIMER indicator lights on the unit.
5
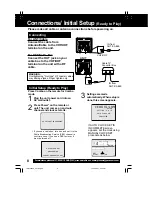
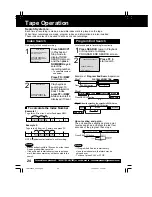
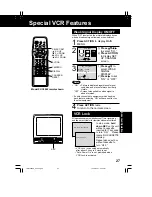
Timer Recording
You can set up to 8 programs to be recorded while
you are away.
1
2
3
Ready Check List
All connections are made.
Your unit is plugged in.
The clock is set to correct time.
The tape is long enough.
The record tab is in place.
SE
SELE CT
START
START DAT
ATE
7 F
FR I --:--
--:-- --:--
--:-- --
--
TODAY
DATE
START
STOP
CH
SLP
SELECT :
SET :
END : PROG / ACT I ON
- - - - - - - - -- - - - - - - -- - - - - - -
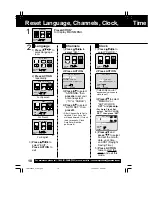
Press PROG* to display SET PROGRAM
screen.
1) Press
to select
TIMER
PROGRAMMING
.
2) Press to display
screen
.
• If a program is already in
memory, press
, and
to select an unused
program number.
Press
to select
and or to set the
recording DATE.
• 1~31 = One time
• DAILY = MON~FRI
• WEEKLY SUN~SAT
= Same time once a week
Repeat step 3 to set:
• start time, stop time
• Channel (or LINE for outside source)
• Speed (SP, LP, SLP)
Today’s
Date
Example
DAILY
7
2
1
31
6
8 9
SELECT / Selection Order
WEEKLY
(SAT)
WEEKLY
(MON)
WEEKLY
(SUN)
PROG TIMER indicator
SET :
SELECT :
END : PROG
SET PROGRAM
ON TIMER
ON TIMER
T I MER PR
T I MER PROGRAMMING
OGRAMMING
VOL
CH
STOP/EJECT REW/
ACTION
VOL
CH
STOP/EJECT REW/
ACTION
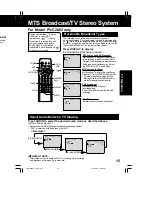
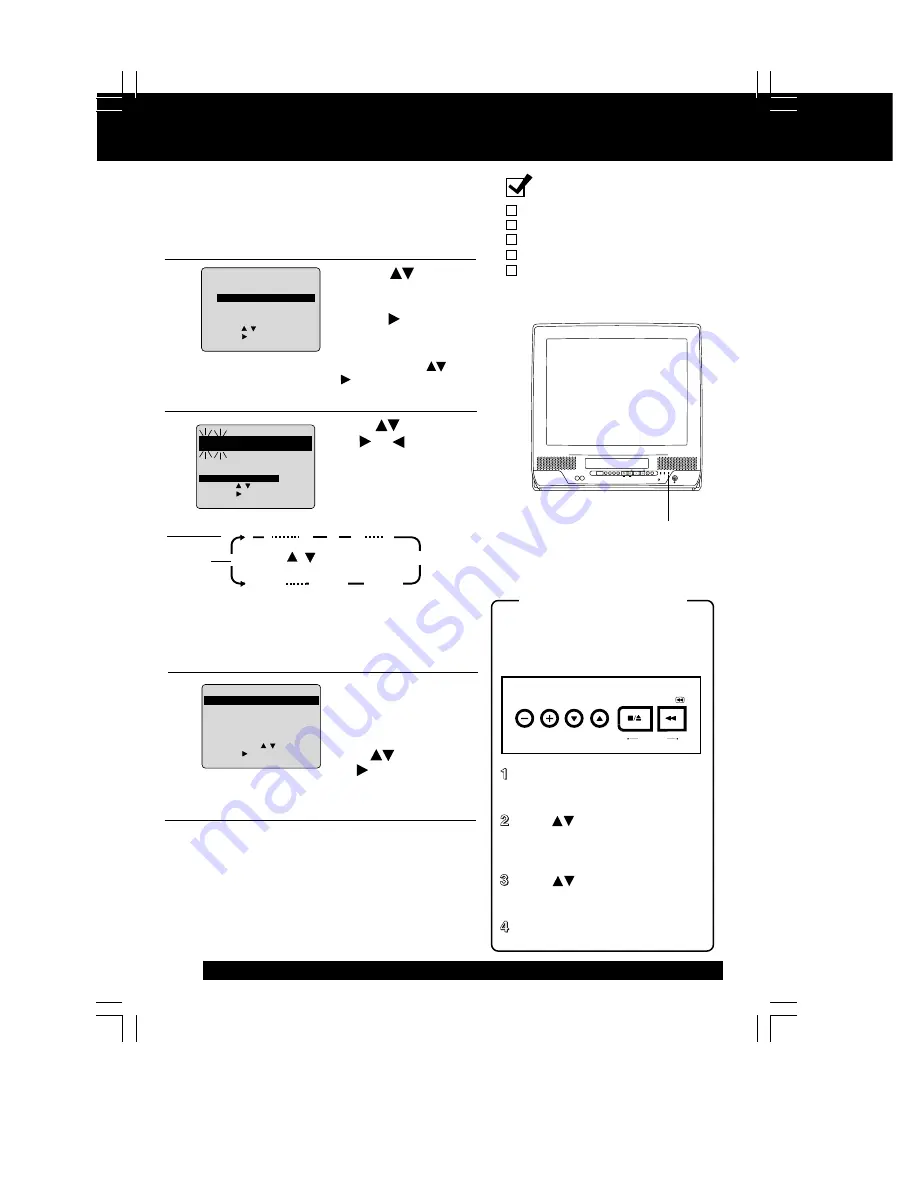
You can set a Timer Recording
using ACTION key on the unit.
(See page 11.)
Press STOP/EJECT and REW
together without a tape inserted
to display MAIN MENU.
Press + - to select “VCR”
and STOP/EJECT and REW
together to display SET UP
VCR screen.
Press to select “TIMER
PROGRAM” and + to display
the TIMER PROGRAM screen.
Repeat main steps 3 ~ 5.
Timer Recording Using
unit Buttons
LSQT0582A_P22-33.p65
12/14/2001, 1:52 PM
22
Summary of Contents for Omnivision PV-C2542
Page 22: ...6 1 2 Disassembly Method Fig D2 22 ...
Page 23: ...Fig D3 23 ...
Page 24: ...6 1 2 1 Notes in chart 1 Removal of VCR Unit Fig D4 24 ...
Page 28: ...6 2 2 Inner Parts Location Fig J1 1 28 ...
Page 29: ...6 2 3 EJECT Position Confirmation Fig J1 2 29 ...
Page 30: ...6 2 4 Full Erase Head and Cylinder Unit Fig J2 30 ...
Page 70: ...70 ...
Page 73: ...11 2 MECHANISM BOTTOM SECTION 73 ...
Page 74: ...11 3 CASSETTE UP COMPARTMENT SECTION 74 ...
Page 75: ...11 4 CHASSIS FRAME SECTION 1 75 ...
Page 76: ...11 5 CHASSIS FRAME SECTION 2 76 ...
Page 77: ...11 6 PACKING PARTS AND ACCESSORIES SECTION 77 ...
Page 84: ...121 LSPG1279 PACKING CASE PAPER F 6 84 ...
Page 97: ...R5317 ERDS2TJ101 CARBON 1 4W 100 97 ...
Page 99: ...R6045 ERJ6GEYJ102V MGF CHIP 1 10W 1K 99 ...
Page 118: ...R5401 ERJ6GEYJ561V MGF CHIP 1 10W 560 118 ...


