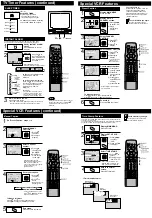
Location of Controls
Connections
Remote Control Buttons
Light Tower Illuminated Remote Control
LIGHT button:
When the LIGHT button is pressed, the buttons which can be activated in the selected mode will light and the selected mode
button (COMBO or DSS CABLE) will flash for 5 seconds. If no buttons are pressed within 5 seconds, the light will turn off in
order to conserve battery power. Also, while holding down the buttons, the selected mode button will flash so you will be able
to see, in the dark, which mode has been selected.
EJECT button:
When EJECT is pressed, the tape is ejected from Cassette Compartment.
If EJECT is pressed during recording, the unit will not respond to the command.
COMBO
EJECT
POWER
FM/TV
MUTE
ACTION
PIP
MOVE
LIGHT
DSS CABLE
RAPID TUNE
FREEZE
SWAP
ADD/DELETE
PLAY
REWIND/SEARCH
CM SKIP
PAUSE/SLOW
AUDIO
NITE
SLEEP
REC
STOP
DISPLAY/ENTER
TAPE POSITION
SEARCH
SPEED
COUNTER RESET
FAST FORWARD/SEARCH
TRACKING UP/DOWN
NUMBERED KEYS
PROGRAM
VCR plus+
VOLUME UP/DOWN
SET/BACKSPACE
CHANNEL UP/DOWN
SELECT UP/DOWN
VHF/UHF
AUDIO
R
OUT
L
Rear View of the unit
AC Power Plug
VHF/UHF Antenna
Input Terminal
In from your Antenna
or Cable.
Audio Output Connector(L/R)
For connection to the audio
input connector of a
stereo amp.
When plugged into an AC
outlet, this unit consumes
5.2 W of electric power in
OFF condition.
Front View of the unit and Indicators on the Front Panel
POWER
POWER
VOL
VOL
CH
CH
STOP/EJECT
STOP/EJECT REW/
REW/
PLAY/REPEAT
PLAY/REPEAT FF/
FF/
REC
REC
TIMER/FM
TIMER/FM
ACTION
ACTION
REC
REC ON TIMER
ON TIMER PROG TIMER
PROG TIMER
REC
REC ON TIMER
ON TIMER PROG TIMER
PROG TIMER
PROG TIMER Indicator
Lights when the unit is set for
Lights when the unit is set for
Timer Recording.
It flashes when a T
Timer
Recording has been set with
no tape inserted, the clock is
not set, or the tape is in motion.
REC Indicator
Lights during recording.
Lights during recording.
In Rec Pause or OTR
In Rec Pause or OTR
Pause mode, the
Pause mode, the
indicator flashes.
indicator flashes.
ON TIMER Indicator
Lights when the
On T
Timer is set.
Remote Sensor
Remote Sensor
Cassette Compartment
PLAY/REPEAT
FAST FORWARD/SEARCH
TIMER/FM
REC
Built-In Speaker (x2)
Phones Jack
STOP/EJECT
ACTION
CHANNEL UP/DOWN
TRACKING UP/DOWN
SELECT UP/DOWN
VOLUME UP/DOWN
SET
POWER
Audio/Video In Jack
L-AUDIO IN-R
L-AUDIO IN-R
VIDEO IN
VIDEO IN
REWIND/SEARCH
ACTION
Unhook the antenna from your
previous TV or VCR and connect it to
the back of the unit as shown in the
diagram.
If your antenna system has separate
UHF and VHF lead-ins, you need a
UHF/VHF Band Mixer (not supplied.)
DSS/Cable box Connections
Without a Cable Box
You can;
• record or view unscrambled channels.
You cannot;
• record or view scrambled channels.
• view a channel other than the one
selected for any type of recording.
With a Cable Box
You can;
• record or view any channel including scrambled channels.
NOTE: Channel selection must be made at the cable box.
You cannot;
• view a channel other than the one selected for any
type of recording.
• do a Timer recording of a channel unless you select it
at the cable box.
Note to CABLE System Installer
This reminder is provided to call the CABLE (Cable TV) System
Installers attention to Article 820-40 of the NEC that provides
guidelines for proper grounding and, in particular, specifies that
the cable ground shall be connected to the grounding system of
the building, as close to the point of cable entry as practical.
With a DSS Receiver
You can;
• record or view any channel including scrambled
channels.
NOTE: Channel selection must be made at the DSS
Receiver.
You cannot;
• view a channel other than the one selected for
any type of recording.
• do a Timer recording of a channel unless you
select it at the DSS box.
NOTE: The DSS receiver must be turned off to view
programs from a cable box or antenna. See the DSS
manual for details.
Antenna
or
CABLE
unit
VHF/
UHF
Antenna
or
CABLE
unit
VHF/
UHF
OUT
IN
Cable Box
Antenna
or
CABLE
unit
VHF/
UHF
OUT
IN
DSS Receiver
Satellite
IN
WARNING:
When using “Nut type” RF coaxial
cables, tighten with fingers only.
Overtightening may damage terminals.
Outdoor Antenna Connections
VHF/UHF
AUDIO
R
OUT
L
UHF/VHF Band
Mixer (not supplied)
(FLAT) Twin Lead
300 Ohm Cable
(Round) 75 Ohm
coaxial Cable
Back of unit
300-75 ohm
Transformer
(not supplied)
from
Antenna
or
(Flat) Twin Lead
300 Ohm Cable
When the unit is turned on the first time, setup
mode is entered automatically.
1
Press POWER* on
the remote or unit.
Press CH .
(Setup completed)
Press CH to exit.
• If your area observes
daylight saving time,
but you would like to
turn the DST feature
off, complete the
“To Set or Reset the
Clock” step and set
DST: OFF.
3
Case 1
2
Select the language.
for English
for Spanish
(Español)
for French
(Français)
• If wrong language is set, complete “Reset all unit Memory
Functions” steps.
• If you use a cable box, it must be left on.
(Setup incomplete)
IMPORTANT NOTE FOR AUTO CLOCK SET
• Auto clock set is performed the first time when the unit is turned off each day. If used, a cable box must be left on and
tuned to the PBS channel at the time the unit power is turned off if you want auto clock set to be done.
• If using a DSS receiver, it must be turned off for auto clock set.
• If a Cable Box or DSS receiver is connected to the unit via Audio/Video Jacks, an RF coaxial cable must also be
connected for auto clock set and channel auto set features.
• If for any reason the time is changed manually, automatic time correction will not occur.
Case 2
See Case 2
next section.
CHANNEL / CLOCK AUTO SET
CONNECT ANTENNA CABLE
LOCAL PBS CH THEN. . .
AND I F YOU USE A CABLE
BOX, TUNE I T TO YOUR
PLE ASE PUSH CH UP KEY
Process of Setup
Language
channel
Clock
CH AUTO SET PROCEED I NG
AUTO CLOCK SET
PROCEED I NG
6 / 7 / 2000 WED 12 : 00PM
DST : ON
AUTO CLOCK SET
COMPLETED
SETT I NG : CH 1 0
END : PUSH CH UP KEY
PUSH ACT I ON TO SET CLOCK
AUTO CLOCK SET
I S I NCOMPLETE
• If your area observes daylight saving
time and DST is set to ON, but the
time is incorrect; complete the Time
Zone Adjust steps.
Start Channel Auto Set
and Clock Auto Set.
One Time Setup
Summary of Contents for OmniVision PV-C2780-K
Page 8: ...Fig 1 3 Fig 1 4 8 ...
Page 26: ...Fig D5 6 1 2 1 Notes in chart 26 ...
Page 29: ...6 2 2 Inner Parts Location Fig J1 1 29 ...
Page 30: ...6 2 3 EJECT Position Confirmation Fig J1 2 30 ...
Page 31: ...6 2 4 Grounding Plate Unit Full Erase Head and Cylinder Unit Fig J2 1 31 ...
Page 44: ...6 3 CASSETTE UP ASS Y SECTION 6 3 1 Top Plate Wiper Arm Unit and Holder Unit Fig K1 1 44 ...
Page 81: ...81 ...
Page 85: ...11 2 MECHANISM BOTTOM SECTION 85 ...
Page 86: ...11 3 CASSETTE UP COMPARTMENT SECTION 86 ...
Page 87: ...11 4 CHASSIS FRAME SECTION 1 87 ...
Page 88: ...11 5 CHASSIS FRAME SECTION 2 88 ...
Page 89: ...11 6 PACKING PARTS AND ACCESSORIES SECTION 89 ...


