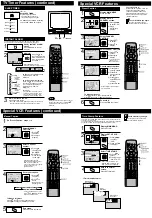
TV Timer Features (continued)
Special VCR Features (continued)
VOL
CH
CH
5 : 20PM
CANCEL : ADD / DLT KEY 02 : 00
SET : CH KEY ON UN I T
Set SLEEP TIMER.
Press SLEEP repeatedly.
• Pressing DISPLAY with sleep
timer set displays remaining time.
SLEEP TIMER
This unit can be set for auto power off.
To Cancel, press SLEEP repeatedly
until “SLEEP TIMER 00” appears.
Display INSTANT ALARM
screen.
Press TIMER/FM on the unit
to display.
INSTANT ALARM
The feature allows you to set a timer alarm for up to 60 minutes.
Useful for when you are cooking and need to leave the kitchen.
1
2
3
To cancel, press ADD/DLT while
“CANCEL” and “SET” are
displayed.
To increase timer in progress,
Press CH
on the unit to restart
countdown rounded up to next 1,
5, or 10 minute interval while
“CANCEL” and “SET” are
displayed.
<Example>
• If current time remaining is 12:15,
countdown will restart from 15:00.
• If current time remaining is 9:15,
countdown will restart from 10:00.
Set Alarm.
Remaining Time
Alarm will sound at 0: 00.
Press any button to stop.
• The volume of the alarm gradually increases for one minute
and then continues to beep until any button is pressed.
VIDEO IN
VIDEO IN
L-AUDIO IN-R
L-AUDIO IN-R
POWER
POWER
VOL
VOL
CH
CH
STOP/EJECT
STOP/EJECT REW/
REW/
PLAY/REPEAT
PLAY/REPEAT FF/
FF/
REC
REC
TIMER/FM
TIMER/FM
ACTION
ACTION
REC
REC ON TIMER
ON TIMER PROG TIMER
PROG TIMER
Press CH
on
the unit to select time
while “CANCEL” and
“SET” are displayed
(see below.)
2
CH
1
TIMER/FM
1:00 (one minute)
2:00
3:00
9:00
10:00
15:00
20:00
25:00
30:00
40:00
50:00
60:00 (Max)
one-minute
increase
until 10:00
five-minute
increase
until 30:00
ten-minute
increase
until 60:00
Note
TIMER /FM
Press TIMER/FM on the unit
repeatedly to change display as follows.
SLEEP TIMER 30
SLEEP TIMER 60
SLEEP TIMER 90
SLEEP TIMER 00
While timer function is in progress, you can
change channels on the unit with CH
while “CANCEL” and “SET” are not
displayed.
Special VCR Features
ANTENNA : CABLE
AUTO SET
CHANNE
NNEL
CAP
CAPT I ON
ON
WEAK S I GNAL D I SPLAY : OFF
CABLE BOX SET UP
VCR P l u s+ CH SET UP
SELECT : KEY
SET : KEY
END : ACT I ON KEY
SET UP CHANNEL
1
2
Display MAIN MENU.
Press ACTION*.
1) Press
to select “CH.”
2) Press
ACTION to
display.
Preset Caption
Display SET UP
CHANNEL screen.
3
1) Press
to select.
2) Press to
display.
Select CHANNEL
CAPTION.
4
1) Press
to
select.
2) Press to
display.
Select PRESET CAPTION.
6
End setup.
• To create your own
captions, go to
“Manual Caption.”
PRESE
PRESET
T CA
CAPT
PT I ON
MANUAL CAPT I ON
CHANNEL CAPT I ON
SELECT : KEY
SET : KEY
END : ACT I ON KEY
Press ACTION four times.
5
1) Press
to
select a station.
2) Press to
move cursor to
the right.
3) Press
to
select channel
number.
4) Press to set.
- -
- -
- -
- -
PRESET CAPT I ON
SELECT : KEY
SET : KEY
END : ACT I ON KEY
PBS
CNN
ESPN
HBO
- -
- -
- -
- -
- -
- -
- -
- -
ABC
ABC
CBS
FOX
NBC
Go with preset captions.
4 2
- -
3 5
- -
PRESET CAPT I ON
CLEAR : ADD / DLT KEY
SELECT : KEY
SET : KEY
END : ACT I ON KEY
TNT
UPN
WB
DSC
CBC
CTV
TSN
GLOB
6 2
2 1
5 2
1 2 3
• Repeat step 5 until the Caption
List is complete.
To Make Corrections
Press
, then to select channel number.
Press
to change, or ADD/DLT to delete.
Channel Caption is ...
Station names, e.g. ABC, TNN, etc.
so that they will appear when a
channel is selected. Choose 24
preset names (Preset Caption), or
make up to 10 names of your own
(Manual Caption.)
Check list before you begin.
You need a list of stations and the
channel numbers you receive them on.
M A I N MENU
CLOCK
C H
SET : ACT I ON KEY
SELECT : KEY
VCR
T V
EX I T
LANGUAGE
MANUAL CAPT I ON
CH NUMBER
O2
CLEAR : ADD / DLT KEY
SELECT : KEY
SET : KEY
END : ACT I ON KEY
CAPT I ON
A
- - -
MANUAL CAPT I ON
SELECT : KEY
SET : KEY
END : ACT I ON KEY
CAPT I ON
- - - -
CH NUMBER
O2
2
3
Select MANUAL
CAPTION.
1) Press
to select CH
NUMBER.
2) Press to
move cursor
to the right.
Manual Caption
Select Channel
number.
4
1) Press
to select.
2) Press to
enter.
Enter your caption.
5
Press ACTION four times.
End setup.
1
Do “Preset Caption” steps 1~3.
1) Press
to select.
2) Press to
display.
• Channels already set and
channels deleted from Channel
Memory are not displayed.
• You can set a total of ten channel
captions with up to four
characters each.
• Characters change in
the following order.
• Press repeatedly to move the
cursor to “CH NUMBER.” Repeat
steps 3 and 4 as desired.
To Make Corrections
Press
, then to select channel number.
Press
to change, or ADD/DLT to delete.
A B C Z BLANK &
9 2 1 0 / !
PRESET CAPT I ON
MANUAL CA
CAPT
PT I ON
CHANNEL CAPT I ON
SELECT : KEY
SET : KEY
END : ACT I ON KEY
Display MAIN MENU.
Press ACTION*.
Display SET UP VCR
screen.
1) Press
to select
“VCR.”
2) Press ACTION
to display.
1
2
3
Time Stamp Feature
Check list before you begin.
The clock is set to correct time.
The record tab is in place.
This unit writes program data (see example below) for about the first 10
seconds of every recording.
The information is then displayed during the first 10 seconds of playback.
To change the data, see “Changing Time Stamp Data” section.
REPEAT PLAY : OFF
T I MER PROGRAMMING
T I ME STA
STAMP : ON
REMOTE WARN I NG : ON
SELECT : KEY
SET : KEY
END : ACT I ON KEY
SET UP VCR
4
Return to normal
screen.
Press ACTION twice.
<Time Stamp Example >
Normal/ One
Touch Recording
Timer
Recording
When Clock
is not set...
M A I N MENU
T V
VCR
EX I T
CLOCK
C H
LANGUAGE
SET : ACT I ON KEY
SELECT : KEY
Select TIME STAMP.
1) Press
to
select.
2) Press to set
“ON” or “OFF.”
• When “OFF” is selected, the
program data is written on the
tape, but will not be displayed.
Summary of Contents for OmniVision PV-C2780-K
Page 8: ...Fig 1 3 Fig 1 4 8 ...
Page 26: ...Fig D5 6 1 2 1 Notes in chart 26 ...
Page 29: ...6 2 2 Inner Parts Location Fig J1 1 29 ...
Page 30: ...6 2 3 EJECT Position Confirmation Fig J1 2 30 ...
Page 31: ...6 2 4 Grounding Plate Unit Full Erase Head and Cylinder Unit Fig J2 1 31 ...
Page 44: ...6 3 CASSETTE UP ASS Y SECTION 6 3 1 Top Plate Wiper Arm Unit and Holder Unit Fig K1 1 44 ...
Page 81: ...81 ...
Page 85: ...11 2 MECHANISM BOTTOM SECTION 85 ...
Page 86: ...11 3 CASSETTE UP COMPARTMENT SECTION 86 ...
Page 87: ...11 4 CHASSIS FRAME SECTION 1 87 ...
Page 88: ...11 5 CHASSIS FRAME SECTION 2 88 ...
Page 89: ...11 6 PACKING PARTS AND ACCESSORIES SECTION 89 ...

