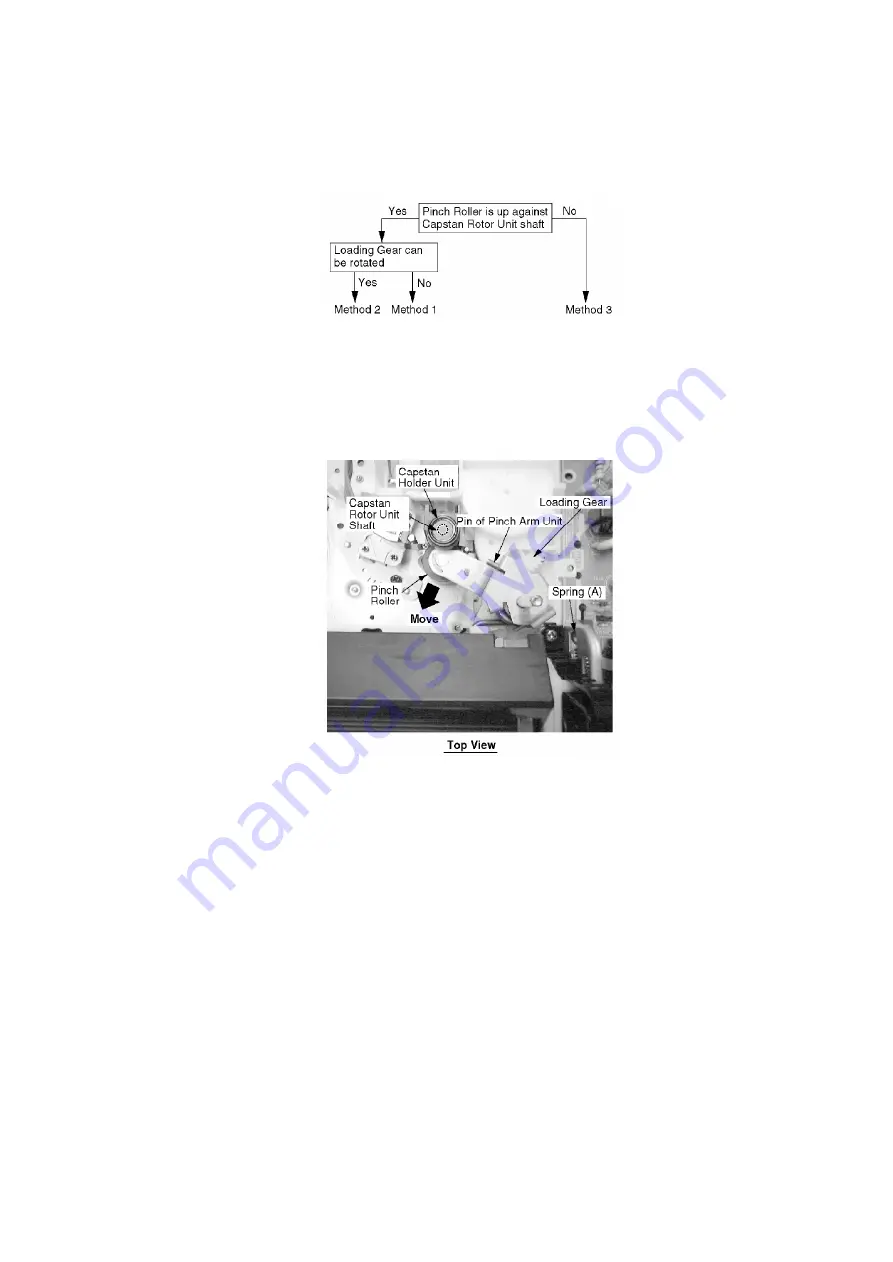
When a tape jam is encountered, check the tape loading condition and use the following
procedure to remove a tape jam.
Fig. 7-1
5.1.10.1.1. Method -1:
1. Move the Pinch Roller Unit out by unhooking the Pin of Pinch Arm
Unit so that the Pinch Roller is separated from the Capstan Rotor
Unit shaft.
Fig. 7-2
2. Remove the tape from the tape path.
3. Rewind the tape into the cassette by rotating the Center Clutch
Unit counterclockwise.
4. Unhook Spring (A) of the Drive Rack Arm.
5. Remove Screw (A).
6. Lift the Cassette Up Ass’y. While pulling the Cassette Up Ass’y out
far enough so that it clears the Drive Rack Arm, slide the Drive
Rack Unit as indicated by the arrow to remove the cassette tape
from the Cassette Up Ass’y.
7. Check the cause of mechanical trouble and repair.
Fig. 7-3
17
Summary of Contents for OmniVision PV-Q1311
Page 9: ...Fig 1 4 Fig 1 5 9...
Page 23: ...5 2 IC TRANSISTOR AND CHIP PART INFORMATION 23...
Page 27: ...Fig D4 Fig D5 27...
Page 31: ...6 2 2 Inner Parts Location Fig J1 1 31...
Page 32: ...6 2 3 EJECT Position Confirmation Fig J1 2 32...
Page 33: ...6 2 4 Grounding Plate Unit Full Erase Head and Cylinder Unit Fig J2 1 33...
Page 84: ...84...
Page 88: ...11 2 MECHANISM BOTTOM SECTION 88...
Page 89: ...11 3 CASSETTE UP COMPARTMENT SECTION 89...
Page 90: ...11 4 CHASSIS FRAME SECTION 1 90...
Page 91: ...11 5 CHASSIS FRAME SECTION 2 91...
Page 93: ...Model PV C2011 PV C2021 PV C2031W VV 2001 PV C2061 93...
Page 111: ...R4591 ERDS2TJ681T CARBON 1 4W 680 111...
Page 113: ...R6009 ERJ6GEYJ102V MGF CHIP 1 10W 1K 113...
Page 135: ...R6032 ERJ6GEYJ102V MGF CHIP 1 10W 1K 135...


