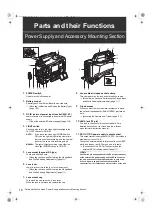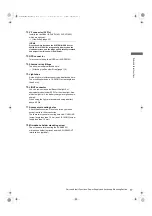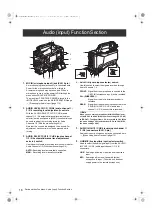
22
Parts and their Functions: Shooting and Recording/Playback Functions Section
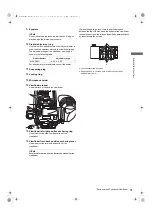
5.
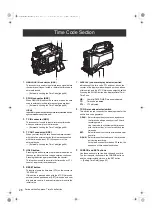
SYNCHRO SCAN ADJUSTMENT buttons
These buttons are enabled when the 3.SHUTTER
switch is positioned at [ON] and synchro scan is
selected.
They are used to adjust the speed of the synchro scan.
The – button decreases shutter speed; the + button
increases shutter speed.
If you shoot a PC monitor, for example, you should
adjust shutter speed so that the horizontal bars in the
viewfinder will produce less noise.
6.
REC button
Pressing this button starts recording, pressing again
stops recording.
This button has the same function as the 27.REC button
on the handle and the VTR button at the lens.
7.
SHOT MARKER button
Pressing this button while recording adds a shot mark to
the thumbnail of that clip. This button also adds a shot
mark to any thumbnail selected on the LCD monitor.
For more information on shot marks.
>
[Shot Mark Function] (page 46)
Also, you can use this button as the USER3 button for
menu settings.
>
[Assigning Functions to USER Buttons] (page 55)
8.
Text memo button
Records a text memo if pressed during recording or
playback or when playback is paused.
>
[Text Memo Function] (page 45)
Also, you can use this button as the USER4 button for
menu settings.
>
[Assigning Functions to USER Buttons] (page 55)
9.
MON OUT CHARACTER switch
This switch controls the superimposition of characters
onto the video output from the MON OUT connector.
ON:
Characters are superimposed.
OFF:
Characters are not superimposed.
>
[Settings of signals output from MON OUT
connector] (page 89)
10.
REW (rewind) button
During pause, this button performs a fast-reverse
playback with the lamp blinking.
During playback, it performs an approximately 4
a
fast-
reverse playback with the PLAY and REW lamps
blinking.
If this button is pressed when playback is paused, the
start of the clip being played back is located in pause
mode.
11.
STOP button
This button stops playback.
Also, press this button when you stop interval recording
or one-shot recording, or when you quit consolidating
clips once in ONE CLIP REC mode.
12.
FF (fast forward) button
During pause, this button is used to perform fast
playback with the lamp blinking.
During playback, it performs an approximately 4
a
fast
playback with the PLAY and FF lamps blinking.
If this button is pressed when playback is paused, the
start of the next clip is located in pause mode.
13.
PLAY/PAUSE button
This button is used to view playback using the
viewfinder screen or a color video monitor. The lamp
comes on when playback starts.
In playback mode, this button pauses (PLAY/PAUSE)
playback with the lamp blinking.
14.
P2 CARD ACCESS LED
This LED indicates the recording and playback status of
each card.
>
[P2 CARD ACCESS LED and Status of P2 cards]
(page 33)
15.
REMOTE (remote control) connector
Connect the AJ-RC10G remote control unit (optional).
>
[Connection of the remote control unit (AJ-RC10G)]
(page 143)
You can also remote control part of the functions by
connecting the AG-EC4G extension control unit
(optional).
>
[Connection of the extension control unit (AG-
EC4G)] (page 145)
16.
SD memory card insertion slot
An SD memory card (optional accessory) is inserted
here. Use the SD memory card for recording/calling the
settings menu and lens files for this unit, and also
uploading metadata, etc.
Notes
<Cautions in using SD memory cards>
z
Use the unit by inserting an SD memory card that is
compliant with the SD standard or the SDHC standard.
z
MMC (MultiMediaCards) cannot be used. (Bear in mind
that taking pictures may no longer be possible if you do
use them.)
z
If you intend to use miniSD/microSD cards in camera-
recorder, always install the adapter specially designed
for miniSD/microSD cards. (The unit will not work
properly if only the miniSD/microSD card adapter is
installed. Make sure that the card has been installed in
the adapter before using it.)
z
Use of Panasonic’s SD memory cards and miniSD/
microSD cards is recommended. Be sure to format
cards using camera-recorder.
z
Any SD memory card with the following capacities (8 MB
to 2 GB) and any 32 GB SDHC memory card can be used
with the unit.
z
For the latest information not available in the operating
Instructions, visit the P2 Support Desk at the following
Web sites.
http://pro-av.panasonic.net/
z
The SDHC card conforms to a new standard for memory cards
with a large capacity of more than 2 GB which was established
by the SD Association in 2006.
AJ-HPX3100G(VQT3A79)_E.book 22 ページ 2010年9月17日 金曜日 午後9時21分

