36
For assistance, please call : 1-800-211-PANA(7262) or send e-mail to : consumerproducts@panasonic.com
Digital Still Camera
Using the Light
Before you begin...
• Connect Camcorder to power source.
• Insert the Memory Card (page 34).
• Set POWER to PHOTO.
Set LIGHT to AUTO.
When RECORD/PAUSE is pressed to
capture an image in dim lighting, the Light
comes on for about 2 seconds, the image
is captured, then the light goes out.
Or, set LIGHT to ON/OFF manually.
(See page 16 for further details.)
For capture of still images in dim lighting.
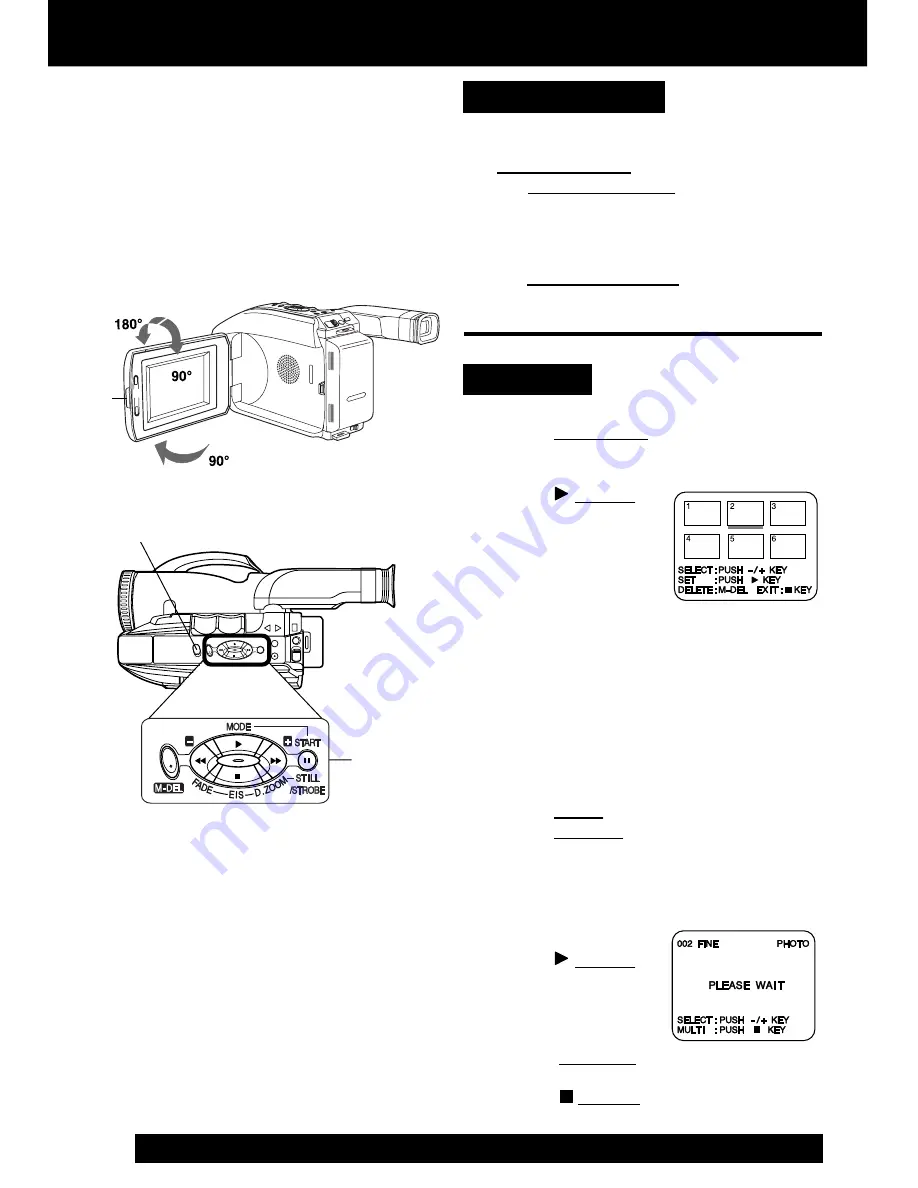
Playback
1
Press LCD-OPEN and swing LCD
monitor fully open. Adjust viewing angle.
2
Press (PLAY) to
play mode.
The Multi Image
Playback screen
appears. The last
captured image
screen is underlined.
• If there are no recordings on the card,
“NO PICTURE” appears on-screen.
• In NORMAL or FINE mode, the color
of the Multi Image page number is as
follows:
NORMAL mode
➞
green
FINE mode
➞
white
3
Press + (FF)
➞
next.
Press – (REW)
➞
previous.
• The selected image will be underlined
in green.
• Continue pr (FF) or – (REW)
for next or previous page.
4
Press (PLAY) to
display image. This
screen appears
followed by image.
• Press DISPLAY to remove or redisplay
this screen.
• Press (STOP) to redisplay Multi
Image playback screen.
Note:
• If Memory Card is not inserted, “NO
CARD” appears on-screen. Set Power to
OFF, then insert the Memory Card.
• Pictures captured with other brand
products cannot be used with this
Camcorder.
• If “INCOMPATIBLE IMAGE” appears on-
screen, the size of the captured image
cannot be played back on this Camcorder.
• Do not change POWER setting to
CAMERA or change recording mode while
“PLEASE WAIT” is displayed.
• If “CARD ERROR” appears on-screen,
see page 56.
LIGHT
2
,
3
,
4
1


