7
Getting
Star
ted
Getting
Star
ted
1
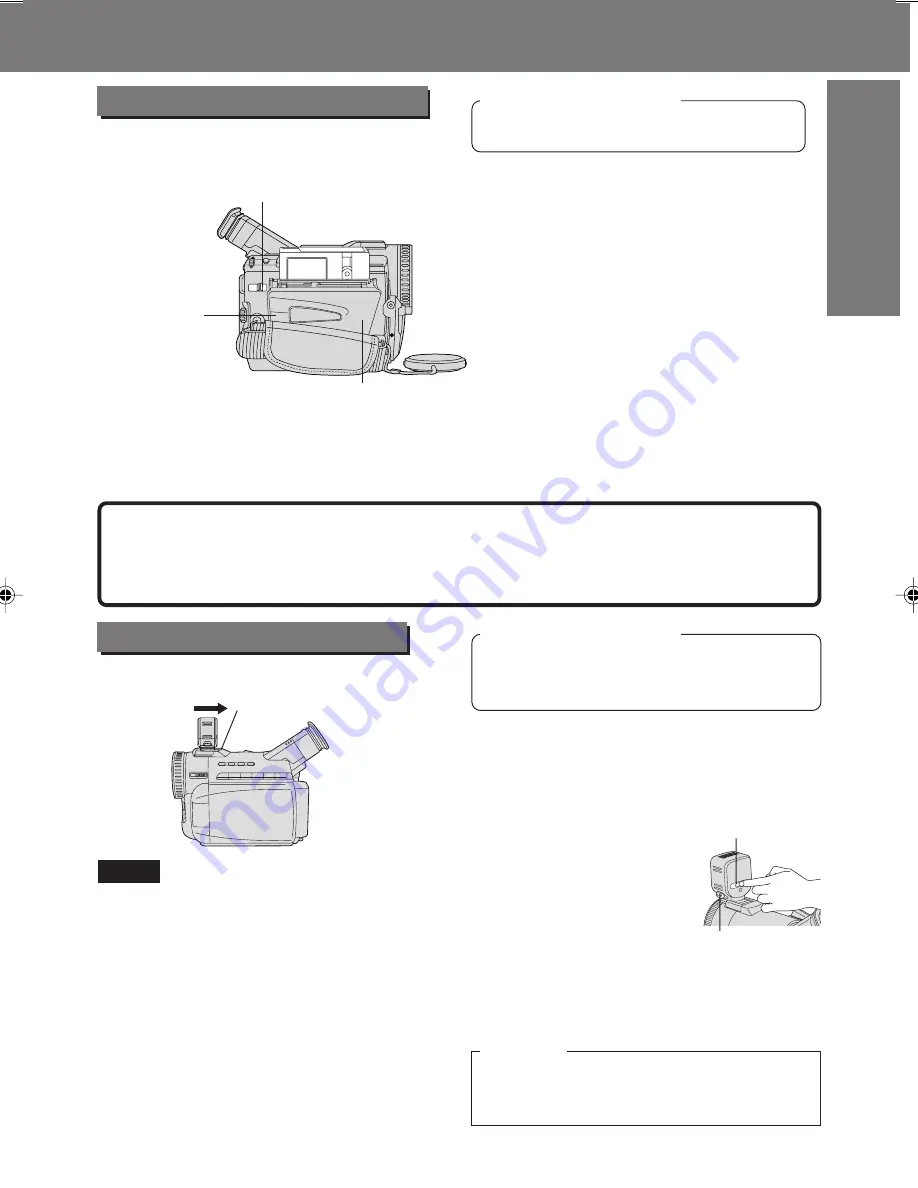
Slide Light into the Built-in Light
Mount.
Be sure it locks into place.
2
Press LIGHT to turn
ON or OFF.
Before Using
Before Using
1
Slide TAPE EJECT to open the
Cassette Compartment Cover.
2
Insert a cassette record tab up,
window side facing out.
3
Press PUSH TO CLOSE mark to
close the Cassette Compartment
Cover.
1
TAPE EJECT
Switch
Cassette Compartment Cover
3
PUSH TO
CLOSE mark
Note
• If hand strap is tight it may prevent Cassette Compartment Cover from fully opening
for tape insertion or ejection. Loosen hand strap if necessary.
• When inserting the cassette, make sure it faces in the right direction and then push in
completely.
Cassette Insertion/Removal
Before you begin
• Connect the Palmcorder to a power
source. (See pages 11, 12.)
To brighten the natural colors in a scene.
Using the Light (Optional)
Before you begin
• Connect the Palmcorder to a power
source. (See pages 11, 12.)
• Set POWER to CAMERA or M-CARD.
• If the Palmcorder is connected to a power
source, the cassette can be inserted and
ejected without turning the Palmcorder
on.
• To remove the cassette...
Slide TAPE EJECT to open the Cassette
Compartment Cover and pull the cassette
tape straight out.
Hint to locate recording position when inserting cassette
• When you insert a partially recorded cassette, use the Edit Search Function (see page
24) to visually confirm the point at which you want to start a new recording. Especially
advisable when you want to add a recording to a tape that is already full.
2
LIGHT Button
LIGHT RELEASE Button
Built-in Light Mount
Caution
This light becomes hot during operation.
Make sure nothing covers the Light
during operation.
• Using the light will reduce battery
operating time.
• Be sure to provide
adequate ventilation if using Light in a
hot environment for an extended period.
• Be sure LIGHT is set to OFF when not in
use.
• Do not attempt to lift or carry the
Palmcorder by holding the Enhancement
Light.
• If light bulb needs to be replaced, take
Light to your nearest authorized
servicenter.
Note
To remove the Light:
Press LIGHT RELEASE and slide the
Light out of the mount.
201_401. 5-8.p65
01/01/18, 17:07
7


