background image

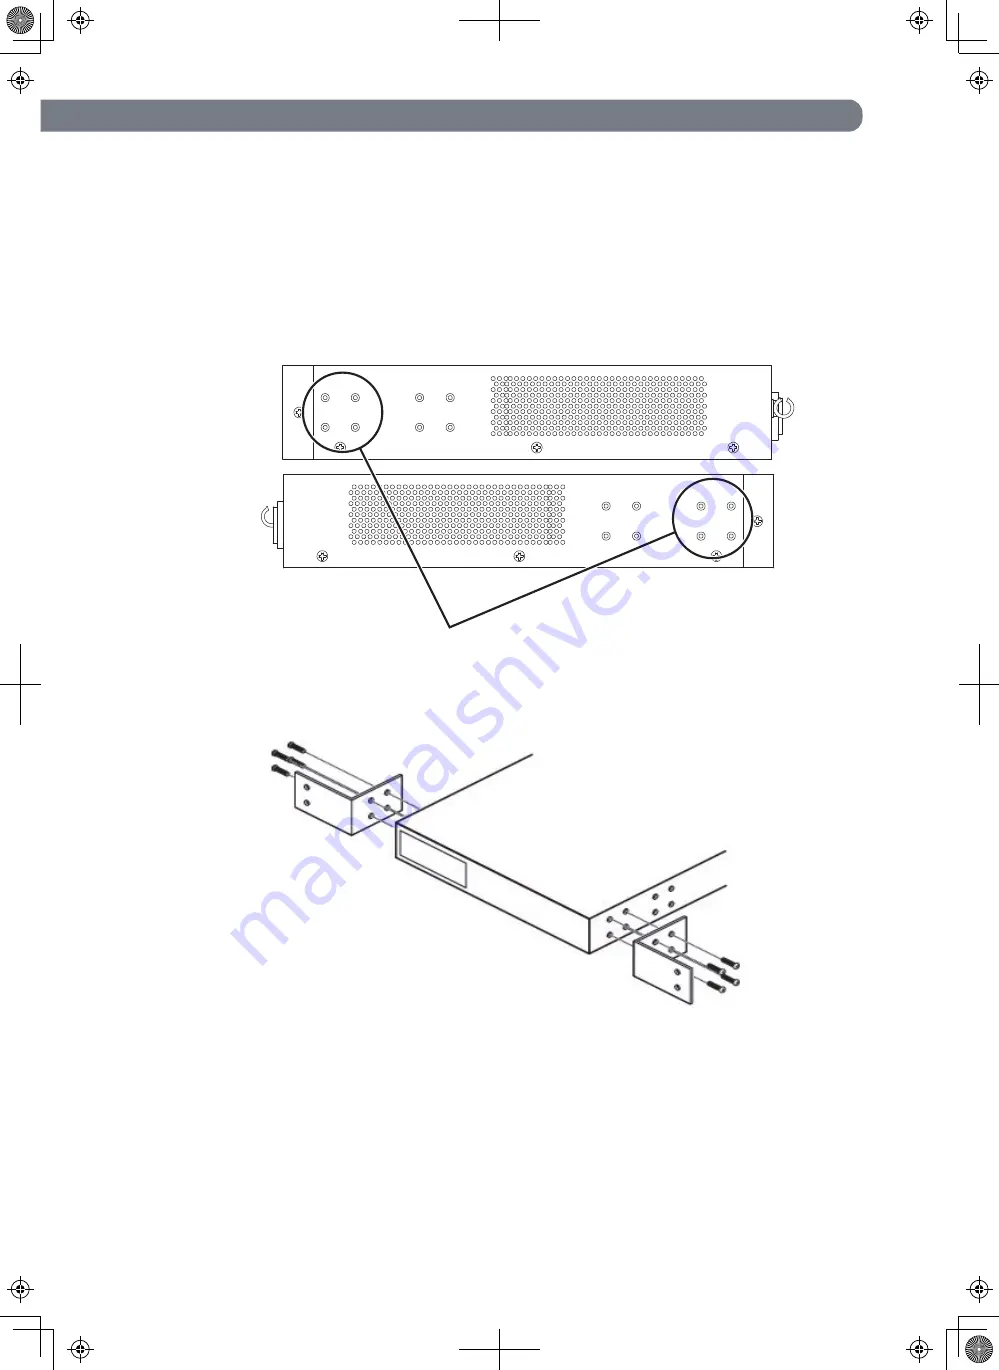
Take out the provided mount brackets (2pcs.)and eight screws (for fixing the mount 
brackets and the Ethernet Switch).Fix the mount brackets to the four holes on each 
side of the Ethernet Switch using the screws.
Then,securely install the Ethernet Switch on the rack using the four provided screws 
(for mounting on a 19-inch rack) or screws provided with the rack.

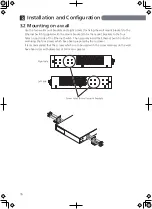
3.3 Mounting to rack

Right side

Left side

Screw holes for fixing the 19-inch rack mount brackets

17

Summary of Contents for PN28240i-NZ

Page 1: ...d by the warranty I0818 50822 Printed in Japan Switch M24eGi Installation Guide Model No PN28240i TH PN28240i MY PN28240i ID PN28240i SG PN28240i NZ The instruction manuals Menu Version CLI Version Web Version latest firmware and SDN application ZEQUO assist Plus can be downloaded from the following URL https panasonic co jp ew pewnw english datadownload index html 2 12 7 Higashi Shimbashi Minato ...

Page 2: ...eatures 1 2 Specifications 1 3 Accessories 1 4 Basic operation 2 Part Names and Functions 2 1 LED display change 3 Installation and Configuration 3 1 Grounding Cable Connection 3 2 Mounting on a wall 3 3 Mounting to rack 3 4 Configuration of IP address Basic Troubleshooting 3 6 7 7 8 9 9 10 13 15 15 16 17 18 20 ...

Page 3: ...or modify this Ethernet Switch Deviation could lead to fire electric shock and or equipment failure Do not damage the power cord Do not bend too tightly stretch twist bundle with other cord pinch put under a heavy object and or heat it Damaged power cord could lead to fire and or electric shock Do not handle the power cord with wet hand Deviation could lead to electric shock and or equipment failu...

Page 4: ...carefully so that fingers or hands may not be damaged by twisted pair port SFP extension slot console port or power cord hook block Do not put the Ethernet Switch into fire Deviation could lead to explosion and or fire If the device is going to be used in high temperature environments do not perform the following operations with bare hands Relocating the installation area transporting and attachin...

Page 5: ...unication failures is extremely high in regard to systems that directly affect systems and human lives which require extremely high reliability Be aware of glitches which are caused in the usage environments such as age related degradation etc This may vary depending upon conditions such as utilisation rates and usage environments but performance might decrease due to the age related degradation e...

Page 6: ...t place it in the proximity Static electricity could lead to equipment failure Do not put a strong shock including dropping to this Ethernet Switch Deviation could lead to equipment failure Before connecting a console cable to the console port discharge static electricity for example by touching metal appliance do not discharge by touching this Ethernet Switch Do not store and or use this Ethernet...

Page 7: ...n unit and referring the history of loop on the setting screen Has a loop detection history function which notifies when a loop occurs with the corresponding LED and enables a network administrator to identify the looped port after the loop is removed Fanless design solves noise problem or fan failure Power consumption can be suppressed by switching off the port LEDs left via the ECO mode LED func...

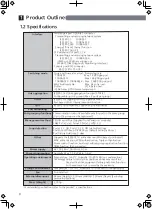
Page 8: ...ntication MAC based port based MAC authentication WEB authentication Triple authentication Storm control function multi cast address group registration function DDM function IPv6 supported IEEE802 1p compatible Supports 4 priority queues Temperature 0 60 C Humidity 20 80 RH no condensation Warning Failure to satisfy the conditions above may result in a fire electric shock equipment failure and or ...

Page 9: ...ED does not light up When the Eco mode is set Port LED lamps do not light up Optional accessories Power Cord The following power cords are supplied as per the intended nation of delivery Locale Thailand 250 VAC 6 A TIS166 2549 Indonesia 250 VAC 10 A 250 VAC 10 A 250 VAC 5 A CEE7 7 BS1363 BS1363 13 A 5 A Malaysia Singapore Product Number PN28240i TH PN28240i ID PN28240i MY PN28240i SG 250 VAC 10 A ...

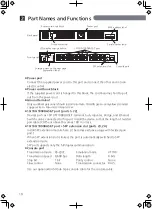
Page 10: ...ASE T port SFP extension slot ports 23 24 Install SFP extension module here It becomes exclusive usage with twisted pair port When SFP extension slot is linked the port is automatically switched to SFP extension mode SFP port supports only the full duplex communication Console port Transmission mode RS 232C Transmission speed 9 600 bps Stop bit 1 bit Flow control None Emulation mode VT100 Data len...

Page 11: ... Starting up Orange Blink Malfunction Contact the shop Off Power is OFF GIGA GIGA mode LED Green Light Operating in GIGA mode 100M Speed mode LED Green Light Operating in Speed mode FULL DUPLEX mode LED Green Light Operating in DUPLEX mode LOOP HISTORY Loop History mode LED Green Light Operating in Loop History mode Green Blink Loop is occurring or occurred within the last 3 days Power LED Collisi...

Page 12: ...s or 10 Mbps or no device is connected 100M Green Light Link is established at 100 Mbps Off Link is established at 1000 Mbps or 10 Mbps or no device is connected FULL Green Light Link is established at full duplex Off Link is established at half duplex or no device is connected Orange Light Shutting down by loop detection Off Not shutting down by loop detection LOOP HISTORY Green Light Loop has be...

Page 13: ...ode at the start is called Base mode There are two types of Base modes Status mode factory default setting and ECO mode You can change the Base mode by holding down the LED display switch button for at least 3 sec When the Base mode is changed normally all STATUS ECO GIGA 100M and FULL LED lamps light up at the same time When you release the button the Base mode is changed to the selected mode If ...

Page 14: ...nding port The Loop shutoff mode has the following 2 types of modes Block mode factory default When loops are detected the port statuses are automatically blocked and just the specified packets which include the loop detection packets will be transmitted and received Shut down mode When loops are being detected the ports will be automatically linked down and none of the packets will be transmitted...

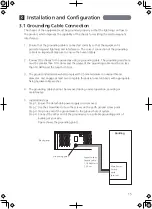
Page 15: ...ounding cable must be no less than 18 AWG and the length is 50 cm 3 The ground installed screw shall comply with 3 5mm minimum in nominal thread diameter and engage at least two complete threads into metal chassis with appropriate fixing hardware like washer 4 The grounding cable shall not be removed during normal operation servicing or maintenance 5 Installation steps Step 1 Ensure the detachable...

Page 16: ...ur holes on each side of the Ethernet Switch Then securely install the Ethernet Switch onto the wall using the four screws which have been prepared by the customer It is recommended that the screws which are to be used with the screw retainers on the wall have head sizes with diameters of 9 4 mm or greater Right side Left side Installation and Configuration 3 16 Screw holes for wall mount brackets...

Page 17: ...brackets to the four holes on each side of the Ethernet Switch using the screws Then securely install the Ethernet Switch on the rack using the four provided screws for mounting on a 19 inch rack or screws provided with the rack 3 3 Mounting to rack Right side Left side Screw holes for fixing the 19 inch rack mount brackets 17 ...
Page 18: ...ct System I P Configuration The screen to enter some addresses is displayed Screen 4 5 Press I to set an IP Address press M to set a Subnet Mask or press G to set a Default Gateway Then enter the specified address Screen 4 6 After completing the settings select Q uit to previous menu twice to return to Main Menu Screen 2 Here select Save Configuration to F lash Screen 5 and the command prompt chan...

Page 19: ...r detailed settings and administration methods please see the PDF version of the Operating Instructions on Panasonic s website Detailed configuration and management methods using CLI WEB Configuration and management method from ZEQUO assist Plus 19 ...

Page 20: ...are slow Are the communication speed and mode settings correct If the proper communication mode signal cannot be obtained apply half duplex mode Please reconfirm autonegotiation setting Do not set forced full duplex for the equipment that the Ethernet Switch is connected to Is not the utilization ratio of the network to which this Ethernet Switch is connected too high Please try to separate the eq...

Reviews: