27
Advanced Operations
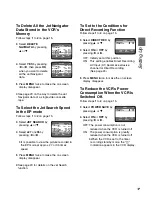
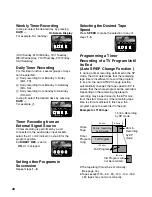
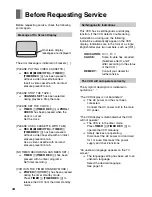
To Activate the Auto SP/EP Change
Function:
Press
SPEED
to select
A
.
≥
Every time you press
SPEED
,
the indication
changes in the following order:
SP
>
EP
>
A
>
SP
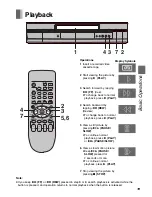
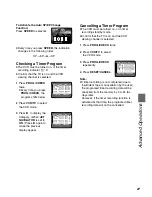
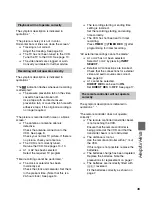
Checking a Timer Program
≥
The VCR must be turned on, or the timer
recording indicator “
Á
” lit.
≥
Confirm that the TV is on and the VCR
viewing channel is selected.
1
Press
PROG./CHECK
twice.
≥
Every time you press
PROG./CHECK
, the
program shifts below.
2
Press
VCR/TV
to select
the VCR mode.
3
Press
1
to display the
Category. (When
JET
NAVIGATOR
is set to
ON
.) Press
1
again to
make the previous
display appear.
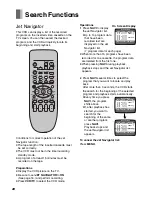
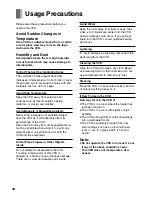
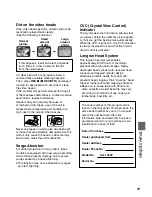
Cancelling a Timer Program
≥
The VCR must be turned on, or in timer
recording standby mode.
≥
Confirm that the TV is on and the VCR
viewing channel is selected.
1
Press
PROG./CHECK
twice.
2
Press
VCR/TV
to select
the VCR mode.
3
Press
PROG./CHECK
repeatedly.
4
Press
RESET/CANCEL
.
Note:
≥
If timer recording is not completed (due to
insufficient tape or cancellation by the user),
the programed timer recording data will be
cancelled from the memory by 4 A.M. two
days later.
However, if the timer recording function is
activated at that time, the programed timer
recording data will not be cancelled.
CH
DATE
ON
OFF
A
2 2 0 : 0 2 2 1 : 3 0
27TH
CATEGORY :
1
DATE
CH ON
OFF
2 7 W E
2
2 0 :0 2
2 1 :3 0 SP
S U - S A 125
1 0 :3 0
1 1 :0 0 A
S U
14
1 5 :0 0
1 6 :0 0 SP
– – – –
– – – –:– – – –:– –
2 8 T H
A2
2 0 :0 2
2 1 :3 0 SP
3 0 S A
4
1 9 :1 0
1 9 :5 5 EP
– – – –
– – – –:– – – –:– –
– – – –
– – – –:– – – –:– –
END:MENU
SELECT:
1
1
2
3
4
5
6
7
8
DATE
CH ON
OFF
2 7 W E
2
2 0 :0 2
2 1 :3 0
S U - S A 125
1 0 :3 0
1 1 :0 0
S U
14
1 5 :0 0
1 6 :0 0
1 9 T U
5
2 2 :1 5
2 3 :3 0
2 8 T H
A2
2 0 :0 2
2 1 :3 0
3 0 S A
4
1 9 :1 0
1 9 :5 5
– – – –
– – – –:– – – –:– –
– – – –
– – – –:– – – –:– –
END:MENU
SELECT:
1
1
2
3
4
5
6
7
8
DATE
CH ON
OFF
2 7 W E
2
2 0 :0 2
2 1 :3 0 SP
S U - S A 125
1 0 :3 0
1 1 :0 0 A
S U
14
1 5 :0 0
1 6 :0 0 SP
1 9 T U
5
2 2 :1 5
2 3 :3 0 EP
2 8 T H
A2
2 0 :0 2
2 1 :3 0 SP
3 0 S A
4
1 9 :1 0
1 9 :5 5 EP
– – – –
– – – –:– – – –:– –
– – – –
– – – –:– – – –:– –
END:MENU
SELECT:
1
1
2
3
4
5
6
7
8
Summary of Contents for ProLine AG-1350
Page 39: ...39 ...

