- 70 -
Setting a schedule
Perform the settings of the system setting and the data management for the schedule.
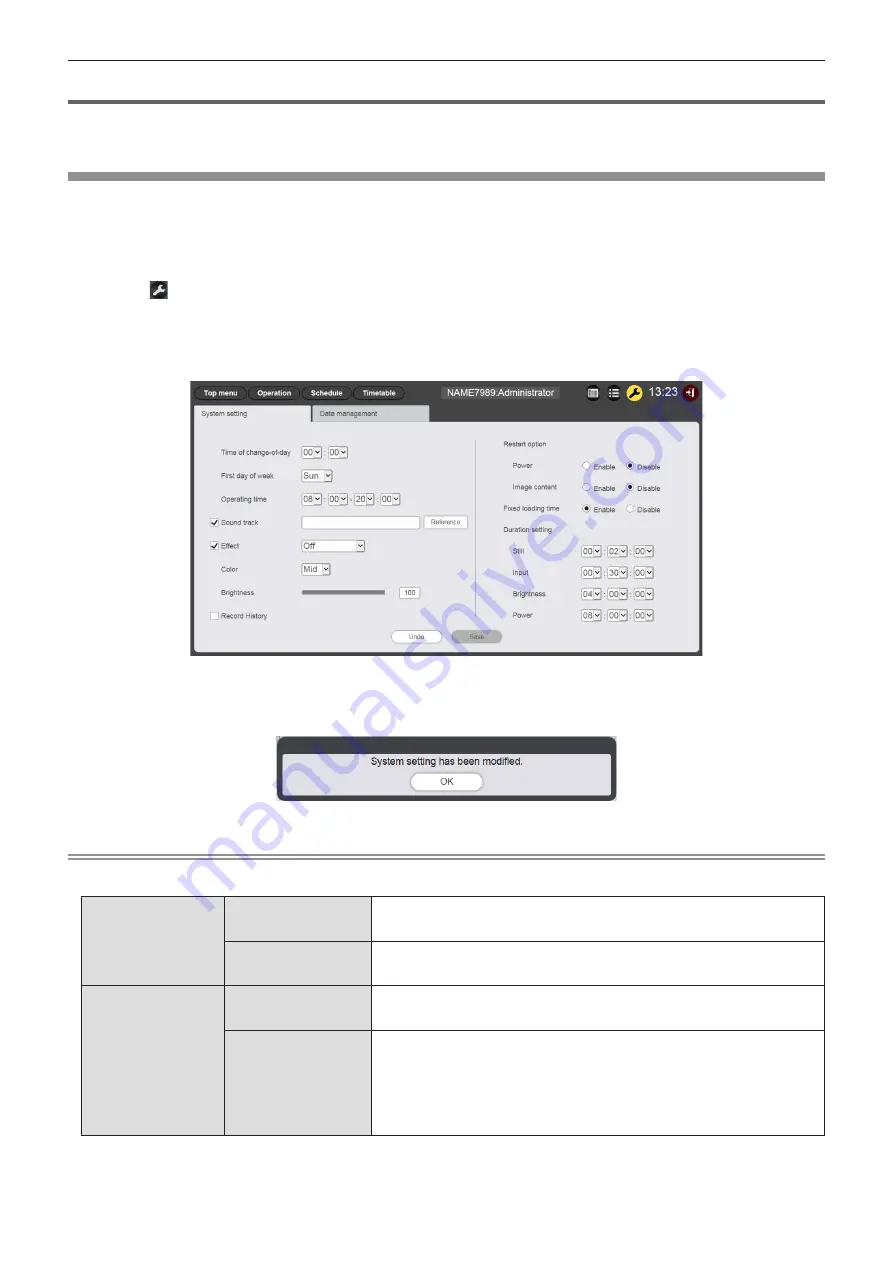
Perform system setting
Perform the system setting of the schedule.
1
Click the [Schedule] menu on the top menu screen.
f
The schedule screen is displayed.
2
Click .
f
The schedule setting screen is displayed.
3
Click the [System setting] tab.
f
The [System setting] page is displayed.
4
Perform various settings and click the [Save] button.
5
When the confirmation screen is displayed, click the [OK] button.
f
The set contents are registered in the SD card.
Note
f
When [Power] and [Image content] in [Restart option] are set to [Enable] or [Disable], the following operations are applied.
[Power]
[Enable]
Signage playback (schedule) resumes when power off/on registered in the schedule
is performed, or the power <
v
/
b
> button on the remote control or power supply
control by a command is performed, and then the input switches to signage.
[Disable]
Signage playback does not resume even when power off/on registered in the
schedule is performed, or the power <
v
/
b
> button on the remote control or power
control by a command is performed.
[Image content]
[Enable]
Signage playback (schedule) resumes at the playback start time of the image
content (still image/movie/external input display content/playlist in the SD card) set
in the schedule, and then the input switches to signage.
[Disable]
Signage playback does not resume even at the start time of the image content
(still image/movie/external input display content/playlist in the SD card) set in the
schedule.
f
When the [Restart option] is set on [System setting] page, the setting will be
reflected in the menu setting of the projector. For details, refer to [SETUP] menu
→ “Setting the restart option” of [SIGNAGE] (Operating Instructions - Functional
Manual).


