Chapter 1
Preparation — Precautions for use
ENGLISH - 17
r
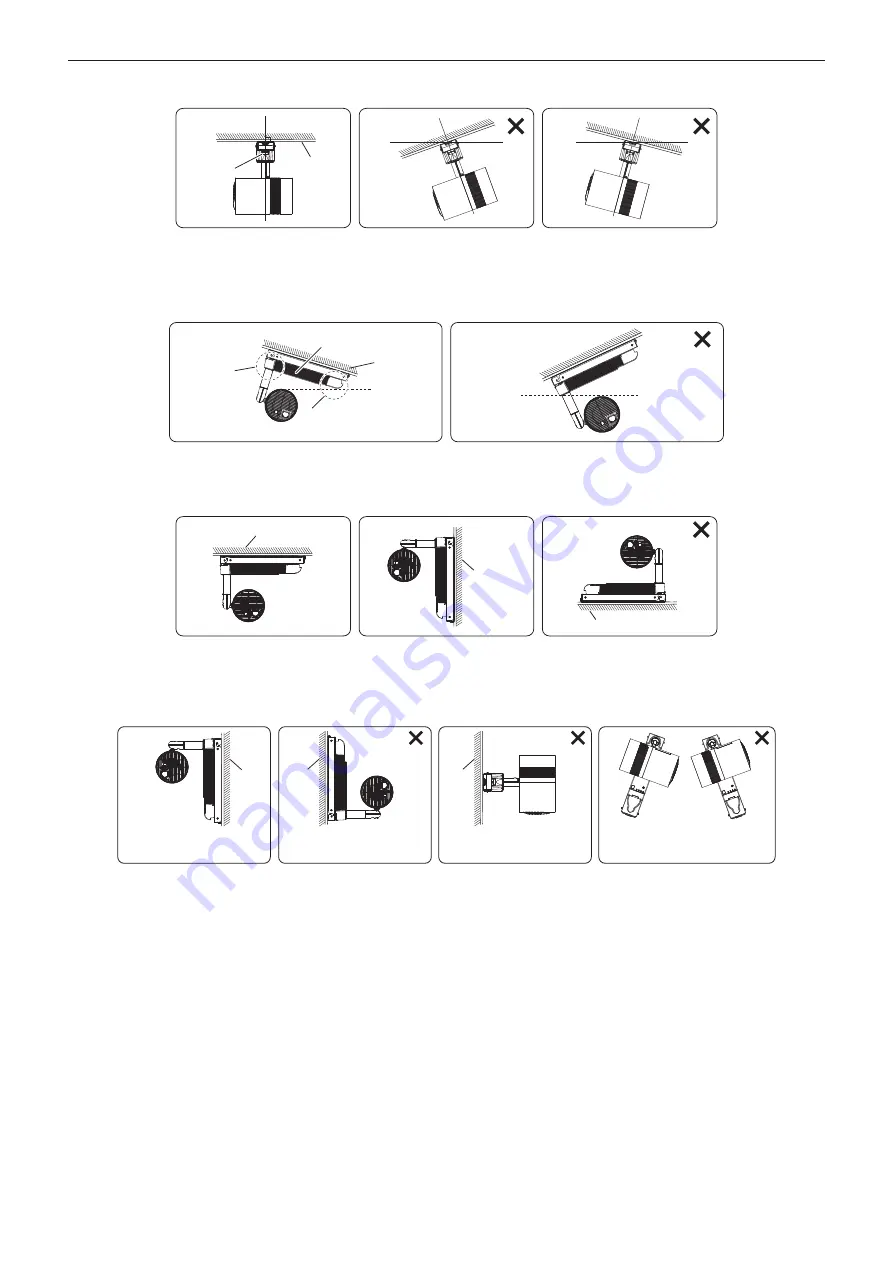
Do not install the projector on a ceiling with the power supply unit tilted right or left.
Can be installed
Cannot be installed
Cannot be installed
Ceiling
Power
supply
unit
r
When installing the projector on a sloped ceiling, install in a direction that the pole
side of the power supply unit will be higher than the power <
v
/
b
> button side.
Can be installed
Cannot be installed
Ceiling
Power <
v
/
b
> button side
Power supply unit
Pole side
r
When using the optional Mount Bracket, do not install the projector on a floor.
Ceiling
Wall
Floor
Can be installed
Can be installed
Cannot be installed
r
When installing the projector to a wall using the optional Mount Bracket, set the pole
side higher than the power <
v
/
b
> button side and the power supply unit vertically.
Pole side set at the
higher side
Pole side set at the
lower side
Power supply unit set
horizontally
Can be installed
Cannot be installed
Cannot be installed
Cannot be installed
Power supply unit not
set vertically
Wall
Wall
Wall
r
When using the projector in combination with the optional Floor Stand Kit, install on a
horizontal surface.
r
When using the projector in combination with the optional Mount Bracket or Floor
Stand Kit, use the power cord supplied with the optional accessories, and ground at
the outlet side.
r
Focus adjustment
The projection lens is thermally affected by the light from the light source, making the focus unstable in the period
just after switching on the power. It is recommended that images be projected continuously for at least 30 minutes
before the focus is adjusted.
r
Cautions when setting up the projector
f
Do not block the ventilation ports (intake and exhaust) of the projector.


