background image

ENGLISH - 85

About VueMagic

(The wireless module (Model No.: ET-WML100) of the optional accessories is required if the wireless LAN is connected.)

By using still image transfer application software “VueMagic”, you can transfer images to the projector when iPad /


 iPhone / iPod touch or Android terminals are connected to this projector through the wireless LAN.

Connecting with the VueMagic compatible device

1)  Check the SSID set in the projector.


f

Check the [SSID] in the [Expand] menu → [Network] → [Network information].

2)  Choose the SSID of this projector on the wireless LAN setting screen of the connected device, and 

then connect the wireless.

3)  Press the <MEMORY VIEWER/USB DISPLAY/NETWORK> button on the remote control to select 

[Network]. 


f

Switch to the network input.


f

Press the <INPUT/ENTER> button on the control panel and select the input source in the Input menu.


f

Check the login password (a four-digit number that is automatically generated) and the IP address (wireless LAN) which 

are displayed on the Network idle screen.

4)  Start the VueMagic mobile presenter application of the correspondent VueMagic devices.

5)  Choose the model No. of this projector in the projector list. 


f

The connection confirmation screen is displayed.

6)  Choose the display position.


f

The password entry screen is displayed.

7)  Enter the login password and click [OK].


f

The connected device screen is projected on the screen.

Note


f

When connecting to the iOS device or Android device, you must install the dedicated application “VueMagic” to the device. 

For detailed information, refer to the following web site. (Only in English.)


URL http://vuemagic.pixelworks.com

Disconnecting with the VueMagic compatible device

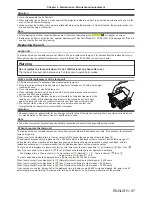
Close the VueMagic mobile presenter application of the device by clicking the 

.

Chapter 5   Operation of Function - About VueMagic

Summary of Contents for PT-LB332

Page 1: ... manual is intended for products manufactured from Nov 2015 and beyond Before operating this product please read the instructions carefully and save this manual for future use Before using your projector be sure to read Read this first x pages 2 to 9 Model No PT LW362 PT LW312 PT LB412 PT LB382 PT LB332 ENGLISH TQBJ0839 1 ...

Page 2: ... TO RAIN OR MOISTURE o AVERTISSEMENT RISQUE DE CHOC ÉLECTRIQUE NE PAS OUVRIR WARNUNG ZUR VERMEIDUNG EINES ELEKTRISCHEN SCHLAGES GERÄT NICHT ÖFFNEN ПРЕДУПРЕЖДЕНИЕ ОПАСНОСТЬ ПОРАЖЕНИЯ ЭЛЕКТРИЧЕСКИМ ТОКОМ НЕ ОТКРЫВАТЬ 경고 감전 위험이 있으므로 열지마십시오 The lightning flash with arrowhead symbol within an equilateral triangle is intended to alert the user to the presence of uninsulated dangerous voltage within the ...

Page 3: ... radiate radio frequency energy and if not installed and used in accordance with the instructions may cause harmful interference to radio communications However there is no guarantee that interference will not occur in a particular installation If this equipment does cause harmful interference to radio or television reception which can be determined by turning the equipment off and on the user is ...

Page 4: ...orrespond with the coloured markings identifying the terminals in your plug proceed as follows The wire which is coloured GREEN AND YELLOW must be connected to the terminal in the plug which is marked with the letter E or by the Earth symbol or coloured GREEN or GREEN AND YELLOW The wire which is coloured BLUE must be connected to the terminal in the plug which is marked with the letter N or colou...

Page 5: ...age the insulation z z If not using the projector for an extended period of time pull the power plug out from the wall outlet Pull the power plug out from the wall outlet and wipe it with a dry cloth regularly Do not handle the power plug and power connector with wet hands Failure to observe this will result in electric shocks Do not overload the wall outlet If the power supply is overloaded ex by...

Page 6: ...batteries improperly and refer to the following Failure to observe this will cause burns batteries to leak overheat explode or catch fire z z Do not use unspecified batteries z z Do not use chargeable batteries z z Do not disassemble dry cell batteries z z Do not heat the batteries or place them into water or fire z z Do not allow the and terminals of the batteries to come into contact with metall...

Page 7: ...locations exposed to direct sunlight or near stoves Do not place the projector where it may be affected by salt or corrosive gas Doing so may cause the projector to become faulty due to corrosion Do not place objects in front of the lens while the projector is being used Doing so can cause fire or damage to the object and can cause the projector to malfunction z z Extremely strong light is emitted...

Page 8: ...car expostas a temperaturas superiores a 100 C 212 F O gás liberado pela bateria pode irritar a garganta danificar o lacre do invólucro ou o vazamento provocar calor ruptura da blindagem e produzir fogo devido ao curto circuito dos terminais provocado internamente Evite o contato com o liquido que vazar das baterias Caso isto ocorra lave bem a parte afetada com bastante água Caso haja irritação co...

Page 9: ...ped independently by or for Panasonic Corporation 2 The software owned by third party and licensed to Panasonic Corporation 3 The software which is licensed under the GNU GENERAL PUBLIC LICENSE Version2 0 GPL V2 0 4 The software which is licensed under the GNU LESSER GENERAL PUBLIC LICENSE Version2 1 LGPL V2 1 5 Open source software which is not licensed under the GPL V2 0 and LGPL V2 1 The softwa...

Page 10: ... V Keystone Corner correction and Curved correction functions allow you to correct the image to fit the screen Reduced maintenance costs Maintenance costs are reduced by use of a recommended lamp replacement interval of 10 000 H 1 1 When Lamp control is constantly set to Eco 2 without switching to other modes This time is only the target for replacement and not the warranty time Quick Steps For de...

Page 11: ... by using the remote control 39 Using the automatic setup function 39 Switching the input signal 39 Switching the aspect ratio of the image 40 Using the keystone distortion and curved correction functions 40 Using the information function 40 Using the freeze function 41 Using the AV mute function 41 Using the presentation timer function 41 Switching the lamp power 41 Using the digital zoom functio...

Page 12: ... Termination of the Memory Viewer 78 USB Display function 79 When using Windows 79 When using Mac OS 80 Network connection 81 When connecting via wired LAN 81 When connecting via wireless LAN 82 About Presenter Light 84 About VueMagic 85 Web control function 86 Computer that can be used for setting 86 Accessing from the web browser 86 Chapter 6 Maintenance Power Warning Indicators 93 When an indic...

Page 13: ...ENGLISH 13 Chapter 1 Preparation This chapter describes things you need to know or check before using the projector ...

Page 14: ... 400 m 4 593 above sea level between 5 C 41 F and 35 C 95 F when using it at high altitudes between 1 400 m 4 593 and 2 700 m 8 858 above sea level and between 5 C 41 F and 30 C 86 F when using it at high altitudes between 2 700 m 8 858 and 3 000 m 9 843 above sea level f f Near high voltage power lines or near motors Doing so may interfere with the operation of the projector r rBe sure to ask a s...

Page 15: ... to a customer Do not tell your password in case you receive such an inquiry f f The connecting network must be secured by firewall or others f f Set a password for web control and restrict the users who can log in Cautions on use r rTo get a good picture quality f f Draw curtains or blinds over windows and turn off any lights near the screen to prevent outside light or light from indoor lamps fro...

Page 16: ...ed cables as well Notes on Using Wireless Connection Wireless connection function of the projector uses radio waves in the 2 4 GHz band A radio station license is not required but be sure to read and fully understand the following items before use The wireless module Model No ET WML100 of optional accessories must be installed when you want to use the wireless LAN function of this projector r r Do...

Page 17: ...third party may access your personal or corporate network without authorization and engage in the following types of behavior Retrieve personal and or secret information information leak Spread false information by impersonating a particular person spoofing Overwrite intercepted communications and issue false data tampering Spread harmful software such as a computer virus and crash your data and o...

Page 18: ...39 Attention f f After unpacking the projector discard the power cord cap and packaging material properly f f Do not use the supplied power cord for devices other than this projector f f For lost accessories consult your dealer f f Store small parts in an appropriate manner and keep them away from young children Note f f The type and number of the power cord depend on the country in which you purc...

Page 19: ...ojector are included in the PDF files Software Multi Projector Monitoring Control Software Windows This software allows you to monitor and control multiple projectors connected to the LAN Optional accessories Options Model No Ceiling Mount Bracket ET PKL100H for high ceilings ET PKL100S for low ceilings ET PKL420B Projector Mount Bracket Replacement Lamp Unit ET LAL500 Replacement Filter Unit ET R...

Page 20: ... PC adj and Auto Keystone correction at the same time x page 39 15 HDMI button Switches the HDMI signal to project 16 INFO button Displays the Info menu x page 74 17 KEYSTONE button Displays the Keystone menu x page 40 18 LAMP button Switches the settings of Lamp control Æ pages 41 57 19 P TIMER button Operate the P timer function x page 41 20 IMAGE button Switches the image mode x pages 42 53 21 ...

Page 21: ...tance of about 5 m 16 4 13 16 if pointed directly at the remote control signal receiver The remote control can control at angles of up to 30 vertically and 30 horizontally but the effective control range may be reduced f f If there are any obstacles between the remote control and the remote control signal receiver the remote control may not operate correctly f f You can operate the projector by re...

Page 22: ...e 40 7 INPUT ENTER w button Displays the input source menu Æ pages 38 49 Used to execute ENTER button when the menu screen appears Note f f The INPUT ENTER button on the control panel is functioned as the ENTER button when the menu screen is displayed The operating procedure of menu screen is described as Press the ENTER button in this manual in order to unify the control panel operation with the ...

Page 23: ...B Display function 8 USB A VIEWER WIRELESS terminal When using the Memory Viewer function insert the USB memory directly to this terminal x page 76 Please insert the wireless module Model No ET WML100 directly to this terminal when using the wireless LAN function x page 82 9 AUDIO IN 1 terminal This is the terminal to input computer audio signals 10 AUDIO IN 2 L R terminal This is the terminal to ...

Page 24: ...ber is assigned to each projector When you want to set the ID number at first you need to set the ID number of the projector and then set the ID number on the remote control The factory default ID number of the unit the projector and the remote control is set to ALL you can control with this setting If necessary please set the ID number to the remote control and the projector About how to set the ...

Page 25: ...ENGLISH 25 Chapter 2 Getting Started This chapter describes things you need to do before using the projector such as the setup and connections ...

Page 26: ...Project way Ceiling Rear Project way Front Parts for ceiling mount Optional This requires an optional ceiling mount bracket Be sure to use the Projector Mount Bracket together with the ceiling mount bracket for high ceilings or low ceilings Model No ET PKL100H for high ceilings ET PKL100S for low ceilings ET PKL420B Projector Mount Bracket f f Use only the ceiling mount brackets specified for this...

Page 27: ...aspect ratio 16 10 aspect ratio Screen diagonal SD Minimum distance LW Maximum distance LT Height position H Minimum distance LW Maximum distance LT Height position H Minimum distance LW Maximum distance LT Height position H 0 76 30 1 1 1 3 0 065 1 0 1 2 0 008 0 9 1 1 0 027 1 02 40 1 4 1 7 0 087 1 3 1 6 0 011 1 3 1 5 0 036 1 27 50 1 8 2 2 0 109 1 6 2 0 0 014 1 6 1 9 0 046 1 52 60 2 2 2 6 0 131 2 0...

Page 28: ... 81 150 5 4 6 5 0 327 4 9 5 9 0 041 4 8 5 8 0 137 5 08 200 7 3 8 7 0 435 6 6 7 9 0 054 6 4 7 7 0 181 6 35 250 9 1 10 9 0 544 8 2 9 9 0 068 8 0 9 6 0 227 7 62 300 10 9 13 1 0 653 9 9 11 9 0 082 9 6 11 6 0 272 For PT LB412 PT LB382 and PT LB332 All measurements below are approximate and may differ slightly from the actual measurements Unit m Projection size 4 3 aspect ratio 16 9 aspect ratio Screen ...

Page 29: ...reen width SW 0 8 SD 0 872 SD 0 848 SD Minimum distance LW 1 4369 SD 0 025 1 3045 SD 0 025 1 2692 SD 0 025 Maximum distance LT 1 7263 SD 0 025 1 5673 SD 0 025 1 5249 SD 0 025 For PT LW312 4 3 aspect ratio 16 9 aspect ratio 16 10 aspect ratio Screen height SH 0 6 SD 0 490 SD 0 530 SD Screen width SW 0 8 SD 0 872 SD 0 848 SD Minimum distance LW 1 4332 SD 0 02327 1 3008 SD 0 02327 1 2660 SD 0 02327 M...

Page 30: ...djustable foot to extend it as shown in the figure and rotate it in the opposite direction to contract it Attention f f Heated air comes out of the air exhaust port while the lamp is lit Do not touch the air exhaust port directly when you adjust the adjustable foot f f If keystone distortion occurs on the projected image perform Keystone from the Expand menu x page 62 Adjustable range Adjustable f...

Page 31: ...m connection cable to suit the device f f Video signals containing too much jitter may cause the images on the screen to randomly wobble or wafture In this case a time base corrector TBC must be connected f f The projector accepts Video signals S video signals and YCB CR YPB PR signals and analog RGB signals synchronous signals are TTL level and digital signal f f Some computer models or graphics ...

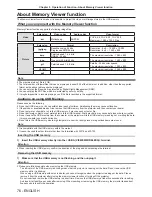
Page 32: ...ecting a VCR A VCR with built in time base corrector TBC A time base corrector TBC between the projector and the VCR f f If nonstandard burst signals are connected the image may be distorted In such case connect the time base corrector TBC between the projector and the external devices Note f f For an HDMI cable use an HDMI High Speed cable that conforms to HDMI standards If a cable that does not ...

Page 33: ...the projector using the computer with the resume feature last memory you may have to reset the resume feature to operate the projector f f When the VARIABLE AUDIO OUT terminal is connected with cable the sound will not be output from the built in speaker f f The video signal from the DVD D terminal of the external device such as a computer is connect to the HDMI IN terminal by using a conversion c...

Page 34: ...34 ENGLISH Chapter 3 Basic Operations This chapter describes basic operations to start with ...

Page 35: ...N G STANDBY R informs you the status of the power Confirm the status of the power indicator ON G STANDBY R before operating the projector Indicator status Status No illumination The projector is turned off The power cord is unplugged Red Lighting The projector is turned off In standby mode Blinking The projector is in warming up after turning on the power The projector is in projected state after ...

Page 36: ...ars If the PIN code of the projector has been set the PIN code input screen will be displayed after the completion of the startup display Please enter a PIN code as the following steps 1 Press the ENTER button 2 Press as to select the number from 0 to 9 3 Press the ENTER button f f The fixed number changes to and the cursor moves to the next frame 4 Repeat the above steps to enter a three digit nu...

Page 37: ...he image to match the screen with the zoom ring 7 Adjust the focus with the focus ring Powering Off the Projector 1 2 3 1 2 1 Press the power v b button on the control panel or on the remote control f f The following message appears 2 Press the power v b button on the control panel or on the remote control again f f Projection of the image will stop and the power indicator ON G STANDBY R blinks in...

Page 38: ...spect x page 51 How to adjust the state of the image If the projected image or the position is not correct when the positioning of the projector and the screen is correctly installed adjust the focus and zoom 1 Adjust the projection angle f f Install the projector on a flat surface and parallel to the screen so that the projected screen is rectangular f f If the screen is tilted downward extend th...

Page 39: ...malfunction f f If you press any button on the remote control during the automatic adjustment the automatic adjustment will be canceled f f If the automatic setup function is used while moving images are being input the adjustment may not be performed properly even for an RGB signal that can use automatic setup Switching the input signal You can switch the input signals to project buttons 1 Press ...

Page 40: ...ction or Reset value 3 Press the ENTER button f f The individual adjustment screen of the selected function is displayed 4 Press asqw to adjust Note f f For more details refer to the Expand menu Keystone x page 62 f f Press the KEYSTONE button on the control panel or on the remote control when the H V Keystone Corner correction or Curved correction individual adjustment screen is displaying the in...

Page 41: ...f f The audio and image turn on Using the presentation timer function You can operate the P timer function Presentations etc can be performed while checking the elapsed time button 1 Press the P TIMER button on the remote control f f The count is started f f The elapsed time is displayed at the bottom right of the projected image 2 Press the P TIMER button again f f The count is stopped 3 Press th...

Page 42: ...ons on the control panel to move the display position during zoom in Controlling the volume of the speaker You can adjust the volume of the audio output from the build in speaker and the VARIABLE AUDIO OUT terminal buttons 1 Press the VOLUME or VOLUME button on the remote control VOLUME Increases the volume VOLUME Decreases the volume Switching the image mode This function allows you to switch the...

Page 43: ... numbers of the projector are set by pressing the IMAGE button one time to six times while holding down the MENU button f f The number of times you press the IMAGE button corresponds to the desired ID code number The number of times to press the IMAGE button is as follows Code 1 Once Code 2 Twice Code 3 3 times Code 4 4 times Code 5 5 times Code 6 6 times f f The ID code is changed when the MENU b...

Page 44: ...44 ENGLISH Chapter 4 Settings This chapter describes the settings and adjustments you can make using the on screen menu ...

Page 45: ...f The selected item is highlighted in orange 3 Press the ENTER button f f The submenu is displayed and submenu items become selectable there is no lower menu under the submenu there is lower menu under the submenu f f Please perform step 4 f f If there is lower menu under the submenu will be displayed except for System in Display menu f f Please perform step 7 4 Press as to select a sub menu item ...

Page 46: ...the ENTER button or the MENU button f f The changed settings or the adjusted value is confirmed Note f f Pressing the MENU button while the menu screen is displayed returns to the previous menu or exits the menu screen f f Some items may not be adjusted or used for certain signal formats to be input to the projector The menu items that cannot be adjusted or used are shown in gray characters and th...

Page 47: ...ndard 53 Contrast 32 53 Brightness 32 53 Color 1 32 54 Tint 1 32 54 Color temp 2 Mid 54 Red 32 54 Green 32 54 Blue 32 54 Sharpness 8 55 Daylight View Off 55 1 Only for video S video and Component signals 2 Only for computer signals and HDMI signals Note f f The factory default settings may vary depending on the image mode Setting Sub menu item Factory default Page On start Off 56 Standby mode Eco ...

Page 48: ...ansition Effect Slide Right 72 Sort Order Name Order 72 Rotate No Rotate 72 Best Fit Off 73 Repeat Off 73 Apply 73 Info Details x page 74 Note f f Some items may not be adjusted or used for certain signal formats to be input to the projector The menu items that cannot be adjusted or used are shown in gray characters and they cannot be selected f f Sub menu items and factory default settings differ...

Page 49: ...button to switch to Computer 1 Component input COMPUTER 2 Switch to Computer 2 input HDMI Switch to HDMI input VIDEO Press this button to switch to Video S video input MEMORY VIEWER USB DISPLAY NETWORK Press this button to switch to Memory Viewer USB Display Network input When using the control panel 1 Press the INPUT ENTER button f f The Input screen is displayed 2 Press as to select one item and...

Page 50: ... Auto PC adj cannot be operated when 480i 576i 480p 576p 720p 1080i or 1080p is selected in the Display menu System or when the signal is coming from the HDMI IN terminal Fine sync Only for computer signals input You can adjust to achieve an optimal image when there is a flickering image or smeared outlines 1 Press as to select Fine sync 2 Press the ENTER button 3 Press as to adjust the level f f ...

Page 51: ...ded in the digital zoom function H Size Only for computer signals input Use this function to adjust and minimize the effect of interference caused by projection of patterns consisting of vertical stripes The projection of the vertical striped pattern may cause cyclic patterns noise Adjust so that the amount of interference is at a minimum 1 Press as to select H Size 2 Press the ENTER button 3 Pres...

Page 52: ... background screen when no input signal is detected 1 Press as to select Background display 2 Press the ENTER button 3 Press as to switch the item f f The items will switch each time you press the button Blue Displays the entire projection area in blue Black Displays the entire projection area in black System Set it to match the resolution of the computer input signals Set the color system of Vide...

Page 53: ...cting on a black board green board such as classroom Colorboard The picture becomes suitable for projecting on a color board To select Colorboard press the ENTER button the Colorboard screen is displayed To select Red Blue Green or Yellow and press the ENTER button User image The picture quality is displayed after the manual adjustment of Color adjust 4 Press the ENTER button Contrast You can adju...

Page 54: ...e level Operation Adjustment Adjustment range Press the a button Adjusts skin tone toward greenish color 0 63 Press the s button Adjusts skin tone toward reddish purple Color temp Only for computer signals and HDMI signals You can switch the color temperature if the white areas of the projected image are bluish or reddish 1 Press as to select Color temp 2 Press the ENTER button 3 Press as to switc...

Page 55: ...per 0 15 Press the s button Contours become softer Daylight View The Daylight View Lite function improves the vividness of the image even if it is projected under a bright light 1 Press as to select Daylight View 2 Press the ENTER button 3 Press as to switch the item f f The items will switch each time you press the button f f You can also press the DAYLIGHT VIEW button on the remote control x pag...

Page 56: ... mode Set the power consumption during standby Change the setting whether or not use the network function 1 Press as to select Standby mode 2 Press the ENTER button 3 Press as to switch the item f f The items will switch each time you press the button Eco Restricts some functions in the standby mode to reduce power consumption Normal Does not restrict network function and serial communication func...

Page 57: ...equired Note f f Set it to Eco 2 rather than Eco 1 set it to Eco 1 rather than Normal when you want to reduce power consumption extend the life of lamp and reduce operation noise Cooling fast Switch the cooling fan speed when the power is turned off and shorten the cooling time of the cooling fan 1 Press as to select Cooling fast 2 Press the ENTER button 3 Press as to switch the item f f The items...

Page 58: ... control Projector Disables the button operations on the control panel Remote control Disables the button operations on the remote control Iris Aperture correction and signal compensation are performed automatically based on the image to result in an image of optimum contrast 1 Press as to select Iris 2 Press the ENTER button 3 Press as to switch the item f f The items will switch each time you pr...

Page 59: ...h as a blu ray player is connected to the HDMI IN terminal 0 1023 Select when the DVI D terminal output of an external device such as a computer is connected to the HDMI IN terminal via a conversion cable or similar cable Select also when the HDMI terminal output of a computer or other device is connected to the HDMI IN terminal Note f f The optimal setting varies depending on the output setting o...

Page 60: ... control button names etc are displayed in the selected language f f The language can be changed to English German French Italian Spanish Portuguese Dutch Swedish Finnish Norwegian Danish Polish Hungarian Czech Russian Turkish Arabic Kazakh Vietnamese Chinese Korean Japanese and Thai Note f f The on screen display language of the projector is set to English by default and when Expand Factory defau...

Page 61: ...lect Auto PC adj 4 Press the ENTER button 5 Press as to switch the item f f The items will switch each time you press the button On Enables the automatic execution of Auto PC adj function Off Disables the automatic execution of Auto PC adj function Auto keystone This function is used to set the automatic execution of Auto keystone function 1 Press as to select Auto setup 2 Press the ENTER button f...

Page 62: ... cord 1 Press as to select Keystone 2 Press the ENTER button f f The Keystone screen is displayed 3 Press as to select Keystone 4 Press the ENTER button 5 Press as to switch the item f f The items will switch each time you press the button Reset When Standby mode is set to Eco plug out the power cord or turn off the projector the keystone correction will be canceled When Standby mode is set to Nor...

Page 63: ...n Upper left Upper right Lower left Lower right Note f f The white arrows indicate that there is no correction f f A red arrow indicates the direction of correction f f An arrow disappears at the maximum correction Curved correction 1 Press as to select Keystone 2 Press the ENTER button f f The Keystone screen is displayed 3 Press as to select Curved correction 4 Press the ENTER button f f The Cur...

Page 64: ...e Curved correction Y Offset cannot be adjusted independently After adjusting the Curved correction X Y Gain at the beginning please adjust the Curved correction X Offset and the Curved correction Y Offset f f Press the KEYSTONE button on the control panel or on the remote control when the H V Keystone Corner correction or Curved correction individual adjustment screen is displaying the individual...

Page 65: ...ble when the captured image is not registered Capture Set the user logo display when the projector start up 1 Press as to select Logo 2 Press the ENTER button f f The Logo screen is displayed 3 Press as to select Capture 4 Press the ENTER button 5 A confirmation screen is displayed press as to select Yes and then press the ENTER button f f After capturing the image the Logo select is set to User T...

Page 66: ...e ENTER button after moving the cursor to Cancel to return the menu screen f f If you entered an incorrect digit the digit will turn red and reset and then re enter a digit Logo PIN code change Change the Logo PIN code 1 Press as to select Logo 2 Press the ENTER button f f The Logo screen is displayed 3 Press as to select Logo PIN code change 4 Press the ENTER button f f The Logo PIN code input sc...

Page 67: ...e next digit iii Repeat the above steps and enter a three digit number f f Move the cursor to Set after fixing the three digit number iv Press the ENTER button f f Return to the Security screen 7 Press as to switch the item f f The items will switch each time you press the button On The PIN code screen will be displayed when turn on the projector The projector cannot be operated without entering t...

Page 68: ... to work Ready Countdown The time from the state which the management function is working to the standby mode can be set to 0 30 minutes when Power management is set to Ready The increment is 1 minute Setting Timer in step 3 The time that the Power management starts to work can be set to 1 30 minutes The increment is one minute 1 Press as to select Timer 2 Press the ENTER button 3 Press as to swit...

Page 69: ... and then press the ENTER button Test pattern Displays the Test pattern built in to the projector Settings of position size and other factors will not be reflected in test patterns Make sure to display the input signal before performing various adjustments 1 Press as to select Test pattern 2 Press the ENTER button f f The Test pattern screen is displayed 3 Press as to switch the item Off Test patt...

Page 70: ...is already functioning f f Consult your network administrator regarding the IP address Subnet and Gateway Network information 1 Press as to select Network 2 Press the ENTER button f f The Network screen is displayed and then confirm the following items MAC address Displays the MAC address of this projector IP address Displays the current IP address of this projector SSID 1 Displays the SSID charac...

Page 71: ... as to select Factory default 2 Press the ENTER button f f The Return to Factory default screen is displayed 3 Press as to select Yes and then press the ENTER button f f The OK screen is displayed 4 Press as to select Yes and then press the ENTER button f f The Please wait message will appear and resetting operation will start and after completing the operation the Please wait message will disappe...

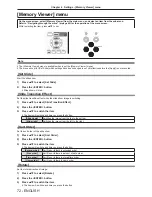
Page 72: ...select Slide Transition Effect 2 Press the ENTER button 3 Press as to switch the item f f The items will switch each time you press the button Slide down Switches the image from the top to the bottom Slide right Switches the image from the left to the right Sort Order Set the sort order of the slide show 1 Press as to select Sort Order 2 Press the ENTER button 3 Press as to switch the item f f The...

Page 73: ...fit with the aspect of the projected screen Off Displays in the normal pixels of the image Repeat Set whether or not to play the slide show repeatedly 1 Press as to select Repeat 2 Press the ENTER button 3 Press as to switch the item f f The items will switch each time you press the button On Repeat broadcast the first file after the last file is broadcasted Off Return to the thumbnail display aft...

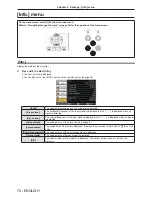
Page 74: ...ency of the input signal is displayed in kHz is displayed when no signal is detected V sync freq The vertical frequency of the input signal is displayed in Hz is displayed when no signal is detected Lamp status The setting status of Lamp control is displayed Lamp counter The usage time of the lamp is displayed Displays the converted runtime when Eco 1 is using Power management The setting status o...

Page 75: ...ENGLISH 75 Chapter 5 Operation of Function This chapter describes the operation methods of some functions ...

Page 76: ...projector and then contact your dealer f f Do not put water chemical or oil to the USB memory It may cause short out or fire f f Do not put foreign objects or put metal objects to the USB terminal Static electricity may cause data loss or data corruption f f Do not remove the USB memory from the computer or the projector while the USB memory is reading out or writing the data It may cause data los...

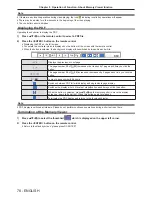
Page 77: ...ally when Sort Order and Slide Transition Effect and so on of Memory Viewer menu are set to the special setting 1 Press asqw on the remote control to select a file 2 Press the MENU button to select the Memory Viewer Set Slide 3 Press the ENTER button on the remote control f f The picture will display on the full screen f f Press the ENTER button to return to the thumbnail screen Note f f If you pr...

Page 78: ...r decreases by 1 page each time you click the button The page number of 5 5 GO1 1 10 increases or decreases by 5 pages each time you click the button Jumps to page number directly Switches between PDF full width display and single whole page display Switches the display size in 3 levels of magnification each time you click the button When the button is selected press asqw on the remote control to ...

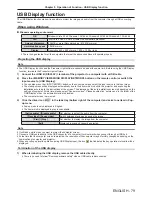
Page 79: ...e instructions of the screen The displaying of the auto installation screen is depending on the settings of computer At this time please select Run autorun exe Please double click autorun exe in the folder of the USB Display when the automatic startup is disabled f f The computer screen is projected 3 Click the driver icon in the task tray bottom right of the computer and select one item in Pop up...

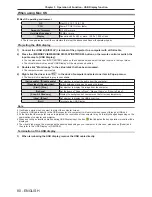
Page 80: ...Disable audio Set whether to output the audio from the computer Play video Pause video Switch between playing and pausing the image Start Stop Set whether to display the image from the computer Options Set the items of Keep in Dock Open at Login or Show in Finder Show All Windows Display the background of computer on the full screen temporarily Hide Show Set whether to display the USB driver icon ...

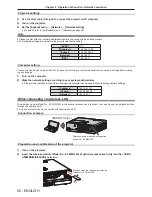
Page 81: ...ch or Android terminals are connected to this projector through the wireless LAN Refer to VueMagic x page 85 for details f f PJLink By using PJLink protocol you can send inquiries about the operations or status of the projector from a computer Refer to Using the PJLink protocol x page 102 for details When connecting via wired LAN Connection example LAN cable straight LAN cable straight Hub Compute...

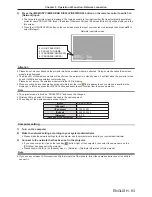
Page 82: ...e network setting according to your system administrator f f If the projector settings are the default settings the computer can be used with the following network settings IP address 192 168 1 101 Subnet 255 255 255 0 Gateway 192 168 1 1 When connecting via wireless LAN The wireless module Model No ET WML100 of the optional accessories is required if you want to use the network function through t...

Page 83: ...while the LED is blinking f f When executing an invalid operation during network input the icon that indicates the key operation is invalid will be displayed In this case press the MENU button and execute each function from the menu operation Note f f The projector name is fixed as PROJECTOR and cannot be changed f f Wireless LAN and wired LAN cannot be used in the same segment f f The settings of...

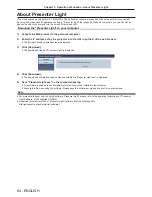
Page 84: ...ownload f f The download screen of Presenter Light is displayed 4 Click Download f f The download confirmation screen of the executable file Presenter Light exe is displayed 5 Save Presenter Light exe on the computer desktop f f This software is used as the executable file format It cannot be installed in the computer f f Execute this file when using the software Please save this software or make ...

Page 85: ... panel and select the input source in the Input menu f f Check the login password a four digit number that is automatically generated and the IP address wireless LAN which are displayed on the Network idle screen 4 Start the VueMagic mobile presenter application of the correspondent VueMagic devices 5 Choose the model No of this projector in the projector list f f The connection confirmation scree...

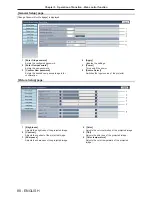
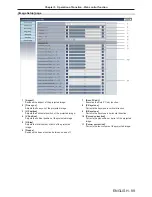
Page 86: ...e web browser 1 Activate the Web browser in the personal computer 2 Enter the IP address set by the projector into the URL input field of the web browser f f The Network Display System screen is displayed 3 Click Login and enter the password in the Password column f f The factory default setting of the user name is admin fixed and the password is admin 4 Click Login f f The System Status page is d...

Page 87: ...tem 6 Alert Setup The Alert Setup page is displayed by clicking this item 7 Mail Setup The Mail Setup page is displayed by clicking this item 8 Network Setup The Network Setup page is displayed by clicking this item System status page Display the status of the projector for the following items 1 Model Name Displays the model No of the projector 2 Versions Displays the version of the firmware of th...

Page 88: ... the power 6 Source Select Switches the input source of the projector Picture Setup page 1 Brightness Adjusts the brightness of the projected image 2 Contrast Adjusts the contrast of the projected image 3 Sharpness Adjusts the sharpness of the projected image 4 Color Adjusts the color saturation of the projected image 5 Tint Adjusts the skin tone of the projected image 6 Color temperature Adjusts ...

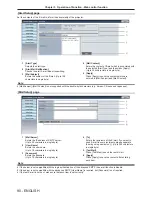
Page 89: ...e Adjusts the total number of dots of the projected image 6 Freeze Switches the freeze function between on and off 7 Auto PC adj Executes the Auto PC adj function 8 V Keystone Corrects the keystone in vertical direction 9 H Keystone Corrects the keystone in horizontal direction 10 Curved correction Corrects the pincushion or barrel of the projected image 11 Corner correction Corrects the four corn...

Page 90: ...e 1 Mail Server Enters the IP address of SMTP server Up to 39 characters in single byte 2 User Name Enters the user name Up to 19 characters in single byte 3 Password Enters the password Up to 19 characters in single byte 4 To Enters the recipients of the E mail If you want to send E mail to some recipients please separate them by using semicolon Up to 299 characters in single byte 5 Test Mail Cli...

Page 91: ...ter string will be able to change when the projector is connected Channel Selects the channel from 1 11 for use Access Point Encryption Selects Disable when encryption is disabled Selects WPA2PSK_AES when encryption is enabled Access Point key Enters the encryption key 8 to 63 alphanumerics Checks Show key to make the characters visible 3 Apply Updates the settings Note f f Changing LAN settings w...

Page 92: ...92 ENGLISH Chapter 6 Maintenance This chapter describes methods of inspection when there are problems maintenance and replacement of the units ...

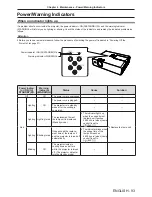
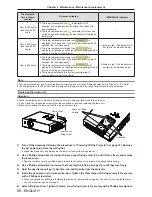
Page 93: ... is plugged The projector is in standby mode after the cooling is completed Lighting Lighting in red The replacement time of the lamp unit is displayed Standby mode f f The indicator lights up when the usage time of the lamp unit reaches 6 000 hours when Lamp control is set to Eco 1 f f Replace the lamp unit Lighting Blinking in red It has exceed the replace ment time of the lamp unit and the proj...

Page 94: ...e until the luminous lamp cools off and then turn on the power f f There is a problem in the lamp circuit Have the source voltage been changed Drop f f Turn off the projector and unplug the AC power cord and consult your dealer Blinking Off Internal temperature is high Warning When the internal temperature rises further and the air filter warning icon 1 is displayed on the screen after a while the...

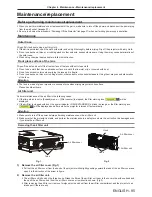
Page 95: ... its surface Please handle with care Air filter unit Perform maintenance of the air filter in the following cases f f If the time which is set in Expand menu Filter counter is elapsed the filter warning icon will be displayed f f If the air filter is clogged with dust the power indicator ON G STANDBY R blinks in orange or the filter warning icon will be displayed and after a while the projector is...

Page 96: ...e order f f Make sure that the air filter cover is closed tightly Resetting the filter counter Be sure to reset the filter counter after cleaning the air filter unit 1 Connect the power plug press the power v b button on the control panel or on the remote control 2 Press the MENU button to display the main menu then press as to select Expand 3 Press the INPUT ENTER button on the control panel or t...

Page 97: ...cury When disposing of used lamp units contact your local authorities or dealer for correct methods of disposal Attention f f Panasonic takes no responsibility for any damage or malfunction of the product resulting from use of lamp units which are not manufactured by Panasonic Use only specified lamp units Note f f The model numbers of accessories and optional accessories are subject to change wit...

Page 98: ...he usage period of 6 000 hours which is displayed in Lamp counter is a rough estimate and is not guaranteed Replacing the Lamp unit Attention f f When the projector is mounted on a ceiling do not work with your face close to the projector f f Do not remove or loosen the screws other than specified ones when replacing the lamp unit f f Make sure to attach the lamp unit and the lamp cover securely L...

Page 99: ...e power before replacing the air filter unit f f Make sure that the projector is stable and perform the replacement in a safe place where the unit will not be damaged even if you drop the air filter unit 1 Remove the air filter cover f f Refer to Removing the air filter unit x page 95 2 Remove the air filter unit f f Refer to Removing the air filter unit x page 95 3 Attach the optional Replacement...

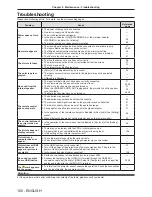
Page 100: ...een inserted correctly 24 f f The remote control signal receptor on the projector may be obstructed 21 f f The remote control unit may be out of the operation range 21 f f Strong light such as fluorescent shine onto the signal receptor 21 f f Is the operation of the remote control set to disabled in Key lock of the Setting menu 58 f f When different codes are set on the projector and on the remote...

Page 101: ...ENGLISH 101 Chapter 7 Appendix This chapter describes specifications and after sales service for the projector ...

Page 102: ...Error status query 1st byte Fixed at 0 f f 0 No error known f f 1 Warning f f 2 Error 2nd byte Indicates lamp errors range 0 2 3rd byte Indicates temperature errors range 0 2 4th byte Fixed at 0 5th byte Fixed at 0 6th byte Fixed at 0 LAMP Lamp status query 1st digits 1 5 digits Lamp cumulative operating time 2nd digit 0 Lamp off 1 Lamp on INST Input selection list query 11 12 21 22 23 31 41 51 52...

Page 103: ...nal name Contents NC TXD Transmitted data RXD Received data NC GND Earth NC CTS Connected internally RTS NC Communication conditions Factory default Signal level RS 232C compliant Sync method Asynchronous Baud rate 19 200 bps Parity None Character length 8 bits Stop bit 1 bit X parameter None S parameter None Connecting terminals on projector D Sub 9p female Computer Communication cable straight D...

Page 104: ...mp starts illuminating there may be a delay in response or the command may not be executed Try sending or receiving any command after 60 seconds f f When transmitting multiple commands be sure to wait until 0 5 seconds has elapsed after receiving the response from the projector before sending the next command When transmitting a command which does not need a parameter a colon is not necessary Note...

Page 105: ...eter PON Power on To check if the power is on use the Power query command POF Power standby IIS Switching the input signal VID SVD RG1 RG2 HD1 CP1 MV1 UD1 NWP VIDEO S VIDEO RGB1 RGB2 HDMI COMPONENT MEMORY VIEWER USB DISPLAY NETWORK AUU Volume up AUD Volume down OSH AV mute function Sending the command switches on off Do not switch on off in a short period of time AMT Mute function 0 Off 1 On QPW P...

Page 106: ...0 48 0 74 3 R Y H 1125 1080 25p 1 920 x 1 080 28 1 25 0 74 3 R Y H 1125 1080 30p 1 920 x 1 080 33 8 30 0 74 3 R Y H 1125 1080 60p 1 920 x 1 080 67 5 60 0 148 5 R Y H l 1125 1080 50p 1 920 x 1 080 56 3 50 0 148 5 R Y H l VGA 640 x 480 31 5 59 9 25 2 R H l l 640 x 480 35 0 66 7 30 2 R H 640 x 480 37 9 72 8 31 5 R H l l 640 x 480 37 5 75 0 31 5 R H l l 640 x 480 43 3 85 0 36 0 R H SVGA 800 x 600 35 2...

Page 107: ...2 Where marked l signals indicates in Plug and Play is compatible with EDID of projector Unmarked signals in Plug and Play may also be compliant if input terminals are written in the format list Where Plug and Play is unmarked and nothing is written in the format list difficulties in projecting image may occur even when computer and projector appear to have same resolution 3 Pixel Repetition signa...

Page 108: ...gnal 525i 480i Horizontal 15 73 kHz Vertical 59 94 Hz 625i 576i Horizontal 15 63 kHz Vertical 50 Hz 525p 480p Horizontal 31 47 kHz Vertical 59 94 Hz 625p 576p Horizontal 31 25 kHz Vertical 50 Hz 750 720 60p Horizontal 45 00 kHz Vertical 60 Hz 750 720 50p Horizontal 37 50 kHz Vertical 50 Hz 1125 1080 60i Horizontal 33 75 kHz Vertical 60 Hz 1125 1080 50i Horizontal 28 13 kHz Vertical 50 Hz 1125 1080...

Page 109: ...WML100 compatible USB B DISPLAY USB connector type B x 1 only for USB Display SERIAL IN 1 D sub 9 pin RS 232C compliant for computer control use LAN 1 for RJ 45 network connection PJLink compatible 10Base T 100Base TX Power cable length 1 8 m 70 7 8 Cabinet Molded plastic Dimensions Width 335 mm 13 3 16 Height 96 mm 3 25 32 when adjustable foot shortened Depth 252 mm 9 29 32 Weight Approx 2 9 kg 6...

Page 110: ...ISH Dimensions Unit mm inch 335 13 3 16 87 3 7 16 250 9 27 32 252 9 29 32 61 2 13 32 9 11 32 96 3 25 32 167 5 6 19 32 68 5 2 11 16 55 2 5 32 Actual dimension may differ by product Chapter 7 Appendix Dimensions ...

Page 111: ...rque wrench to tighten bolts to their specified tightening torques Do not use electric screwdrivers or impact screwdrivers f f Read the Installation Instructions for the Ceiling Mount Bracket for Projectors for details f f The model numbers of accessories and optional accessories are subject to change without prior notice Bottom View Model No of Ceiling mount bracket ET PKL100H for high ceilings E...

Page 112: ...nserting and Removing batteries 24 Installation mode 26 Iris 58 K Key lock 58 Keystone 62 KEYSTONE button Control panel 22 Remote control 20 40 L LAMP button Remote control 20 41 Lamp control 57 Lamp unit 97 Language 60 List of compatible signals 106 Logo 64 M Main menu 46 Maintenance replacement 95 Making adjustments and selections 37 Memory Viewer menu 72 MEMORY VIEWER USB DISPLAY NETWORK button...

Page 113: ...on and the Directives 2002 96 EC and 2006 66 EC By disposing of these products and batteries correctly you will help to save valuable resources and prevent any potential negative effects on human health and the environment which could otherwise arise from inappropriate waste handling For more information about collection and recycling of old products and batteries please contact your local municip...

Reviews: