Chapter 4
Settings — [NETWORK] menu
206 - ENGLISH
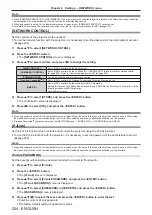
5) Press
as
to select [NOTIFIED IP ADDRESS 1], [NOTIFIED IP ADDRESS 2], [NOTIFIED IP ADDRESS
1(IPv6)], or [NOTIFIED IP ADDRESS 2(IPv6)].
f
Enter the IP address of the computer to be notified of the status of the projector.
[Art-Net]
Set the Art-Net function.
f
To use the Art-Net function with the projector, it is necessary to set the password of the administrator account.
(
x
page 202)
Note
f
When a password is not set for the administrator account (when blank), the network function of the projector cannot be used. When using
the web control function or the communication control via LAN (including operation by application software), set a password.
f
The Art-Net function cannot be used using the “IPv6” protocol. Set the [NETWORK] menu
→
[WIRED LAN]
→
[IP VERSION] to either [IPv4]
or [IPv4 & IPv6] and assign the IP address for “IPv4”.
[Art-Net SETUP]
Make settings to use the Art-Net function.
1) Press
as
to select [Art-Net].
2) Press the <ENTER> button.
f
The
[Art-Net]
screen is displayed.
3) Press
as
to select [Art-Net SETUP].
4) Press
qw
to switch the item.
f
The items will switch each time you press the button.
[OFF]
Disables the Art-Net function.
[ON(2.X.X.X)]
Enables the Art-Net function and sets the IP address to 2.X.X.X.
[ON(10.X.X.X)]
Enables the Art-Net function and sets the IP address to 10.X.X.X.
[ON(MANUAL)]
Enables the Art-Net function and uses the IP address set in [WIRED LAN].
f
Proceed to Step
5)
when anything other than [OFF] is selected.
5) Press the <ENTER> button.
f
The
[Art-Net SETUP]
screen is displayed.
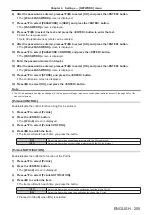
6) Press
as
to select an item, and press
qw
to switch the setting.
[NET]
Enter [NET] to be used when the projector processes Art-Net.
[SUB NET]
Enter [SUB NET] to be used when the projector processes Art-Net.
[UNIVERSE]
Enter [UNIVERSE] to be used when the projector processes Art-Net.
[START ADDRESS]
Enter [START ADDRESS] to be used when the projector processes Art-Net.
7) Press
as
to select [STORE], and press the <ENTER> button.
f
The confirmation screen is displayed.
8) Press
qw
to select [OK], and press the <ENTER> button.
Note
f
If [ON(2.X.X.X)] or [ON(10.X.X.X)] is selected, IP address is calculated and set automatically.
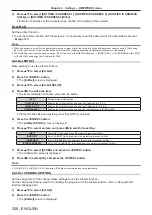
[Art-Net CHANNEL SETTING]
Set the assignment of the channel. Make settings to use the Art-Net function.
For the channel definitions used for controlling the projector with the Art‑Net function, refer to “Using Art‑Net
function” (
x
page 269).
1) Press
as
to select [Art-Net].
2) Press the <ENTER> button.
f
The
[Art-Net]
screen is displayed.

