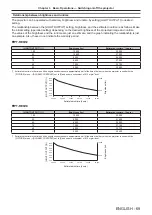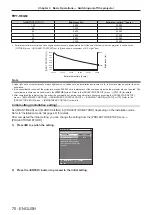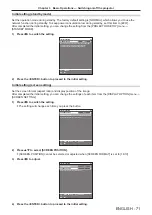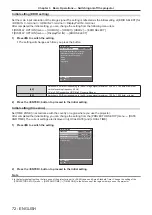
Chapter 3
Basic Operations — Projecting
78 - ENGLISH
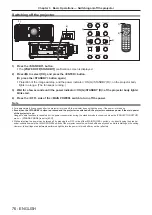
Switching the input directly with the control panel
The input of the image to project can be switched by directly specifying it with the input selection button on the
control panel.
1)
Press the input selection button (<HDMI 1/2>, <DISPLAYPORT>, <SLOT>).
<HDMI 1/2>
Switches the input to HDMI.
The image of the signal input to the <HDMI IN 1> terminal or the <HDMI IN 2> terminal is projected.
Switches to the other input when one input has already been selected.
<DISPLAYPORT>
Switches the input to DisplayPort.
The image of the signal input to the <DisplayPort IN> terminal is projected.
<SLOT>
Switches the input to SDI, DIGITAL LINK, PressIT, or SLOT.
Displays the image from the Function Board installed in the slot.
Attention
f
Images may not be projected properly depending on the external device, or the Blu-ray disc or DVD disc, to be played back.
Depending on the selected input, set the [PICTURE] menu
→
[SYSTEM SELECTOR] and the [DISPLAY OPTION] menu
→
[SLOT IN].
f
Confirm the aspect ratio of the projection screen and the image, and switch to an optimum aspect ratio from the [POSITION] menu
→
[ASPECT].
Note
f
The operation when the <HDMI 1/2> button, <DISPLAYPORT> button or <SLOT> button is pressed can be fixed to operation to switch to
the specified input using the [SECURITY] menu
→
[CONTROL DEVICE SETUP].
f
When the projector is in standby mode, current input selection status cannot be changed even if the input selection button on the remote
control or the control panel is pressed.
Switching the input by displaying the input selection screen
The input of the image for projection can be selected by displaying the input selection screen.
1)
Press the <INPUT MENU> button on the remote control or control panel.
f
Press the input selection button on the remote control and directly specify the input of the image to project.
The following input selection screen is an example when the optional DIGITAL LINK Terminal Board (Model
No.: TY-SB01DL) is installed in <SLOT>.
ENTER
SET
SELECT
HDMI2
DIGITAL LINK [SLOT]
DisplayPort
HDMI1
INPUT SELECT
2)
Press the <INPUT MENU> button again.
f
The input will switch each time you press the <INPUT MENU> button.
Note
f
Input can be switched by pressing
as
to select the input of the image for projection and pressing the <ENTER> button while the input
selection screen is displayed.
f
If the optional DIGITAL LINK output supported device (Model No.: ET-YFB100G, ET-YFB200G) is connected to the <DIGITAL LINK IN/LAN>
terminal of the optional DIGITAL LINK Terminal Board (Model No.: TY-SB01DL) installed in the slot, the input selection menu for the DIGITAL
LINK output supported device is displayed when the <ENTER> button is pressed while the DIGITAL LINK input is selected in the input
selection screen.
f
If the optional DIGITAL LINK output supported device (Model No.: ET-YFB100G, ET-YFB200G) is connected to the <DIGITAL LINK IN/LAN>
terminal of the optional DIGITAL LINK Terminal Board (Model No.: TY-SB01DL) installed in the slot, the DIGITAL LINK logo and the input
name selected in the DIGITAL LINK output supported device are displayed in the display section of the [DIGITAL LINK] in the input selection
screen.
f
The display for the input varies depending on the installed Function Board.
g
[SDI [SLOT]]: 12G-SDI Terminal Board (Model No.: TY-SB01QS)
g
[DIGITAL LINK [SLOT]]: DIGITAL LINK Terminal Board (Model No.: TY-SB01DL)
g
[PressIT [SLOT]]: Wireless Presentation System Receiver Board (Model No.: TY-SB01WP)
g
[SLOT]: Function Board by other manufacturers
f
PressIT is a nickname of “Wireless Presentation System”.

