of DVD using Self-Diagnostic function. If the version is different than that indicated on the
Firmware Disc, update it using the Firmware Disc. Refer to "
HOW TO UPDATE THE FIRMWARE
OF DVD
."
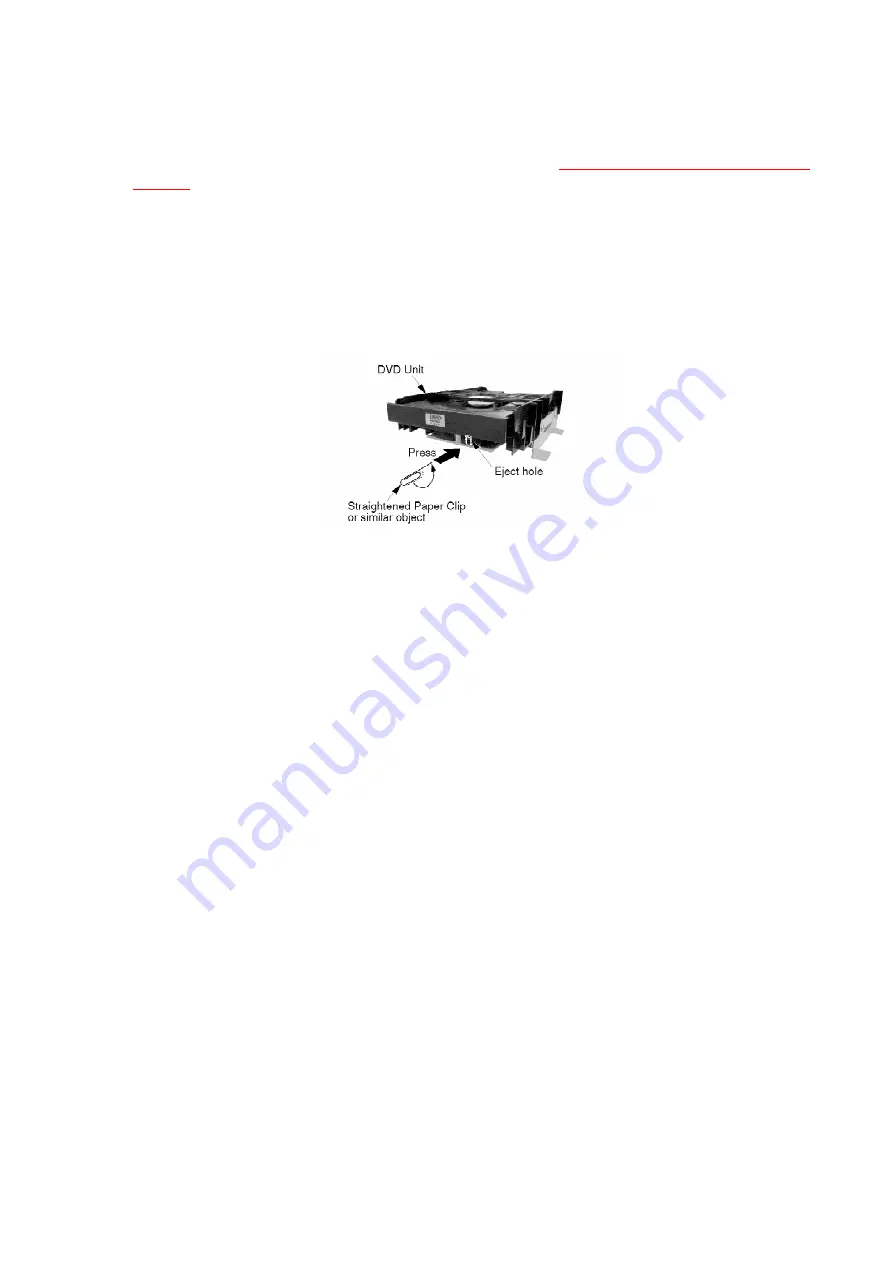
4.1.6. METHOD FOR EJECTING THE DVD TRAY MANUALLY
1. Insert a Straightened Paper Clip or similar object into the Eject
hole.
2. Press it gently, and then pull the Tray fully out.
Fig. 4
4.1.7. SELF-DIAGNOSTIC TEST FUNCTION FOR DVD UNIT
This unit has a Self-Diagnostic function which detects a problem or malfunction within the unit
and displays its corresponding Error code on the TV Screen.
Note:
If, after approx. 30 seconds, a unit set to DVD mode automatically
switches to VCR mode, there is likely a problem with the DVD
Decoder C.B.A. (IC8000, IC8100, IC8200, etc.)
How to enter DVD Self-Diagnostic mode
1. Connect a TV Monitor.
2. Insert a DVD disc into the DVD Unit.
3. Set the unit to DVD mode. Then, press STOP button to stop
playback.
Note:
Do not let a DVD play during DVD Self-Diagnostic mode.
4. Press and hold STOP button on the VCR and 9 key on the remote
together with no cassette inserted. The unit will enter the DVD Self
-Diagnostic mode.
Fig. 5-1
10
Summary of Contents for PVD4742 - DVD/VCR DECK
Page 1: ...ORDER NO MKE0201800C1 B3 DVD VCR DECK PV D4742 SPECIFICATIONS 1 ...
Page 23: ...Fig D2 23 ...
Page 27: ...5 2 1 Disassembly Reassembly Method 5 2 2 Inner Parts Location Fig J1 1 27 ...
Page 28: ...5 2 3 EJECT Position Confirmation Fig J1 2 28 ...
Page 54: ...7 SCHEMATIC DIAGRAMS 54 ...
Page 56: ...10 2 MECHANISM BOTTOM SECTION 56 ...
Page 57: ...10 3 CASSETTE UP COMPARTMENT SECTION 57 ...
Page 58: ...10 4 CHASSIS FRAME AND CASING PARTS SECTION 58 ...
Page 59: ...10 5 PACKING PARTS AND ACCESSORIES SECTION 59 ...


