7.3.7.2. HOW TO ENTER EVR
ADJUSTMENT MODE
Press and hold STOP, PLAY, and VOL DOWN buttons on the
unit together over 5 seconds with no cassette inserted.
The adjustment overlay will appear.
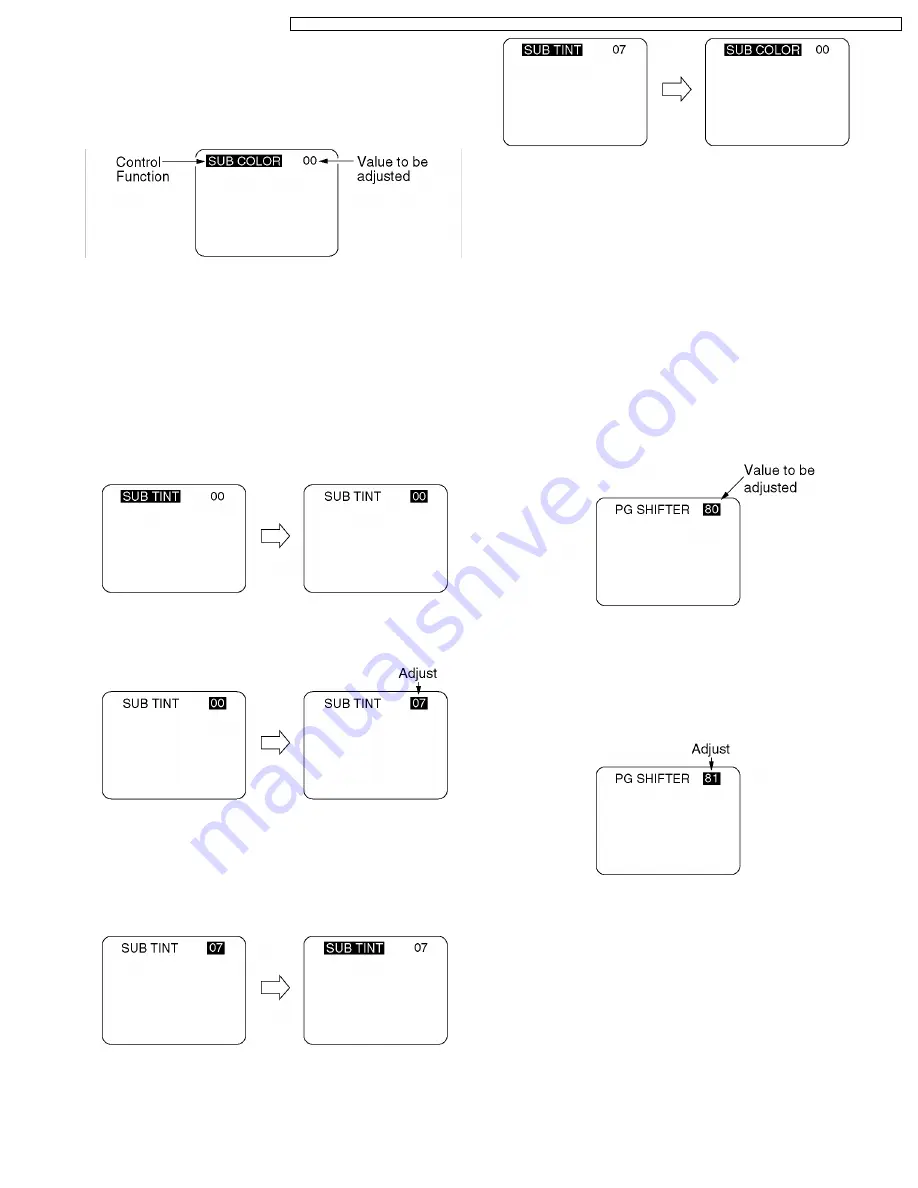
Fig. E5-1
7.3.7.2.1. How to adjust:
1. Press CH UP/DOWN key on the remote control to select
control function to be adjusted.
Important Note:
Make a note of the original value of the controls
before modifying in case the wrong control is
adjusted.
2. Press VOL UP/DOWN key on the remote control so that the
shaded area moves to the value.
Fig. E5-2
3. Press CH UP/DOWN key on the remote control to adjust
the value of the selected control.
Fig. E5-3
Note:
You can select a desired channel by using the numbered
keys on the remote control in EVR adjustment mode.
4. Press VOL UP/DOWN key on the remote control so that the
shaded area moves to the control function.
Fig. E5-4
5. Press CH UP/DOWN key on the remote control to select a
control function for the next adjustment if necessary.
Fig. E5-5
7.3.7.2.2. How to release from EVR
Adjustment Mode:
Press and hold STOP, PLAY, and VOL DOWN buttons on the
unit together over 5 seconds again or press the POWER button
OFF.The adjusted value will be written to Memory IC (IC6004).
7.3.7.3. HOW TO ENTER EVR PG
SHIFTER ADJUSTMENT MODE
1. Enter EVR adjustment mode.
2. Insert the VHS Alignment Tape and playback in SP mode.
The adjustment overlay will appear.
Fig. E5-6
7.3.7.3.1. How to adjust:
Press CH UP/DOWN key on the remote control to adjust the
value.
Fig. E5-7
7.3.7.3.2. How to release from EVR PG
Shifter Adjustment Mode:
Press STOP button or press the POWER button OFF.
The adjusted value will be written to Memory IC (IC6004).
49
PVQ-1310 / PV-C1320 / PV-C1330W / VV-1300 / VV-1310W / PV-C1340 / PV-C1350W / PV-C2010 / PV-C2020 / PV-C2030W / VV-2000 / PV-C2060


