RQT9358
33
Other
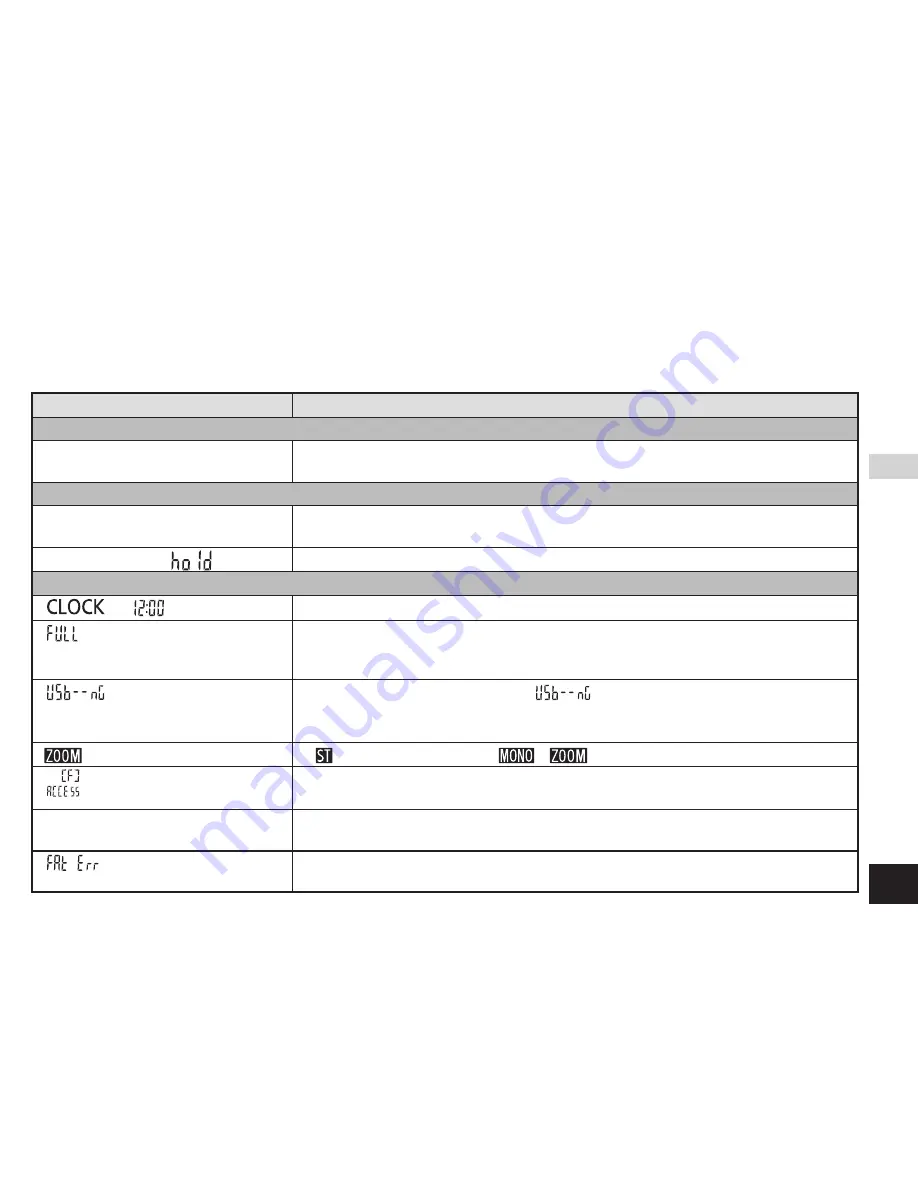
Before requesting service, make the following checks. If you are in doubt about some of the check points, or if the remedies
indicated in the chart do not solve the problem, refer to “Customer Services Directory (United States and Puerto Rico)” on
page 43 if you reside in the U.S.A. and Puerto Rico, or refer to “Product information” on page 38 if you reside in Canada.
Symptom
Checkpoints
Battery
Cannot use a battery that can be
still used on other equipment.
• This unit considers the battery as empty even if there is actually
power left in it. This is to preserve the clock setting.
Operations
No operation.
• Make sure the batteries are correctly inserted.
• You cannot operate on this unit when the unit is connected to a computer.
Cannot operate when “
” appears.
• The Hold function is on. Switch Hold off (
➜
page 6).
Display
“
”, “
” blinks.
• Please set the time (
➜
page 7).
“
” appears.
• There are 99 files in folder A, B, C, D.
• There is no remaining memory (
➜
page 39). Delete unnecessary
recording files, files and data other than MP3 files (
➜
pages 12, 26).
“
” appears.
• If the batteries are extremely exhausted, “
” is displayed even if the unit is connected to the
computer and the computer does not recognize this unit. Disconnect this unit from the computer once,
replace the batteries (If batteries are not inserted, insert batteries.) (
➜
page 5) and reconnect it.
“
” is not displayed on menu screen.
• “ ” has been set. When set to “
”, “
” is displayed on menu screen (
➜
page 15).
“
” appears.
• This appears when updating data in this unit (e.g. after disconnecting
this unit from the computer, when turning the power on, etc.).
N o r m a l d i s p l ay a p p e a r s
during setting operation
• When you do not operate for 60 seconds during setting operation, the
setting in process is canceled and normal display appears.
“
” appears.
• Format was performed on a computer, etc., or the file system is damaged. Perform
format on this unit (The data is all erased after formatting is complete.) (
➜
page 12).
Troubleshooting guide


