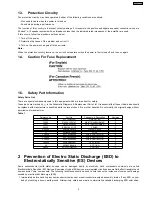
which should be removed for potential shock reasons prior to applying power to the unit under test.
2. After removing an electrical assembly equiped with ES devices, place the assembly on a conductive surface such as aluminium
foil, to prevent electrostatic charge build up or exposure of the assembly.
3. Use only a grounded-tip soldering iron to solder or unsolder ES devices.
4. Use only an anti-static solder remover device. Some solder removal devices not classified as “anti-static (ESD protected)” can
generate electrical charge to damage ES devices.
5. Do not use freon-propelled chemicals. These can generate electrical charges sufficient to damage ES devices.
6. Do not remove a replacement ES device from its protective package until immediately before you are ready to install it. (Most
replacement ES devices are packaged with leads electrically shorted together by conductive foam, aluminium foil or
comparable conductive material).
7. Immediately before removing the protective material from the leads of a replacement ES device, touch the protective material
to the chassis or circuit assembly into which the device will be installed.
Caution
Be sure no power is applied to the chassis or circuit, and observe all other safety precautions.
8. Minimize body motions when handling unpackaged replacement ES devices. (Otherwise harmless motion such as the brushing
together of your clothes fabric or the lifting of your foot from a carpeted floor can generate static electricity (ESD) sufficient to
damage an ES device).
6
SA-AK450PL
Summary of Contents for SA-AK450PL
Page 8: ...8 SA AK450PL ...
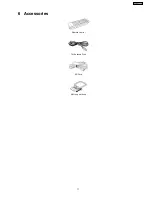
Page 11: ...6 Accessories Remote Control FM Antenna Wire AC Cord AM Loop Antenna 11 SA AK450PL ...
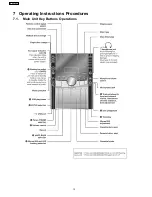
Page 12: ...7 Operating Instructions Procedures 7 1 Main Unit Key Buttons Operations 12 SA AK450PL ...
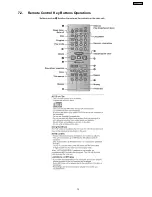
Page 13: ...7 2 Remote Control Key Buttons Operations 13 SA AK450PL ...
Page 26: ...10 3 Main Parts Location 26 SA AK450PL ...
Page 38: ...10 17 1 Replacement of Pinch Roller and Head Block 38 SA AK450PL ...
Page 39: ...10 17 2 Replacement of Motor Capstan Belt A Capstan Belt B and Winding Belt 39 SA AK450PL ...
Page 45: ...12 4 Checking and Repairing of Power P C B 45 SA AK450PL ...
Page 47: ...47 SA AK450PL ...
Page 51: ...15 3 Main P C B 15 4 Panel P C B 51 SA AK450PL ...
Page 52: ...15 5 Power P C B Transformer P C B 52 SA AK450PL ...
Page 53: ...15 6 Waveform Chart 53 SA AK450PL ...
Page 62: ...SA AK450PL 62 ...
Page 64: ...64 SA AK450PL ...
Page 84: ...SA AK450PL 84 ...
Page 89: ...23 Exploded Views 23 1 Cabinet Parts Location SA AK450PL 89 ...
Page 90: ...SA AK450PL 90 ...
Page 91: ...23 2 Deck Mechanism Parts Location RAA4403 S SA AK450PL 91 ...
Page 92: ...23 3 Packaging SA AK450PL 92 ...


