background image

17

RQT8043

RQTX0273

ES

P

A

Ñ

O

L

ES

P

A

Ñ

O

L

ES

P

A

Ñ

O

L

ES

P

A

Ñ

O

L

ES

P

A

Ñ

O

L

Note:

•  If you press [OK] or pause recording while using TIME MARK 

mode during recording, the fi ve minutes counter will be reset.

•  You cannot insert track marks manually in SYNCHRO mode.

Erasing the recorded tracks

This function enables you to erase unwanted tracks quickly and 
easily.

1


USB

 Press 

[

6

, USB] and then [

7

] (stop).


MEMORY

 Press 

[

6

, MEMORY] and then [

7

] (stop).

2

 Press [

5

1

2

] to select your desired album or track.

3

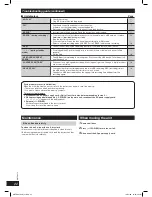
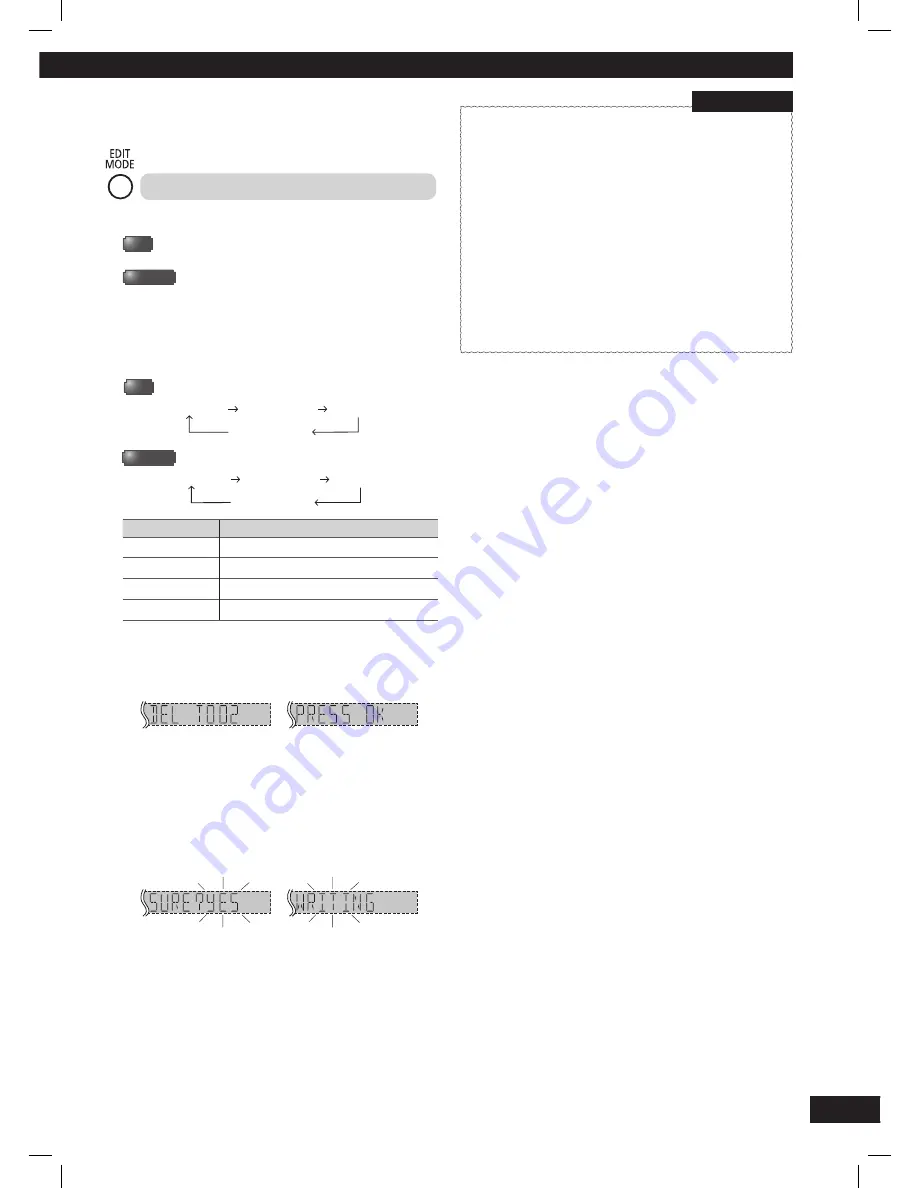
  Press [EDIT MODE] repeatedly to select the desired 

erasing mode.


USB

TRACKDEL

ALBUMDEL

FORMAT

Original display


MEMORY

TRACKDEL

ALBUMDEL

ALL DEL

Original display

Edit mode

Function

TRACKDEL

Erase single track

ALBUMDEL

Erase one album

FORMAT

Format the USB device

ALL DEL

Erase all albums

4

 Press [OK].


Within 2 seconds or so, the selected album or track to be 
erased is displayed followed by the “PRESS OK” display.

 Example:

5

  Press [OK] again.

6

 Press [

1

2

] to select “YES” then press [OK] to confi rm the 

erasure.


“WRITING” is displayed.

 OR

 Press 

[

1

2

] to select “NO” then press [OK] to cancel the 

erasure.

 Example:

Note:

For “ALBUMDEL”, only 999 tracks in albums which contain more 
than 999 tracks will be erased. To erase the selected album, repeat 
steps 2 to 6.

NOTE on USB

Compatible devices

Devices which are defi ned as USB mass storage class:
•  USB devices that support bulk only transfer.
•  USB devices that support USB 2.0 full speed.

Supported format

•  Folders are defi ned as album.
•  Files are defi ned as track.
•  Track must have the extension “.mp3” or “.MP3”. 
•  CBI (Control/Bulk/Interrupt) is not supported.
•  A device using NTFS fi le system is not supported. [Only 

FAT 12/16/32 (File Allocation Table 12/16/32) fi le system is 
supported.]

•  Depending on the sector size, some fi les may not work.

When you connect your digital audio player to the USB port, it 
charges all the time except standby mode.

RQTX0273-2M_us.indd   17

RQTX0273-2M_us.indd   17

12/21/09   12:22:14 PM

12/21/09   12:22:14 PM

Summary of Contents for SA-AK980

Page 1: ...nit may not look exactly the same as illustrated Dear Customer Thank you for purchasing this product For optimum performance and safety please read these instructions thoroughly before connecting operating or adjusting this product Please keep this manual for future reference 1 x AC power supply cord 1 x Power plug adaptor 2 x Remote control batteries 1 x FM indoor antenna 1 x AM loop antenna 1 x ...

Page 2: ...re applicable to the following system System SC AK980 Main unit SA AK980 Front speakers SB PF980 Surround speakers SB PS980 Subwoofer 1 with LEVEL control SB WAK980 Subwoofer 2 SB WAK981 Inside of product RQTX0273 2M_us indd 2 RQTX0273 2M_us indd 2 12 21 09 12 20 17 PM 12 21 09 12 20 17 PM ...

Page 3: ...ure the AC power cord is connected correctly and not damaged Poor connection and lead damage can cause fire or electric shock Do not pull bend or place heavy items on the lead Grasp the plug firmly when unplugging the lead Pulling the AC power cord can cause electric shock Do not handle the plug with wet hands This can cause electric shock Foreign matter Foreign matter Do not let metal objects fal...

Page 4: ...ystem for proper ventilation These speakers do not have magnetic shielding Do not place them near televisions personal computers or other devices easily influenced by magnetism You can damage your speakers and shorten their useful life if you play sound at high levels over extended periods Reduce the volume in the following cases to avoid damage When playing distorted sound When adjusting the soun...

Page 5: ...osion if battery is incorrectly replaced Replace only with the same or equivalent type recommended by the manufacturer Dispose of used batteries according to the manufacturer s instructions Handling of the disc trays and discs Not doing the following will cause damage to the unit Removing the power plug Press y I POWER to turn off the unit and remove the power plug only after all the displays have...

Page 6: ... Push Click Insertion of connector Even when the connector is perfectly inserted depending on the type of inlet used the front part of the connector may jut out as shown in the drawing However there is no problem using the unit Connector Appliance inlet If the power plug does not fit your socket use the power plug adaptor included For your reference To save power when the unit is not to be used fo...

Page 7: ...round speaker right Optional antenna connections Optional antenna connections Use an outdoor antenna if radio reception is poor Note Disconnect the outdoor antenna when the unit is not in use Do not use the outdoor antenna during a lightning storm FM outdoor antenna FM outdoor antenna not included 75 Ω coaxial cable not included Rear panel of this main unit AM outdoor antenna Push AM outdoor anten...

Page 8: ...ge Excessive sound pressure from earphones and headphones can cause hearing loss Plug type Ø 3 5 mm stereo not included Display panel 11 15 Disc tray open or close 5 10 Disc change 10 Track skip function 10 15 3 Disc direct play 10 7 Manual EQ s bass control setting 19 D BASS selection 19 Microphone volume control 20 Microphone jack 20 Stop playback Demonstration function 5 Main unit Main unit Ref...

Page 9: ...ay or pause 14 3 Disc play or pause 10 4 Track skip or search check program content preset channel selection tuning function time adjustment timer operation manual EQ setting 10 11 13 15 18 19 RE MASTER selection 19 SURROUND sound selection 19 Title search function 16 Display function 11 14 Dimmer function CD high speed recording function 16 5 USB recording or pause 14 Clock or timer setting 18 Sl...

Page 10: ...to search During program play page 11 or random play see right Play Mode function you can search only within the track Play Mode function You can listen to specific discs and tracks Preparation Select and play your desired disc Press PLAY MODE to select the desired mode 1 DISC 1 DISC Play one selected disc ALL DISC ALL DISC Play all loaded discs in succession from the selected disc to the final di...

Page 11: ...ess 4 1 or to select the track To select a track directly press the numeric buttons after pressing 4 1 or 6 Press OK Repeat steps 4 to 6 to program other tracks 7 Press 6 CD to start play For two digit track press h10 once then the two digits For three digit track press h10 twice then the three digits Cancel program mode Press PROGRAM in the stop mode Replay the program Press PROGRAM then 6 CD in ...

Page 12: ...o playback may not be possible NOTE on MP3 Files are treated as tracks and folders are treated as albums This unit can access up to 999 tracks 255 albums and 20 sessions Disc must conform to ISO9660 level 1 or 2 except for extended formats To play in a certain order prefix the folder and file names with 3 digits numbers in the order you want to play them When PLAYERROR appears on the display an un...

Page 13: ... display of the current minimum frequency 2 Continue to hold down FM AM When the minimum frequency changes release the button To return to the original step repeat the above steps After changing the setting previously preset frequency will be cleared Memory preset Memory preset 30 FM and 15 AM stations can be preset Preparation Press FM AM to select FM or AM Automatic presetting 1 Press OK repeate...

Page 14: ...ording to a USB mass storage device or the internal memory internal memory Panasonic will not be held responsible on the consumer s action to record copyrighted music in the form of various audio files which results in copyright infringement Note These functions do not work with any RANDOM mode selection Repeat mode will turn off when recording starts A new album is created each time you perform r...

Page 15: ...DISPLAY repeatedly during recording Example display during CD recording Elapsed play time Remaining play time REC mode USB remaining REC time MEMORY remaining REC time Recording of MP3 tracks You can record MP3 tracks stored in an album from the disc to a USB device or the unit s internal memory Album recording can also be performed from the USB device to the internal memory and vice versa 1 Selec...

Page 16: ...al speed or perform high speed recording Record the CD at normal speed The sound is muted during high speed recording Recording from CD using analog format You can change your recording mode from the default digital recording to analog recording 1 Press 6 CD and then 7 stop 2 Press and hold EDIT MODE to select ANALOG REC Each time you press and hold the button ANALOG REC analog recording DIGITAL R...

Page 17: ...d by the PRESS OK display Example 5 Press OK again 6 Press 1 2 to select YES then press OK to confirm the erasure WRITING is displayed OR Press 1 2 to select NO then press OK to cancel the erasure Example Note For ALBUMDEL only 999 tracks in albums which contain more than 999 tracks will be erased To erase the selected album repeat steps 2 to 6 NOTE on USB Compatible devices Devices which are defi...

Page 18: ...Press SLEEP to select OFF Changing the remaining time Press SLEEP to show the remaining time and press SLEEP again to select your desired time Note The play and sleep timer or the record and sleep timer can be used together The sleep timer always has priority Be sure not to overlap timer settings Using the timers Setting the clock Setting the clock This is a 24 hour clock 1 Press CLOCK TIMER to se...

Page 19: ...epeatedly to select your desired setting HEAVY SOFT CLEAR VOCAL FLAT off Setting Effect HEAVY Adds punch to rock CLEAR Clarifies higher frequencies SOFT For background music VOCAL Adds gloss to vocal FLAT No effect Changing the sound quality Changing the sound quality Manual EQ Manual EQ 1 Press MANUAL EQ repeatedly to select your desired setting BASS MID TREBLE Original display Setting Effect BAS...

Page 20: ...by replacing 2 with 1 Connecting to a portable audio equipment Connecting to a portable audio equipment This feature enables you to enjoy music from a portable audio equipment Audio cord not included Portable audio equipment not included Playing from a portable audio equipment Switch off the equalizer function if there is any of the portable audio equipment before you plug into the MUSIC PORT jack...

Page 21: ...ty Wipe it clean Replace the disc if it is scratched warped or non standard Condensation has formed Wait 1 to 2 hours for it to evaporate 5 The total number of tracks displayed is incorrect The disc cannot be read Distorted sound is heard You have inserted a disc the unit cannot play insert one it can You have inserted a disc that has not been finalized or completely formatted Disc tray s cannot o...

Page 22: ...mode or use normal recording 16 DEVICE FULL You cannot perform recording because the total USB remaining REC recording time of the USB device is less than the total time of music source Change to a USB device which has the appropriate recording time and perform the recording again 16 System memory reset Initialization When the following situations occur refer to the instructions below to reset the...

Page 23: ...1x max 4x CD only MEMORY SECTION Memory Memory size 2 GB Memory file format MP3 mp3 Memory recording Recording file format MP3 mp3 Bit rate 128 kbps 192 kbps 320 kbps Memory recording speed 1x max 4x CD only SPEAKER SECTION Front speakers SB PF980 Surround speakers SB PS980 Type 2 way 2 speaker system Bass reflex Speaker unit s Tweeter 6 cm cone type Woofer 20 cm cone type Impedance 3 Ω Input powe...

Page 24: ...47262 National Line 635 PANA 635 7262 Bogota Line Ecuador 1800 PANASONIC 1800 726276 Costa Rica 800 PANA737 800 7262737 EI Salvador 800 PANA 800 7262 Guatemala 1 801 811 PANA 1 801 811 7262 Chile 800 260602 From a cell phone 245 2520 Venezuela 800 PANA 800 800 7262 800 Uruguay 0 800 PANA 0800 7262 Mexico Service To obtain information in the Republic of Mexico contact us at email atencion clientes ...

Reviews: