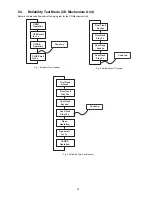


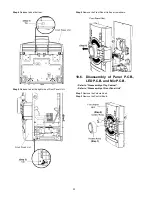


34
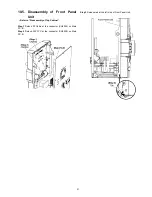
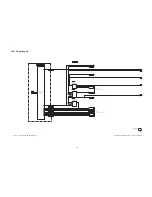
Caution: During assembling, ensure that Panel P.C.B. is
seated properly through the located & fully catched.
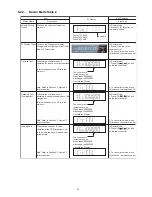
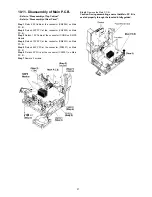
Step 6 Remove 1 screw.
Step 7 Release 1 catch.
Step 8 Remove the Panel P.C.B., LED P.C.B. and Mic P.C.B..
Caution: During assembling, ensure that Mic P.C.B. is
seated properly through the located & fully catched.
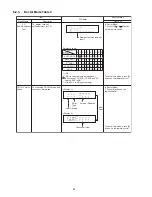
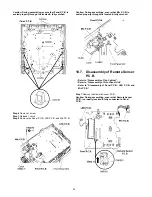
10.7. Disassembly of Remote Sensor
P.C.B.
• Refer to “Disassembly of Top Cabinet”.
• Refer to “Disassembly of Front Panel Unit”.
• Refer to “Disassembly of Panel P.C.B., LED P.C.B. and
Mic P.C.B.”.
Step 1 Remove the Remote Sensor P.C.B..
Caution: During assembling, ensure that Remote Sensor
P.C.B. is properly inserted & fully connected to Panel
P.C.B..
Summary of Contents for SA-AKX36
Page 15: ...15 5 General Introduction 5 1 Media Information ...
Page 16: ...16 6 Location of Controls and Components 6 1 Remote Control Key Button Operation ...
Page 17: ...17 6 2 Main Unit Key Button Operation ...
Page 18: ...18 7 Installation Instructions 7 1 Speaker and A C Connection ...
Page 26: ...26 9 Troubleshooting Guide Contents for this section is not available at time of issue ...
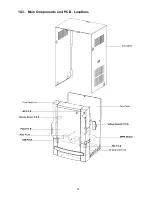
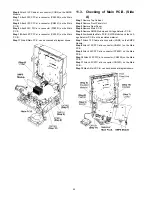
Page 29: ...29 10 3 Main Components and P C B Locations ...
Page 52: ...52 ...
Page 54: ...54 ...
Page 70: ...70 ...
Page 80: ...80 ...
Page 90: ...90 MMH1302 ...