background image

4

RQT8221

Simple setup

Preparation

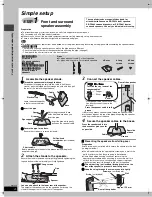
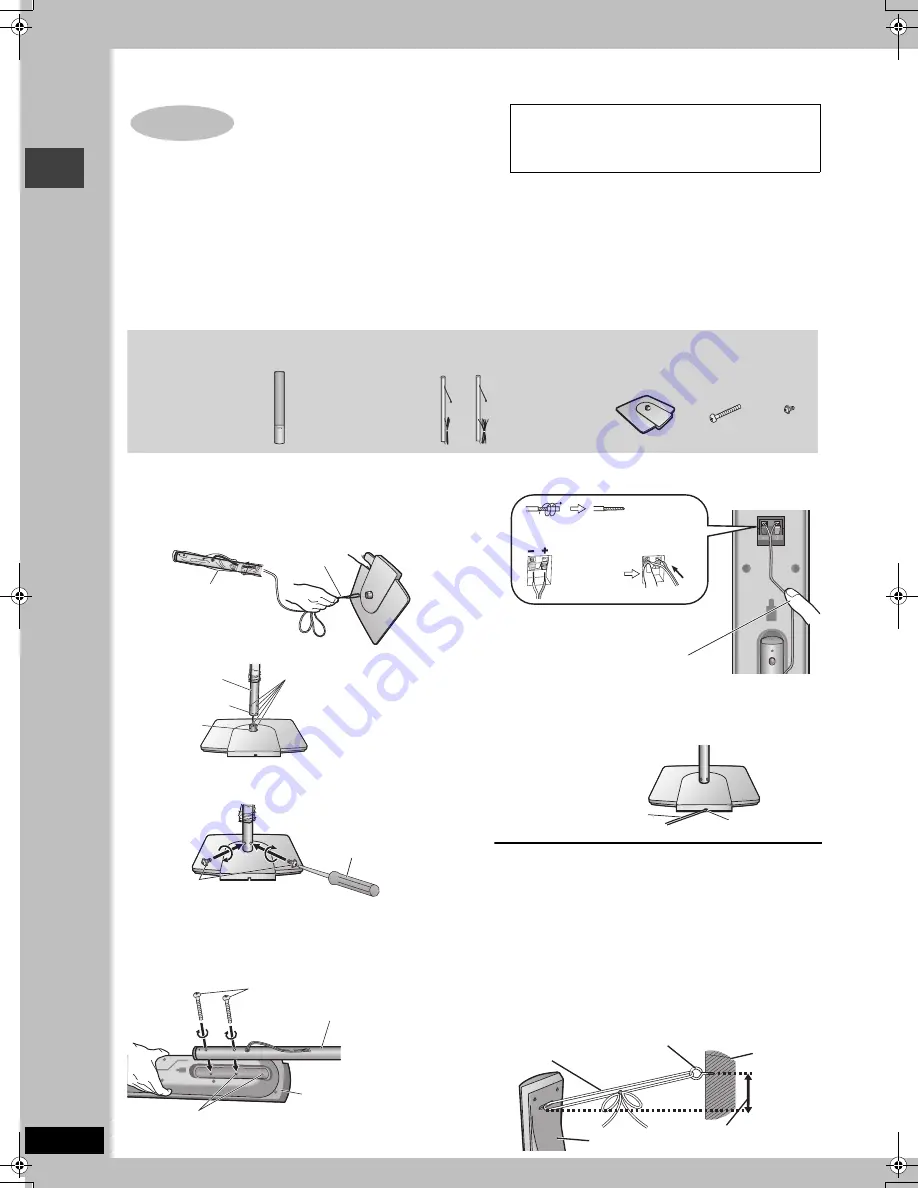
To prevent damage or scratches, lay down a soft cloth and perform assembly on it.

For assembly, use a Phillips-head screwdriver.

Make sure you have all the indicated components before starting assembly, setup, and connection.

There is no difference between the right and left speakers and pipes.

[Note]

To prevent the speaker cables from being pulled out of the pipes, leave the plastic wrap on the pipes while assembling the speaker stands.

[Continental[Europe\

The front and surround speaker pairs as well as the pipe pairs are different.
–Check the label on the rear of the speaker before attaching the pipe (

page 5).

–The pipe with the shorter cable is for the front speaker.

1

Assemble the speaker stands.

1

Thread the speaker cable through the base.

For quicker threading, loosely fold the cable in half (do not 
crease), pass the folded portion through the hole, and then pull 
the rest of the cable through the base.

2

Insert the pipe.

3

Secure the pipe to the base.

Ensure the screws are securely fastened.

2

Attach the stands to the speakers.

Ensure the stand is fastened on straight by gradually tightening the 
top and bottom screws alternately until fully tightened.

You can also attach to the lower rear of the speaker.

The height of the speaker can be changed when attaching the 
stand to the upper rear or lower rear of the speaker.

3

Connect the speaker cables.

4

Secure the speaker cables to the bases.

Preventing the speakers from falling over 

Preparation

Attach screw eyes (not included) to secure the speakers to the wall 
(

diagram below).

You will need to obtain the appropriate screw eyes to match the 
walls or pillars to which they are going to be fastened.

Consult a qualified housing contractor concerning the 
appropriate procedure when attaching to a concrete wall or a 
surface that may not have strong enough support. Improper 
attachment may result in damage to the wall or speakers.

1

Thread the string (not included) through the slot on the 
rear of the speaker to prevent it from falling over.

2

Loop the string through the screw eye and tie tightly.

STEP

1

Front and surround 
speaker assembly

The supplied stands are specially designed for 
attachment to Panasonic SB-FS930 front speakers,
SB-FS880 surround speakers, or SB-FS881 front or 
surround speakers. Use only as indicated in this setup.

[Continental[Europe\

2 Front and 
2 Surround


speakers

[Southeast[Asia,]
[the[Middle[East,[South[Africa,[
[Saudi[Arabia[and[Kuwait[

4 Front/Surround
speakers

4 Bases

8 Long
screws

8 Short

screws

Pipes

2

k

pipes with short cable: For front speakers

2

k

pipes with long cable: For surround speakers

Cable

Base

Leave the excess speaker 
cable for connecting later.

Plastic wrap

Insert the pipe while gently 
pulling on the speaker cable.

Match the groove and these 
holes with the base when you 
insert the pipe.

Pipe support

Pipe

Base

Groove

Short screws

Phillips-head 
screwdriver

(not included)

Before proceeding to the next step, please remove the plastic 
wrap from the pipe.

Speaker

Long screws

Pipe

Twist off the vinyl ends of the 
speaker cables.

§

Rear of the speaker

_

:

 Copper

`

:


Silver

Push!

If there is any excess speaker cable, thread the speaker cable 
into the opening near the top of the pipe while pulling the speaker 
cable from the bottom of the base.

Press the speaker cable into the 
groove.

§ 

If the speaker cables do not have vinyl 

tips, directly connect them to the 
terminals.

Rear side 
of base

Press the speaker cable into 
the base cover groove as far 
as possible.

Cable

Groove

String

 (not included)

Wall

Screw eye

 (not included)

Rear of the speaker

Approx. 150 mm

Fr

o

n

a

n

d surr

ound

 speak

er asse

mb

ly

HT885W_En.book  Page 4  Thursday, October 20, 2005  12:31 PM

Summary of Contents for SA-HT885W

Page 1: ...881 Active subwoofer SB WA885 SB WA885 Digital transmitter SH FX50T SH FX50T Digital receiver SE FX50 SE FX50 2 ALL 3 5 2 Before connecting operating or adjusting this product please read the instructions completely Please keep this manual for future reference Unless otherwise indicated illustrations in these operating instructions are for Continental Europe Operations in these instructions are de...

Page 2: ...ÄMISEKSI EI LAITETTA SAA ALTISTAA SATEELLE KOSTEUDELLE VESIPISAROILLE TAI ROISKEELLE EIKÄ NESTETTÄ SISÄLTÄVIÄ ESINEITÄ KUTEN ESIMERKIKSI MALJAKOITA SAA ASETTAA LAITTEEN PÄÄLLE VAROITUS ÄLÄ ASENNA TAI LAITA TÄTÄ LAITETTA KABINETTITYYPPISEEN KIRJAKAAPPIIN TAI MUUHUN SULJETTUUN TILAAN JOTTA TUULETUS ONNISTUISI VARMISTA ETTÄ VERHO TAI MIKÄÄN MUU MATERIAALI EI HUONONNA TUULETUSTA JOTTA VÄLTETTÄISIIN YL...

Page 3: ...ERTED INTO ANY 13 AMPERE SOCKET Fuse cover Figure A Figure B Fuse 5 ampere Fuse 5 ampere Figure A Figure B Table of contents Caution for AC Mains Lead 3 Accessories 3 Control reference guide 10 Discs that can be played 11 Convenient functions 14 Displaying current playback condition QUICK OSD Reviewing titles to play ADVANCED DISC REVIEW Quick replay Skipping 30 seconds forward Changing the zoom r...

Page 4: ...ified housing contractor concerning the appropriate procedure when attaching to a concrete wall or a surface that may not have strong enough support Improper attachment may result in damage to the wall or speakers 1Thread the string not included through the slot on the rear of the speaker to prevent it from falling over 2Loop the string through the screw eye and tie tightly STEP1 Front and surroun...

Page 5: ...a metal cabinet or bookshelf Main unit Place the front center and surround speakers at approximately the same distance from the seating position The angles in the diagram are approximate Additional information for wireless setup This product uses the same radio frequencies as other devices that may be present in your home To help avoid any interference these other devices may cause during the oper...

Page 6: ...d Kuwait Front and center speaker connection Connect the surround speaker cables here only if you do not intend to use the digital receiver below 4 SURROUND R 3 SURROUND L Saudi Arabia and Kuwait The illustration shows the model for Continental Europe AC IN 4 VOLT VOLT VOLT ADJ ADJ ADJ 110 110 110 127V 127V 127V 220 220 220 240V 240V 240V Click i Copper j Silver Connect the AC mains lead after spe...

Page 7: ...ect Video YPbPr or S Video YPbPr from QUICK SETUP page 9 If RGB No Output is selected the RGB signal is output from the SCART AV terminal but no signal is output from the component video output terminals STEP4 Video connections COMPONENTVIDEOOUT COMPONENTVIDEOOUT PB PR Y S VIDEO S VIDEO OUT OUT VIDEO VIDEO OUT OUT PROGRESSIVE INTERLACE PROGRESSIVE INTERLACE VIDEO IN Back of the main unit Video cab...

Page 8: ...em cable AM loop antenna FM indoor antenna FM indoor antenna Affix this end of the antenna where reception is best To household mains socket Conserving power The main unit consumes a small amount of power even when it is turned off For Continental Europe approx 0 7 W or for Southeast Asia the Middle East South Africa Saudi Arabia and Kuwait approx 0 9 W To save power when the unit is not to be use...

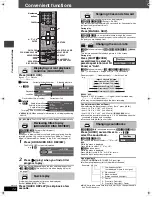
Page 9: ... SKIP SUBTITLE AUDIO PLAY SPEED QUICK REPLAY SLEEP QUICK OSD ADVANCED DISC REVIEW FL DISPLAY REPEAT SHIFT ANGLE PAGE GROUP AV SYSTEM DVD CD PLAY LIST TV VOL TV VOL ENTER 1 2 6 9 4 5 7 8 CANCEL 0 S10 3 AUX SETUP RETURN SHIFT DVD CD 3 4 2 1 ENTER 1 Turn on the main unit 2 Select DVD CD 3 Show the QUICK SETUP screen 4 Follow the messages and make the settings 5 Press to finish QUICK SETUP 6 Press to ...

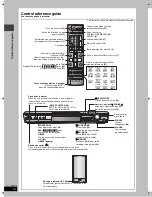
Page 10: ... disc tray 12 PHONES Connect headphones 28 VOLUME Turn up down the volume 12 PROGRESSIVE Enjoy progressive video 12 RDS Continental Europe only Display RDS text data 23 H BASS Turn the bass sound enhancement on off 25 H BASS indicator 4 5 X TUNING W Skipping or slow search play 12 Select the radio stations 22 Standby on switch Í I Press to switch the unit from on to standby mode or vice versa In s...

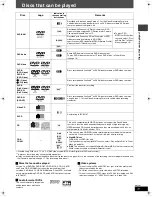
Page 11: ... video contents select Play as Data Disc in Other Menu page 19 MPEG4 Recorded with Panasonic SD multi cameras or DVD video recorders conforming to SD VIDEO specifications ASF standard MPEG4 Simple Profile video system G 726 audio system DivX 1 DVD Audio DVD A DVD V Some DVD Audio discs contain DVD Video content To play DVD Video content select Play as DVD Video in Other Menu page 19 DVD Video DVD ...

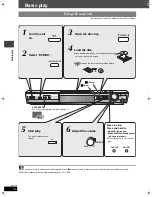
Page 12: ... SELECTOR Press to skip Press and hold to search during play slow motion during pause Motion picture part Press 1 play to start normal play 6 Adjust the volume 5 Start play The tray is automatically closed 3 Open the disc tray Stop 2 Select DVD CD 1 Turn the unit on 4 Load the disc Load double sided discs so the label for the side you want to play is facing up RAM Remove the disc from its cartridg...

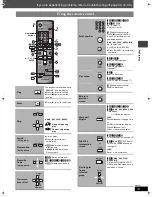
Page 13: ... SUBTITLE AUDIO FL DISPLAY ANGLE PAGE GROUP 1 2 6 5 CANCEL 3 4 2 1 ENTER SHIFT Numbered buttons SKIP ENTER SLOW SEARCH ENTER ENTER Select Register Enter number RAM DVD RW VR DVD A DVD V VCD CD e g To select 12 S10 1 2 VCD with playback control Press to cancel the PBC function and then press the numbered buttons WMA MP3 JPEG MPEG4 DivX e g To select 123 1 2 3 ENTER Press CANCEL to cancel the number...

Page 14: ...ral times to select the soundtrack RAM DVD RW VR VCD You can use this button to select L R or LR DivX While the menu is displayed Press 2 1 to select L R or LR DVD V Karaoke discs While the menu is displayed Press 2 1 to select On or Off for vocals Read the disc s instructions for details Signal type data LPCM PPCM ÎDigital DTS MPEG Signal type kHz Sampling frequency bit ch Number of channels DivX...

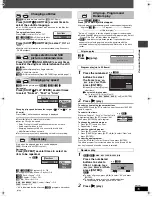
Page 15: ...ata Disc in Other Menu page 19 DVD A Some discs contain bonus groups If a password screen appears after selecting a group enter the password with the numbered buttons to play the bonus group Refer also to the disc s jacket DVD A Press 1 play 1 Press the numbered buttons to select the items WMA MP3 JPEG MPEG4 DivX then press ENTER Repeat this step to program other items To select a 2 digit number e...

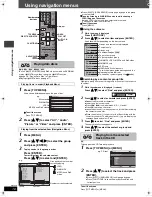
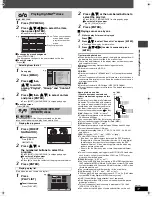
Page 16: ...ion and current position To exit the screen Press TOP MENU or MENU Playing data discs Playing items in order Playback Menu Playing from the selected item Navigation Menu VOLUME CH SKIP SLOW SEARCH MENU DIRECT NAVIGATOR TOP MENU RETURN FUNCTIONS SUBWOOFER LEVEL SUPER SRND H BASS C FOCUS SFC PLAY MODE TEST CH SELECT SETUP MUTING MIX 2CH PL ZOOM MANUAL SKIP SUBTITLE AUDIO PLAY SPEED QUICK REPLAY SLEE...

Page 17: ...n MP3 or mp3 Compatible compression rate between 32 kbps and 320 kbps This unit does not support ID3 tags Compatible sampling rates 8 11 02 12 16 22 05 24 32 44 1 and 48 kHz JPEG Extension JPG jpg JPEG or jpeg To view JPEG files on this unit Take them on a digital camera that meets the DCF Standard Design rule for Camera File system Version 1 0 Some digital cameras have functions that are not supp...

Page 18: ... change remaining elapsed time display Video MPEG4 DivX To display pixel number DivX fps frame per second is also displayed Audio page 14 Changing soundtracks WMA MP3 To display the current disc type Still Picture To switch still pictures Thumbnail To show thumbnail images Subtitle page 15 Changing subtitles Marker VR RAM DVD RW VR To recall a marker recorded on DVD Video recorders To recall a mar...

Page 19: ...tal 3 channel or higher with the dialogue recorded in the center channel On Off Multi Re master RAM DVD RW VR DVD V Discs recorded with 48 kHz only DVD A Discs recorded with 44 1 kHz or 48 kHz only VCD CD During 2ch output of these discs this feature gives you a more natural sound by adding the higher frequency signals not recorded on the disc for example playing DVD Video recorded with 48 kHz at ...

Page 20: ... ENTER 1 2 6 9 4 5 7 8 0 S10 3 Select Register SHIFT SETUP MUTING QUICK SETUP enables successive settings of the items in the shaded area Audio Choose the audio language English Language options 1 Original 2 Other 3 Subtitle Choose the subtitle language Automatic 4 English Language options 1 Other 3 Menus Choose the language for disc menus Changing the menu language in QUICK SETUP also changes thi...

Page 21: ...nd on NTSC Disc Output setting above 6 NTSC PAL60 Output will depend on NTSC Disc Output setting above PAL Dynamic Range Compression Off On Adjusts for clarity even when the volume is low by compressing the range of the lowest sound level and the highest sound level Convenient for late night viewing Only works with Dolby Digital Speaker Settings below Set the delay time for your center and surroun...

Page 22: ... and AM 1 While listening to the radio broadcast Press ENTER 2 While the frequency and P are flashing on the display Press the numbered buttons to select a channel Alternatively press W CH X then press ENTER To select a 2 digit number e g 12 S10 1 2 The station occupying a channel is erased if another station is preset to that channel Automatic presetting VOLUME CH SKIP SLOW SEARCH MENU DIRECT NAV...

Page 23: ... M Middle of the road music Note RDS displays may not be available if reception is poor Use outdoor antennas if radio reception is poor Disconnect the antenna when the unit is not in use Do not use the outdoor antenna during an electrical storm Main unit only RDS broadcasting PTY displays NEWS VARIED FINANCE COUNTRY AFFAIRS POP M CHILDREN NATIONAL INFO ROCK M SOCIAL A OLDIES SPORT M O R M RELIGION...

Page 24: ... Super Surround is turned on This also works when Dolby Pro Logic II is turned on Except DivX Dolby Pro Logic II is an advanced decoder that derives 5 channel surround Left and Right Front Center Left and Right Surround from any stereo program material whether or not it has been specifically Dolby Surround encoded Press ÎPLII Each time you press the button MOVIE Movie software recorded in Dolby Su...

Page 25: ...y used for listening 3 Press 3 increase or 4 decrease to adjust the speaker level for each speaker C RS LS j6 dB to i6 dB L R Only the balance is adjustable To adjust the balance of the front speakers While outputting the test signal press 2 1 Adjust the speaker level to the same level as the front speakers To stop the test signal Press SHIFT i TEST again To adjust speaker level during play Effect...

Page 26: ...VIDEOOUT PROGRESSIV PROGRESSIVE IN E INTERLACE TERLACE PB Y PR S VIDEO S VIDEO OUT OUT VIDEO VIDEO OUT OUT A AV REC REC OUT OUT AUDIO OUT R L VIDEO IN 2 1 PLAY OUT REC IN R L R L VIDEO OUT AUDIO OUT R L DIGITAL TRANSMITTER Television not included Video cassette recorder not included To show video from the video cassette recorder Select VIDEO 2 input on your television in this example To play audio...

Page 27: ...art recording and play Press AUX to select AUX as the source Operating the television and the video cassette recorder Television Video cassette recorder Changing the remote control code Operating the tape deck Recording to the tape deck Listening to the tape deck PANASONIC 01 29 30 31 AKAI 07 11 28 36 37 ALBA 05 11 12 BAUR 32 BLAUPUNKT 28 36 BRANDT 26 41 BUSH 02 05 10 11 12 32 38 DAEWOO 11 12 32 D...

Page 28: ... the mode VCD Press AUDIO during play Each time you press the button LR Vocals and accompaniment L Accompaniment only R Vocals only Select L for karaoke R and L may be reversed on some discs Sleep timer Muting VOLUME CH SKIP SLOW SEARCH MENU DIRECT NAVIGATOR TOP MENU RETURN FUNCTIONS VCR AUX TV TUNER BAND TV AV SUBWOOFER LEVEL SUPER SRND H BASS C FOCUS SFC PLAY MODE TEST CH SELECT SETUP MUTING MIX...

Page 29: ... or surround speakers to a wall we recommend using a string not included to prevent it from falling page 4 Fitting speaker stands not included Center speaker only Ensure the stands meet these conditions before purchasing them Note the diameter and length of the screws and the distance between screws as shown in the diagram The stands must be able to support over 10 kg The stands must be stable eve...

Page 30: ...ses video files without any considerable loss of video quality Dolby Digital This is a method of coding digital signals developed by Dolby Laboratories Apart from stereo 2 channel audio these signals can also be multi channel audio A large amount of audio information can be recorded on one disc using this method DTS Digital Theater Systems This surround system is used in many movie theaters around...

Page 31: ... Quechua 8185 Rhaeto Romance 8277 Romanian 8279 Russian 8285 Samoan 8377 Sanskrit 8365 Scots Gaelic 7168 Serbian 8382 Serbo Croatian 8372 Shona 8378 Sindhi 8368 Singhalese 8373 Slovak 8375 Slovenian 8376 Somali 8379 Spanish 6983 Sundanese 8385 Swahili 8387 Swedish 8386 Tagalog 8476 Tajik 8471 Tamil 8465 Tatar 8484 Telugu 8469 Thai 8472 Tibetan 6679 Tigrinya 8473 Tonga 8479 Turkish 8482 Turkmen 847...

Page 32: ...ameras or DVD video recorders Conforming to SD VIDEO specifications ASF standard MPEG4 Simple Profile video system G 726 audio system 5 Conforming to IEC62107 6 MPEG 1 Layer 3 MPEG 2 Layer 3 7 Windows Media Audio Ver 9 0 L3 Not compatible with Multiple Bit Rate MBR Pick up Wavelength CD 785 nm DVD 662 nm Laser power CLASS 2 CLASS 3A NORSK Bølgelengde CD 785 nm DVD 662 nm Laserstyrke Ingen farlig s...

Page 33: ...5 mmk8 5 mm Digital receiver 103 mmk215 mmk178 mm Mass Digital transmitter 0 03 kg Digital receiver 2 3 kg Wireless module Frequency range 2 402j2 480 GHz No of channels 79 Bandwidth Channel 1 MHz RF Output Power Continental Europe 13 dBm Max Southeast Asia the Middle East South Africa Saudi Arabia and Kuwait 14 dBm Max RF Output Impedance 50 Type of Emissions Data Rate 1 Mbps Operating temperatur...

Page 34: ...ve less effect with some discs Multi Re master and Dolby Pro Logic II do not work if you have changed the play speed Humming is heard during play An AC mains lead or fluorescent light is near the subwoofer Keep other appliances and cables away from the subwoofer No sound There may be a pause in sound when you change the play speed Audio may not be output due to how files were created DivX 17 Conti...

Page 35: ...may be dirty Wipe it clean 30 ERROR Incorrect operation performed Read the instructions and try again DVD H stands for a number Trouble may have occurred The number following H depends on the status of the unit Turn the unit off and then back to ON Alternatively turn the unit off disconnect the AC mains lead and then reconnect it If the service numbers fail to clear note the service number and con...

Page 36: ...Matsushita Electric Industrial Co Ltd p Web Site http www panasonic co jp global RQT8221 2B F0505TS2105 DIGITAL TRANSMITTER SH FX50T DIGITAL RECEIVER SE FX50 Continental Europe ...

Reviews: