background image

14 Optical Pick-up Self-Diagnosis and Replacement

Procedure

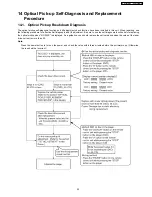
14.1. Optical Pickup Breakdown Diagnosis

The optical pickup self-diagnosis function and tilt adjustment check function have been included in this unit. When repairing, use
the following procedure for effective Self-diagnosis and tilt adjustment. Be sure to use the self-diagnosis function before replacing
the optical pickup when "NO DISC" is displayed. As a guideline, you should replace the optical pickup when the value of the laser
drive current is more than 55.

Note:

Press the power button to turn on the power, and check the value within three minutes before the unit warms up. (Otherwise,
the result will be incorrect.)

35

SA-HT885WGC / SA-HT885WGS

Summary of Contents for SA-HT885WGC

Page 1: ...d copying and distribution is a violation of law SA HT885WGC SA HT885WGS Colour S Silver Type Type of Emissions Data Rate 1 Mbps lAmplifier section RMS Output Power Dolby Digital Mode lTotal RMS Dolby Digital mode Power 700 W At 1kHz and total harmonic of 10 lFront 60 W Channel 6Ω lCenter 220 W Channel 6Ω lSurround 60 W Channel 6Ω At 100Hz and total harmonic of 10 lActive subwoofers 240 W Channel ...

Page 2: ...ps 4000 audio picture and video contents and 400 groups lData recorded with Panasonic SD multi cameras or DVD video recorders Comforming to SD VIDEO specifications ASF standard MPEG4 Simple Profile video system G 726 audio system 12 JPEG lMaximum number of recognizable audio picture and video contents and groups 4000 audio picture and video contents and 400 groups lExif Ver 2 1 JPEG Baseline files...

Page 3: ...11 1 Cautions to Be Taken in Handling the Optical Pickup Unit 20 11 2 Cautions to Be Taken When Replacing the Optical Pickup 20 11 3 Grounding for electrostatic breakdown prevention 20 12 Disassembly and Main Component Replacement Procedure 22 12 1 Disassembly Procedure 22 12 2 Main Components and P C B Locations 23 12 3 Disassembling the Top Cabinet 24 12 4 Disassembling the Lid assembly When tak...

Page 4: ...ols and Equipment 43 17 2 Important points in adjustment 43 17 3 Storing and Handling Test Discs 43 17 4 Optical adjustment 44 18 Abbreviations 45 19 Voltage Chart 47 19 1 DVD Module P C B 47 19 2 Main P C B 48 19 3 FL P C B MIC P C B Tray Loading P C B 49 20 Wave Form Chart 50 21 Schematic Diagram Notes 51 22 Block Diagram 53 23 Schematic Diagram 59 24 Printed Circuit Board Diagram 69 25 Wiring C...

Page 5: ...ower of the component and the active subwoofer should be connected to the component to check operational conditions of the component 2 If the active subwoofer is not available due to repair of the unit use the following equipment Jig product number RFKZ0182 110V 127V 220V 230V 240V for overseas domestic use 5 SA HT885WGC SA HT885WGS ...

Page 6: ... servicing carry out the following leakage current checks to prevent the customer from being exposed to shock hazards 3 Prevention of Electro Static Discharge ESD to Electrostatically Sensitive ES Devices Some semiconductor solid state devices can be damaged easily by static electricity Such components commonly are called Electrostatically Sensitive ES Devices Examples of typical ES devices are in...

Page 7: ...rent Current consumption at AC 220 240 V 50 Hz in NO SIGNAL mode should be 600 mA Current consumption at AC 110 127 V 50 60Hz in NO SIGNAL mode should be 1180 mA 5 Protection Circuitry The protection circuitry may have operated if either of the following conditions are noticed No sound is heard when the power is turned on Sound stops during a performance The function of this circuitry is to preven...

Page 8: ...tical instruments 4 Recommend not to look at pick up lens for a long time 7 About Lead Free Solder PbF Distinction of PbF PCB PCBs manufactured using lead free solder will have a PbF stamp on the PCB Caution Pb free solder has a higher melting point than standard solder Typically the melting point is 50 70 F 30 40 C higher Please use a high temperature soldering iron In case of the soldering iron ...

Page 9: ... SHIFT ANGLE PAGE GROUP AV SYSTEM DVD CD PLAY LIST TV VOL TV VOL ENTER 1 2 6 9 4 5 7 8 CANCEL 0 S10 3 SLEEP TV AV AUX SUBWOOFER LEVEL SUPER SRND H BASS C FOCUS SFC PLAY MODE TEST CH SELECT SETUP MUTING MIX 2CH PL ZOOM MANU QUICK OSD AL SKIP SUBTITLE AUDIO PLAY SPEED QUICK REPLAY SLEEP ADVANCED DISC REVIEW FL DISPLAY REPEAT ANGLE PAGE GROUP STANDBY ON INDICATOR TUNING REMOTE CONTROL SIGNAL SENSOR S...

Page 10: ...Rate MBR a file that contains the same content encoded at several different bit rates RAM JPEG DVD A DVD V DVD V DVD RW VR VCD CD VCD CD WMA WMA MP3 JPEG Discs that can be played Disc Logo Indication in these operating instructions Remarks Recorded with Panasonic SD multi cameras or DVD video recorders using the DCF Design rule for Camera File system Standard Version 1 0 Recorded with Panasonic SD...

Page 11: ...11 SA HT885WGC SA HT885WGS ...

Page 12: ...ng of Receiver Unit SH FX50 This model can be equipped with the digital transmitter and receiver to enjoy surround sound wirelessly 8 3 1 Below is tips on using the digital receiver 12 SA HT885WGC SA HT885WGS ...

Page 13: ...l media experience on consumer electronic devices by delivering a simple standardized approach that allows consumers who have created personal collections of digital music photography and video on their PC to lCreate a HighMAT CD or DVD which can be easily played back on consumer electronics devices such as CD and DVD players and car stereos lMove digital media files using recordable media such as...

Page 14: ...ts there are numerous inconsistent ways that devices read the data For the consumer the playback experience can be confusing A Solution Created HighMAT delivers a better digital media access experience by creating a standard approach for PCs to structure digital media on various physical formats and for playback devices to read the data 14 SA HT885WGC SA HT885WGS ...

Page 15: ... ways that various DVD players can read the music or photos files often leads to a confusing and inconsistant playback experince HighMAT compatible products play content back with consistent interface This includes products which are JPEG compatible products without HighMAT support 15 SA HT885WGC SA HT885WGS ...

Page 16: ...available in leading software and consumer electronic devices to dramatically improve the digital media experience when you create homemade CDs HighMAT delivers a simple standardized way for PC software and consumer electronics devices to talk to each other and work better together 16 SA HT885WGC SA HT885WGS ...

Page 17: ...n about your music like full song names artist titles album names and genre And you can get faster startup on your home entertainment device To enjoy the benefits of HighMAT all you need is software that supports HighMAT for CD burning of music or photos as well as a home entertainment device like a DVD player that supports HighMAT for playback Always look for the HighMAT logo on your software or ...

Page 18: ...Remote control AM loop antenna FM indoor antenna Video Cable Speaker cable AC cord AC cord For GS area System cable Speaker label 9 Accessories 18 SA HT885WGC SA HT885WGS ...

Page 19: ...10 Caution for AC Cord 19 SA HT885WGC SA HT885WGS ...

Page 20: ... to it Use with caution when handling the flexible cable 4 The antistatic FPC is connected to the new optical pickup unit After replacing the optical pickup unit and connecting the flexible cable cut off the antistatic FPC 11 2 Cautions to Be Taken When Replacing the Optical Pickup The flexible cable of the optical pickup unit which was supplied as a component is equipped with a short clip to prev...

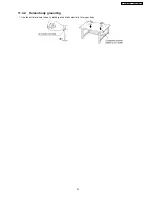
Page 21: ...11 3 2 Human body grounding 1 Use the anti static wrist strap to discharge the static electricity form your body 21 SA HT885WGC SA HT885WGS ...

Page 22: ...acement reverse the respective procedures Special reassembly procedures are described only when required 3 Select items from the following index when checks or replacement are required Disassembling the Top Cabinet Disassembling the Lid assembly When taking out disc manually Disassembling the Front Panel Disassembling the FL P C B Volume P C B and MIC P C B Disassembling the DVD mechanism Unit Dis...

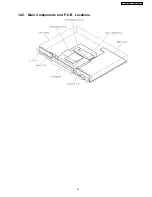
Page 23: ...12 2 Main Components and P C B Locations 23 SA HT885WGC SA HT885WGS ...

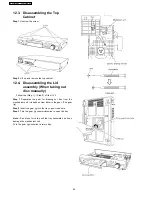
Page 24: ...em 12 3 Step 1 Separates the gear for drawing out tray from the mechanism unit It inserts a screw driver in the gear The gear jig Step 2 Insert the gear jig into the tray open close hole Step 3 Turn the gear jig counterclockwise to open the tray Note Do not use force to push the tray backwards as it can damage the mechanism unit Turn the gear jig clockwise to return tray 24 SA HT885WGC SA HT885WGS...

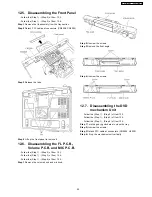
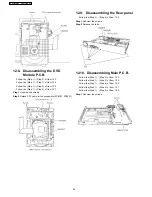
Page 25: ...of Item 12 3 Follow the Step 1 Step 3 of Item 12 4 Follow the Step 1 Step 4 of Item 12 5 Step 1 Remove the volume knob and mic knob Step 2 Unscrew the screws Step 3 Remove the front angle Step 4 Unscrew the screws 12 7 Disassembling the DVD mechanism Unit Follow the Step 1 Step 2 of Item 12 3 Follow the Step 1 Step 3 of Item 12 4 Follow the Step 1 Step 4 of Item 12 5 Step 1 Turn the gear jig clock...

Page 26: ...C cable at the connectors FP8201 FP8501 12 9 Disassembling the Rear panel Follow the Step 1 Step 2 of Item 12 3 Step 1 Unscrew the screws Step 2 Release the tabs 12 10 Disassembling Main P C B Follow the Step 1 Step 2 of Item 12 3 Follow the Step 1 Step 3 of Item 12 4 Follow the Step 1 Step 4 of Item 12 5 Follow the Step 1 Step 4 of Item 12 7 Follow the Step 1 Step 2 of Item 12 9 Step 1 Unscrew th...

Page 27: ...9 Step 1 Connect FFC cable at connector CN2008 CN2009 Step 2 Turn Mechanism unit to vertically position 12 11 2 Servicing position of the Main P C B Follow the Step 1 Step 2 of Item 12 3 Follow the Step 1 Step 3 of Item 12 4 Follow the Step 1 Step 4 of Item 12 5 Follow the Step 1 Step 4 of Item 12 7 Follow the Step 1 of Item 12 8 Follow the Step 1 Step 2 of Item 12 9 Step 1 Connect FFC cable at co...

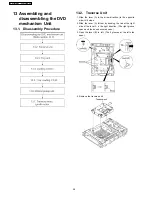
Page 28: ... the arrow direction to the opposite side till it stops 2 Slide the lever A further by bending the tab at the right side of the lever A in the right direction The right groove opens and the boss becomes seen 3 Open the lever B to left The 2 grooves at the left side open 4 Remove the traverse unit 28 SA HT885WGC SA HT885WGS ...

Page 29: ...es a little forward and stops 5 Remove the drive arm concave phase from the tray slider and tray Assembling the tray unit 1 Insert a part of the tray into the unit sliding over the groove on the mechanical chassis unit 2 Insert the tray to the point before the tab of the mechanical chassis unit 3 Hook the drive arm concave phase over the tray and the tray slider 4 Press in the tray 5 Make sure tha...

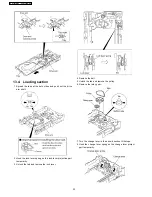
Page 30: ... lock lever projection part temporarily 3 Unlock the tab and remove the lock lever 4 Remove the belt 5 Unlock the tab and remove the pulley 6 Remove the relay gear 7 Turn the change lever in the arrow direction till it stops 8 Hook the change lever spring on the change lever project part temporarily 30 SA HT885WGC SA HT885WGS ...

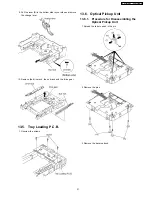
Page 31: ...ve the drive rack the sub rack and the drive gear 13 5 Tray Loading P C B 1 Unscrew the screws 13 6 Optical Pickup Unit 13 6 1 Procedure for Disassembling the Optical Pickup Unit 1 Spread the tabs to push in the pin 2 Remove the pins 3 Remove the traverse deck 31 SA HT885WGC SA HT885WGS ...

Page 32: ...rrow direction till it stops 5 Unscrew the screws 6 Remove the drive rack 7 Unscrew the screw 8 Slide the shaft in the arrow direction 9 Lift the optical pickup unit with the shaft 10 Remove the optical pickup unit 32 SA HT885WGC SA HT885WGS ...

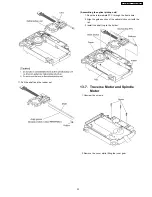
Page 33: ...he intermediate FPC through the frame hole 2 Align the guide section of the optical pickup unit with the rail 3 Install the shaft top to the holder 13 7 Traverse Motor and Spindle Motor 1 Unscrew the screws 2 Remove the cover while lifting the inner gear 33 SA HT885WGC SA HT885WGS ...

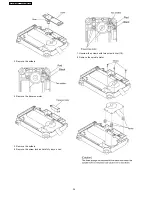
Page 34: ... the solders 4 Remove the traverse motor 5 Remove the solders 6 Remove the screw lock as carefully as you can 7 Unscrew the screws with torx screw driver T6 8 Remove the spindle motor 34 SA HT885WGC SA HT885WGS ...

Page 35: ...dure for effective Self diagnosis and tilt adjustment Be sure to use the self diagnosis function before replacing the optical pickup when NO DISC is displayed As a guideline you should replace the optical pickup when the value of the laser drive current is more than 55 Note Press the power button to turn on the power and check the value within three minutes before the unit warms up Otherwise the r...

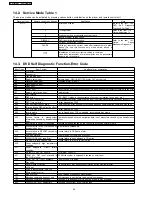
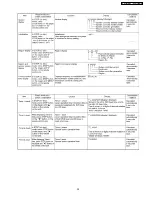
Page 36: ...ilure Communication error result error occurred although communication command was sent F504 Error adjusting DSC data slice offset F505 DSC Attention error Similar disposal as F500 F506 Invalid media Disc is flipped over TOC unreadable incompatible disc media ODC related F600 Access failure to management information caused by demodulation error Operation stopped because navigation data is not acce...

Page 37: ... No existence model Firm version agreement check for factory preset setting failure prevention F897 Initialize is not completed Initialize completion check for factory preset setting failure prevention F898 Disagreement of hardware and software Unsuitable combination of AV DECORDER SDRAM and FLASH ROM firmware F8A0 Message command is not appropriate Begin sending message to AV task Note An error c...

Page 38: ...14 4 Service mode table 2 Pressing various button combinations on the player and remote control unit can activate the service modes 38 SA HT885WGC SA HT885WGS ...

Page 39: ...39 SA HT885WGC SA HT885WGS ...

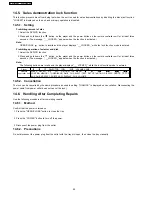
Page 40: ...sage ___LOCKED_ appears when the function is activated Note The following buttons are invalid and the player displays ___LOCKED_ while the lock function mode is entered Player SELECTOR VOLUME KNOB Remote controller unit SLEEP REPEAT 0 9 RETURN TOP MENU POSITION MEMORY TUNER BAND D MIX CH SELECT TEST SET UP MUTING DISPLAY GROUP TV VCR AUX QUICK REPLAY SUBTITLE FL DISPLAY CH VOLUME 14 5 2 Cancellati...

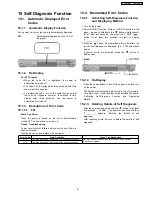
Page 41: ...tion With no DVD CD inserted in the player press and hold down the button simultaneously for at least two seconds and press the F_SKIP button for at least two seconds in order to display T___________ 3 Press the button If a memorized error is detected the result of self diagnosis is displayed Ex T H15 See table below If several errors are detected press the button to display each 15 2 2 Re Display...

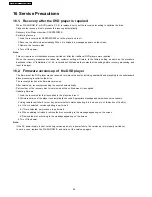
Page 42: ...D player may be renewed to improve the quality including operability and playability to the substandard discs processing to optimize the drive The recovery disc has also firmware version up After version up recovery processing is executed automatically Part number of the recovery disc for version up will be noticed when it is supplied Updating firmware 1 Load the recovery disc that is supplied to ...

Page 43: ...owever make adjustment if there is a noticeable degradation in picture quality Optical adjustments cannot be made inside the optical pickup Adjustment is generally unnecessary after replacing the traverse unit 17 2 2 Important points in electrical adjustment Follow the adjustment procedures described in this Manual 17 3 Storing and Handling Test Discs Surface precision is vital for DVD test discs ...

Page 44: ...ptimum point 3 Finish the procedure with tilt adjustment Jitter value depends on the model 1 If the jitter value changes like B the optimum point is easy to find 2 If the jitter value changes like A set the optimum point near the middle 17 4 1 3 Check after adjustment Play test disc or any other disc to make sure there is no picture degradation in the inner middle and outer peripheries and no audi...

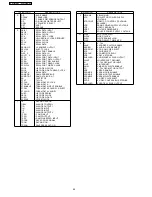
Page 45: ...T DATA RESPONSE DIGITAL SERVO CONTROLLER DATA SLICE LOOP FILTER DIGITAL VIDEO DISC INITIAL LOGO ABBREVIATIONS E EC ECR ENCSEL ETMCLK ETSCLK ERROR TORQUE CONTROL ERROR TORQUE CONTROL REFERENCE ENCODER SELECT EXTERNAL M CLOCK 81MHz 40 5MHz EXTERNAL S CLOCK 54MHz F FBAL FCLK FE FFI FEO FG FSC FSCK FOCUS BALANCE FRAME CLOCK FOCUS ERROR FOCUS ERROR AMP INVERTED INPUT FOCUS ERROR AMP OUTPUT FREQUENCY GE...

Page 46: ... SUB CODE CLOCK SUB CODE Q DATA SYSTEM CLOCK T TE TIBAL TID TIN TIP TIS TPSN TPSO TPSP TRCRS TRON TRSON TRACKING ERROR BALANCE CONTROL BALANCE OUTPUT 1 BALANCE INPUT BALANCE INPUT BALANCE OUTPUT 2 OP AMP INPUT OP AMP OUTPUT OP AMP INVERTED INPUT TRACK CROSS SIGNAL TRACKING ON TRAVERSE SERVO ON INITIAL LOGO ABBREVIATIONS V VBLANK VCC VCDCONT VDD VFB VREF VSS V BLANKING COLLECTOR POWER SUPPLY VOLTAG...

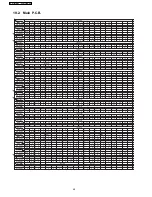
Page 47: ...241 242 243 244 245 246 247 248 249 250 251 252 253 254 255 256 CD PLAY 1 7 0 1 7 3 3 3 4 3 4 0 3 3 2 6 0 3 6 2 8 0 2 9 3 4 2 9 Ref No MODE 1 2 3 4 5 6 7 8 9 10 11 12 13 14 15 16 17 18 19 20 CD PLAY 3 4 3 2 3 4 3 1 3 2 0 1 3 2 3 4 3 1 3 0 0 1 2 9 3 4 2 7 3 3 3 3 3 3 3 0 2 2 Ref No MODE 21 22 23 24 25 26 27 28 29 30 31 32 33 34 35 36 37 38 39 40 CD PLAY 1 6 0 1 3 4 0 3 4 1 7 2 7 Ref No MODE 41 42 4...

Page 48: ...1 0 0 0 0 0 0 0 4 9 2 5 0 2 4 4 9 4 9 4 8 2 7 0 Ref No MODE 21 22 23 24 25 26 27 28 29 30 31 32 33 34 35 36 37 38 39 40 CD PLAY 0 4 7 0 0 0 0 4 7 4 7 4 7 4 7 0 0 0 4 6 0 4 0 4 4 4 6 0 4 6 STANDBY 0 4 8 0 0 0 0 0 0 0 0 0 0 0 0 0 0 1 0 1 0 0 0 Ref No MODE 41 42 43 44 45 46 47 48 49 50 51 52 53 54 55 56 57 58 59 60 CD PLAY 0 4 6 0 0 1 0 0 0 0 0 0 4 7 0 0 0 4 6 4 6 4 6 4 5 4 7 0 STANDBY 0 0 0 0 0 0 0 ...

Page 49: ...3 0 3 0 5 0 5 0 5 0 5 0 5 0 0 7 0 2 Q2600 Q2702 Q2703 Q2607 Q2605 Q2604 Q2500 Q2803 Q2808 Q2801 Q2601 Q2608 Q2609 Q2818 Q2813 Q2809 Q2807 Q2814 Q2805 Q2201 Q2200 Q2804 Q2806 19 3 FL P C B MIC P C B Tray Loading P C B FL P C B Ref No MODE 1 2 3 4 5 6 7 8 9 10 11 12 13 14 15 16 17 18 19 20 CD PLAY 22 2 10 2 1 7 0 1 8 1 8 4 2 4 6 3 5 0 4 22 2 22 2 22 2 19 9 22 3 19 9 17 4 19 9 19 8 19 9 STANDBY 0 0 0...

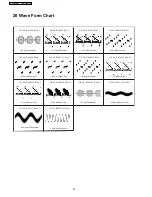
Page 50: ...No IC2018 13 PLAY 3 8Vp p 100nsec div WF No IC2011 36 PLAY 40mVp p 200usec div WF No IC2013 7 PLAY 80mVp p 200usec div WF No IC2006 11 PLAY 1 1Vp p 20usec div 1 1Vp p 20usec div 0 5Vp p 20usec div WF No IC2006 12 PLAY 1 0Vp p 20usec div WF No IC2006 13 PLAY 2 1Vp p 20usec div WF No IC2006 15 PLAY 2 1Vp p 20usec div WF No IC2006 16 PLAY 1 2Vp p 20usec div 1 0Vp p 20usec div 50 SA HT885WGC SA HT885W...

Page 51: ...depending on the internal impedance of the DC circuit tester Important safety notice Components identified by mark have special characteristics important for safety Furthermore special parts which have purposes of fire retardant resistors high quality sound capacitors low noise resistors etc are used When replacing any of components be sure to use only manufacturer s specified parts shown in the p...

Page 52: ...SA HT885WGC SA HT885WGS 52 ...

Page 53: ...IN2 VIN1 MOTOR SPINDLE MOTOR TRAVERSE EEP ROM Not supplied C3EBGC000044 IC8611 ACT F HFM ACT F ACT T ACT T ACTUATOR COIL FOCUS COIL TRACKING BIAS2 TRACKING COIL FOCUS COIL TRAVERSE SPINDLE MOTOR DRIVE C0GBG0000048 IC8251 PWM1 VHALF TRV DRV 144 128 MUTE12 MUTE CH4 20 MUTE4 MUTE3 LDIN 6 OPOUT SHIFT LEVEL SHIFT LEVEL SHIFT LEVEL SHIFT LEVEL IC8001 MN2DS0009AP DV3 2 LSI LD DRIVE LD DRIVE 130 129 131 1...

Page 54: ...R OVERSAMPLING 4X 8X LOW PASS FILTER OUTPUT AMP AND DAC V OUT8 LOW PASS FILTER OUTPUT AMP AND DAC V OUT7 LOW PASS FILTER OUTPUT AMP AND DAC V OUT6 LOW PASS FILTER OUTPUT AMP AND DAC V OUT5 LOW PASS FILTER OUTPUT AMP AND DAC V OUT4 LOW PASS FILTER OUTPUT AMP AND DAC V OUT3 LOW PASS FILTER OUTPUT AMP AND DAC V OUT2 MODULATOR DELTA SIGMA MULTI LEVEL ENHANCED V OUT1 LOW PASS FILTER OUTPUT AMP AND DAC ...

Page 55: ... 28 36 35 37 CL CE NC SD DI ST DO DVD STAT DVD CMD DVD CLK S VIDEO OUT JK2001 IC2006 VIDEO DRIVE C9ZB00000498 GND1 VCC2 VCC1 B VIDEO OUT JK2001 15 14 CR BLUE JK2001 11 CB GREEN JK2001 12 13 Y RED JK2001 2dB 75 2dB 150K BIAS 4dB 75 LPF 13 5MHz 2dB 150K BIAS 4dB 75 LPF 13 5MHz 2dB 150K BIAS 4dB 75 LPF 13 5MHz 2dB 150K BIAS 4dB 75 LPF 13 5MHz 4dB 75 2dB LPF 13 5MHz 150K BIAS Rch TUN L FM ON SUPPLY PO...

Page 56: ... 26 28 29 52 50 51 49 MIX IN 35 X2000 Q2000 RESET B B NF B C0ABBB000230 IC2015 CENTER SUB WOOFER BUFFER AMP B MUTING CONTROL MUTING B B C0AABB000125 IC2013 HEADPHONES AMP MUTING CONTROL MUTING MUTING CONTROL MUTING MUTING CONTROL MUTING CONTROL MUTING MUTING OUT FL OUT FR OUT LS OUT RS TONE 58 57 56 55 54 53 TMF LA TMF LB TMF RA TMF RB TMFR TMF L 46 1 5 RC IN LC IN 6 7 RS IN LS IN SS C 3 MIC IN EX...

Page 57: ...LED Q6074 DRIVE LED PHONES JK6002 Rch B B 5 10 12 16 19 21 22 24 30 31 33 35 38 41 12 13 16 17 19 21 25 27 28 30 32 34 36 39 14 18 20 22 24 26 29 33 35 6 9 11 13 15 17 18 20 32 34 36 37 39 40 SIGNAL LINES Indicates the Pin No of Right Channel MAIN SIGNAL LINE FM SIGNAL LINE FM OSC SIGNAL LINE AM SIGNAL LINE AM OSC SIGNAL LINE FM AM SIGNAL LINE CD DA AUDIO VIDEO SIGNAL LINE NOTE Signal Lines are ap...

Page 58: ...SA HT885WGC SA HT885WGS 58 ...

Page 59: ... R VGND Y VGND C ADAC5V MIX L ADAC5V MIX R ADGND FL ADGND FR ADGND SL ADGND SR ADGND CNT ADGND SW A REF ZFLAG AMUTE DGND AUDIODIGITAL DGND D 5V DGND D 5V DGND A 5V 220P C8532 R8533 0 R8532 2200 G4 G3 G2 G1 C8572 0 1 C8571 10 0 1 C8258 16V47 C8257 6V33 C8550 K8106 0 TRV INNER SW DGND TRVM TRVM SPM SPM FP8251 GND VRCD SUBSEL PIN CD SUB1 SUB2 VCC VREF1 GND OEIC LDDVD LDGND LDCD PIN DVD VREF2 RF RF GN...

Page 60: ...AC2OUT DAC1OUT AVDDF COMP1 VREF IREF1 COMP2 AVSSF DAC4OUT DAC5OUT AVDDE AVSSE AVDDG AVSSG OSCI OSCO VSS VDD12 DACCK LRCK SRCK ADOUT3 ADOUT2 ADOUT1 ADOUT0 IECOUT VSS VDD33 VDIO7 VDIO6 VDIO5 VDIO4 VDIO3 VDIO2 VDIO1 VDIO0 VDD33 VSS EXTRG1 SCLOCK SDATA EXTRG0 TRCCLK NC NC NC NC VSS VDD33 MDQ15 MDQ0 MDQ14 MDQ1 MDQ13 MDQ2 VDD33 VSS MDQ12 MDQ3 MDQ11 MDQ4 MDQ10 MDQ5 MDQ9 MDQ6 VDD33 VSS MDQ8 MDQ7 VDD12 DQM...

Page 61: ...SS A4 A6 A1 A5 A7 A10 AP BA1 BA0 CS RAS CAS A8 A9 A11 NC CKE A0 CLK WE UDQM LDQM VDD DQ7 VSSQ DQ6 DQ5 NC VSS DQ8 VDDQ DQ9 VSSQ VDDQ DQ10 DQ11 DQ3 VSSQ DQ2 DQ1 VDDQ DQ0 DQ12 VDDQ DQ13 DQ14 VSSQ VSS VDD DQ15 DQ4 NEXOE NEXCE MA 3 MA 4 MA 2 MA 5 MA 1 MA 6 MA 0 MA 7 MA 10 MA 8 MA 9 MA 11 MA 4 MA 5 MA 6 MA 7 MA 8 MA 9 MA 11 MA 3 MA 2 MA 1 MA 0 MA 10 0 1 C8652 0 1 C8651 EXDT 0 EXDT 8 EXDT 1 EXDT 9 EXDT 2...

Page 62: ...PY Y G VGND CB PB B VGND CR PR R VGND Y VGND C ADAC5V MIXL ADAC5V MIXR ADACGND FL ADACGND FR ADACGND SL ADACGND SR ADACGND CENTER ADACGND SUBW VREF ZFLAG DGND DIGITAL AUDIO DGND D 5V DGND D 5V DGND D 5V AGND D 5V AGND D 1 2V DGND D 1 2V DGND M 9V MGND M 9V MGND STATUS CMD DSPCLK R2650 30K R2271 0 R2172 0 LOUT2 LOUT1 TMFR TMFL BNFRA BNFRB BNFLA BNFLB GOUTFL VINFL GOUTFR VINFR AGND THGND CL DA AGND ...

Page 63: ...636 68K R2638 3 9K R2663 1 8K R2639 33P C2621 68K R2642 22K R2161 1 5K R2610 56K R2609 56K R2611 0 1 C2608 0 068 C2618 0 033 C2175 0 033 C2270 C2609 5600P 22K R2625 0 47 C2607 150K R2608 0 12 C2606 15K R2893 18K R2892 1 5K R2244 1 C2249 1 5K R2144 1 C2149 0 15 C2262 3 9K R2261 0 1 C2261 22K R2262 50V10 C2610 3 3K R2613 R2605 2 2K R2278 22K R2178 22K 10K R2606 50V10 C2603 33K R2164 33K R2264 3 3K R...

Page 64: ... B0BC9R000008 D2804 G0A200D00002 L2803 25V220 C2802 470 R2813 1K R2817 4 7K R2815 B0BC7R500001 D2802 0 01 C2859 8 3V820 C2806 G0A101ZA0028 L2801 B0JCPD000025 D2801 100P C2804 R2811 10K 1 2 3 4 5 VCC OUT GND INV STBY EXT R EXT L 10V2 2 C2858 10V2 2 C2857 CR CB Y YOUT VOUT COUT B1GBCFJN0033 Q2004 10V220 C2038 50V4 7 C2702 1 C2028 1 C2029 0 R2917 0 R2919 C0C220JA0055 L2010 0 R2918 2 2K R2820 10K R292...

Page 65: ...20 R2032 220 R2903 0 R2904 0 R2033 220 R2034 220 R2035 220 R2036 1K R2037 1K R2043 220 R2039 220 R2040 220 R2041 220 R2085 0 0 1 C2000 R2047 220 R2048 220 R2049 220 R2007 1K R2012 220 R2013 220 R2014 220 R2016 220 R2018 220 R2019 220 47K R2011 10K R2008 22K R2079 10K R2017 R2010 47 R2006 220 R2003 220 R2002 220 R2001 220 R2000 220 56K R2058 47K R2056 47K R2057 R2050 220 R2051 220 R2052 220 R2053 2...

Page 66: ... 7 6 5 3 2 1 F2 45 F2 44 NP 43 NP 42 G1 41 P17 40 P15 37 NP 3 LED9V FLD DA FLD CLK FLD RST VCC XOUT XIN GND FLD CS FLO0 FL22 FL23 FL24 FL25 FL26 VP FL27 FL28 FL29 FL21 FL20 FL19 FL18 FL17 FL16 FL15 FL14 FL13 FL11 FL10 FL09 FL08 FL07 FL06 FL05 FL04 FL03 NC FL12 FL30 NC P16 G1 P14 G2 P13 G3 P12 G3 G4 NX NX NX NX NX G5 NC G6 G6 P11 G7 P10 P9 G8 P8 P7 P6 P5 G10 P4 P3 P2 P1 G10 NP F1 F1 22K R6028 22K R...

Page 67: ...92 100 R6087 4 7K R6088 1M R6086 Muting B1ABCF000011 Q6071 1000P C6074 470K R6084 8 2K R6085 50V4 7 C6068 4 7K R6083 68 R6095 50V1 C6082 100P C6080 0 033 C6077 50V1 C6078 50V1 C6076 470P C6072 50V4 7 C6070 560 R6082 1000P C6071 CN6009 4 3 2 1 Amplifer B1ABCF000011 Q6073 Amplifer B1ABCF000011 Q6072 J0JBC0000030 L6005 680 R6081 680 R6080 0 1 C6093 0 1 C6092 J0JBC0000019 L6006 J0JBC0000019 L6004 MIC1...

Page 68: ...SA HT885WGC SA HT885WGS 68 ...

Page 69: ...1 CKE12 CKE13 CKE14 CKE16 CKE17 C8531 C8532 C8533 C8530 CKF1 CKF2 CKF3 CKF4 CKF5 CKF6 FP8251 C8424 C8428 C8427 CL8252 CL8251 CL8422 CL8423 CL8425 CL8426 CL8427 CL8428 CL8434 CL8424 R8343 C8341 Q8341 R8342 R8341 R8337 C8335 Q8335 R8336 R8335 C8331 R8334 R8332 R8331 R8333 Q8331 Q8325 C8325 R8328 R8327 R8325 R8326 Q8321 R8323 R8321 R8322 R8324 C8321 CL8512 CL8511 TL8201 C8528 C8504 C8522 C8521 C8511 ...

Page 70: ...64 W2074 C2211 C2130 R2129 C2131 C2232 C2228 R2235 R2708 W2030 C2632 IC2602 IC2601 R2639 R2657 Q2607 C2619 R2635 R2634 R2633 C2620 R2627 R2647 Q2604 R2643 R2649 R2641 R2637 D2850 D2829 C2127 C2227 C2112 C2212 R2847 R2846 R2854 C2851 D2830 R2085 R2660 W2057 Q2609 R2659 R2661 R2663 R2658 R2664 Q2608 R2662 W2062 R2848 R2834 R2835 R2074 R2073 C2858 C2229 C2128 C2857 C2842 C2706 R2126 R2125 C2705 R2601...

Page 71: ...05 IC6000 S6012 C6011 C6005 S6014 S6013 C6003 CN6008 C6007 D6010 FL6000 H6010 D6000 S6011 1 2 18 19 1 24 24 30 41 44 45 2 1 4 4 0 3 1 3 5 3 0 2 5 2 1 2 0 1 5 1 1 1 0 5 1 POWER INPUT SELECTOR PROGRESSIVE H_BASS PbF C B E MIC LEVEL MIC 2 MIC 1 Q6073 Q6071 Q6072 C6086 R6095 R6090 C6080 C6079 R6088 C6077 R6087 C6072 R6084 C6074 C6071 R6082 L6005 R6080 R6081 R6083 L6004 R6091 R6086 L6006 R6085 R6089 C6...

Page 72: ...SA HT885WGC SA HT885WGS 72 ...

Page 73: ... LOADING P C B E A CN6008 PHONES VOLUME SENSOR AV JACK CS901 M 2 19 1 18 JK6002 VR6000 Z6000 CN6032 10 1 7 9 2 1 25 24 2 1 10 9 2 1 1 2 19 18 10 1 CN2004 H2000 1 CN2009 CN2008 CN2002 7 JK2000 JK2001 48 50 47 49 4 2 3 1 PbF PbF PbF PbF PbF PbF SOLDER SIDE SOLDER SIDE SOLDER SIDE SOLDER SIDE 1 2 3 4 5 6 7 SA HT885WGC GS WIRING CONNECTION MIC P C B F SOLDER SIDE PbF 1 4 H6010 MIC LEVEL MIC 2 MIC 1 VR...

Page 74: ...SA HT885WGC SA HT885WGS 74 ...

Page 75: ...9 20p C0AABB000125 C2CBHG000190 100p C0HBB0000044 40p C1BB00000845 80p B1GFGCAA0001 Cathode A Ca Anode Anode Cathode Ca A B3AAA0000583 A Ca Cathode Anode MN2DS0003APH 256p 1 24 25 48 1 4 8 5 RFKWMH90B160 C0GBG0000048 1 3 2 C0CBADG00023 1 3 2 C0EBE0000384 1 4 C0DBEZG00021 2 5 3 UNR511V00L UNR521100L B0ADCJ000020 MAZ82200ML B0BC01000014 MA2J11100L B0ACCE000003 B0ACCK000005 A Ca Cathode Anode B0JCPD0...

Page 76: ...tput 46 YC_H O Control signal for the video signal Mix 47 MUTE_L O MUTE signal for the Line output 48 VOL_DA O DATA signal for 6ch VOL ASP 49 VOL_CK O CLOCK signal for 6ch VOL ASP 50 SCART_ MUTE O Line out for SCART terminal 51 MIC_MUTE O Muting circuit for the MIC input 52 SS_DAT O DATA Signal for S SRND IC 53 SS_CLK O Clock Signal for S SRND IC 54 N C Not used open 55 HB_MUTE O H Bass Mute Pin N...

Page 77: ...s are in microfarads µF unless specified otherwise P Pico farads pF F Farads F Resistance values are in ohms unless specified otherwise 1K 1 000 OHM 1M 1 000k OHM The parenthesized indications in the Remarks columns specify the model names and areas Refer to the cover page The marking RTL indicates the retention time is limited for this item After the discontinuation of this assembly in production...

Page 78: ...28 1 Loading Mechanism Traverse Unit Cabinet 28 1 1 Loading Mechanism Traverse Unit Cabinet Parts Location 78 SA HT885WGC SA HT885WGS ...

Page 79: ...79 SA HT885WGC SA HT885WGS ...

Page 80: ...28 RYPX0091A K TRANSMITTER CLASSIS M 29 K1NA08B00012 WIRELESS CONNECTOR M 30 REXX0447 4P FLAT WIRE MIC M 31 RGW0352 S MIC KNOB M TRAVERSE DECK 310 RHM0003 J MAGNET M 311 RDG0547 PULLEY GEAR M 312 RDG0548 RELAY GEAR M 313 RDG0549 DRIVE GEAR M 314 RDV0070 BELT M 315 REM0102 MOTOR UNIT M 316 RGQ0395 K TRAY M 317 RME0350 CHANGE LEVER SPRING M 318 RME0351 LOCK LEVER SPRING M 319 RME0353 TRAY SLIDER SPR...

Page 81: ...1ABEB000002 TRANSISTOR M Q2609 B1GDCFGA0018 TRANSISTOR M Ref No Part No Part Name Description Remarks Q2702 B1GDCFGA0018 TRANSISTOR M Q2703 B1ABEB000002 TRANSISTOR M Q2800 B1BACD000018 TRANSISTOR M Q2801 B1ADCF000001 TRANSISTOR M Q2802 B1GFGCAA0001 TRANSISTOR M Q2803 B1BCCG000002 TRANSISTOR M Q2804 B1ABCF000176 TRANSISTOR M Q2805 B1ABCF000176 TRANSISTOR M Q2806 B1BCCD000019 TRANSISTOR M Q2807 B1BC...

Page 82: ...P CONNECTOR M CN2008 K1MY10AA0016 10P CONNECTOR M CN2009 K1MY19AA0015 19P CONNECTOR M CN2012 K1MP08A00006 8P CONNECTOR M CN6008 K1MY19BA0021 19P CONNECTOR M CN6009 K1KA04BA0061 4P CONNECTOR M CN6032 K1MY10BA0019 10P CONNECTOR M CS901 K1KA07BA0061 7P CONNECTOR M FP8101 K1MN50BA0173 50P CONNECTOR M Ref No Part No Part Name Description Remarks FP8251 K1MN06BA0148 6P CONNECTOR M FP8531 K1MN26BA0025 26...

Page 83: ... M W6033 ERJ6GEY0R00V CHIP RESISTOR M W6034 ERJ6GEY0R00V CHIP RESISTOR M W6035 ERJ6GEY0R00V CHIP RESISTOR M RESISTORS R2000 ERJ3GEYJ221V 220 1 16W M R2001 ERJ3GEYJ221V 220 1 16W M Ref No Part No Part Name Description Remarks R2002 ERJ3GEYJ221V 220 1 16W M R2003 ERJ3GEYJ221V 220 1 16W M R2006 ERJ3GEYJ221V 220 1 16W M R2007 ERJ3GEYJ102V 1K 1 16W M R2008 ERJ3GEYJ103V 10K 1 16W M R2010 ERJ3GEYJ473V 47...

Page 84: ... ERJ3GEYJ104V 100K 1 16W M R2217 ERJ3GEYJ104V 100K 1 16W M R2218 ERJ3GEYJ223V 22K 1 16W M Ref No Part No Part Name Description Remarks R2219 ERJ3GEYJ222V 2 2K 1 16W M R2220 ERJ3GEYJ223V 22K 1 16W M R2221 ERJ3GEYJ223V 22K 1 16W M R2222 ERJ3GEYJ223V 22K 1 16W M R2227 ERJ3GEYJ104V 100K 1 16W M R2228 ERJ3GEYJ102V 1K 1 16W M R2229 ERJ3GEYJ103V 10K 1 16W M R2230 ERJ3GEYJ103V 10K 1 16W M R2231 ERJ3GEYJ10...

Page 85: ...12 ERJ3GEYJ104V 100K 1 16W M R2713 ERJ3GEYJ102V 1K 1 16W M R2801 ERJ3GEYJ1R0V 1 1 16W M R2803 ERJ3GEYJ182V 1 8K 1 16W M Ref No Part No Part Name Description Remarks R2804 ERJ3GEYJ272V 2 7K 1 16W M R2805 ERJ3GEYJ1R0V 1 1 16W M R2806 ERJ3GEYJ1R0V 1 1 16W M R2808 ERJ3GEYJ1R0V 1 1 16W M R2811 ERJ3GEYJ103V 10K 1 16W M R2813 ERJ3GEYJ471V 470 1 16W M R2815 ERJ3GEYJ472V 4 7K 1 16W M R2817 ERJ3GEYJ102V 1K ...

Page 86: ... M R8321 ERJ3RBD101V 100 3W M R8322 ERJ3GEY0R00V 0 1 16W M R8323 ERJ2GEJ330X 33 2W M Ref No Part No Part Name Description Remarks R8324 ERJ2GEJ102X 1K 2W M R8325 ERJ3RBD101V 100 3W M R8326 ERJ3GEY0R00V 0 1 16W M R8327 ERJ2GEJ330X 33 2W M R8328 ERJ2GEJ102X 1K 2W M R8331 ERJ3RBD101V 100 3W M R8332 ERJ3GEY0R00V 0 1 16W M R8333 ERJ2GEJ330X 33 2W M R8334 ERJ2GEJ102X 1K 2W M R8335 ERJ3RBD101V 100 3W M R...

Page 87: ...V M C2154 ECJ1VB1E103K 0 01 25V M C2155 ECJ1VB1H102K 1000P 50V M Ref No Part No Part Name Description Remarks C2156 ECJ1VB1A105K 1 10V M C2157 ECJ1VB1A105K 1 10V M C2160 ECJ1VB1H471K 470P 50V M C2161 ECJ1VB1C104K 0 1 16V M C2162 ECJ1VB1A154K 0 15 10V M C2163 ECEA1HKA3R3B 3 3 50V M C2164 ECJ1VB1H272K 2700P 50V M C2165 ECJ1VB1A124K 0 12 10V M C2166 ECJ1VB1A124K 0 12 10V M C2167 ECEA1HKA4R7I 4 7 50V ...

Page 88: ...20P 50V M C2819 ECJ1VB1A105K 1 10V M C2820 ECJ1VB1E103K 0 01 25V M C2821 ECEA0JKA470B 47 6 3V M Ref No Part No Part Name Description Remarks C2822 ECJ1VB1E103K 0 01 25V M C2823 ECJ1VB1A105K 1 10V M C2824 ECJ1VB1A105K 1 10V M C2825 ECA0JM331B 330 6 3V M C2826 ECQB1H104JF4 0 1 50V M C2827 ECEA1HKA100I 10 50V M C2828 ECA1HM101B 100 50V M C2829 ECA1HM101B 100 50V M C2830 F2A1E1020065 1000P 25V M C2831...

Page 89: ... C8427 ECJ0EF1C104Z 0 1 16V M C8428 ECJ0EF1C104Z 0 1 16V M C8501 F2G0J101A031 100P 6 3V M Ref No Part No Part Name Description Remarks C8502 ECJ0EF1C104Z 0 1 16V M C8503 ECJ0EF1C104Z 0 1 16V M C8504 ECJ0EF1C104Z 0 1 16V M C8505 ECJ0EF1C104Z 0 1 16V M C8511 ECJ1VB0J105K 1 6 3V M C8512 ECJ1VB0J105K 1 6 3V M C8513 ECJ0EB1A104K 0 1 10V M C8514 ECJ0EB1A104K 0 1 10V M C8515 ECJ0EB1A104K 0 1 10V M C8516 ...

Page 90: ...0 1 16V M C8562 F2G1C100A072 10P 16V M C8563 F2G0J470A031 47P 6 3V M C8564 ECJ1VB0J105K 1 6 3V M C8571 ECJ3YB1A106M 10 10V M C8572 ECJ0EF1C104Z 0 1 16V M C8601 ECJ0EF1C104Z 0 1 16V M C8602 ECJ0EB1C153K 0 015 16V M C8606 ECJ0EF1C104Z 0 1 16V M C8611 ECJ0EF1C104Z 0 1 16V M C8621 ECJ0EC1H120J 12P 50V M C8622 ECJ0EC1H120J 12P 50V M C8651 ECJ0EB1A104K 0 1 10V M C8652 ECJ0EB1A104K 0 1 10V M C8691 ECJ0EF...

Page 91: ...Y COVER M Ref No Part No Part Name Description Remarks A2 K2CQ2CA00002 AC CORD M A2 RJA0053 3X AC CORD M GS A3 RQT8221 1B O I BOOK En M A3 RQT8481 G O I BOOK Cn Ar M A4 RSA0007 L FM INDOOR ANTENNA M A5 K1HA25HA0001 SYSTEM CABLE M A6 K2KA2BA00001 VIDEO CABLE M A7 RQCA1029 SPEAKER LABEL M A8 REEX0501B J SPEAKER CABLE M A9 N1DAAAA00001 AM LOOP ANTENNA M 28 3 Packing Materials Accessories Parts List 2...

Reviews: