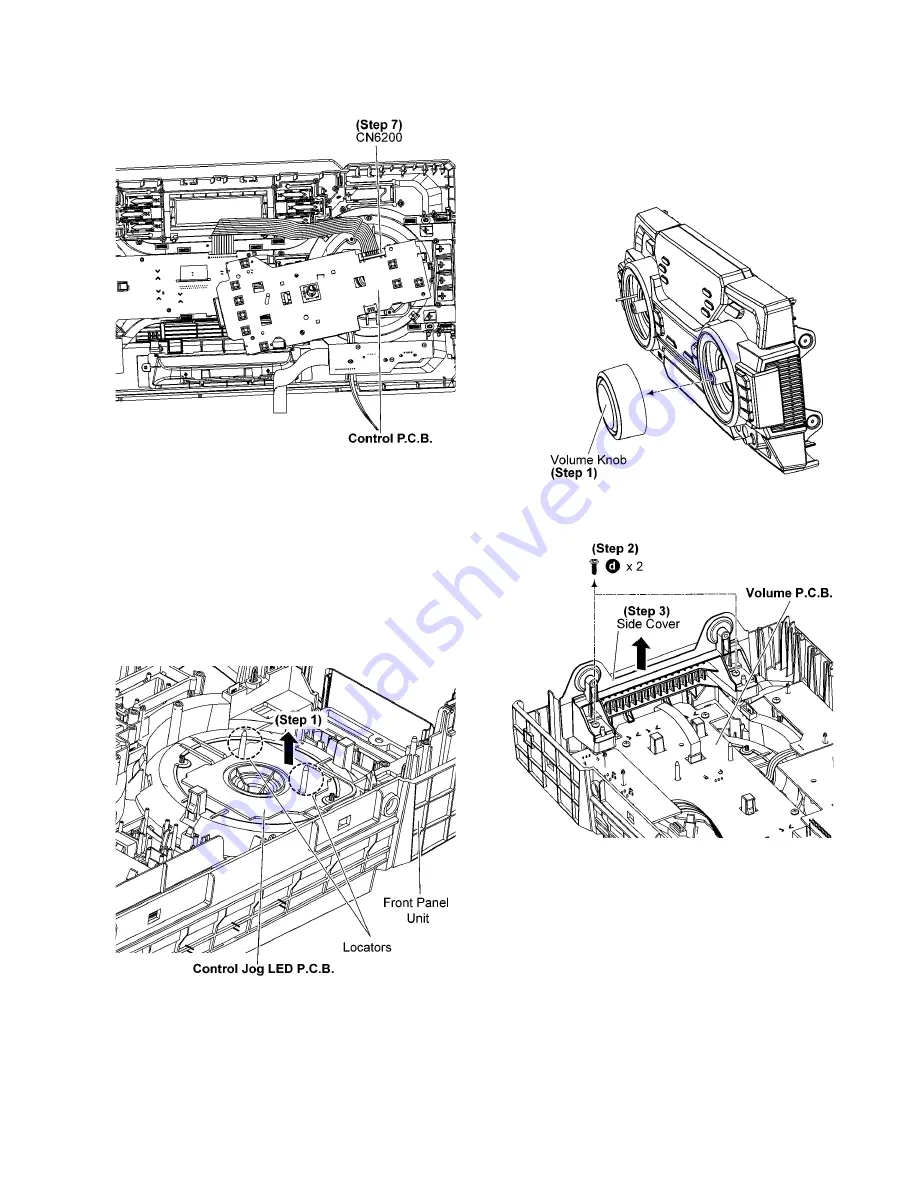
Step 7 Detach 12P Cable at the connector (CN6200) on Con-
trol P.C.B..
9.10. Disassembly of Control Jog
LED P.C.B.
• Refer to “Disassembly of Top Cabinet”.
• Refer to “Disassembly of Front Panel Unit”.
• Refer to “Disassembly of FL Display P.C.B.”.
• Refer to “Disassembly of Control P.C.B.”.
Step 1 Lift up to remove the Control Jog LED P.C.B..
Caution: During assembling, ensure that the Control Jog
LED P.C.B. is properly located & fully inserted into the
Front Panel Unit.
9.11. Disassembly of Volume P.C.B.
• Refer to “Disassembly of Top Cabinet”.
• Refer to “Disassembly of Front Panel Unit”.
• Refer to “Disassembly of FL Display P.C.B.”.
• Refer to “Disassembly of Control P.C.B.”.
Step 1 Remove the Volume Knob.
Step 2 Remove 2 screws.
Step 3 Remove the Side Cover.
Summary of Contents for SA-MAX750LMK
Page 13: ...5 General Introduction 5 1 Media Information ...
Page 14: ...6 Location of Controls and Components 6 1 Remote Control Key Button Operation ...
Page 15: ...6 2 Main Unit Key Button Operation ...
Page 17: ...7 1 1 Service Mode Table ...
Page 24: ...8 Troubleshooting Guide Contents for this section is not available at time of issue ...
Page 27: ...9 3 Main Components and P C B Locations ...
Page 83: ...PSG ...


