53
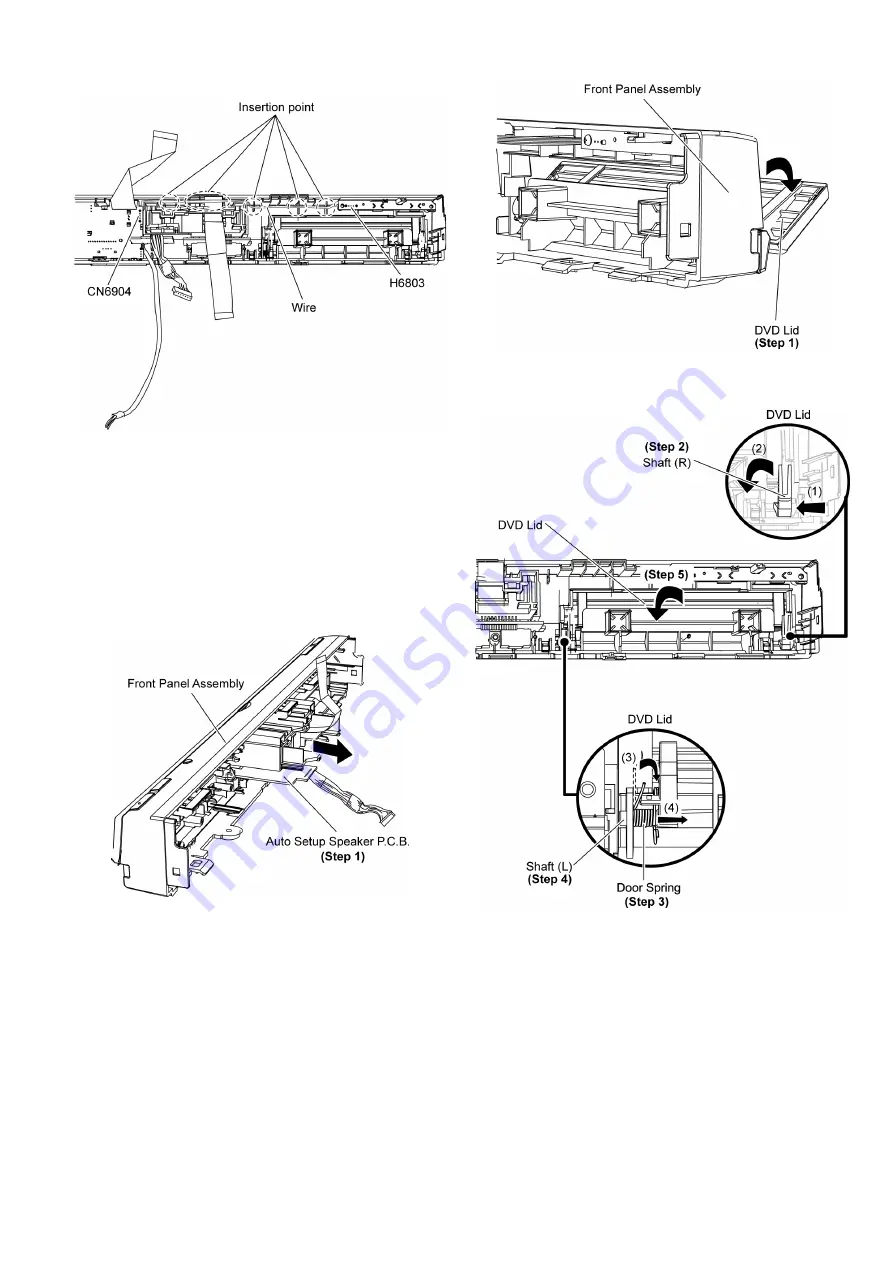
Step 7 Remove Panel P.C.B. & Power Button P.C.B.
Caution: During assembling, ensure the 3P wire is solder
to Power Button P.C.B at location (H6803) is completely
inserted into the insertion point.
9.8.
Disassembly of Auto Setup
Speaker P.C.B.
• Follow (Step 1) to (Step 3) of Item 9.3.
• Follow (Step 1) to (Step 13) of Item 9.6.
• Follow (Step 1) to (Step 7) of Item 9.7.
Step 1 Remove the Auto Setup Speaker P.C.B. in the direction
of arrow.
9.9.
Disassembly of DVD Lid
• Follow (Step 1) to (Step 3) of Item 9.3.
• Follow (Step 1) to (Step 13) of Item 9.6.
Step 1 Open the DVD lid in the direction of arrow, until it is
aligned parallel with the front panel.
Step 2 Move the shaft (R) of the DVD lid in the direction of
arrow (1) & (2).
Step 3 Lift the door spring of shaft (L) in the direction of arrow
(3).
Step 4 Move the shaft (L) of the DVD Lid in the direction of
arrow (4).
Step 5 Remove the DVD lid in the direction of arrow.
9.10. Disassembly of iPod P.C.B.
• Follow (Step 1) to (Step 3) of Item 9.3.
• Follow (Step 1) to (Step 13) of Item 9.6.
Summary of Contents for SA-PT470EB
Page 13: ...13 ...
Page 43: ...43 Fig 3 Fan Connector CN5501 ...
Page 49: ...49 9 2 Main Components and P C B Locations ...
Page 109: ...109 ...


