•
•
•
•
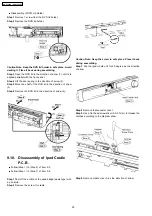
Disassembly of DVD Lid Holder
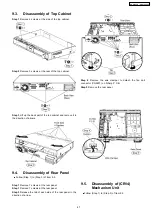
Step 1 Remove 1 screw from the DVD lid holder.
Step 2 Remove the DVD lid holder.
Caution Note: Keep the DVD lid holder in safe place. Avoid
denting it. Place it back during assembling.
Step 3 Open the DVD lid in the direction of arrow (1), until it is
aligned parrallel with the front panel.
Step 4 Lift the door spring in the direction of arrow (2).
Step 5 Move the shaft of the DVD lid in the direction of arrow
(3).
Step 6 Remove the DVD lid in the direction of arrow (4).
9.10. Disassembly of Ipod Cradle
P.C.B.
•
•
•
•
Follow (Step 1) to (Step 3) of Item 9.3.
•
•
•
•
Follow (Step 1) to (Step 7) of Item 9.6.
Step 1 Peel off the portion of the pana badge (paste type) with
a pen knife.
Step 2 Remove the screw for cradle.
Caution Note: Keep the screw in safe place. Place it back
during assembling.
Step 3 Flip the Ipod cradle unit for 45 degree as the direction
of arrow.
Step 4 Remove theconnector cover.
Step 5 Use a flat head screwdriver (0.5-0.7mm) to release the
catches according to the diagram show.
Step 6 Remove cradle cover A as the direction of arrow.
50
SA-PT960P / SA-PT960PC
Summary of Contents for SA-PT960P
Page 12: ...12 SA PT960P SA PT960PC ...
Page 44: ...44 SA PT960P SA PT960PC ...
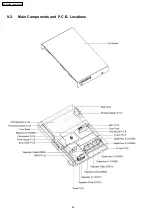
Page 46: ...9 2 Main Components and P C B Locations 46 SA PT960P SA PT960PC ...
Page 80: ...14 Voltage and Waveform Chart 14 1 DVD Module P C B 80 SA PT960P SA PT960PC ...
Page 92: ...SA PT960P SA PT960PC 92 ...
Page 102: ...102 SA PT960P SA PT960PC ...
Page 130: ...CN5501 Fig 3 Fan Connector 130 SA PT960P SA PT960PC ...
Page 132: ...Table 1 132 SA PT960P SA PT960PC ...
Page 136: ...136 SA PT960P SA PT960PC ...
Page 141: ...24 Exploded Views 24 1 Cabinet Parts Location SA PT960P SA PT960PC 141 ...

