RQT7704
16
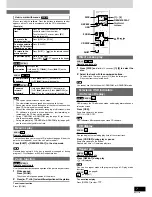
Auto-off function
Setting the time
Remote control only
Turning the demo function on/off
To dim the display panel
Remote control only
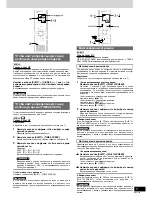
Press [SHIFT] + [DIMMER].
The display is dimmed and the indicators are turned off.
(The AC supply indicator remains on.)
Press [SHIFT]
o
[DIMMER] again to restore the display.
Switching displays
Press [DISPLAY] to select the desired spectrum analyzer.
Every time you press the button:
Normal
Aurora
Peak hold
(OFF)
To mute the volume
Remote control only
Press [MUTING].
Press the button again to cancel.
“MUTING” goes out.
To cancel from the unit, turn [VOLUME] to minimum (--dB), then raise
it to the required level.
Muting is also cancelled when the unit is turned off.
Using headphones (not included)
Reduce the volume level and connect the headphones to the
[PHONES] jack.
Plug type: 3.5 mm stereo
Note
Avoid listening for prolonged periods of time to prevent hearing damage.
When CD or tape is selected as the source
To save power, the unit turns off if it is left unused for ten minutes.
This function does not work if the source is tuner or AUX.
Hold down [–AUTO OFF].
“AUTO OFF” is shown on the display.
The setting is maintained even if the unit is turned off.
If you select tuner or AUX as the source, “AUTO OFF” goes out. It
comes on again when you select CD or tape.
To cancel
Hold down [–AUTO OFF] again.
This is a 24-hour clock.
1
Switch on the unit.
2
Press [CLOCK/TIMER] to select “CLOCK”.
Every time you press the button:
CLOCK
REC
PLAY
Previous display
3
(within 7 seconds or so)
Press [
g
3
] or [
f
4
] to set the time.
4
Press [CLOCK/TIMER] to finish setting the time.
The display will return to whatever was displayed before you set
the time.
To display the time
Press [CLOCK/TIMER] once when the unit is on or at standby mode.
The time is shown for about 5 seconds.
Note
Reset the clock regularly to maintain accuracy.
Remote control only
DISPLAY
SHIFT
PHONES
AUTO OFF
Convenient functions
When the unit is first plugged in, a demonstration of its functions may
be shown on the display.
If the demo setting is off, you can show a demonstration by selecting
“DEMO ON”.
Press and hold [–DEMO].
The display changes each time the button is held down.
NO DEMO (off)
↔
DEMO ON (on)
While in the standby mode, select “NO DEMO” to reduce power
consumption.
Note
DEMO function cannot be turned on when Dimmer is on.


