background image

RQT7704

17

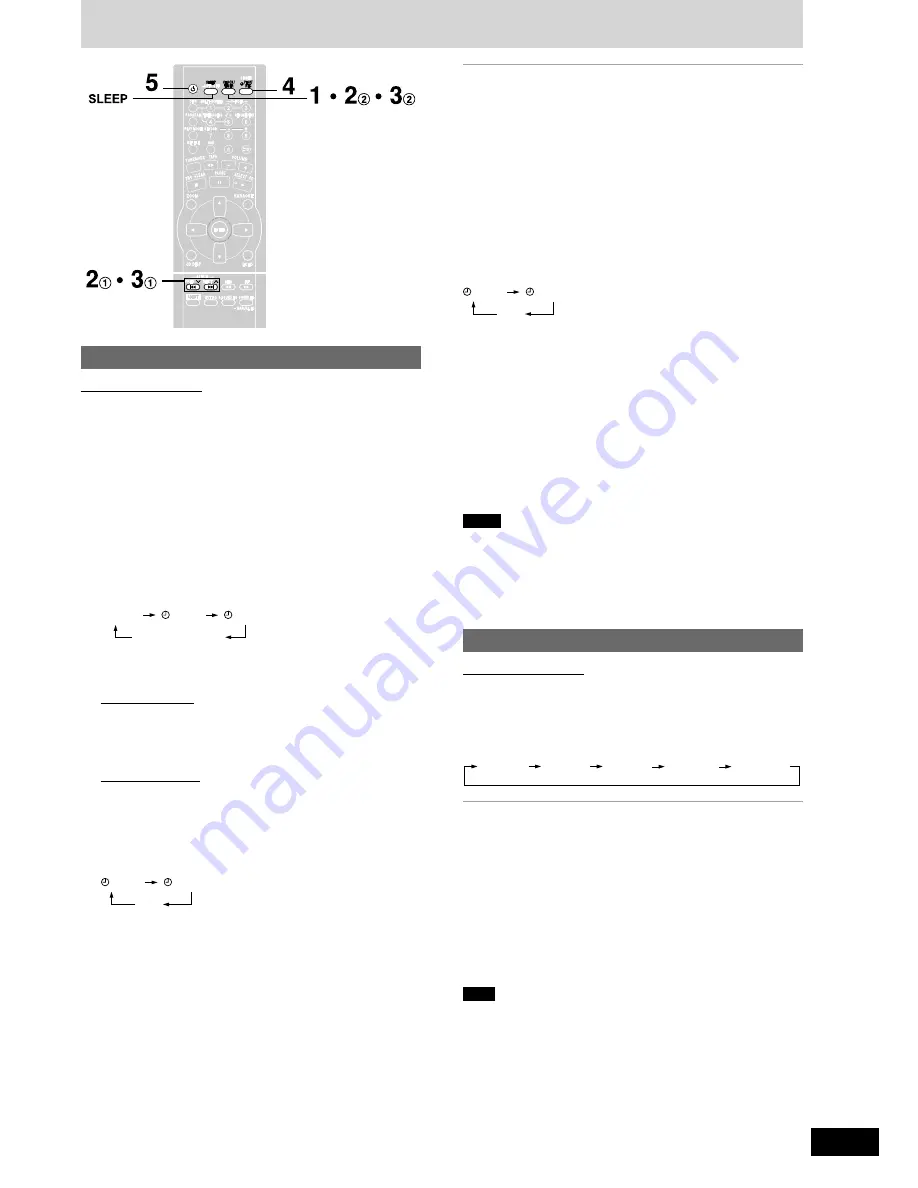
Using the timers

To cancel the timer

Press [

r

PLAY/REC] to clear the timer indicator from the display.

(The timer comes on at the set time everyday if the timer is on.)

To change the settings (when the unit is on)

To change the play/record times

Do steps 1, 2, 3 and 5.

To change the source or volume

1. Press [

r

PLAY/REC] to clear the timer indicator from the display.

2. Make changes to the source or volume.
3. Do steps 4 to 5.

To change the timer

Press [

r

PLAY/REC] to select the desired timer.

Every time the button is pressed:

REC

PLAY

(off)

To check the settings

Press [CLOCK/TIMER] while the unit is on to select “

r

PLAY” or

r

REC”.

The settings are shown in the following order:
Play timer: start time

finish time

source

volume

Record timer: start time

finish time

source

To check the settings while the unit is off, press [CLOCK/TIMER]
twice.

If you use the unit after the timers are set

After using, check that the correct tape/CD are loaded before turning
the unit off.

 Notes

If you turn the unit off and on again while a timer is functioning, the
finish time setting will not be activated.

If you selected AUX as the source, when the timer comes on, the
unit turns on and engages “AUX” as the source. If you want to
playback or record from a connected unit, set that unit’s timer to the
same time. (See the connected unit’s instruction manual.)

Using the sleep timer

Remote control only

This timer turns the unit off after a set time.

While enjoying the desired source:

Press [SLEEP] to select the time (minutes).

Every time you press the button:

SLEEP 90

SLEEP 120

SLEEP 60

SLEEP 30

SLEEP OFF

To cancel the sleep timer

Press [SLEEP] to select “SLEEP OFF”.

To confirm the remaining time

Press [SLEEP] once.
The remaining time is shown for about 5 seconds.

To change the setting

Press [SLEEP] to select the new setting.

You can use the sleep timer in combination with the play/record timer.
Make sure the unit is off before the play/record timer’s start time.

 Note

The sleep timer will be turned off when you start recording from a CD.

Using the play/record timer

Remote control only

You can set the timer to come on at a certain time to wake you up
(play timer) or to record a radio station or from the aux source (record
timer).
The play and record timers cannot be used together.

Preparations:

Turn the unit on and set the clock (

A

 page 16).

For the play timer

, prepare the desired music source (tape/CD/

radio/aux), and set the volume.

For the record timer

, check the cassette’s erasure prevention tabs

(

A

 page 14) and insert the tape in deck 2 (

A

 page 13). Tune to the

radio station (

A

 page 12) or select the aux source (

A

 page 15).

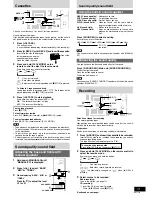
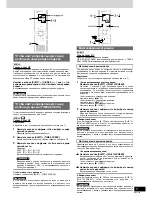
1

Press [CLOCK/TIMER] to select the timer function.

Every time you press the button:
CLOCK

REC

PLAY

Previous display

r

PLAY: to set the play timer

r

REC:

to set the record timer

2

ON time setting

1

(Within 8 seconds or so)

Press [

f


4

] or [

g


3

] to set the start time.

2

Press [CLOCK/TIMER].

3

OFF time setting

1

Press [

f


4

] or [

g


3

] to set the finish time.

2

Press [CLOCK/TIMER].

The start and finish times are now set.

4

Press [

r

PLAY/REC] to display the timer indicator.

Every time you press the button:

REC

PLAY

(off)

r

PLAY: to turn the play timer on

r

REC:

to turn the record timer on

(The indicator doesn’t appear if the start and finish times or the
clock hasn’t been set.)

5

Press [

f

f

f

f

f

] to turn the unit off.

The unit must be off for the timers to operate.

Play timer:

Play will start in the set condition at the set time
with volume increasing gradually to the set level.

Record timer:

The unit comes on 30 seconds before the set
time with the volume muted.

Summary of Contents for SA-VK31

Page 1: ...erating Instructions Model No SC VK31 Before connecting operating or adjusting this product please read these instructions completely Please keep this manual for future reference RQT7704 R G0404CP0 En Ru EE UP DOWN VOLUME ...

Page 2: ...nce caused by mobile tele phones during use If such interference is apparent please increase separation between the product and the mobile telephone THIS UNIT IS INTENDED FOR USE IN MODERATE CLIMATES CAUTION THIS PRODUCT UTILIZES A LASER USE OF CONTROLS OR ADJUSTMENTS OR PERFORM ANCE OF PROCEDURES OTHER THAN THOSE SPECI FIED HEREIN MAY RESULT IN HAZARDOUS RADIATION EXPOSURE DO NOT OPEN COVERS AND ...

Page 3: ...old and new batteries use different types at the same time heat or expose to flame take apart or short circuit attempt to recharge alkaline or manganese batteries use batteries if the covering has been peeled off keep together with metallic objects such as necklaces Mishandling of batteries can cause electrolyte leakage which can damage items the fluid contacts and may cause a fire If electrolyte ...

Page 4: ... this unit only Do not use it with other equipment For your reference Information you enter into the unit s memory except for time remains intact for up to a week after the AC power supply cord is disconnected Connector Appliance inlet Approx 6 mm Caution Use the speakers only with the recommended system Failure to do so may lead to damage to the amplifier and or the speakers and may result in the...

Page 5: ... Buttons such as 2 function in exactly the same way as the buttons on the main unit Sleep timer Auto off button SLEEP AUTO OFF 16 17 Multi screen button MULTI SCREEN 9 Disc button DISC 7 Program button PROGRAM 8 11 12 Time access button TIME ACCESS 9 Play mode select button PLAY MODE 8 11 14 Repeat button REPEAT 7 On screen display button OSD 7 Tuner band select AUX button TUNER AUX 12 15 _ CD pau...

Page 6: ...gnal recorded on version 2 0 CDs that enables you to control playback It makes video enjoyment more interesting by allowing you to interact with the system via menus search functions or other typically computer like operations Do not use irregularly shaped CDs attach extra labels and stickers use CDs with labels and stickers that are coming off or with adhesive exuding from under labels and sticke...

Page 7: ... display information on a television screen Press OSD Every time you press the button OSD ON OSD OFF Note OSD indicators differ depending on video CD software CD display Remote control only You can display the remaining play time of the current track Press CD DISP during play or pause Every time you press the button Elapsed play time Remaining play time Repeat play Remote control only Press REPEAT...

Page 8: ...m the selected track 4 Only when you selected A RANDOM in step 1 Press CD to start play To stop play Press L CLEAR When playback ends The current play mode will be retained Final disc For example if play starts from disc 4 disc 3 will be the final disc Order of progression Disc 4z5z1z2z3 Program play You can program up to 24 tracks Remote control only Preparation Press CD and then L CLEAR 1 Press ...

Page 9: ...ides the screen up into several parts and displays the picture from each of the tracks You can select the track you want from the various pictures on the screen Preparation Make sure OSD is on A page 7 1 While playback is stopped Press SHIFT MULTI SCREEN Track 1 will first be played back for a few seconds then will be displayed as a still picture The same will then happen for the following tracks ...

Page 10: ...rack to provide information about the track You cannot use 1 RANDOM play A RANDOM play search function and time access function Some MP3 may not be played due to the condition of the disc or recording Recordings will not necessarily be played in the order you recorded them File format indicator MP3 Indicates the disc contains MP3 files CD display for MP3 Remote control only During play or pause Pr...

Page 11: ...5z1z2z3 Note You cannot use program mode together with CD Play Mode function Program play for MP3 You can program up to 24 tracks Remote control only Preparation 1 Turn the television on select the video input with the television input switch 2 Select the desired disc A page 6 3 Press L CLEAR 1 An album list appears Press PROGRAM 2 Press 8 9 to select an album and press ENTER 3 A track list appear...

Page 12: ...ere are two methods of pre setting stations Automatic presetting All the stations the tuner can receive are preset Manual presetting You can select the stations to preset and the order they are preset in Up to 15 stations each can be set in the FM and AM bands 1 Press TUNER BAND to select band The unit comes on Every time you press the button FM AM 2 Press PLAY MODE on the remote control to select...

Page 13: ...up the leader tape so recording can begin immediately 1 Press c DECK 2 and insert the cassette to be recorded Insert with the side to be recorded facing towards you and the exposed tape facing down The tape direction is automatically set to F To record on the reverse side Press TAPE twice then press L STOP 2 Press and hold PLAY MODE on the remote control to select the reverse mode Every time you p...

Page 14: ...corded from the beginning on the reverse side At the end of the reverse side recording stops and the current track will be interrupted MP3 CD VCD 1 1 You can enjoy karaoke while watching the TV screen which displays the motion picture and words of a song Soft ware KARAOKE Video CDs Sound multiplex Tape CD Voice modes Stereo Tape CD Non KARAOKE a a off Background For singing music Voice along V MUT...

Page 15: ...of vinyl wire horizontally across a window or other convenient location Leave the loop antenna connected Note Disconnect the outdoor antenna when the unit is not in use Do not use the outdoor antenna during a lightning storm Optional antenna connections External unit connections An analog player with a built in phono equalizer can be connected A video cassette recorder VCR or other recording equip...

Page 16: ...rce is tuner or AUX Hold down AUTO OFF AUTO OFF is shown on the display The setting is maintained even if the unit is turned off If you select tuner or AUX as the source AUTO OFF goes out It comes on again when you select CD or tape To cancel Hold down AUTO OFF again This is a 24 hour clock 1 Switch on the unit 2 Press CLOCK TIMER to select CLOCK Every time you press the button CLOCK REC PLAY Prev...

Page 17: ...ime Press SLEEP once The remaining time is shown for about 5 seconds To change the setting Press SLEEP to select the new setting You can use the sleep timer in combination with the play record timer Make sure the unit is off before the play record timer s start time Note The sleep timer will be turned off when you start recording from a CD Using the play record timer Remote control only You can se...

Page 18: ...e same disc is inserted Unusual sound is heard CD RW cannot be read TAKE OUT DISC appears on the display Picture is smaller than screen Picture appears too wide Picture appears in monochrome The picture of the video CD does not appear on TV When there is a television set nearby Remote control Remote control doesn t work Check if the batteries are inserted correctly 3 Replace the batteries if they ...

Page 19: ...g Power consumption in standby mode 0 85 W Note 1 Specifications are subject to change without notice Mass and dimensions are approximate 2 Total harmonic distortion is measured by the digital spectrum analyzer 3 HIGH stands for High Frequency LOW stands for Low Frequency CASSETTE DECK SECTION Track system 4 track 2 channel Heads Record playback Solid permalloy head Erasure Double gap ferrite head...

Page 20: ...Matsushita Electric Industrial Co Ltd Web Site http www panasonic co jp global RQT7704 20 ...

Page 21: ...04CP0 CD cÚ ÂÓÒËÒÚÂÏ àÌÒÚ Û͈Ëfl ÔÓ ÍÒÔÎÛ Ú ˆËË Model No SC VK31 è  ÔÓ ÍÎ eÌËeÏ pa oÚoÈ ËÎË Â ÛÎË Ó ÍoÈ aÌÌo o ÔÔ Úa Ôpo ÚËÚe ÔÓÊ ÎÛÈÒÚ ÚÛ ËÌÒÚ ÛÍˆË ÔÓÎÌÓÒÚ ëÓı ÌËÚ ÔÓÊ ÎÛÈÒÚ ÚÛ ËÌÒÚ ÛÍˆË En Ru EE UP DOWN VOLUME ...

Page 22: ...íÇìûí çéêåÄãúçéâ ÇÖçíàãüñàà Ñãü èêÖÑéíÇêÄôÖçàü êàëäÄ èé êÄÜÖçàü ùãÖäíêàóÖëäàå íéäéå àãà ÇéáçàäçéÇÖçàü èéÜÄêÄ à3 3Ä èÖêÖÉêÖÇÄ çÖ áÄäêõÇÄâíÖ ÇÖçíàãüñàéççõÖ éíÇÖêëíàü ÄèèÄêÄíÄ ÉÄáÖíÄåà ëäÄíÖêíüåà òíéêÄåà à èéÑéÅçõåà èêÖÑåÖíÄåà çÖ êÄáåÖôÄâíÖ çÄ ÄèèÄêÄí àëíéóçàäà éíäêõíéÉé èãÄåÖçà íÄäàÖ äÄä ÉéêüôàÖ ëÇÖóà ÇõÅêÄëõÇÄâíÖ ÅÄíÄêÖà Ç åìëéê ìóàíõÇÄü éïêÄçì éäêìÜÄûôÖâ ëêÖÑõ èêÖÑìèêÖÜÑÖçàÖ Ñãü ìåÖçúòÖçàü êàëäÄ Ç...

Page 23: ... ÌËÍ ÔËÚ ÌËfl ÂÒÎË ÓÌ ÌÂ Û ÂÚ ËÒÔÓÎ ÁÓ Ú Òfl Ú ÂÌËÂ Ô Ó ÓÎÊËÚÂÎ ÌÓ Ó Ô ËÓ ÂÏÂÌË èpËÎ ÂÏ Â ÔpËÌ ÎeÊÌÓÒÚË ëÂÚ ÓÈ ÌÛp ÔËÚ ÌËfl ÔÂpÂÏÂÌÌÓ Ó ÚÓÍ 1 Ú ÇÌÛÚpÂÌÌflfl óå ÌÚÂÌÌ 1 Ú ä ÂÎ Îfl Ë ÂÓ ÒÓ ËÌÂÌËfl 1 Ú Å Ú ÂÈÍË àÒÔÓÎ ÁÓ ÌË ÖÒÎË Ì Ç ÂÏ ÚÂΠËÁÓ Â Ì Û ËÎ Ò ˆ ÂÚÓÔÂ Â Ñ ÌÌ Â ÓÏÍÓ Ó Ó ËÚÂÎË ÒÍÓÌÒÚ ÛË Ó Ì ÒÔÂˆË Î ÌÓ Îfl ÓÚ ÎËÁË ÓÚ ÚÂΠËÁÓ ÌÓ ÓÚ ÂÎ Ì Â ÏÓ ÂÎË ÚÂΠËÁÓ Ó Ë ÒÔÓÒÓ ÛÒÚ ÌÓ ÍË ÓÏÍÓ Ó Ó ËÚÂÎÂÈ ÏÓ ÛÚ...

Page 24: ...Ï ç ÁÏ ÈÚ ÌÌ Â ÓÏÍÓ Ó Ó ËÚÂÎË Ì ÒÚÂÌ ı ËÎË ÔÓÚÓÎÍ èÓ ÒÓ ËÌËÚ ÒÂÚ ÓÈ ÌÛ ÔËÚ ÌËfl Ô ÂÏÂÌËÓ Ó ÚÓÍ ÚÓÎ ÍÓ ÔÓÒΠÚÓ Ó Í Í Û ÛÚ ÔÓÎÌÂÌ Ò ÓÒÚ Î Ì Â ÒÓ ËÌÂÌËfl èÓ ÓÚÓ Í ëÍ ÛÚËÚÂ Ë Û ÎËÚ  ıÌË ÍÓ̈ ËÌËÎÓ ÓÈ ËÁÓÎflˆËË Ò Ô Ó Ó Ó ÌÚÂÌÌ Ë ÌÛ Ó ÓÏÍÓ Ó Ó ËÚÂÎÂÈ äÎÂÈÍ fl ÎÂÌÚ è ËÍ ÂÔËÚ ÌÚÂÌÌÛ ÍÎÂÈÍÓÈ ÎÂÌÚÓÈ ÔÓÎÓÊÂÌËÂ Ì ËÎÛ Â Ó Ô ËÂÏ 1 ÇÌÛÚ ÂÌÌflfl óå ÌÚÂÌÌ 2 ê ÏÓ Ì fl Äå ÌÚÂÌÌ ìÒÚ ÌÓ ËÚ ÌÚÂÌÌÛ Â ÚËÍ Î ÌÓ Ì...

Page 25: ... äÌÓÔÍ ÒÚ ÓÂÌÌÓ Ó Á ÛÍÓ Ó Ó Í Î ÈÁÂ Û ÌÓ Ó Í Î ÈÁ SOUND EQ MANUAL EQ 13 DECK 1 DECK 2 UP DOWN STOP REW PREV NEXT SELECT FF DISPLAY DEMO PBC CD AUX TAPE TUNER BAND ép Ì ÛÔp ÎÂÌËfl Ì Îˈ ÓÈ Ô ÌÂÎË éÒÌÓ ÌÓÈ ÔÔ p Ú èÛÎ Ú Ñì 1 àÌ ËÍ ÚÓ ÔËÚ ÌËfl Ô ÂÏÂÌÌÓÚÓ ÚÓÍ AC IN ùÚÓÚ ËÌ ËÍ ÚÓ Ó ËÚ ÍÓ ÔÔ Ú ÔÓ ÒÓ ËÌÂÌ Í ÚÂÔÒÂÎ ÌÓÈ ÓÁÂÚÍ 2 è ÂÍÎ ÚÂÎ ÔËÚ ÌËfl standby on f f f f f I ç ÊÏËÚ Ô ÂÍÎ ÚÂÎ ÚÓ Ô ÂÍÎ ËÚ ÔÔ ...

Page 26: ...Ú Òfl ËÒÍ ÏË ÌÂÔ ËÎ ÌÓÈ ÙÓ Ï Ô ËÍÎÂË Ú ÎË ÌËÂ ÚËÍÂÚÍË Ë Ì ÍÎÂÈÍË ÔÓÎ ÁÓ Ú Òfl ËÒÍ ÏË Ò ÓÚÒÚ ËÏË ÚËÍÂÚÍ ÏË Ë Ì ÍÎÂÈÍ ÏË ËÎË Ò ÒÚÛÔ ËÏ ËÁ ÔÓ ÚËÍÂÚÍË ËÎË ÌaÍÎeÈÍË ÍÎÂÂÏ Ô ËÍ ÂÔÎflÚ Á Ë ËÂ ÓÚ ˆ ÔËÌ ÔÓÍ ÚËfl ËÎË Û ËÂ Ô ËÌ ÎÂÊÌÓÒÚË Ú ÍÓ Ó Ó ÔËÒ Ú Ì ÍÓÏÔ ÍÚ ËÒÍ ı ËÒÚËÚ ËÒÍË Ò ËÒÔÓÎ ÁÓ ÌËÂÏ ÊË ÍÓÒÚÂÈ è ÓÚË ÈÚÂ ËÒÍË ÒÛıÓÈ Ïfl ÍÓÈ ÚÍ Ì ËÒÔÓÎ ÁÓ Ú ËÒÍË ÒÓ ÒÍÓÔË Ó ÌÌ ÏË Ò ËÏÂ ËıÒfl Ì ÌÍÂ ÚËÍÂÚÍ ÏË óÚÓ ËÁ ÂÊ Ú ÔÓ ÂÊ...

Page 27: ... Ó ËÒÔÎÂÂ Ì ÚÂΠËÁËÓÌÌÓÏ Í Ì ç ÊÏËÚ ÍÌÓÔÍÛ OSD ä Ê È Á ÍÓ Ç Ì ÊËÏ ÂÚ ÍÌÓÔÍÛ OSD ON ÍÎ OSD OFF ÍÎ è ËÏ ÌË àÌ ËÍ ÚÓ Í ÌÌ ı ËÒÔΠÓÚÎË ÚÒfl Á ËÒËÏÓÒÚË ÓÚ Ô Ó ÏÏÌÓ Ó Ó ÂÒÔ ÂÌËfl Video CD ÑËÒÔÎÂÈ CD íÓÎ ÍÓ ÔÛÎ Ú Ñì Ç ÏÓÊÂÚÂ Ò ÂÚËÚ ÓÒÚ ÂÂÒfl ÂÏfl ÓÒÔ ÓËÁ  ÂÌËfl ÚÂÍÛ ÂÈ Ó ÓÊÍË ç ÊÏËÚ ÍÌÓÔÍÛ CD DISP Ó ÂÏfl ÓÒÔ ÓËÁ  ÂÌËfl ËÎË Ô ÛÁ ä Ê È Á ÍÓ Ç Ì ÊËÏ ÂÚ ÍÌÓÔÍÛ àÒÚÂÍ Â ÂÏfl éÒÚ ÂÂÒfl ÂÏfl ÓÒÔ ÓËÁ  ÂÌËfl Ó...

Page 28: ...ÚÓ Í ç ÊÏËÚ ÍÌÓÔÍÛ CD Á ÚÂÏ ÍÌÓÔÍÛ L CLEAR 1 ç ÊÏËÚ ÍÌÓÔÍÛ PLAY MODE ÚÓ Ú ÊÂÎ ÂÏ È ÂÊËÏ ä Ê È Á ÍÓ Ç Ì ÊËÏ ÂÚ ÍÌÓÔÍÛ ALL DISC 1 RANDOM 1 SONG 1 DISC A RANDOM ALL DISC êÂÊËÏ ÓÒÔ ÓËÁ  ÂÌËfl ÒÂı Á ÛÊÂÌÌ ı ËÒÍÓ ÔÓÒÎÂ Ó ÚÂÎ ÌÓ Ò ÌÌÓ Ó ËÒÍ Ó ÔÓÒΠÌÂ Ó ËÒÍ 1 SONG êÂÊËÏ ÓÒÔ ÓËÁ  ÂÌËfl Ó ÌÓÈ ÌÌÓÈ Ó ÓÊÍË Ì ÌÌÓÏ ËÒÍ 1 RANDOM êÂÊËÏ ÓÒÔ ÓËÁ  ÂÌËfl Ó ÌÓ Ó ÌÌÓ Ó ËÒÍ Ô ÓËÁ ÓÎ ÌÓÏ ÔÓ fl Í A RANDOM êÂÊËÏ ÓÒÔ Ó...

Page 29: ...Ú ÌÛÊÌÛ Ç Ï Ó ÓÊÍÛ ËÁ ÁÌ ı ËÁÓ ÊÂÌËÈ Ì Í ÌÂ èÓ ÓÚÓ Í ì Â ËÚÂÒ ÚÓÏ ÚÓ Í ÌÌ È ËÒÔÎÂÈ ÍÎ ÂÌ A ÒÚ 7 1 äÓ ÓÒÔ ÓËÁ Â ÂÌËÂ ÓÒÚ ÌÓ ÎÂÌÓ ç ÊÏËÚÂ ÍÌÓÔÍË SHIFT MULTI SCREEN ÑÓ ÓÊÍ 1 ÒÌ Î Û ÂÚ ÓÒÔ ÓËÁ Â ÂÌ ÚÂ ÂÌËÂ ÌÂÒÍÓÎ ÍËı ÒÂÍÛÌ Á ÚÂÏ Û ÂÚ Ò Â ÂÌ Í Í ÌÂÔÓ ËÊÌÓÂ ËÁÓ ÊÂÌËÂ X íÓ ÊÂ Ò ÏÓÂ Á ÚÂÏ ÒÎÛ ËÚÒfl ÒÓ ÒÎÂ Û ËÏË Ó ÓÊÍ ÏË ç Í ÌÂ Û ÂÚ Ò Â ÂÌÓ Ó ÌÓ ÂÏÂÌÌÓ Ó 9 Ó ÓÊÂÍ óÚÓ Ò ÂÚËÚ ÔÓÒÎÂ Û ËÂ Ó ÓÊÍË ç ÊÏËÚÂ ÍÌÓÔÍÛ ...

Page 30: ...flÏ Á ÔËÒË äÓ ÒÓÁ ÚÒfl Ù ÈÎ ÙÓ Ï Ú MP3 Îfl ÓÒÔ ÓËÁ  ÂÌËfl Ì ÚÓÏ ÔÔ Ú îÓ Ï Ú ËÒÍ ÑËÒÍ ÓÎÊÂÌ ÒÓÓÚ ÂÚÒÚ Ó Ú ÙÓ Ï ÚÛ ISO9660 Û Ó ÂÌ 1 ËÎË 2 Á ËÒÍÎ ÂÌËÂÏ Ò Ë ÂÌÌ ı ÙÓ Ï ÚÓ îÓ Ï Ú Ù ÈÎ î ÈÎ ÙÓ Ï Ú åê3 ÓÎÊÌ ËÏÂÚ Ò Ë ÂÌË MP3 ËÎË mp3 óÚÓ ÓÒÔ ÓËÁ Ó ËÚ ÓÔ Â ÂÎÂÌÌÓÏ ÔÓ fl Í èÓÒÚ ÚÂ Ì Î ËÏÂÌ Ô ÔÓÍ Ë Ù ÈÎÓ 3 ÁÌ Ì Â ÌÓÏÂ Ô ÂÙËÍÒ ÔÓ fl Í ÍÓÚÓ ÓÏ Ç ıÓÚËÚ ÓÒÔ ÓËÁ Ó ËÚ Ëı î ÈÎ ÏÓ ÛÚ Ì Á ÔËÒ Ú Òfl ÌÓÏ ÌÓÏ ÔÓ fl Í Â...

Page 31: ...Á  ÂÌËfl CD 4 4 3 îÛÌ͈ËË ÂÊËÏ ÓÒÔ ÓËÁ  ÂÌËfl CD Îfl åê3 Ç ÏÓÊÂÚ Á Ô Ó ÏÏË Ó Ú Ó 24 Ó ÓÊÂÍ íÓÎ ÍÓ ÔÛÎ Ú Ñì èÓ ÓÚÓ Í 1 ÇÍÎ ËÚ ÚÂΠËÁÓ Â ËÚÂ Ë ÂÓ ıÓ Ò ÔÓÏÓ Ô ÂÍÎ ÚÂÎfl ÚÂΠËÁËÓÌÌÓ Ó ıÓ 2 Ç Â ËÚ ÌÛÊÌ È ËÒÍ A ÒÚ 6 3 ç ÊÏËÚ ÍÌÓÔÍÛ L CLEAR 1 èÓfl ËÚÒfl ÒÔËÒÓÍ Î ÓÏÓ ç ÊÏËÚ ÍÌÓÔÍÛ PROGRAM 2 ç ÊÏËÚ ÍÌÓÔÍË 8 8 8 8 8 9 9 9 9 9 ÚÓ Ú Î ÓÏ Ë Ì ÊÏËÚ ÍÌÓÔÍÛ ENTER 3 èÓfl ËÚÒfl ÒÔËÒÓÍ Ó ÓÊÂÍ ç ÊÏËÚ ÍÌÓÔÍË 8 8 ...

Page 32: ... Í Ç ÔÓÎÌËÚ ÚË ÓÔ ˆËË ÓÚ ÂÎ ÌÓ Îfl óM Ë ÄM Ë Ô ÁÓÌ èÓ ÓÚÓ Í ç ÒÚ ÓÈÚÂ Ú ÌÂ Ì ÒÚÓÚÛ Ò ÍÓÚÓ ÓÈ Ç ıÓÚËÚÂ Ì Ú Ô Â ÛÒÚ ÌÓ ÍÛ ç ÊÏËÚÂ Ë Û Â ÊË ÈÚ ÍÌÓÔÍÛ PROGRAM ÔÓÍ ÌÂ Ì ÌÂÚ ËÁÏÂÌflÚ Òfl ÒÚÓÚ í Ì ÓÒÛ ÂÒÚ ÎflÂÚ Ô Â ËÚÂÎ ÌÛ Ì ÒÚ ÓÈÍÛ ÒÂı ÒÚ ÌˆËÈ ÍÓÚÓ Â ÓÌ ÏÓÊÂÚ Ô ËÌËÏ Ú Ì Í Ì Î ÓÒıÓ fl ÂÏ ÔÓ fl Í èÓÒΠÁ  ÂÌËfl ÓÒÛ ÂÒÚ ÎflÂÚÒfl Ì ÒÚ ÓÈÍ Ì ÔÓÒÎÂ Ì Á ÔÓÏÌÂÌÌÛ ÒÚ ÌˆË êÛ Ì fl Ô Â ÛÒÚ ÌÓ Í è ÓËÁ Ó ËÚÂ Ô Â ÛÒÚ ÌÓ Í...

Page 33: ...ÂÚËÚÒfl ËÌ ËÍ ˆËfl MANUAL EQ 2 ç ÊÏËÚ ÍÌÓÔÍÛ ÚÓ Ú ËÌ ËÍ ˆË BASS MID ËÎË TREBL 3 äÓ Ò Â Ë ÂÚÒfl ËÌ ËÍ ˆËfl BASS MID ËÎË TREBL ç ÊÏËÚ ÍÌÓÔÍË 8 9 ÚÓ ÔÓ Â ÛÎË Ó Ú Û Ó ÂÌ ÓÚ 3 Ó 3 ê ÛÎË Ó Í ÌËÁÍËı Ë ÒÓÍËı ÒÚÓÚ Ò ÔÓÏÓ Û ÌÓ Ó Í Î ÈÁÂ Ç Ó Í ÒÒÂÚ Îfl Á ÔËÒË àÒÔÓÎ ÁÛÈÚÂ Í ÒÒÂÚ ÚËÔ normal ä ÒÒÂÚ ÚËÔ high Ë metal ÏÓ ÛÚ ËÒÔÓÎ ÁÓ Ú Òfl ÌÓ ÔÔ Ú Ì ÒÏÓÊÂÚ Ô ËÎ ÌÓ Á ÔËÒ Ú ËÎË ÒÚË Ú Ëı èÓ ÓÚÓ Í è ÂÏÓÚ ÈÚÂ Ì Î Ì È Û Ò...

Page 34: ...Û Í ÒÒÂÚÛ ÂÍÛ 2 ì  ËÚÂÒ ÚÓ ÂÍ 1 ÌÂÚ Í ÒÒÂÚ 4 ç ÊÏËÚÂ Ë Û Â ÊË ÈÚ ÍÌÓÔÍÛ PLAY MODE Ì ÔÛÎ Ú Ñì ÚÓ Ú Â Â ÒÌ È ÂÊËÏ 5 ç ÊÏËÚ ÍÌÓÔÍÛ REC ëÚÓ ÓÌ Ä ãÂÔÂÒÚÓÍ Îfl ÒÚÓ ÓÌ B ãÂÔÂÒÚÓÍ Îfl ÒÚÓ ÓÌ Ä äÎÂÈÍ fl ÎÂÌÚ Ç ÏÓÊÂÚÂ Ì ÒÎ Ê Ú Òfl Í ÓÍÂ Ó ÂÏfl Ô ÓÒÏÓÚ Í Ì íÇ ÍÓÚÓ È Ò Â Ë ÂÚ ËÊÛ ÂÂÒfl ËÁÓ ÊÂÌËÂ Ë ÒÎÓ ÔÂÒÌË è ËÏ ÌË è Ó Â Í ÂÔ Ë Â ÂÌÌÓÈ Ú Îˈ ÛÍ Á ÂÚ ÚÓ ÂÊËÏ ÔÂÌËfl Ì ËÏÂÌ ÙÙÂÍÚË ÂÌ Y Ç Ú ÍËı ÒÎÛ flı ÎÛ Â ËÁ ...

Page 35: ... ÔÓÎÌËÚ ÂÈÒÚ Ëfl ÔÛÌÍÚÓ 1 Ë 2 Ì ÒÚ 14 Y ê Á ÂÎ è ÓÒÎÛ Ë ÌËÂ Í ÓÍ äÓ Ç ÔÓÂÚ ÏÂÒÚÂ Ò ËÒÍ ÏË CD ÇÒÚ Ú ÌÛÊÌ Â ËÒÍË A ÒÚ 6 äÓ Ç ÔÓÂÚ ÏÂÒÚÂ Ò ÎÂÌÚÓÈ ÇÒÚ Ú ÌÛÊÌÛ ÎÂÌÚÛ ÂÍÛ 1 A ÒÚ 13 ç ÊÏËÚ ÍÌÓÔÍÛ REC Ë Ì ÌËÚ ÒÚÛÔÎÂÌË ÂÊËÏÂ Í ÓÍ óÚÓ ÓÒÚ ÌÓ ËÚ Á ÔËÒ ç ÊÏËÚ ÍÌÓÔÍÛ L STOP è ËÏ ÌË óÚÓ ÓÒÔ ÓËÁ Ó ËÚ Á ÔËÒ ÌÌÛ ÎÂÌÚÛ Ó flÁ ÚÂÎ ÌÓ Ì ÊÏËÚ ÍÌÓÔÍÛ KARAOKE Ì ÔÛÎ Ú Ñì ÚÓ Ú ÂÊËÏ ÍÎ Ç Ì ÏÓÊÂÚ ÓÒÔ ÓËÁ Ó ËÚ ...

Page 36: ...ÑËÒÔÎÂÈ ËÁÏÂÌflÂÚÒfl Í Ê È Á ÍÓ Û Â ÊË ÂÚÒfl ÍÌÓÔÍ NO DEMO ÍÎ DEMO ON ÍÎ Ç Ë ÈÚ ÔÓÎÓÊÂÌË NO DEMO ÚÓ ÛÏÂÌ ËÚ ÔÓÚ Â ÎÂÌË ÎÂÍÚ Ó Ì ËË ÂÊËÏ ÓÊË ÌËfl è ËÏ ÌË îÛÌ͈Ëfl DEMO Ì ÏÓÊÂÚ Ú ÍÎ ÂÌ ÍÓ ÍÎ ÂÌ ÙÛÌ͈Ëfl ÛÏÂÌ ÂÌËfl fl ÍÓÒÚË ËÒÔÎÂfl ÇÍÎ ÂÌË ÍÎ ÂÌË ÙÛÌ͈ËË ÂÏÓÌÒÚ ˆËË ó Ò ÔÓÍ Á Ú pÂÏfl 24 ÒÓ ÓÏ ÙÓ Ï Ú 1 ÇÍÎ ËÚ ÔÔ Ú 2 ç ÊÏËÚ ÍÌÓÔÍË CLOCK TIMER Ë ÂpËÚ ÂÊËÏ CLOCK ä Ê È Á ÍÓ Ç Ì ÊËÏ ÂÚ ÍÌÓÔÍÛ CLOCK REC...

Page 37: ...Ì Ò Ú ÂÚ ÛÒÚ ÌÓ ÎÂÌÌÓÂ ÂÏfl Í Ê È ÂÌ ÑÎfl ËÁÏÂÌÂÌËfl ÛÒÚ ÌÓ ÓÍ ÍÓ ÔÔ Ú ÍÎ ÂÌ ÑÎfl ËÁÏÂÌÂÌËfl ÂÏÂÌË ÓÒÔ ÓËÁ Â ÂÌËfl Á ÔËÒË Ç ÔÓÎÌËÚÂ ÂÈÒÚ Ëfl ÔÛÌÍÚÓ 1 2 3 Ë 5 ÑÎfl ËÁÏÂÌÂÌËfl ËÒÚÓ ÌËÍ ËÎË Û Ó Ìfl ÓÏÍÓÒÚË 1 óÚÓ Û Ú ËÌ ËÍ ÚÓ Ú ÈÏÂ Ò ËÒÔÎÂfl Ì ÊÏËÚÂ ÍÌÓÔÍÛ rPLAY REC 2 Ç ÔÓÎÌËÚÂ ËÁÏÂÌÂÌËfl Îfl ËÒÚÓ ÌËÍ ËÎË Û Ó Ìfl ÓÏÍÓÒÚË 3 Ç ÔÓÎÌËÚÂ ÂÈÒÚ Ëfl ÔÛÌÍÚÓ 4 Ë 5 óÚÓ ËÁÏÂÌËÚ Ú ÈÏÂ ç ÊÏËÚÂ ÍÌÓÔÍË rPLAY REC ÚÓ Ú ÌÛÊÌ È Ú ÈÏÂ ä...

Page 38: ... È Ô Ó Ó ÚÂΠËÁÓ Ë ÔÔapaÚ ç ËÒÔΠÓÚÓ ÊÂÌ ÌÂ Â Ì fl ËÌÙÓ Ï ˆËfl ËÎË ÓÒÔ ÓËÁ  ÂÌË ÌÂ Ì ËÌ ÂÚÒfl ç Î ÂÚÒfl ÔÓÚ fl ÌÌ ı ËÁÓ ÊÂÌËfl ËÎË ËÁÓ ÊÂÌË ËÒÍ ÊÂÌÓ èÓÎÌÓ ÍÓÎË ÂÒÚ Ó Ò Â Ë ÂÏ ı Ó ÓÊÂÍ ÓÚÎË ÂÚÒfl Í Ê È Á ÍÓ ÒÚ ÎflÂÚÒfl ÚÓÚ ÊÂ Ò Ï È ËÒÍ ëÎ ËÚÒfl ÌÂÓ Ì È Á ÛÍ CD RW Ì ÏÓÊÂÚ Ú Ô Ó ËÚ Ì àÌ ËÍ ˆËfl TAKE OUT DISC ÔÓfl ÎflÂÚÒfl Ì ËÒÔΠàÁÓ ÊÂÌË ÏÂÌ Â ÂÏ Í Ì àÁÓ ÊÂÌË ÒÎË ÍÓÏ Ë ÓÍÓ àÁÓ ÊÂÌË ÏÓÌÓı ÓÏÌÓ àÁÓ Ê...

Page 39: ...ÂÌËÂÏ Ò ÉpoÏÍo o opËÚeÎ ÎË çËÁÍo acÚoÚÌ È poÏÍo o opËÚeÎ 16 ÒÏ ÍoÌË ecÍo o ÚËÔa Ç coÍo acÚoÚÌ È poÏÍo o opËÚeÎ 6 ÒÏ ÍoÌË ecÍo o ÚËÔa àÏÔ ÌÒ HIGH 6 éÏ LOW 6 éÏ ÇıÓ Ì fl ÏÓ ÌÓÒÚ IEC HIGH 75 ÇÚ å ÍÒ LOW 75 ÇÚ å ÍÒ B xo ÌoÈ ypo eÌ Á yÍo o o a ÎeÌËfl 85 Å ÇÚ 1 0 Ï ó ÒÚÓÚa paÁ eÎeÌËfl 3 ÍɈ ÑË Ô ÁÓÌ ÒÚÓÚ 39 Ɉ 21 ÍɈ 16 Å 52 Ɉ 20 ÍɈ 10 Å ê ÁÏ òxÇxÉ 220 x 330 x 237 ÏÏ å ÒÒ 3 4 Í éÅôàÖ èÄêÄåÖíêõ ùÎÂÍÚ ÓÔ...

Page 40: ...Matsushita Electric Industrial Co Ltd Web Site http www panasonic co jp global RQT7704 20 ...

Reviews: