background image

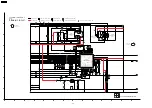
18.3. DVD (Audio)

: DVD AUDIO SIGNAL LINE 

: MAIN SIGNAL LINE

: USB SIGNAL LINE

: DVD RF SIGNAL LINE

OPTICAL PICKUP UNIT

ADDRESS

MEMORY

DATA

MEMORY

IC8051

64M SDRAM

ADDRESS

MEMORY

DATA

MEMORY

CLK

NWE

/CAS

/RAS

/CS

A11

A10

A9

A8

A7

A6

A5

A4

A3

A2

A1

A0

DQ15

DQ14

DQ13

DQ12

DQ11

DQ10

DQ9

DQ8

DQ7

DQ6

DQ5

DQ4

DQ3

DQ2

DQ1

DQ0

38

16

17

18

19

35

22

34

33

32

31

30

29

26

25

24

23

53

51

50

48

47

45

44

42

13

11

10

8

7

5

4

2

MCK

NWE

NCAS

NRAS

NCSM

MA11
(DQM3)

MA10

MA9

MA8

MA7

MA6

MA5

MA4

MA3

MA2

MA1

MA0

MDQ15

MDQ14

MDQ13

MDQ12

MDQ11

MDQ10

MDQ9

MDQ8

MDQ7

MDQ6

MDQ5

MDQ4

MDQ3

MDQ2

MDQ1

MDQ0

IC8001

DV5.0 LSI

RFINP

VN1RF

VN2RF

VN3RF

VN4RF

RFINN

P6

P7

P8

53

55

FROM/TO
SYSTEM CONTROL

CPU CLOCK

CPU STATUS

CPU CMD

FP8101

49

CN2801

50

48

2

CN2801

39

FP8101

12

CN2801

37

FP8101

14

CN2801

11

FP8101

40

1

3

FP8101

CN2801

100

18

FP8531

RFP

RFN

19

FP8531

160

162

164

168

170

172

176

178

177

175

171

169

201

203

207

209

208

206

202

200

198

199

192

190

189

188

194

181

185

167

163

161

159

TD(DVD)

26

TC(DVD)

17

15

TB(DVD)

TA(DVD)

25

95

96

97

98

99

1

2

4

54

FP8101

CN2801

58

215

57

76

A MUTE

QR8420

MUTING

AND GATE

AND GATE

IC8695

C0JBAA000502

IC8691

C0JBAA000502

2

4

11

12

10

3

148

150

LRCK

DACCK

BICK

1

MCLK

LOUT1

VCOM

16

DZF1

ROUT1

MIX-L

ZFLAG

TO
SYSTEM CONTROL

TO AUDIO

MIX-R

LRCK

SDTI1

6

7

8

CSN

9

P/S

CCLK

CDTI

149

SRCK

P11

STBDAC

STBDAC

SBT3

SBO3

ADAC-CLK

SRCK

LRCK

151

ADOUT

DMIXOUT

P10

TRCCLK

MN2DS0018MP

IC8420

AUDIO DAC

C0FBBK000047

DELTA-SIGMA

MODULATOR

CLOCK

DIVIDER

uP

INTERFACE

8X

INTERPOLATOR

DE-EMPHASIS

CONTROL

ATT

AUDIO

DATA

INTERFACE

SCF
LPF

DELTA-SIGMA

MODULATOR

8X

INTERPOLATOR

ATT

SCF
LPF

C3ABPY000011

FP8531

FP8531

FP8531

FP8531

1

2

4

SA-VK470EE DVD (AUDIO) BLOCK DIAGRAM

P5

50

IC9003

X9004

INVERTER GATE

C0JBAB000908

60

65

8

2

3

4

5

7

IC8651

32M FLASH MEMORY

ADDRESS

ADDRESS

DATA

ADDRESS

ADDRESS / DATA

NRST

NEXOE

NEXCE

NEXWE

EXADR20

EXADR19

EXADR18

EXADR17

EXADR16

EXADT15

EXADT14

EXADT13

EXADT12

EXADT11

EXADT10

EXADT9

EXADT8

EXADT7

EXADT6

EXADT5

EXADT4

EXADT3

EXADT2

EXADT1

EXADT0

XRST 12

28

XOE

XCE 26

11

XWE

A20 10

9

A19

A18 16

17

A17

A16 48

1

A15

A14

2

3

A13

A12

4

5

A11

A10

6

7

A9

A8 8

18

A7

A6 19

20

A5

A4 21

22

A3

A2 23

24

A1

A0 25

45

DQ15

DQ14 43

41

DQ13

DQ12 39

36

DQ11

DQ10 34

32

DQ9

DQ8 30

DQ7 44

DQ6 42

DQ5 40

38

DQ4

DQ3 35

33

DQ2

31

DQ1

DQ0 29

212

42

41

40

39

38

37

36

29

28

27

26

25

24

23

22

21

35

34

30

45

31

213

214

70

IC9002

LATCH

LE

11

D8 9

D7

D6

8

7

D5

D4

6

5

D3

D2

4

3

D1

EXADT15

EXADT14

EXADT13

EXADT12

EXADT11

EXADT10

EXADT9

EXADT8

EXADT7

EXADT6

EXADT5

EXADT4

EXADT3

EXADT2

EXADT1

EXADT0

2

12

13

14

15

16

17

18

19

Q8

Q7

Q6

Q5

Q4

Q3

Q2

Q1

IC9001

LATCH

LE

11

D8 9

D7

D6

8

7

D5

D4

6

5

D3

D2

4

3

D1

EXADT7

EXADT6

EXADT5

EXADT4

EXADT3

EXADT2

EXADT1

EXADT0

EXADT7

EXADT6

EXADT5

EXADT4

EXADT3

EXADT2

EXADT1

EXADT0

2

12

13

14

15

16

17

18

19

Q8

Q7

Q6

Q5

Q4

Q3

Q2

Q1

C0JBAZ001251

C0JBAZ001251

3

1

4

6

USB

D +

D -

1

CN7002

VBUS OUT

2

FP9001

1

FP9001

2

FP9001

3

5

CN8002

CN7002

CN8002

CN7002

CN8002

4

IC9005

OC

EN

IN

IN

OUT

OUT

6

OUT

C0DBZYY00266

QR9030

LEVEL

SHIFTER

USB VBUS

USB OVER

D+5V

146

ROUT

144

LOUT

60

65

P13

DRV2

REGULATOR

RFKWMH32B325

X8621

OSCO

OSCI

P1

156

IECOUT 156

155

5

6

46

1

OUT

RESET

C0EBA0000039

C3EBGC000056

SDA

SDA

P2 47

SCL

SCL

RESET

C0EBE0000456

IC8606

16M EEPROM

IC8611

IC8601

1

OUT

JK2801

DIGITAL OUT

(COAXIAL)

1

2

3 CHASSIS GND

BUFFER

Q2980

: AUDIO SIGNAL LINE

SA-VK470EE

91

Summary of Contents for SA-VK470EE

Page 1: ... Ltd All rights reserved Unauthorized copying and distribution is a violation of law SA VK470EE Colour K Black Type Phone jack Terminal Stereo 3 5 mm jack Mic jack Terminal Mono 6 3 mm jack 1 system AUX Terminal Stereo RCA jack Q Q Q Q CASSETTE DECK SECTION Type Auto reverse Track system 2 Track 1 Channel Heads Record playback Solid permalloy head Erasure Double gap ferrite head Motor DC servo mot...

Page 2: ...ion between 160 x 120 and 6144 x 4096 pixels Sub sampling is 4 0 0 4 2 0 4 2 2 or 4 4 4 Extremely long and narrow pictures may not be displayed 5 MPEG4 data recorded with the Panasonic SD multi cameras or DVD video recorders Conforming to SD VIDEO specifications ASF standard MPEG4 Simple Profile video system G 726 audio system 6 Plays all versions of DivX video including DivX 6 with standard playb...

Page 3: ...3 SA VK470EE ...

Page 4: ... 16 Disassembly of Deck Mechanism P C B 55 9 17 Disassembly of Cassette Lid 56 9 18 Rectification for Tape Jam Problem 56 9 19 Disassembly of D Amp P C B 56 9 20 Replacement of Audio Digital Power Amp IC IC5000 58 9 21 Disassembly of Main P C B 58 9 22 Disassembly of SMPS P C B 60 9 23 Replacement of Switch Regulator IC IC5701 61 9 24 Replacement of Switch Regulator Diode D5702 62 9 25 Replacement...

Page 5: ...hanism AC Inlet P C B 121 21 6 D Amp P C B 122 21 7 SMPS P C B 123 22 Basic Troubleshooting Guide 125 22 1 Troubleshooting Guide for F61 and or F76 125 22 2 Basic Troubleshooting Guide for Traverse Unit DVD Module P C B 131 22 3 Basic Troubleshooting Guide for HDMI AV Output 132 23 Terminal Function of IC s 134 23 1 IC2801 RFKWVK470GC IC System Control 134 23 2 IC6901 C0HBB0000057 IC FL Driver 134...

Page 6: ...3 Use an AC voltmeter with 1000 ohms volt or more sensitivity to measure the potential across the resistor 4 Check each exposed metallic part and measure the voltage at each point 5 Reverse the AC plug in the AC outlet and repeat each of the above measurements 6 The potential at any point should not exceed 0 75 volts RMS A leakage current tester Simpson Model 229 or equivalent may be used to make ...

Page 7: ... without permission of manufacturer Table 1 Ref No Part No Part Name Description Remarks 18 RGRX0070L B REAR PANEL M 36 RKMX0144 K TOP CABINET M 68 REXX0684 BLACK WIRE M 69 REXX0685 RED WIRE M A2 K2CQ2CA00007 AC CORD M PCB4 REPX0622Y SMPS P C B M RTL PCB5 REPX0622Y AC INLET P C B M RTL DZ5701 ERZV10V511CS ZNR M L5701 ELF15N035AN LINE FILTER M L5702 ELF22V035B LINE FILTER M L5703 ELF22V020A LINE FI...

Page 8: ...bly 3 Use only a grounded tip soldering iron to solder or unsolder ES devices 4 Use only an anti static solder removal device Some solder removal devices not classified as anti static ESD protected can generate electrical charge sufficient to damage ES devices 5 Do not use freon propelled chemicals These can generate electrical charges sufficient to damage ES devices 6 Do not remove a replacement ...

Page 9: ...on power from pickup 100 µW VDE Laser radiation from the pickup unit is safety level but be sure the followings 1 Do not disassemble the pickup unit since radiation from exposed laser diode is dangerous 2 Do not adjust the variable resistor on the pickup unit It was already adjusted 3 Do not look at the focus lens using optical instruments 4 Recommend not to look at pickup lens for a long time 9 S...

Page 10: ...ork using Lead Free Solder PbF The lead free solder has to be used when repairing the equipment for which the lead free solder is used Definition The letter of PbF is printed on the PCB using the lead free solder To put lead free solder it should be well molten and mixed with the original lead free solder Remove the remaining lead free solder on the PCB cleanly for soldering of the new IC Since th...

Page 11: ... flexible cable of the optical pickup unit removed should be short circuited with a short pin or a clip 3 The flexible cable may be cut off if an excessive force is applied to it Use caution when handling the flexible cable 4 The antistatic FPC is connected to the new optical pickup unit After replacing the optical pickup unit and connecting the flexible cable cut off the antistatic FPC 5 2 Ground...

Page 12: ...12 SA VK470EE ...

Page 13: ...Remote control AC cord Mic Video cable FM indoor antenna AM Loop antenna 6 Accessories Note Refer to Replacement Parts List Section 25 for the part number 13 SA VK470EE ...

Page 14: ...ot included EXT IN MUSIC PORT Jack STOP DEMO REC TAPE MIC Jack DVD CD OPEN CLOSE USB Port Display panel MANUAL EQ H BASS VOLUME Track skip or search tape fast forward or rewind tape program sensor TPS tune or preset channel selection time adjustment manual EQ setting MID and TREBLE REW FF To select the desired display mode Every time you press the button Normal Peak hold Re ection Off Normal Indic...

Page 15: ...s and hold To mute the sound Press the button to activate Press the button again or adjust the volume to cancel Muting is also cancels when you switch the unit to standby To dim the display panel Press and hold again to cancel The display is dimmed but brightens when you perform some operations This auto off function allows you to turn off the unit in disc tape or USB mode only after left unused f...

Page 16: ...ras using DVD Video Format 5 Recorded using a format different from DVD Video Format therefore some functions cannot be used 6 A process that allows play on compatible equipment To play a disc that is displayed as Necessary on this unit the disc must first be finalized on the device it was recorded on 7 Closing the session will also work 8 MPEG4 data recorded with the Panasonic SD multi cameras or...

Page 17: ...r screen This unit cannot play files recorded using packet write DVD RAM Discs must conform to UDF 2 0 DVD R RW Discs must conform to UDF bridge UDF 1 02 ISO9660 This unit does not support multi session Only the default session is played CD R RW Discs must conform to ISO9660 level 1 or 2 except for extended formats This unit supports multi session but if there are many sessions it takes more time ...

Page 18: ... from a portable audio equipment Switch off the equalizer function if there is any of the portable audio equipment before you plug into the MUSIC PORT jack Otherwise sound from the speaker may be distorted IMPORTANT Reduce the volume of the main unit and the portable audio equipment before you plug or unplug the equipment into the MUSIC PORT jack 1 Plug the audio cord into the MUSIC PORT jack and ...

Page 19: ...ode to purchase DivX VOD content and then play the content on this unit you will no longer be able to play any content that you purchased using the previous code If you purchase DivX VOD content using a registration code different from this unit s code you will not be able to play this content AUTHORIZATION ERROR is displayed Regarding DivX content that can only be played a set number of times Som...

Page 20: ...mpatible Devices Devices which are de ned as USB mass storage class USB devices that support bulk only transfer USB devices that support USB 2 0 full speed Supported Formats File name File extension Still pictures JPG 1 jpg jpeg Music MP3 WMA mp3 wma Video MPEG4 2 asf 1 It may not be possible to play all the files due to the condition on how they were created 2 For Panasonic D Snap DIGA Note CBI C...

Page 21: ...C B 8 DVD Module P C B firmware version check Refer to the section 8 2 4 Service Mode Table 4 for more information ENTER DVD Module P C B reset Timer 1 check Refer to the section 8 2 5 Service Mode Table 5 for more information Timer 1 reset Timer 2 check Timer 2 reset Note An error code will be canceled if a power supply is turned OFF 1 CPPM is the copy guard function beforehand written in the dis...

Page 22: ...e various service modes for checking Special Note Due to the limitations of the no characters that can be shown on the FL Display the FL Display button on the remote control unit can be used to show the two display pages Display 1 Display 2 Refer to Section 7 2 for the section on Remote Control Key Buttons Operations 22 SA VK470EE ...

Page 23: ...xadecimal notation Display 1 Display 1 Display 2 Display 2 In STOP no disc mode press STOP button on the main unit and 0 button on the remote control unit With pointing of cursor up and down on display Error code check The latest error code stored in the EEPROM IC is displayed Note Refer to Section 8 4 DVD Self Diagnostic Function Error Code for more detailed information on the error codes In STOP...

Page 24: ...DVD Laser Value Identify as LDD mode The value denotes the current in decimal notation The above example shows the initial current is XXXmA and the measured value is YYYmA Press FL Display on remote control unit for next page FL Display Cancelled automatically 5 seconds later CD laser drive current measurement In STOP no disc mode press STOP button on the main unit and 3 button on the remote contr...

Page 25: ...e main unit and 10 button on the remote control unit If the EEPROM version matches checksum YYYY is displayed If the version of the EEPROM does not match NG is displayed a If there is NO EEPROM header string OR b If there is no EEPROM no data is received by Micro processor NO is displayed EEPROM Checksum If applicable refer below Condition1 Opecon Version Display 1 Display 2 Display 3 Condition 2 ...

Page 26: ...C D Source Output Screen Saver NTSC NTSC disc NTSC PAL disc NTSC PAL C Source Output Screen Saver PAL NTSC disc PAL60 default NTSC PAL disc PAL Explanation of Display Individual Model Code Can play PAL disc Region code N If NTSC disc is played NTSC output 6 If NTSC disc is played PAL60 output 2 6 5 4 4 2 2 1 2 3 Region Code NTSC PAL NTSC PAL SECAM NTSC PAL PAL PAL NTSC PAL TV Broadcasting System S...

Page 27: ...low by ENTER button on the remote control unit DVD Module P C B firmware version display Cancelled automatically 5 seconds later In STOP no disc mode press STOP button on the main unit and 8 button on the remote control unit System controller generation Destination System controller version Region No 0 8 DVD Module P C B firmware version is displayed on the FL Display The firmware version can be u...

Page 28: ...ely for DVD laser and CD laser FL Display sequence Display 1 2 Press FL Display button for next page of FL Display Timer 1 reset Laser operation timer of both DVD laser and CD laser is reset all at once Timer 2 check Spindle motor operation timer Timer 2 reset Spindle motor operation timer Time is shown in 5 digits of decimal notation in a unit of 1 hour 00000 will follow 99999 Shown to the above ...

Page 29: ...lt will be incorrect NO DISC is displayed unit does not play smoothly etc Check the laser drive current Replace the traverse unit Refer to the section OPTICAL PICKUP REPLACEMENT PROCEDURE in this Guide Initialize the main unit Value is more than 37 DVD 41 CD Replace with a new optical pickup if the present value is more than 37 DVD 41 CD Cause Damage due to static electricity during replacement Us...

Page 30: ...hanism Self Diagnostic Mode To unlock the mechanism unit for service In this mode the disassembly of CR14 can be carry out Refer to original service manual for CR14 1 All trays are set to STOCK position 2 Mechanism set to tray 1 3 Cam gear set to HOME position Service Mode 1 In self diagnostic mode press 2 button on main unit To exit power off the main unit Press EXCHANGE on main unit for error co...

Page 31: ...s In self diagnostic mode press 2 button on remote control To exit press button on the main unit or remote control unit Reliability 2 Traverse Cycle Test To determine playability operation In self diagnostic mode press 3 button on remote control To exit press button on the main unit or remote control unit Reliability 3 Combi Cycle Test The combine test for both load traverse cycle test l l l Displ...

Page 32: ...or error reproducing disk verify error when connecting it with HDMI DVI F740 HDMI device key I2C error when writing HDMI Key device Press STOP on main into transmitter unit for next error F893 FLASH ROM IC data Firmware error DV5 0 LSI IC IC8651 Press STOP on main falsification error error unit for next error F894 EEPROM IC When failing in the access to EEPROM Press STOP on main abnormality error ...

Page 33: ...1 error H07 Driver IC thermal The spindle motor is abnormal short Press STOP on shut down between brushes main unit for next error H15 Disc tray open The disc tray cannot be opened it Press STOP on detection switch closes spontaneously main unit for next error failure H16 Disc tray close The disc tray cannot be closed it Press STOP on detection switch opens spontaneously main unit for next error f...

Page 34: ...Description of error Automatic FL Display Remarks 8 4 4 USB Error Code Table Error Code F650 USB device Devices Devices other than the mass storage Press STOP on main other than mass class are connected unit for next error storage F651 USB device Non Full The device that the transfer rate did not Press STOP on main Speed Device correspond to Full Speed was unit for next error connected F652 USB de...

Page 35: ...m gear gear assembly abnormal Cam gear does not move to HOME position under the following conditions The tray drive rack does not move to PLAY position Tray does not move to PLAY position UD rack does not move to front position This lead to UD base not raise to top position Press EXCHANGE on main unit for next error Press EXCHANGE on main unit for next error Press EXCHANGE on main unit for next er...

Page 36: ...l Cam gear does not move from HOME to PLAY drive position Error code Sequence of errors Error code Sequence of errors Error code Sequence of errors UDD For CD DVD changer unit CR14 Press EXCHANGE on main unit for next error UD base assembly does not move downwards from tray 1 to tray 5 UD base assembly abnormal UD1 For CD DVD changer unit CR14 Press EXCHANGE on main unit for next error UD base ass...

Page 37: ...message LOCKED appears when the function is activated Note The following buttons are invalid and the main unit displays LOCKED while the lock function mode is entered Main unit OPEN CLOSE TUNE MODE FM MODE SELECTOR Remote controller unit iPod USB FM EXT IN NUMERIC KEYS 0 9 RETURN FUNCTIONS FL DISPLAY SLEEP MUTING 8 5 2 Cancellation The lock can be cancelled by the same procedure as used in setting...

Page 38: ...When updating is finished remove the disc according to the message appearing on the screen b Remove the disc according to the message appearing on the screen 6 Turn off the power Note If the AC power supply is shut out during version up due to a power failure the version up is improperly carried out In such a case replace the FLASH ROM IC and carry out the version up again 8 6 3 DVD Module P C B R...

Page 39: ...al service manual Order No MD0801004CE Caution After replacing of Mechanism Unit CR14 ageing test is necessary Please confirm operation for Mechanism Unit CR14 Disassembly of Top Cabinet Disassembly of Mechanism Unit CR14 Disassembly of Rear Panel Disassembly of Front Panel Unit Disassembly of Panel P C B Tact Switch P C B Remote Sensor P C B Side Bar L LED P C B Side Bar R P C B Disassembly of Mi...

Page 40: ...40 SA VK470EE ...

Page 41: ... IC IC5701 9 24 Switch Regulator Diode D5702 9 25 Regulator Diode D5801 9 26 Regulator Diode D5802 9 27 Regulator Diode D5803 9 21 Main P C B 9 22 SMPS P C B 9 12 CD Lid 9 10 USB P C B 9 11 Music Port P C B 9 9 Mic P C B 9 13 Deck Mechanism Unit 9 17 Cassette Lid 9 14 Deck P C B 9 16 Deck Mechanism P C B 9 15 Deck Mechanism 9 18 Rectification for Tape Jam Problem 9 8 Panel Tact Switch Remote Senso...

Page 42: ...9 3 Main Components and P C B Location 42 SA VK470EE ...

Page 43: ... on both sides of the top cabinet Step 2 Remove 5 screws at the rear panel Step 3 Lift the sides of top cabinet outwards as arrow shown Step 4 Push the top cabinet backwards as arrow shown to release the catches Step 5 Remove the top cabinet 43 SA VK470EE ...

Page 44: ...C cable at the connector CN2805 on Main P C B Step 4 Detach 5P cable at the connector CN8002 on USB P C B Step 5 Release the claws outwards on both sides Step 6 Release catches at both sides Special Note During reassembling procedure ensure both the claws and catches are fully catched Assembly is secured upon hearing a click sound Step 7 Release the tabs at the bottom of the front panel 44 SA VK47...

Page 45: ... Release mechanism unit from the 2 locators Step 10 Lift up the Mechanism Unit CR14 Step 11 Detach 7P FFC cable at the connector FP8251 on DVD Module P C B Step 12 Detach 26P FFC cable at the connector FP8531 on DVD Module P C B Disassembly of Mecha Chassis Step 13 Remove 2 screws Step 14 Remove the Mecha Chassis as arrow shown 45 SA VK470EE ...

Page 46: ...to Step 5 of Item 9 4 Disassembly of Rear Panel Step 1 Remove 11 screws at rear panel Step 2 Slightly lift up the Mechanism Unit CR14 from the two locators Step 3 Release 2 catch from the side panel Step 4 Remove the rear panel in the direction of arrow 9 7 Disassembly of Front Panel Unit Follow the Step 1 to Step 5 of Item 9 4 Follow the Step 5 to Step 7 of Item 9 5 Step 1 Detach 27P FFC cable at...

Page 47: ...p 7 Detach the front panel unit in direction of arrow 9 8 Disassembly of Panel P C B Tact Switch P C B Remote Sensor P C B Side Bar L LED P C B and Side Bar R LED P C B Follow the Step 1 to Step 5 of Item 9 4 Follow the Step 5 to Step 7 of Item 9 5 Follow the Step 1 to Step 7 of Item 9 7 Step 1 Remove Volume knob as arrow shown Step 2 Detach 7P cable at the connector CN6702 on Mic P C B Step 3 Rem...

Page 48: ...Step 4 Remove 2 screws at Tact Switch P C B Step 5 Release 2 catches at Panel P C B Step 6 Release 6 catches at Tact Switch P C B 48 SA VK470EE ...

Page 49: ...r L Led P C B and Side Bar R P C B Step 9 Detach Side Bar L P C B at the connector CN6014 on Panel P C B Step 10 Detach Side Bar R P C B at the connector CN6012 on Panel P C B Step 11 Remove the Side Bar L P C B and Side Bar R P C B Caution Notes 1 During assembling of the P C Bs ensure that the diode shown on Tact Switch P C B are in upright position 49 SA VK470EE ...

Page 50: ... 1 Remove Mic knob as arrow shown Step 2 Detach 7P cable at the connector CN6702 on Mic P C B Step 3 Remove 1 screw on Mic P C B Step 4 Remove the Mic P C B 9 10 Disassembly of USB P C B Follow the Step 1 to Step 5 of Item 9 4 Follow the Step 5 to Step 8 of Item 9 5 Follow the Step 1 to Step 7 of Item 9 7 Disassembly of USB bracket Step 1 Remove 2 screws at USB bracket Step 2 Remove the USB bracke...

Page 51: ...7 of Item 9 7 Step 1 Remove 2 screws at Music Port P C B Step 2 Release 2 catches Step 3 Lift up the Music Port P C B 9 12 Disassembly of CD Lid Follow the Step 1 to Step 5 of Item 9 4 Follow the Step 5 to Step 8 of Item 9 5 Follow the Step 1 to Step 7 of Item 9 7 Step 1 Remove the spring as arrow shown in order of sequences 1 to 3 Step 2 Remove CD Lid as arrow shown Note Please ensure that the sp...

Page 52: ...rd as arrow shown to open the cassette lid assembly Step 3 Remove the deck mechanism unit as arrow shown 9 14 Disassembly of Deck P C B Follow the Step 1 to Step 5 of Item 9 4 Follow the Step 5 to Step 7 of Item 9 5 Follow the Step 1 to Step 7 of Item 9 7 Follow the Step 1 to Step 3 of Item 9 13 Step 1 Remove 3 screws Step 2 Desolder 2P wires at the motor terminal Step 3 Detach 9P cable at connect...

Page 53: ... 7 of Item 9 7 Follow the Step 1 to Step 3 of Item 9 13 Follow the Step 1 to Step 4 of Item 9 14 9 15 1 Replacement of Pinch Roller and Head Block Step 1 Release catch to remove the Pinch Roller F Assembly Step 2 Release catch to remove the Pinch Roller R Assembly Step 3 Release the catches to remove the head connector Step 4 Remove 2 screws at the Deck Mechanism unit Step 5 Remove head block 53 S...

Page 54: ...9 15 2 Replacement of Motor Capstan Belt A Capstan Belt B and Winding Belt 54 SA VK470EE ...

Page 55: ...5 to Step 8 of Item 9 5 Follow the Step 1 to Step 7 of Item 9 7 Follow the Step 1 to Step 3 of Item 9 13 Follow the Step 1 to Step 4 of Item 9 14 Step 1 Desolder plunger terminals Step 2 Remove 1 screw at Deck Mechanism P C B Step 3 Release 3 catches to remove the Deck Mechanism P C B 55 SA VK470EE ...

Page 56: ... be removed from the deck the tape is caught by the capstan or pinch roller during playback or recording rotate the flywheel F in the direction of the arrow to remove it Step 2 Push the lever upward and open the cassette lid Note Follow Disassembly of Cassette Lid Remove the cassette tape 9 19 Disassembly of D Amp P C B Follow the Step 1 to Step 5 of Item 9 4 Follow the Step 1 to Step 10 of Item 9...

Page 57: ... the D Amp P C B together with the chassis support as arrow shown Step 6 Remove 3 screws from D Amp P C B Step 7 Lift up D Amp P C B as arrow shown Note During reassembling procedures ensure the P C B is seated properly at the chassis support 57 SA VK470EE ...

Page 58: ...to injuries 9 20 1 Assembly of Audio Digital Power Amp IC IC5000 Step 1 Fix the Audio Digital Power Amp IC onto the heatsink Step 2 Screw back TR Spring onto the heatsink Make sure it is well tighten to prevent overheat Note Use a blower to remove the minute particles that might caused left on the TR Spring 9 21 Disassembly of Main P C B Follow the Step 1 to Step 5 of Item 9 4 Follow the Step 1 to...

Page 59: ...Step 6 Detach 11P cable at connector CN5802 on SMPS P C B Step 7 Remove 2 screws on Main P C B Step 8 Remove 4 screws at rear panel Step 9 Lift up Main P C B as arrow shown 59 SA VK470EE ...

Page 60: ...tep 1 to Step 10 of Item 9 5 Follow the Step 1 to Step 5 of Item 9 19 Step 1 Detach 11P wires at connector CN5802 at SMPS P C B Step 2 Remove 4 screws at SMPS P C B Step 3 Lift up the SMPS P C B as arrow shown Step 4 Flip the SMPS P C B and desolder 2 wires pins red and black Note During reassembling procedures ensure the P C B is seated properly at the locator 60 SA VK470EE ...

Page 61: ...from the heatsink unit B Caution Handle the heatsink unit B with caution due to its high temperature after prolonged use Touching it may lead to injuries Note Refer to the diagrams of SMPS P C B Item 20 5 for location of the part 9 23 1 Assembly of Switch Regulator IC IC5701 Step 1 Apply grease to the heatsink unit B Step 2 Fix and screw the switch regulator IC IC5701 to the heatsink unit B Specia...

Page 62: ...witch regulator diode D5702 Step 6 Remove the switch regulator diode D5702 from the heatsink unit B Caution Handle the heatsink unit B with caution due to its high temperature after prolonged use Touching it may lead to injuries Note Refer to the diagrams of SMPS P C B Item 20 5 for location of the part 9 24 1 Assembly of Switch Regulator Diode D5702 Step 1 Apply grease to the heatsink unit B Step...

Page 63: ...or diode D5801 on the reverse side of SMPS P C B Step 2 Remove 1 screw from the regulator diode D5801 Step 3 Remove the regulator diode D5801 from the heatsink unit C Caution Handle the heatsink unit C with caution due to its high temperature after prolonged use Touching it may lead to injuries Note Refer to the diagrams of SMPS P C B Item 20 5 for location of the part 9 25 1 Assembly of Regulator...

Page 64: ...iode D5802 Step 3 Remove the regulator diode D5802 from the heatsink unit C Caution Handle the heatsink unit C with caution due to its high temperature after prolonged use Touching it may lead to injuries Note Refer to the diagrams of SMPS P C B Item 20 5 for location of the part 9 26 1 Assembly of Regulator Diode D5802 Step 1 Apply grease to the heatsink unit C Step 2 Fix and screw the regulator ...

Page 65: ...ion due to its high temperature after prolonged use Touching it may lead to injuries Note Refer to the diagrams of SMPS P C B Item 20 5 for location of the part 9 27 1 Assembly of Regulator Diode D5803 Step 1 Apply grease to the heatsink unit C Step 2 Fix and screw the regulator diode D5803 to the heatsink unit C Special Note Ensure the regulator diode D5803 is tightly screwed to the heatsink unit...

Page 66: ...the P C B is seated properly at the locators Note 2 Remember to use tie wraps to tie red black wires between AC Inlet P C B to the chassis 9 29 Disassembly of DVD Module P C B Follow the Step 1 to Step 5 of Item 9 4 Follow the Step 1 to Step 11 of Item 9 5 Disassembly of ground plate unit DVD Module shield plate unit Step 1 Remove 3 screws at DVD Module shield plate unit Step 2 Remove the ground p...

Page 67: ... Disassembly of DVD Module P C B Step 4 Release the catch on DVD Module P C B Step 5 Remove DVD Module P C B 67 SA VK470EE ...

Page 68: ...in play position Step 1 Release the catch and push the guide as arrows shown to open both grooves Step 2 Detach the FFC wires from the adhesive areas Caution Do not pull the FFC wire to remove the traverse unit assembly as it may cause damage to the slot 10 Disassembling and assembling Traverse Unit Assembly in play position 68 SA VK470EE ...

Page 69: ...Unit Assembly Step 1 Slot the traverse unit assembly into the guides as arrow shown Note Ensure the bosses fix exactly onto the guides Step 2 Place down the traverse unit assembly Step 3 Fix the FFC wires by using the adhesive tapes Step 4 Release the catch and push the guide as arrows shown to close both grooves 69 SA VK470EE ...

Page 70: ...Step 4 Detach 5P cable at connector CN8002 on USB P C B Step 5 Detach 21P FFC cable at connector CN2803 on Main P C B Step 6 Detach 10P FFC cable at connector CN2806 on Main P C B Step 7 Detach 2P cable at connector CN2812 on Main P C B Step 8 Release the claws outwards on both sides Step 9 Release the catches at both sides 11 Service Fixture and Tools Prepare service tools before process service ...

Page 71: ...ep 13 Remove 2 screw on USB bracket Step 14 Remove 2 screw on Music Port P C B Step 15 Remove 4 screw at Deck Mechanism unit Step 16 Remove Mic P C B Step 17 Remove USB P C B with USB bracket Step 18 Remove Music Port P C B Step 19 Push the lever upward as arrow shown to open the cassette lid assembly Step 20 Remove Deck Mechanism unit 71 SA VK470EE ...

Page 72: ...tep 26 Connect 2P cable at connector CN2812 on Main P C B Step 27 Connect 21P FFC cable at the connector CN2803 on Main P C B Step 28 Check and repair panel P C B Deck P C B Tact Switch P C B Music Port P C B and Mic P C B 12 3 Checking and Repairing of D Amp P C B Step 1 Remove the top cabinet Step 2 Remove the Mechanism Unit Step 3 Detach 17P FFC cable at connector CN5050 on D Amp P C B Step 4 D...

Page 73: ...echanism unit CR14 according to the diagram show Step 11 Connect 50P FFC cable at the connector CN2801 on Main P C B Step 12 Connect 11P FFC cable at the connector CN2805 on Main P C B Step 13 Connect 5P cable at the connector CN8002 on USB P C B Step 14 Attach original cable with extension cable REXX0683 8P cable from H5801 to CN5500 Step 15 Connect extension cable REEX0930 17P cable from CN2808 ...

Page 74: ... 12 3 Step 1 Detach wire connector at connector CN5802 on SMPS P C B Step 2 Remove 4 screws on SMPS P C B Step 3 Remove 2 screws on AC Inlet P C B Step 4 Cut 2 tie wraps onto wires Step 5 Remove 1 screw at the rear panel Step 6 Move the rear panel slightly backward as arrow shown Step 7 Lift up the AC Inlet P C B together with the SMPS P C B 74 SA VK470EE ...

Page 75: ...nnector CN8002 on USB P C B Step 12 Position SMPS and AC Inlet P C B according to the diagram show Step 13 Attach original cable with extension cable REXX0680 11P cable from CN2701 to CN5050 Step 14 Connect extension cable REEX0930 17P cable from CN2808 to CN5050 Step 15 Attach original cable with extension cable REXX0683 8P cable from H5801 to CN5500 Step 16 Service and repair AC Inlet P C B and ...

Page 76: ...al timing at STOP mode ON approx 200msec e REV REW Supply the plunger power in a flash at REV PLAY mode ON approx 50msec f STOP Supply the plunger power in a flash at FF mode ON approx 50msec Repeat the operation FWD PLAY Note Other operation may start if a timing of supplying the plunger power is missed 13 1 1 Connection Status between Mechanism and Power Supply Motor Plunger 13 1 2 Operative Par...

Page 77: ...dphone jack output jig Fig 8 14 1 2 Setting of Unit VOLUME MAX 14 1 3 Preparations 1 Apply under 9 Assembling and Disassembling 2 Remove 4 screws from the mechanism unit to disassemble under 9 13 Disassembly of Deck Mechanism Unit 3 Connect the headphone jack output jig Fig 8 to headphone jack Fig 8 Fig 9 14 1 4 Tape Speed Adjustment Normal speed adjustment only during forward playback 77 SA VK470...

Page 78: ...osition 3 Insert a normal blank cassette tape QZZCRA 4 While pressing and holding down REC button press TAPE button to pause the recording mode Repeat pressing the buttons till the recording pause mode is activated 5 Check that the output level is within the standard range Standard Range 14 4mV Fig 12 14 1 6 Bias Frequency Check 1 Connect a digital frequency counter Fig 13 2 Set the function to TA...

Page 79: ...0 CD PLAY 3 3 1 6 1 6 3 3 1 6 0 1 2 3 3 3 3 3 2 3 6 0 2 0 0 0 3 3 1 6 0 1 0 1 6 REF NO MODE 201 202 203 204 205 206 207 208 209 210 211 212 213 214 215 216 CD PLAY 0 1 1 6 0 4 0 3 3 1 7 1 8 0 4 1 6 0 1 2 2 3 2 7 2 7 3 3 0 REF NO MODE 1 2 3 4 5 6 7 8 9 10 11 12 13 14 15 16 17 18 19 20 CD PLAY 3 3 3 2 3 3 2 9 2 9 0 3 2 3 0 3 3 3 2 3 0 0 2 8 3 3 2 8 3 3 3 3 3 2 3 2 2 0 REF NO MODE 21 22 23 24 25 26 2...

Page 80: ...21 Q8325 Q8335 Q8341 Q8561 Q8562 Q8331 VK470EE DVD MODULE P C B Q8563 Q8564 Q8565 QR8420 QR9030 QR8111 Q8551 Q8552 IC9005 IC8695 IC9001 IC9002 IC9003 15 2 D Amp P C B REF NO MODE 1 2 3 4 5 6 7 8 9 10 11 12 13 14 15 16 17 18 19 20 CD PLAY 2 5 0 1 0 1 2 9 0 29 3 29 3 29 3 11 0 1 29 5 17 3 29 5 0 1 11 29 3 29 3 29 3 0 29 STANDBY 2 5 0 1 0 1 2 9 0 29 3 21 29 3 11 0 1 29 5 17 3 29 5 0 1 11 29 3 29 3 29...

Page 81: ... 7 4 7 4 7 4 7 4 7 4 7 4 7 4 7 4 7 0 0 0 4 7 4 7 4 7 4 7 4 7 4 7 4 7 REF NO MODE 21 22 23 24 25 26 27 28 29 30 31 32 33 34 35 36 37 38 39 40 CD PLAY 4 7 4 7 4 7 4 7 4 7 4 7 4 7 4 7 4 7 4 7 4 7 4 7 4 7 4 7 4 7 9 4 5 0 0 STANDBY 4 7 4 7 4 7 4 7 4 7 4 7 4 7 4 7 4 7 4 7 4 7 4 7 4 7 4 7 4 7 9 4 5 0 0 REF NO MODE 41 42 43 44 45 46 47 48 49 50 51 52 53 54 55 56 CD PLAY 4 7 4 7 4 7 4 7 4 7 4 7 4 7 4 7 4 6...

Page 82: ...910 Q4006 Q4000 Q4001 Q2980 15 4 Panel Mic Tact Switch P C B REF NO MODE 1 2 3 4 5 6 7 8 9 10 11 12 13 14 15 16 17 18 19 20 CD PLAY 0 0 0 0 29 0 0 4 1 2 5 1 9 1 9 0 5 0 24 4 24 4 22 24 4 17 2 19 7 14 9 STANDBY 0 0 0 0 29 0 0 4 1 2 5 1 9 1 9 0 5 0 24 5 24 5 22 24 4 14 9 19 7 12 REF NO MODE 21 22 23 24 25 26 27 28 29 30 31 32 33 34 35 36 37 38 39 40 CD PLAY 24 4 24 4 24 4 17 2 17 2 24 4 24 4 24 4 17...

Page 83: ...0EE DECK MECHANISM P C B IC971 VK470EE DECK P C B IC1001 IC1001 Q1101 Q1201 Q1306 Q1307 Q1312 IC1000 Q1303 Q1304 Q1309 Q1310 Q1302 15 6 SMPS P C B REF NO MODE 1 2 3 4 5 6 7 CD PLAY 162 0 0 19 3 0 1 1 4 0 5 STANDBY 162 0 0 19 3 0 1 1 4 0 5 REF NO MODE 1 2 3 4 5 6 7 8 CD PLAY 6 0 1 6 1 8 20 3 162 2 0 0 STANDBY 6 0 1 6 2 0 20 3 163 0 0 0 REF NO MODE 1 2 3 CD PLAY 2 2 29 5 26 8 STANDBY 2 2 29 5 26 8 R...

Page 84: ...sec div WF No IC2103 1 7 PLAY 0 3Vp p 200usec div WF No IC2900 4 24 PLAY 0 6Vp p 20usec div WF No IC2103 2 6 PLAY 0 3Vp p 200usec div WF No IC2803 5 PLAY 2 8Vp p 200usec div WF No IC5000 1 PLAY 5 6Vp p 1usec div WF No IC5000 2 PLAY 0 84Vp p 200usec div WF No IC5000 10 14 PLAY 80Vp p 1usec div WF No IC5000 22 PLAY 0 84Vp p 200usec div WF No IC5500 5 PLAY 7 2Vp p 500nsec div WF No IC5500 8 PLAY 5 6V...

Page 85: ...No IC5899 1 2 3 PLAY 1 65Vp p 5msec div WF No IC6601 5 PLAY 2 15Vp p 2usec div WF No IC8001 138 PLAY 1 05Vp p 20usec div WF No IC8001 139 PLAY 0 95Vp p 10usec div WF No IC8001 144 146 PLAY 5 2Vp p 500usec div 85 SA VK470EE ...

Page 86: ...0051 B1GDCFGA0018 B1ABCF000011 B1GBCFGH0001 B1GDCFJJ0047 B1ABGC000001 B1ADGB000008 B1GBCFLL0037 B1ADCF000001 B1GBCFJN0033 2SD1819A0L 2SD0601AHL 2SB1218ARL UNR521100L 2SA207700L UNR221400L 1 2 3 4 5 6 B1CFHA000002 B1GDCFJJ0002 B1GDCFGH0002 B0ACCK000005 B0ACCE000003 Cathode Anode A Ca MA2J72800L MA2J11100L MA2C16500E Cathode Anode A Ca B0HBSM000043 B0BC5R000009 B0BC4R600016 B0BC01000014 B0BC6R100010...

Page 87: ... 8 7 5 4 3 2 1 7 1 1 2 3 CN7002 USB CN8002 ZJ9000 1 5 1 2 4 3 2 1 6 5 CP1301 1 2 CN1305 CP1902 TO MOTOR 1 9 1 2 20 21 1 5 2 4 SOLENOID CS971 PL PL 1 9 WR1903 TO R P HEAD A DVD MODULE P C B SIDE A A DVD MODULE P C B SIDE B M D AMP P C B SOLDER SIDE B MAIN P C B SOLDER SIDE D SIDE BAR L LED P C B SOLDER SIDE F TACT SWITCH P C B SOLDER SIDE G MUSIC PORT P C B SOLDER SIDE H REMOTE SENSOR P C B SOLDER ...

Page 88: ...SA VK470EE 88 ...

Page 89: ... 7 CN6807 CN2806 15 13 CN6001 1 J6001 J6001B CN2807 91 VOL JOG 22 6 CN6001 8 J6501A J6501B CN2807 1 2 3 4 1 2 3 4 CN6014 CN6012 CN6602 CN6604 54 VOL LED 6 22 CN6001 1 J6501A J6501B CN2807 16 12 J6501B J6501A VREF M 9V M 9V 27 1 CN6001 CN2807 SYS6V 20 SYNC SYNC SYNC 1 CN5802 CN2701 S6300 S6301 S6302 S6303 S6304 S6306 S6307 S6308 V FORWARD MANUAL EQ V REWIND TAPE FM AM DVD CD USB EXT IN DVREF VREF V...

Page 90: ...67 VHALF 110 MOTOR DRIVE 48 27 MUTE CH3 P3 P4 MUTE CH1 2 9 49 LPC2 LPCO2 LPC1 LPCO1 RFINP RFINN VIN10 VIN9 VIN8 VIN7 VIN6 VIN5 VIN4 VIN3 VIN2 VIN1 105 FP8531 PIN DVD CD 103 9 LD DRIVE 12 106 LDCD SW DVDIN GND CDIN GND FP8531 Q8561 Q8562 INVERTER Q8565 SWITCH Q8563 SWITCH Q8564 LD DRIVE Q8551 Q8552 FP8531 LDDVD 104 14 FP8531 22 FP8531 10 FP8531 11 18 96 RF FP8531 FP8531 RF 95 19 111 VREF 109 112 23...

Page 91: ...8X INTERPOLATOR ATT SCF LPF C3ABPY000011 FP8531 FP8531 FP8531 FP8531 1 2 4 SA VK470EE DVD AUDIO BLOCK DIAGRAM P5 50 IC9003 X9004 INVERTER GATE C0JBAB000908 60 65 8 2 3 4 5 7 IC8651 32M FLASH MEMORY ADDRESS ADDRESS DATA ADDRESS ADDRESS DATA NRST NEXOE NEXCE NEXWE EXADR20 EXADR19 EXADR18 EXADR17 EXADR16 EXADT15 EXADT14 EXADT13 EXADT12 EXADT11 EXADT10 EXADT9 EXADT8 EXADT7 EXADT6 EXADT5 EXADT4 EXADT3 ...

Page 92: ...z LPF 75Ohm DRIVER 6dB 12MHz LPF 75Ohm DRIVER CRIN BIAS 15 BIAS 9 BIAS 6dB 12MHz LPF 75Ohm DRIVER 6MHz LPF CVIN 6 6dB CLAMP IC2900 JK2001 1 2 3 VIDEO OUT Y GREEN PR RED PB BLUE 4 5 6 DVD VIDEO SIGNAL LINE SA VK470EE VIDEO BLOCK DIAGRAM IC8001 DV5 0 LSI MN2DS0018MP CR PR R CB PB B Y PY G 131 130 C Y 129 138 DAC1 OUT DAC2 OUT DAC3 OUT DAC4 OUT DAC5 OUT 139 BUFFER Q8331 BUFFER Q8335 BUFFER Q8341 BUFF...

Page 93: ...ROL BEATPROOF SWITCH Q1304 SWITCH Q1306 Q1307 Q1312 Q1317 D1301 D971 L1301 1 3 2 6 4 5 Q1310 Q1309 MUTING CONTROL Q1302 MUTING SWITCH Q1101 MUTING SWITCH Q1201 9 PB ROUT CN2803 CN1305 4 CP1301 3 CP1301 16 DMT CN2803 CN1305 8 PB LOUT CN2803 CN1305 13 REC RIN CN1305 CN2803 CN1305 CN2803 12 REC LIN RECINH F CN1305 CN2803 14 REC FROM TO SYSTEM CONTROL CN1305 CN2803 4 AN6 CS971 CP1902 5 PHOTO T REC H P...

Page 94: ... 9V 9V C0ABBB000230 MIX AMP IC2803 C1BB00001121 AUDIO SIGNAL PROCESSOR 3 2 1 5 7 6 POST VM R 36 R OUT 37 POST VOLUME 0 62dB 1dBstep POST VM L 43 L OUT 42 POST VOLUME 0 62dB 1dBstep VR6001 MIC VOLUME JOG IC6000 C0ABBB000230 MIC AMP 3 6 7 3 2 1 FRONT L FRONT R IC2804 Q2501 D2241 LCH AUTO GAIN CONTROL Q2142 D2332 LCH AUTO GAIN CONTROL Q2242 Q2502 MUTING MUTING Q2143 Q2366 MUTING Q2243 C0AABB000125 FR...

Page 95: ...POWER AMP 5 19 23 1 21 22 9 10 15 14 13 11 8 16 12 7 FRONT R FRONT L MUTE F MOD DA IC5500 INVERTER GATE CLOCK GENERATOR C0JBAB000902 X5500 X5501 D5501 D TYPE FLIP FLOP C0JBAF000716 CP1 O1 IC5501 6 8 10 9 14 14 11 3 D1 5 4 6 O1 2 1 5 4 3 2 1 CD1 SD1 MUTING CIRCUIT Q5601 Q5603 Q5604 MODE FRONT R SPEAKER FRONT L SPEAKER SA VK470EE DIGITAL AUDIO AMP BLOCK DIAGRAM DC DET DC DETECT Q5101 Q5102 FROM AUDI...

Page 96: ...Z00001 SHUNT REGULATOR IC5899 IC4000 IC8151 IC8111 IC5701 QR5810 PC5702 PC5720 SYNC SWITCH SHUNT REGULATOR IC5801 Q5802 D5806 C0DABFC00002 TH5860 9V REGULATOR Q4002 OUT VCC 2 4 VO VIN 8 1 5 QR5801 DC DETECT Q4003 M 9V REGULATOR 9V REGULATOR Q2810 SW 5V REGULATOR Q5100 CD 7 5V REGULATOR Q4007 Q4001 QR4004 DC DETECT DC DETECT Q4000 D 2 7V REGULATOR M 9V SW 5V DVD PCONT VCC DC DET 9V 9V DVD 5V D 3 3V...

Page 97: ...special characteristics important for safety Furthermore special parts which have purposes of fire retardant resistors high quality sound capacitors low noise resistors etc are used When replacing any of components be sure to use only manufacturer s specified parts shown in the parts list In case of AC rated voltage Capacitor the part no and values will be indicated in the Schematic Diagram AC rat...

Page 98: ...98 SA VK470EE ...

Page 99: ...138 131 132 126 122 123 119 116 110 112 111 161 159 151 152 149 150 154 156 158 157 155 153 141 143 142 147 148 144 146 145 160 162 2 4 3 1 8 9 5 7 6 11 10 17 16 19 18 13 15 14 26 27 22 23 20 21 25 24 12 216 53 50 51 46 48 47 42 43 38 39 34 35 30 31 28 29 33 32 37 36 41 40 45 44 49 52 54 55 DV5 0 LSI MN2DS0018MP IC8001 MA_6 MA_0 MA_1 BA1 22 R8013 BA0 D1H422020001 RX8020 D1H88204A043 RX8016 D1H8820...

Page 100: ... 4 5 AND GATE C0JBAA000502 IC8691 AND GATE C0JBAA000502 IC8695 LB8690 0 R8323 33 200 R8321 R8325 200 200 R8331 33 R8336 Q8335 2SB1218ARL 33 R8333 R8327 33 C Y Y_PY_G Q8321 2SB1218ARL C8325 0 1 R8328 BUFFER BUFFER BUFFER BUFFER BUFFER 1K Q8325 2SB1218ARL RSTB LRCK DMIXOUT STBDAC SBT3 SBO3 R8324 1K C8321 0 1 AMUTE MUTING R8334 1K C8331 0 1 R8337 1K CB_PB_B Q8331 2SB1218ARL C8335 0 1 R8335 200 R8341 ...

Page 101: ... 27 26 24 25 20 21 19 16 12 14 15 13 18 17 9 10 8 7 6 11 2 3 1 4 5 34 36 39 41 42 40 38 49 52 51 54 53 50 44 43 45 47 48 46 37 35 23 22 32 33 64M SDRAM C3ABPY000011 IC8051 SP_DRV 7 5K R8232 C8232 0 1 C8601 0 1 EXADR14_DT1 EXADR12_DT2 EXADR13_DT9 FEXDT_14 FEXDT_12 FEXDT_13 EXADR15_DT8 FEXDT_15 100 R8611 4 2 1 3 RX8032 D1H447220001 TRCST R9055 4 7K EXADR8_DT4 FEXDT_8 0 1 C9003 FEXDT_11 EXADR11_DT10 ...

Page 102: ...B8551 J0JDC0000045 LB8532 J0JDC0000045 0 LB8531 D1H456020001 RX8533 C8531 100P LB8561 J0JDC0000045 1 5K R8531 LB8530 J0JHC0000045 RX8534 D1H456020001 4 2 1 3 4 2 1 2 1 3 4 3 D1H456020001 RX8531 VIN4 VIN3 VIN2 VIN7 VIN1 VIN8 LB8258 0 LB8260 0 LB8571 J0JDC0000045 5 7 1 3 6 8 2 4 D1H85604A043 RX8532 0 LB8257 LB8259 0 R8540 0 B1CFHA000002 Q8563 B1CFHA000002 Q8564 2SD1819A0L Q8565 DVD_CD 47K R8558 15K ...

Page 103: ...Y CR B1ABCF000176 Q2980 D2002 B0EAKM000117 1000P C2800 DVD_STAT DVD_CLK OPEN_SW 2 1 3 JK2802 AUX IN C2216 680P C2116 680P R2116 18K AUX_L 100P C2117 C2217 100P R2216 18K R2117 15K AUX_R R2217 15K 1 7 5 4 6 2 3 JK2001 CIN C2911 0 01 C2900 6 3V1000 P_GND C2919 6 3V1000 VOUT DVD_MUTE INVERTER M 9V 26 25 27 28 17 18 20 22 24 23 21 19 8 9 7 16 15 14 13 10 11 12 3 1 2 30 32 31 4 5 6 29 C9ZB00000461 IC29...

Page 104: ...R2865 47K R2864 47K 100 R2838 100 R2820 47K R2879 R2867 100 MPORT_SW 4 7K R2846 HP_SW 47K R2843 47K R2869 R2870 47K HOME_SW TRAY_CCW_L OPEN TRAY_CW_H 47K R2871 R2873 47K R2872 47K R2847 2 2K 100P C2861 C2862 100P C2860 100P AM_BP 100 R2863 DECK_EJECT LO_F LO_R TOP FL_CLK FL_CS FL_DOUT MOTOR_L MIC_MUTE MIC_MUTE DMT VDD REC DVREF 100P C2863 C2816 100P C2865 100P 47K R2854 R2874 DECK_AD1 KEY1 100 R28...

Page 105: ...20 C4012 0 01 C4005 C4011 16V100 C4029 0 01 25V220 C4030 R4000 10K L4007 G0A220GA0026 4 2 1 3 5 C0DAAYY00042 IC4001 M 9V C2982 16V22 D4007 B0BC8R100004 6 8 9 7 2 1 4 5 3 10 11 CN2805 OPEN 0 R2937 UD_SENSOR HOME_SW 0 R2935 0 R2936 0 R2934 MODE 0 R2938 0 R2942 Q4007 2SD0592ARA B0EAKM000117 D2000 B0EAKM000117 D2001 CD 7 5V REGULATOR R4029 180 G0A200D00002 L4008 R4032 22 R4033 22 C4026 16V220 0 01 C40...

Page 106: ...1 R2304 0 C2172 0 047 C2174 0 01 C2175 4700P R2173 4 7K R2174 10K 0 33 C2181 50V10 C3801 R3801 1K C2314 47P R2312 1K C2313 2200P R3812 0 C2184 1 0 R3807 R2262 1K 50V0 1 C2263 C2182 0 33 TUNER_L TUNER_R 1K R2101 10K R2104 MPORT_R MPORT_L 10K R2204 1K R2201 100 R2206 PBR 100 R2106 0 047 C2271 0 15 0 R2404 C2403 1 1 C2102 C2202 1 AUX_L AUX_R 1 C2118 1 C2218 1 C2204 1 C2104 C2207 1 53 51 50 52 55 56 5...

Page 107: ... 2 2K MUTING CONTROL MUTING MUTING MUTING MUTING C2142 1 R2143 100K 1 8K R2245 C2242 1 r R2268 10 r 10 R2269 R2168 10 10 R2169 3 2 5 4 1 6 B1GFGCAA0001 Q2366 R2171 3 3K 3 3K R2271 C2266 1000P R2266 10 10 R2167 1000P C2166 10 R2166 10 R2267 B1ABCF000176 Q2142 R2145 1 8K R2146 LCH AUTO GAIN CONTROL RCH AUTO GAIN CONTROL 5 6K R2246 5 6K D2241 B0ACCK000005 R2503 27K R2241 2 7K C2241 1 1 C2141 R2142 1 ...

Page 108: ...10V47 C6932 10V47 C6922 0 01 0 1 C6940 C6921 0 1 R6940 18K 10K R6944 C6927 1000P 0 015 C6928 R6928 4 7K MIC_MUTE R6929 1K Q6910 B1GBCFJJ0051 10K R6945 C6939 1 MIC_OUT R6927 4 7K C6933 1 MIC_IN 9V FL_GND FL_GND C4044 PSAVE CONTROL 3900P G0A220GA0026 L2910 FP2901 C4045 35V33 5 6K R4023 D2901 B0BC035A0007 Q2900 B1BABK000001 B0EAMM000057 SWITCHING TRANSFORMER D2903 D4000 B0EAMM000057 35V33 C4042 D4001...

Page 109: ...G14 SG16 SG15 SG13 GR8 GR10 GR11 GR9 SG11 SG9 SG7 SG5 SG3 SG14 SG12 SG10 SG11 SG13 CD3 3V C6614 0 01 SG1 SG4 SG3 SG8 SG9 SG6 SG5 SG7 SG2 FL_CS R6620 470 R6619 220 FL_CLK R6622 82K C6612 330P 2 1 4 3 CN6012 2 1 4 3 CN6602 D6602 SIDE BAR R LED B3AEA0000107 D6604 SIDE BAR L LED B3AEA0000107 1 8K R6600 LED DRIVE LED DRIVE B1GBCFJN0033 Q6600 2 1 4 3 CN6014 2 1 4 3 CN6604 LED_GND P0 330P C6611 330P C661...

Page 110: ...2 R6511 0 C6810 390P C6861 1000P C6801 0 047 J0JBC0000019 L6802 J0JBC0000019 L6851 R6811 1K 1K R6812 L6801 J0JBC0000019 L6863 J0JBC0000019 J0JBC0000019 L6812 330P C6814 J0JBC0000019 L6811 0 047 C6802 1 2 ZJ6801 1 2 ZJ9000 C6811 1 1 C6812 0 01 C6816 1 6 4 5 JK6800 7 3 2 1 7 6 4 5 JK6810 3 2 0 01 C6815 0 01 C6821 0 01 C6822 6 8 9 7 2 1 4 5 3 10 CN6807 MP_GND S6820 0 01 C6865 390P C6820 0 1 C6803 0 1...

Page 111: ...01 L1302 L1301 G2ZZ00000024 R1061 0 R1203 18K C1222 0 01 C1208 16V10 C1204 0 027 C1207 1500P C1105 470P C1122 0 01 R1103 18K R1303 4 7M C1304 50V4 7 C1108 16V10 C1123 270P C1307 10V220 R1105 2 2K C1103 16V100 C1107 1500P C1302 0 033 R1102 1 5K C1104 0 027 C1106 50V2 2 R1104 10K R1101 33 C1102 1000P C1121 1000P 50V1 C1101 R1202 1 5K C1206 50V2 2 C1301 50V0 1 PBROUT R1305 10K C1223 270P C1308 16V22 ...

Page 112: ... R5604 1 2K 1 2K R5611 R5603 10K R5602 10K Q5604 B1ABCF000176 R5609 10K 1M R5507 390P C5552 X5500 H2A6023A0011 MAZ80510ML D5503 10 C5555 0 1 C5554 1M R5508 100P C5553 R5510 470 C5562 6 3V1000 FAN_DC FAN_GND 0 1 C5560 R5511 22 100P C5561 SW 5V 5 6 4 1 2 3 9 11 13 14 12 10 7 8 IC5501 C0JBAF000716 R5505 100 47P C5558 5 6 4 1 2 3 9 11 13 14 12 10 7 8 C0JBAB000902 INVERTER GATE CLOCK GENERATOR D TYPE F...

Page 113: ...2 C5896 0 1 6 8 9 7 2 1 4 5 3 10 11 CN5802 PCONT B1GBCFLL0037 QR5810 330 R5809 330 R5807 1K R5730 B0BC6R100010 D5725 2 2K R5808 4 3 1 2 B3PBA0000402 PC5720 R5817 330 R5810 330 4 3 1 2 B3PBA0000402 PC5701 1 5K R5811 0 1 C5825 1 5K R5816 8 2K R5812 MAZ80750ML D5806 SYS6V 30V_SENSE 30V_SENSE 2 7K R5815 24K R5813 Q5802 B1ABCF000176 120 R5724 DC_18V 3 1 2 B0HBSM000043 D5802 13V FAN_18V 25V470 C5816 B0E...

Page 114: ...96 2200P C5795 R5797 4 7K C5703 F0C2H1040001 0 1 3 2 1 4 B0FBAR000041 D5701 39K R5893 SYNC C5899 16V220 D5730 MA2J11100L D5798 B0HAMP000094 390K R5704 390K R5705 R5798 10 C5798 50V56 4 3 1 2 PC5702 B3PBA0000402 4 3 1 2 B3PBA0000402 PC5799 100 R5897 Q5898 IC5899 C0DAEMZ00001 B1ABCF000176 R5896 100K C5897 0 1 2 2K R5890 1K R5894 B0EAMM000057 D5896 B0HAMP000094 D5793 C5790 2200P R5891 33K 200K R5786 ...

Page 115: ... PHOTO VREF NC RECINH_F PL PL GND MODE HALF IC971 CNB13030R2AU PHOTO INTERUPTOR CS971 R973 SOLENOID D971 R972 MA2C16500E 4 5 1 3 2 7 6 MODE HALF MO OUT RECINH_F VREF_GND RECINH_R STBY 5V Z971 RGSD12A1445T PL PL RECINH F C5705 F1BAF1020020 1000P C5704 F1BAF1020020 1000P C5706 F1BAF1020020 1000P C5707 F1BAF1020020 1000P 3 2 1 3 2 1 ZJ5701 ZJ5702 2 3 4 1 L5703 ELF22V020A 4 7M R5701 DZ5701 ERZV10V511C...

Page 116: ...SA VK470EE 116 ...

Page 117: ...3 C8211 C8226 C8231 C8232 C8312 C8313 C8320 C8321 C8325 C8331 C8335 C8340 C8341 C8401 C8502 C8503 C8505 C8506 C8511 C8512 C8513 C8514 C8515 C8523 C8524 C8525 C8526 C8527 C8530 C8531 C8532 C8551 C8554 C8561 C8564 C8602 C8611 C8651 C8652 C9003 D8211 FL8101 FL8102 FL8103 FL8104 FP8101 FP8251 FP8531 FP9001 IC8051 IC8111 IC8611 IC8651 IC9001 IC9002 K8100 K8251 L8303 LB8302 LB8303 LB8304 LB8305 LB8401 L...

Page 118: ...ED Q2600 D2600 C2620 C2616 IC2900 R2904 R2905 C2907 C2911 C2913 L2001 L2003 L2004 L2005 W2547 R4029 R2866 D4007 W2548 R2891 IC2801 D2943 R2209 C2800 C2801 C2802 C2804 C2001 C2822 W2507 W2504 R6929 R6928 R2867 C2019 C2020 C3802 C3803 Q6910 R4017 R4018 D4008 QR4004 C4028 R2939 R4031 DZ4007 CN2701 CN2801 CN2808 IC4001 T2900 C2922 C2924 C2923 C2919 C2920 Q4000 C4030 L4006 C4027 C4012 C4011 L4003 L4004...

Page 119: ...ISC 1 CD DISC 2 CD DISC 3 CD DISC 4 CD DISC 5 H BASS C6939 C6300 R6300 W6570 CN6001 S6100 S6101 S6104 S6108 S6207 S6206 S6205 S6204 S6203 S6202 S6201 J6501A VR6630 BASS CONTROL FL6601 D6458 POWER DISPLAY TAPE_REC ADVANCE SURROUND W6045 W6546 W6547 W6011 W6007 W6006 W6034 W6010 ZJ6601 W6038 W6037 W6036 W6035 W6033 W6024 W6030 W6002 W6004 W6548 W6008 W6009 W6005 W6027 W6046 W6040 W6041 W6042 W6025 W...

Page 120: ... W6031 K6511 S6208 W6018 R6303 R6305 C6804 C6803 EJECT R6812 R6811 C6863 C6861 C6852 C6851 C6816 C6815 C6814 C6813 C6812 C6811 L6863 L6851 L6812 L6811 L6802 L6801 C6802 C6801 C6822 C6821 C6820 C6810 C6865 S6820 JK6810 JK6800 CN6807 W6050 W6051 W6052 W6510 W6504 ZJ6801 HEADPHONE W6505 MUSIC PORT IC6000 C6012 C6011 R6011 C6010 R6010 C6009 C6008 R6009 R6008 C6004 C6003 R6007 C6002 R6006 R6005 L6002 L...

Page 121: ...320 C1324 C1311 C1305 C1206 C1209 C1301 C1208 C1310 C1101 C1308 Q1309 Q1316 Q1315 L1302 R1330 R1333 R1309 W1910 W1938 C1326 C1307 C1318 C1108 IC1001 CN1305 WR1903 L1301 CP1902 W1939 W1930 Q1303 Q1312 Q1101 Q1201 C1317 R1327 C1314 R1337 R1203 C1207 C1104 R1104 C1121 R1343 R1344 R1345 R1342 R1305 R1328 R1332 D1301 R1335 R1338 R1334 R1329 C1312 C1316 C1221 R1201 C1205 C1204 C1371 R1371 C1223 R1302 R1...

Page 122: ...150 K5253 C5445 W5780 K5302 W5007 C5014 C5015 C5040 C5133 C5510 C5511 C5601 CN5050 CN5500 IC5000 JK5001 K5013 L5001 L5002 L5500 L5501 R5510 X5500 X5501 ZJ5400 ZJ5410 W5067 W5066 W5068 W5061 W5060 W5005 W5043 W5051 W5052 W5039 W5055 W5064 W5023 W5019 W5053 W5056 W5021 W5050 W5054 W5038 W5012 W5003 W5024 W5022 W5020 W5013 W5063 W5045 W5046 W5044 W5047 W5049 W5048 W5035 W5033 W5006 W5037 W5009 W5010 ...

Page 123: ...801 C5826 Q5802 R5801 D5807 R5800 R5825 C5831 C5832 C5812 C5800 C5815 R5702 R5834 R5832 R5703 K2 C5790 C5794 D5809 W5803 W5804 W5805 W5806 C5805 C5808 C5824 CN5802 T5751 IC5701 C5713 D5702 D5701 D5801 D5802 D5803 C5813 W5725 T5701 C5730 D5805 D5896 C5791 D5798 D5793 C5816 C5899 BACKUP TRANSFORMER C5703 W5729 K5711 C5797 C5798 IC5799 W5734 C5700 ZJ5803 C5737 R5726 C5724 D5729 D5726 Q5720 R5824 R582...

Page 124: ...SA VK470EE 124 ...

Page 125: ... and or F76 after power up of the unit It is for purpose of troubleshooting and checking in SMPS D Amp Main P C B 22 1 1 Block Diagram Speaker Out DC Detect SUBWOOFER CENTER FRONT R FRONT L SURROUND R SURROUND L 30V Detect 30V_SENSE SYS6V FAN Detect D AMP P C B SMPS P C B MICRO P DCDET 2 DCDET2 F61 SYS6V T 18V Fan Detect emperature Detect DCDET 2 125 SA VK470EE ...

Page 126: ...n not proper connected F61 will trigger when the volume increase If the fan is not working check for fan circuit Check the soldering of the SMPS P C B Is there any solder crack at area Q5860 Q5861 Q5862 TH5860 QR5801 Check all the supply line 30V Re connect the Fan to CN2810 Fan Q2948 Q2949 circuit Q2942 Q2943 Touch up the solder crack area Change the defective parts Q5860 Q5861 Q5862 TH5860 Tempe...

Page 127: ... P C B SMPS P C B Thermistor TH5860 Temperature Detect Transistor QR5801 QR5802 30V Detect Feedback circuit PC5702 PC5799 Temperature Detect Q5862 Q5860 Q5861 Feedback circuit PC5720 PC5701 18V FAN D5805 Fig 1 SMPS P C B 127 SA VK470EE ...

Page 128: ...22 1 3 2 D Amp P C B SPEAKER OUTPUT IC 5000 D AMP IC D AMP P C B IC 5200 D AMP IC Muting Circuit Fig 2 D Amp P C B 128 SA VK470EE ...

Page 129: ...CN5501 Fig 3 Fan Connector 22 1 3 3 D Amp IC Configuration VK470EE Pin 10 Front Right IC5000 Pin 14 Front Left Table 1 129 SA VK470EE ...

Page 130: ...22 1 3 4 Main P C B Transistor Q2942 Q2943 Q2948 Q2949 Fan Circuit CONNECTOR CN2807 DC DC CONVERTER IC4001 DC DC CONVERTER IC4000 Fig 4 Main P C B 130 SA VK470EE ...

Page 131: ...1 Pin 66 67 IC8251 Pin 15 to 16 Check for solder short and or component missing damaged a Check connection from DVD Module to Traverse unit FP8251 3 Disc not spinning 4 Traverse not moving 5 Traverse and spindle abnormal movement b Check motor driver circuitry on the voltages and control signals Compare the above with OK condition DVD Module P C B IC8251 Check for solder short and or component dam...

Page 132: ...IC3901 5 HDMI Transmitter communication lines to TV 6 HDMI Transmitter communication from LSI IC8001 I2C_SCL I2C_SDA signals 7 Local Port Slave Address setting resistor at Pin 99 of HDMI Transmitter LSI IC IC3901 for LPSA signal 8 HDMI Transmitter LSI IC IC3901 3 3V Supply 9 HDMI Transmitter LSI IC IC3901 1 2V Supply 10 HDMI Up Con 3 3V Supply 12 Up Con IC I2C Data and Clock Line LB3905 R3905 Q390...

Page 133: ...125 3 Check for capacitor short to GND LB3902 1 Check digital video data line from LSI IC8001 to Up Converter IC3901 VOUT0 VOUT7 RX3707 RX3708 C3902 C3928 C3925 1 TV does not have any display Set FL display shows U702 U703 2 When switching the video output mode from 480P to 720p 1080i TV display becomes blank 3 Color Problem TV Screen is White Blue Purple 1 Audio data lines 2 Check setting of the ...

Page 134: ...nput 49 NC No Connection 50 NC No Connection 51 H BASS JOG A I Bass Control 1 52 H BASS JOG B I Bass Control 2 53 H BASS LED O Bass Led Pin No Terminal Name I O Function 54 VOL LED O Volume Led 55 NC No Connection 56 PLUNGER O Deck plunger control L OFF H ON 57 MOTOR O Deck motor control L OFF H ON 58 NC No Connection 59 NC No Connection 60 DMT O Deck Mute 61 REC O Deck Recording control H Recordi...

Page 135: ...1 P11 O Segment Output 11 22 P10 O Segment Output 10 23 P9 O Segment Output 9 24 P8 O Segment Output 8 25 P7 O Segment Output 7 26 P6 O Segment Output 6 27 P5 O Segment Output 5 28 P4 O Segment Output 4 29 P3 O Segment Output 3 30 VP Voltage Supply 31 P2 O Segment Output 2 32 P1 O Segment Output 1 33 G1 O Grid Segment Output 1 34 G2 O Grid Segment Output 2 35 G3 O Grid Segment Output 3 36 G4 O Gri...

Page 136: ...136 SA VK470EE ...

Page 137: ...24 Exploded Views 24 1 Cabinet Parts Location SA VK470EE 137 ...

Page 138: ...SA VK470EE 138 ...

Page 139: ...24 2 Deck Mechanism Parts Location RAA4111 S SA VK470EE 139 ...

Page 140: ...24 3 Packaging SA VK470EE 140 ...

Page 141: ...ecified otherwise 1K 1 000 OHM 1M 1 000K OHM The parenthesized indications in the Remarks columns specify the model names and areas Refer to the cover page The marking RTL indicates the retention time is limited for this item After the discontinuation of this assembly in production it will no longer be available Parts mentioned M are supplied from PAVCSG Parts mentioned SPG are supplied from PAVC ...

Page 142: ... M 68 REXX0684 BLACK WIRE M 69 REXX0685 RED WIRE M 72 REXX0683 8P WIRE SMPS DAMP M 74 REEX0905 50P FFC CABLE MAIN BE M CASSETTE DECK 101 RED0064 2 R P HEAD BLOCK UNIT M 103 RDG0300 REEL BASE GEAR M 104 RDG0301 WINDING RELAY GEAR M Ref No Part No Part Name Description Remarks 105 RDK0026 4 MAIN GEAR M 107 RDV0033 4 WINDING BELT M 108 RDV0034 2 CAPSTAN BELT A M 110 RMB0312 TRIGGER LEVER SPRING M 111...

Page 143: ...L TRANSISTOR M Q2005 B1ADCE000012 TRANSISTOR M Q2011 B1GBCFJJ0051 TRANSISTOR M Q2012 B1GBCFJJ0051 TRANSISTOR M Ref No Part No Part Name Description Remarks Q2051 B1GDCFJJ0047 TRANSISTOR M Q2052 B1GFGCAA0001 TRANSISTOR M Q2142 B1ABCF000176 TRANSISTOR M Q2143 B1ABEB000002 TRANSISTOR M Q2242 B1ABCF000176 TRANSISTOR M Q2243 B1ABEB000002 TRANSISTOR M Q2366 B1GFGCAA0001 TRANSISTOR M Q2501 B1GDCFJJ0047 T...

Page 144: ...R M Ref No Part No Part Name Description Remarks VA9002 EZJZ1V171AA VARISTOR M VARIABLE RESISTORS VR6001 EVUE27FK2B53 MIC VOLUME M VR6500 EVEKE2F3524M VOLUME JOG M VR6630 K9AA024A0008 BASS CONTROL M SWITCHES S971 K0J1BB000017 SW MODE M S972 K0J1BB000021 SW HALF M S974 K0J1BB000021 SW RECIN_R M S975 K0J1BB000021 SW RECIN_F M S6100 EVQ21405RJ SW POWER M S6101 EVQ21405RJ SW DISPLAY M S6104 EVQ21405RJ...

Page 145: ...WITCHING TRANSFORMER M T5701 ETS42BN1A6AD MAIN POWER TRANSFORMER M T5751 ETS19AB256AG BACKUP SW TRANSFORMER M COMPOMENT COMBINATION TN2802 ENG07825QRF TUNER PACK M Z971 RGSD12A1445T RADA M Z2000 K9ZZ00001279 EARTH PLATE M Z6601 B3RAB0000025 REMOTE SENSOR M ZJ5400 K4CZ01000027 TERMINAL M ZJ5410 K4CZ01000027 TERMINAL M ZJ5701 K4CZ01000027 TERMINAL M Ref No Part No Part Name Description Remarks ZJ570...

Page 146: ...ISTORS Ref No Part No Part Name Description Remarks LB8691 D0GA101JA023 100 1 16W M LB8692 D0GA101JA023 100 1 16W M LB8693 D0GA101JA023 100 1 16W M R972 D0AE821JA178 820 1 4W M R973 D0AE393JA178 39K 1 4W M R1061 D0GBR00JA008 0 1 16W M R1062 D0GBR00JA008 0 1 16W M R1063 D0GBR00JA008 0 1 16W M R1064 D0GBR00JA008 0 1 16W M R1101 D0GB330JA007 33 1 10W M R1102 D0GB152JA007 1 5K 1 10W M R1103 D0GB183JA0...

Page 147: ...V 6 8K 1 10W M R2249 D0GB222JA007 2 2K 1 10W M R2252 ERJ3GEYJ681V 680 1 10W M R2253 D0GB152JA007 1 5K 1 10W M Ref No Part No Part Name Description Remarks R2254 D0GB104JA007 100K 1 10W M R2262 D0GB102JA007 1K 1 10W M R2266 ERJ3GEYJ100V 10 1 10W M R2267 ERJ3GEYJ100V 10 1 10W M R2268 ERJ3GEYJ100V 10 1 10W M R2269 ERJ3GEYJ100V 10 1 10W M R2270 D0GBR00JA008 0 1 16W M R2271 D0GB332JA007 3 3K 1 10W M R2...

Page 148: ...JA007 1K 1 10W M R2976 D0GBR00JA008 0 1 16W M R2978 D0GB182JA007 1 8K 1 10W M R2987 D0GBR00JA008 0 1 16W M Ref No Part No Part Name Description Remarks R3801 D0GB102JA007 1K 1 10W M R3802 D0GB471JA041 470 1 10W M R3803 ERJ3GEYJ332V 3 3K 1 10W M R3804 D0GB471JA041 470 1 10W M R3805 ERJ3GEYJ332V 3 3K 1 10W M R3807 D0GBR00JA008 0 1 16W M R3812 D0GBR00JA008 0 1 16W M R3813 D0GB103JA007 10K 1 10W M R38...

Page 149: ...010 D0GB103JA007 10K 1 10W M R6011 D0GB103JA007 10K 1 10W M Ref No Part No Part Name Description Remarks R6012 D0GBR00JA008 0 1 16W M R6013 D0GBR00JA008 0 1 16W M R6014 D0GB101JA007 100 1 10W M R6100 D0GB103JA008 10K 1 16W M R6101 D0GB102JA008 1K 1 16W M R6102 D0GBR00JA008 0 1 16W M R6103 D0GBR00JA008 0 1 16W M R6104 D0GB102JA007 1K 1 10W M R6106 D0GB302JA007 3 0K 1 10W M R6107 D0GB222JA008 2 2K 1...

Page 150: ...023 100 1 16W M R8621 D0GA105JA023 1M 1 16W M Ref No Part No Part Name Description Remarks R8622 ERJ2RHD102X 1K 1 16W M R9007 D0GA103JA023 10K 1 16W M R9008 D0GA105JA023 1M 1 16W M R9009 D0GA102JA023 1K 1 16W M R9023 D0GA103JA023 10K 1 16W M R9030 ERJ3GEY0R00V 0 1 10W M R9031 ERJ3GEY0R00V 0 1 10W M R9036 D0GA103JA023 10K 1 16W M R9037 D0GA103JA023 10K 1 16W M R9040 D0GA103JA023 10K 1 16W M R9041 D...

Page 151: ... C2163 ECJ1VB1H222K 2200pF 50V M C2166 F1H1H102A219 1000pF 50V M C2171 F1H1A154A001 0 15uF 10V M Ref No Part No Part Name Description Remarks C2172 ECJ1VB1C473K 0 047uF 16V M C2173 F1H1H103A219 0 01uF 50V M C2174 F1H1H103A219 0 01uF 50V M C2175 ECJ1VB1H472K 4700pF 50V M C2181 ECJ1VB1A334K 0 33uF 10V M C2182 ECJ1VB1A334K 0 33uF 10V M C2183 ECJ1VB1C224K 0 22uF 16V M C2184 ECJ1VB1C105K 1uF 16V M C219...

Page 152: ... 0 01uF 50V M C4007 EEUFC1E102B 1000uF 25V M C4008 EEUFC0J821B 820uF 6 3V M Ref No Part No Part Name Description Remarks C4011 ECEA1CKA101B 100uF 16V M C4012 ECA0JAK221XB 220uF 6 3V M C4019 F1H1H103A219 0 01uF 50V M C4020 ECEA1CKA470B 47uF 16V M C4021 ECEA1CKA470B 47uF 16V M C4022 F1H1H103A219 0 01uF 50V M C4023 ECJ1VB1H103K 0 01uF 50V M C4024 F2A1C220A234 22uF 16V M C4025 ECJ1VB1H103K 0 01uF 50V ...

Page 153: ...C6002 F1H1H104A013 0 1uF 50V M C6003 ECJ1VC1H470J 47pF 50V M C6004 F1H1H102A219 1000pF 50V M Ref No Part No Part Name Description Remarks C6005 ECQV1H474JL3 0 47uF 50V M C6006 F1H1H102A219 1000pF 50V M C6008 D0GBR00JA008 0 1 16W M C6009 F1H1A105A025 1uF 10V M C6010 F1H1H102A219 1000pF 50V M C6011 F1H1H561A013 560pF 50V M C6012 ECJ1VC1H470J 47pF 50V M C6300 F1H1H102A219 1000pF 50V M C6503 F1H1H102A...

Page 154: ... C8429 F1G1C104A083 0 1uF 16V M C8501 F2G0J101A031 100uF 6 3V M C8502 F1G1C104A083 0 1uF 16V M C8503 F1G1C104A083 0 1uF 16V M C8504 F1G1C104A083 0 1uF 16V M C8505 F1G1C104A083 0 1uF 16V M C8506 F1G1C104A083 0 1uF 16V M C8511 F1H0J1050013 1uF 6 3V M C8512 F1H0J1050013 1uF 6 3V M C8513 F1G1A1040006 0 1uF 10V M C8514 F1G1A1040006 0 1uF 10V M C8515 F1G1A1040006 0 1uF 10V M C8516 F1G1A1040006 0 1uF 10V...

Reviews: