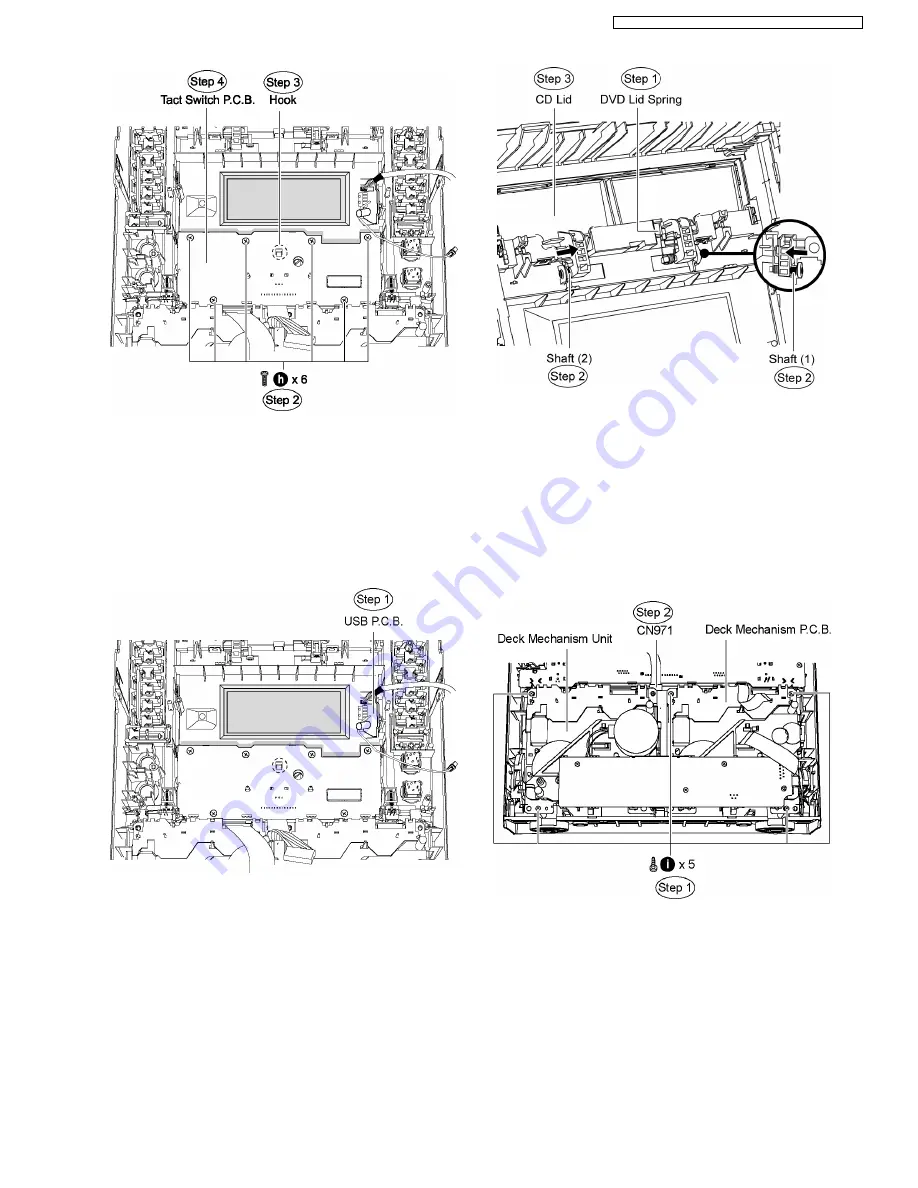
10.14. Disassembly of USB P.C.B
•
•
•
•
Follow (Step 1) to (Step 5) of Item 10.3.
•
•
•
•
Follow (Step 1) to (Step 6) of Item 10.10.
•
•
•
•
Follow (Step 1) to (Step 3) of Item 10.11.
•
•
•
•
Follow (Step 1) to (Step 5) of Item 10.12.
Step 1 Remove USB P.C.B. from the front panel.
10.15. Replacement of CD Lid
•
•
•
•
Follow (Step 1) to (Step 5) of Item 10.3.
•
•
•
•
Follow (Step 1) to (Step 6) of Item 10.10.
•
•
•
•
Disassembly of DVD Lid Spring
Step 1 Lift the DVD lid spring sideward.
Step 2 Move the shaft (1) & (2) in the direction of arrow.
Step 3 Remove the CD lid.
Note: Do not misplace the DVD lid spring. Store it in safe place.
10.16. Disassembly of Deck
Mechanism Unit
•
•
•
•
Follow (Step 1) to (Step 5) of Item 10.3.
•
•
•
•
Follow (Step 1) to (Step 6) of Item 10.10.
Step 1 Remove 5 screws.
Step 2 Detach FFC cable at the connector (CN971) on Deck
Mechanism P.C.B.
Step 3 Push the levers upward to open the the cassette decks
(DECK1 & DECK 2).
57
SA-VK960GC / SA-VK960GCS / SA-VK960GCT / SA-VK960GS
Summary of Contents for SA-VK960GC
Page 13: ...Fig 5 2 13 SA VK960GC SA VK960GCS SA VK960GCT SA VK960GS ...
Page 50: ...10 2 Main Components and P C B Locations 50 SA VK960GC SA VK960GCS SA VK960GCT SA VK960GS ...
Page 84: ...84 SA VK960GC SA VK960GCS SA VK960GCT SA VK960GS ...
Page 86: ...SA VK960GC SA VK960GCS SA VK960GCT SA VK960GS 86 ...
Page 96: ...96 SA VK960GC SA VK960GCS SA VK960GCT SA VK960GS ...
Page 116: ...SA VK960GC SA VK960GCS SA VK960GCT SA VK960GS 116 ...
Page 124: ...SA VK960GC SA VK960GCS SA VK960GCT SA VK960GS 124 ...
Page 128: ...22 Exploded Views 128 SA VK960GC SA VK960GCS SA VK960GCT SA VK960GS ...
Page 129: ...22 1 Cabinet Parts Location SA VK960GC SA VK960GCS SA VK960GCT SA VK960GS 129 ...
Page 130: ...SA VK960GC SA VK960GCS SA VK960GCT SA VK960GS 130 ...
Page 132: ...SA VK960GC SA VK960GCS SA VK960GCT SA VK960GS 132 ...
Page 133: ...22 3 Packaging SF VK960 SA VK960GC SA VK960GCS SA VK960GCT SA VK960GS 133 ...


